2003 NISSAN MAXIMA light
[x] Cancel search: lightPage 164 of 247
IThe booster battery must be rated at
12 volts. Use of an improperly rated
battery can damage your vehicle.
IWhenever working on or near a bat-
tery, always wear suitable eye protec-
tors (for example, goggles or indus-
trial safety spectacles) and remove
rings, metal bands, or any other jew-
elry. Do not lean over the battery
when jump starting.
IDo not attempt to jump start a frozen
battery. It could explode and cause
serious injury.
IYour vehicle has an automatic engine
cooling fan. It could come on at any
time. Keep hands and other objects
away from it.
WARNING
Always follow the instructions below.
Failure to do so could result in damage
to the charging system and cause per-
sonal injury.
1. If the booster battery is in another vehicle,
position the two vehicles to bring their bat-
teries into close proximity to each other.
Do not allow the two vehicles to touch.
2. Apply parking brake. Move the shift lever tothe N (Neutral) position (On automatic
transmission models, move the selector
lever to the P (Park) position). Switch off all
unnecessary electrical systems (light,
heater, air conditioner, etc.).
3. Remove vent caps on the battery (if so
equipped). Cover the battery with an old
cloth to reduce explosion hazard.
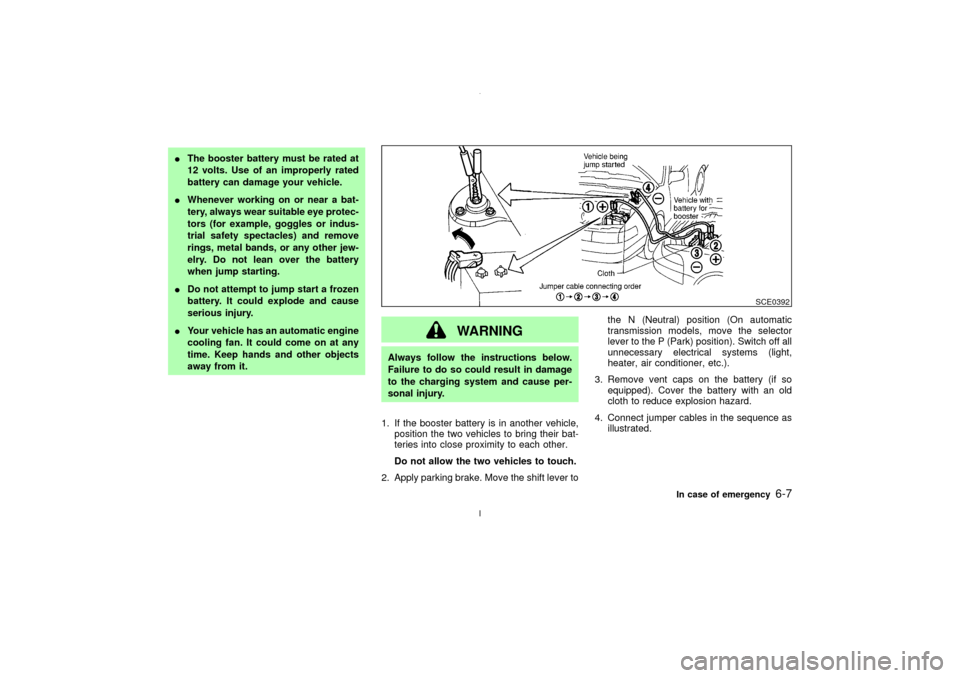
4. Connect jumper cables in the sequence as
illustrated.
SCE0392
In case of emergency
6-7
Z
02.7.12/A33-D/V5.0
X
Page 171 of 247
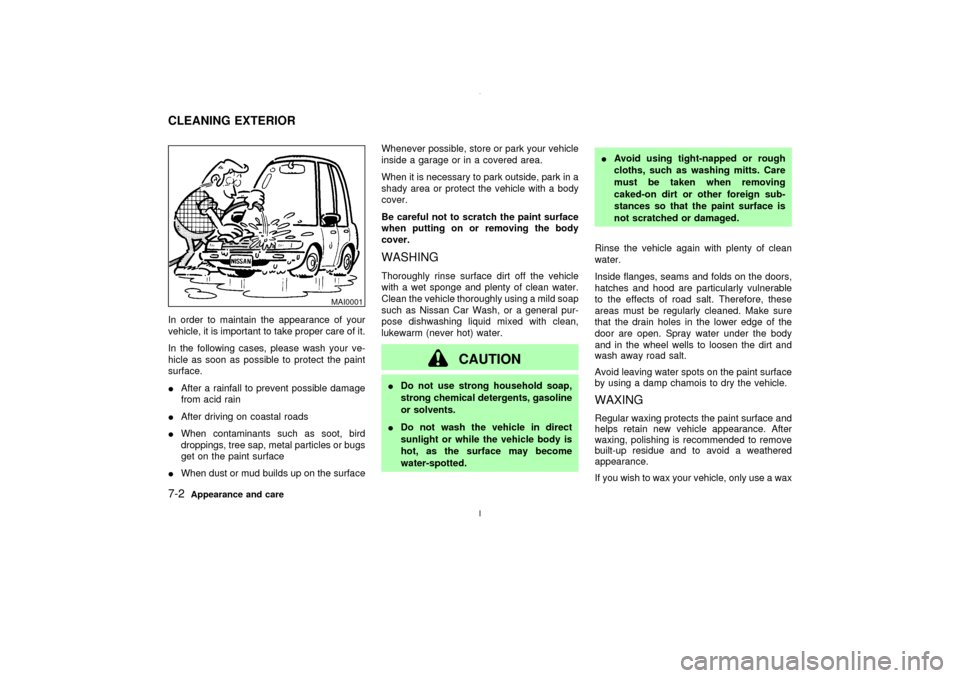
In order to maintain the appearance of your
vehicle, it is important to take proper care of it.
In the following cases, please wash your ve-
hicle as soon as possible to protect the paint
surface.
IAfter a rainfall to prevent possible damage
from acid rain
IAfter driving on coastal roads
IWhen contaminants such as soot, bird
droppings, tree sap, metal particles or bugs
get on the paint surface
IWhen dust or mud builds up on the surfaceWhenever possible, store or park your vehicle
inside a garage or in a covered area.
When it is necessary to park outside, park in a
shady area or protect the vehicle with a body
cover.
Be careful not to scratch the paint surface
when putting on or removing the body
cover.
WASHINGThoroughly rinse surface dirt off the vehicle
with a wet sponge and plenty of clean water.
Clean the vehicle thoroughly using a mild soap
such as Nissan Car Wash, or a general pur-
pose dishwashing liquid mixed with clean,
lukewarm (never hot) water.
CAUTION
IDo not use strong household soap,
strong chemical detergents, gasoline
or solvents.
IDo not wash the vehicle in direct
sunlight or while the vehicle body is
hot, as the surface may become
water-spotted.IAvoid using tight-napped or rough
cloths, such as washing mitts. Care
must be taken when removing
caked-on dirt or other foreign sub-
stances so that the paint surface is
not scratched or damaged.
Rinse the vehicle again with plenty of clean
water.
Inside flanges, seams and folds on the doors,
hatches and hood are particularly vulnerable
to the effects of road salt. Therefore, these
areas must be regularly cleaned. Make sure
that the drain holes in the lower edge of the
door are open. Spray water under the body
and in the wheel wells to loosen the dirt and
wash away road salt.
Avoid leaving water spots on the paint surface
by using a damp chamois to dry the vehicle.
WAXINGRegular waxing protects the paint surface and
helps retain new vehicle appearance. After
waxing, polishing is recommended to remove
built-up residue and to avoid a weathered
appearance.
If you wish to wax your vehicle, only use a wax
MAI0001
CLEANING EXTERIOR7-2
Appearance and care
Z
02.7.12/A33-D/V5.0
X
Page 172 of 247

specified for use over clear coats, such as
Nissan Liquid or Spray Wax. Your NISSAN
dealer can assist you in choosing the proper
product.
IWax your vehicle only after a thorough
washing. Follow the instructions supplied
with the wax.
IDo not use a wax containing any abrasives,
cutting compounds or cleaners that may
damage the vehicle finish.
IIf the surface does not polish easily, use a
road tar remover and wax again.
Machine compounding or aggressive pol-
ishing on a base coat/clear coat paint finish
may dull the finish or leave swirl marks.REMOVING SPOTSRemove tar and oil spots, industrial dust, in-
sects, and tree sap as quickly as possible from
the surface of the paint to avoid lasting dam-
age or staining. Special cleaning products are
available at your NISSAN dealer or any auto-
motive accessory store.UNDERBODYIn areas where road salt is used in winter, the
underbody must be cleaned regularly. This will
prevent dirt and salt from building up andcausing underbody and suspension corrosion.
Before the winter period and again in the
spring, the underseal must be checked and, if
necessary, re-treated.
GLASSWhen cleaning the rear window, it may be
easier to clean if the high-mounted stop light is
removed first.
Be careful when removing the high-mounted
stop light to reduce the risk of damaging the
high-mounted stop light wires.
The high-mounted stop light must be properly
reinstalled before driving your vehicle.
Use glass cleaner to remove smoke and dust
film from the glass surfaces. It is normal for
glass to become coated with a film after the
vehicle is parked in the hot sun. Glass cleaner
SAI0014A
Appearance and care
7-3
Z
02.7.12/A33-D/V5.0
X
Page 176 of 247

8 Maintenance and do-it-yourselfMaintenance requirements ........................................ 8-2
General maintenance ................................................ 8-2
Explanation of general maintenance items .......... 8-2
Maintenance precautions .......................................... 8-5
Engine compartment check locations ....................... 8-7
Engine cooling system .............................................. 8-8
Checking engine coolant level ............................. 8-8
Changing engine coolant ..................................... 8-9
Engine oil ................................................................ 8-10
Checking engine oil level ................................... 8-10
Changing engine oil ........................................... 8-11
Changing engine oil filter ................................... 8-12
Automatic transmission fluid ................................... 8-12
Temperature conditions for checking ................. 8-13
Power steering fluid ................................................ 8-14
Brake and clutch fluid ............................................. 8-14
Window washer fluid ............................................... 8-15
Battery ..................................................................... 8-15
Drive belts ............................................................... 8-17
Spark plugs ............................................................. 8-17
Replacing spark plugs ........................................ 8-18Air cleaner ............................................................... 8-18
Windshield wiper blades ......................................... 8-19
Cleaning ............................................................. 8-19
Replacing............................................................ 8-20
Parking brake and brake pedal ............................... 8-21
Checking parking brake ..................................... 8-21
Checking brake pedal ........................................ 8-21
Brake booster ..................................................... 8-22
Fuses....................................................................... 8-22
Engine compartment .......................................... 8-22
Passenger compartment .................................... 8-24
Keyfob battery replacement .................................... 8-24
Lights ....................................................................... 8-26
Headlights........................................................... 8-27
Exterior and interior lights .................................. 8-28
Wheels and tires ..................................................... 8-33
Tire pressure ...................................................... 8-33
Types of tires...................................................... 8-33
Tire chains .......................................................... 8-34
Changing wheels and tires ................................. 8-35
Z
02.7.12/A33-D/V5.0
X
Page 178 of 247

loose nuts. Tighten if necessary.
Tire rotation*:Tires should be rotated every
7,500 miles (12,000 km).
Wheel alignment and balance:If the vehicle
pulls to either side while driving on a straight
and level road, or if you detect uneven or
abnormal tire wear, there may be a need for
wheel alignment.
If the steering wheel or seat vibrates at normal
highway speeds, wheel balancing may be
needed.
For additional information regarding tires, refer
to ªImportant Tire Safety Informationº in the
Warranty Information Booklet (US) or ªTire
Safety Informationº in the Warranty and Road-
side Assistance Information booklet (Canada).
Windshield:Clean the windshield on a regu-
lar basis. Check the windshield at least every
six months for cracks or other damage. Have a
damaged windshield repaired by a qualified
repair facility.
Windshield wiper blades*:Check for cracks
or wear if they do not wipe properly.
Doors and engine hood:Check that all doors
and the engine hood operate smoothly as well
as the trunk lid or back hatch. Also make sure
that all latches lock securely. Lubricate if nec-essary. Make sure that the secondary latch
keeps the hood from opening when the pri-
mary latch is released.
When driving in areas using road salt or other
corrosive materials, check lubrication fre-
quently.
Lights*:Clean the headlights on a regular
basis. Make sure that the headlights, stop
lights, tail lights, turn signal lights, and other
lights are all operating properly and installed
securely. Also check headlight aim.
Inside the vehicleThe maintenance items listed here should be
checked on a regular basis, such as when
performing periodic maintenance, cleaning the
vehicle, etc.
Warning lights and chimes:Make sure that
all warning lights and chimes are operating
properly.
Windshield wiper and washer*:Check that
the wipers and washer operate properly and
that the wipers do not streak.
Windshield defroster:Check that the air
comes out of the defroster outlets properly and
in good quantity when operating the heater or
air conditioner.
Steering wheel:Check for changes in thesteering conditions, such as excessive free
play, hard steering or strange noises.
Seats:Check seat position controls such as
seat adjusters, seatback recliner, etc. to en-
sure they operate smoothly and that all latches
lock securely in every position. Check that the
head restraints move up and down smoothly
and that the locks (if equipped) hold securely
in all latched positions.
Seat belts:Check that all parts of the seat belt
system (for example, buckles, anchors, adjust-
ers and retractors) operate properly and
smoothly, and are installed securely. Check
the belt webbing for cuts, fraying, wear or
damage.
Accelerator pedal:Check the pedal for
smooth operation and make sure the pedal
does not catch or require uneven effort. Keep
the floor mats away from the pedal.
Clutch pedal*:Make sure the pedal operates
smoothly and check that it has the proper free
play.
Brakes:Check that the brakes do not pull the
vehicle to one side when applied.
Brake pedal and booster*:Check the pedal
for smooth operation and make sure it has the
proper distance under it when depressed fully.
Check the brake booster function. Be sure to
Maintenance and do-it-yourself
8-3
Z
02.7.12/A33-D/V5.0
X
Page 187 of 247
CHANGING ENGINE OIL FILTER1. Park the vehicle on a level surface and
apply the parking brake.
2. Turn the engine off.
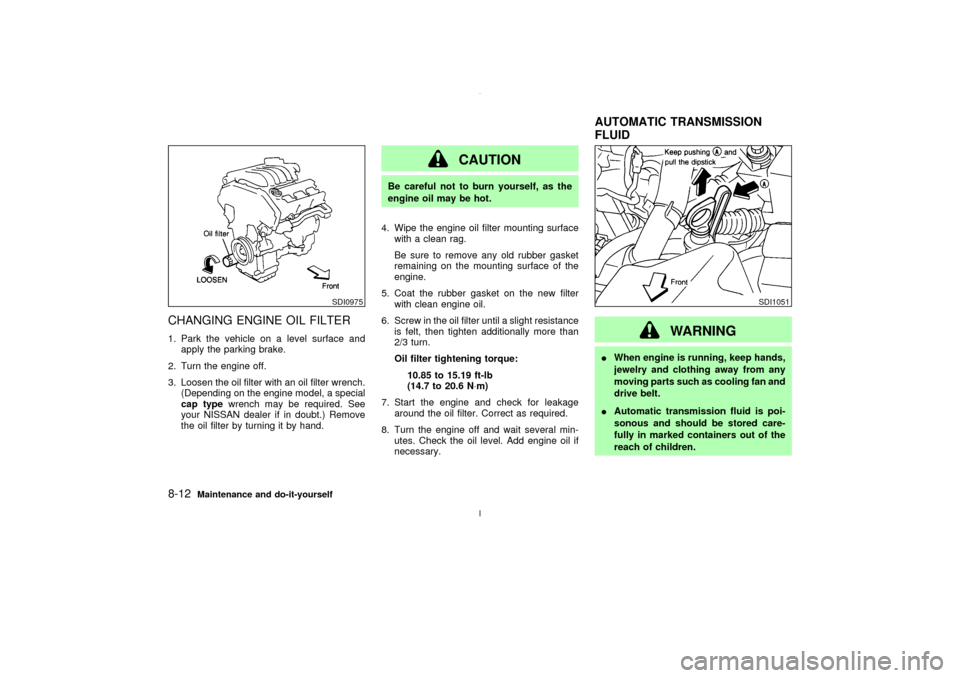
3. Loosen the oil filter with an oil filter wrench.
(Depending on the engine model, a special
cap typewrench may be required. See
your NISSAN dealer if in doubt.) Remove
the oil filter by turning it by hand.
CAUTION
Be careful not to burn yourself, as the
engine oil may be hot.
4. Wipe the engine oil filter mounting surface
with a clean rag.
Be sure to remove any old rubber gasket
remaining on the mounting surface of the
engine.
5. Coat the rubber gasket on the new filter
with clean engine oil.
6. Screw in the oil filter until a slight resistance
is felt, then tighten additionally more than
2/3 turn.
Oil filter tightening torque:
10.85 to 15.19 ft-lb
(14.7 to 20.6 N×m)
7. Start the engine and check for leakage
around the oil filter. Correct as required.
8. Turn the engine off and wait several min-
utes. Check the oil level. Add engine oil if
necessary.
WARNING
IWhen engine is running, keep hands,
jewelry and clothing away from any
moving parts such as cooling fan and
drive belt.
IAutomatic transmission fluid is poi-
sonous and should be stored care-
fully in marked containers out of the
reach of children.
SDI0975
SDI1051
AUTOMATIC TRANSMISSION
FLUID
8-12
Maintenance and do-it-yourself
Z
02.7.12/A33-D/V5.0
X
Page 189 of 247
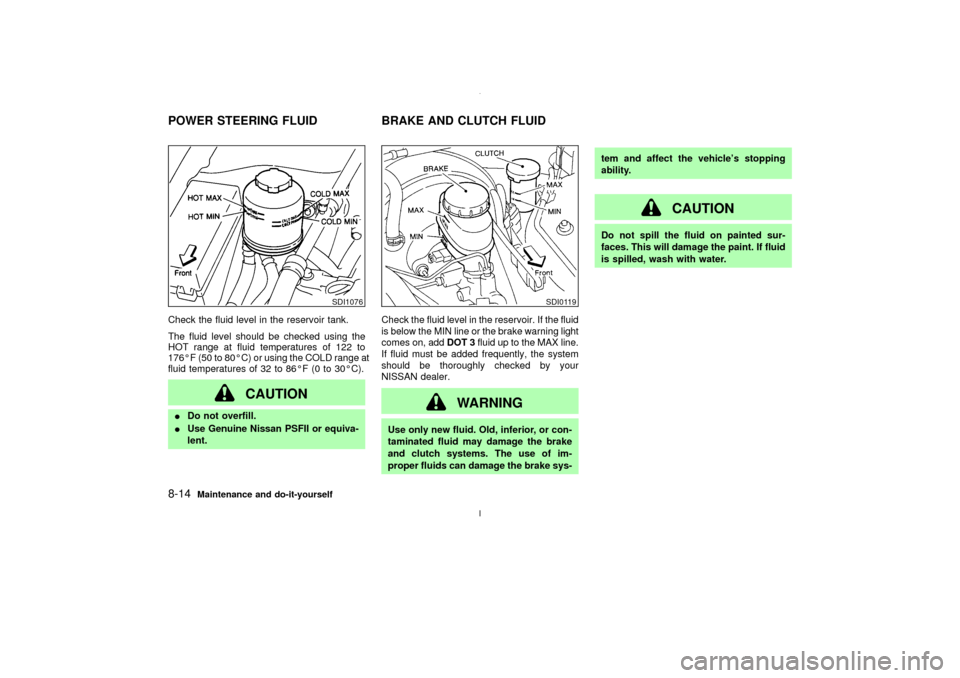
Check the fluid level in the reservoir tank.
The fluid level should be checked using the
HOT range at fluid temperatures of 122 to
176ÉF (50 to 80ÉC) or using the COLD range at
fluid temperatures of 32 to 86ÉF (0 to 30ÉC).
CAUTION
IDo not overfill.
IUse Genuine Nissan PSFII or equiva-
lent.Check the fluid level in the reservoir. If the fluid
is below the MIN line or the brake warning light
comes on, addDOT 3fluid up to the MAX line.
If fluid must be added frequently, the system
should be thoroughly checked by your
NISSAN dealer.
WARNING
Use only new fluid. Old, inferior, or con-
taminated fluid may damage the brake
and clutch systems. The use of im-
proper fluids can damage the brake sys-tem and affect the vehicle's stopping
ability.
CAUTION
Do not spill the fluid on painted sur-
faces. This will damage the paint. If fluid
is spilled, wash with water.
SDI1076
SDI0119
POWER STEERING FLUID BRAKE AND CLUTCH FLUID8-14
Maintenance and do-it-yourself
Z
02.7.12/A33-D/V5.0
X
Page 190 of 247
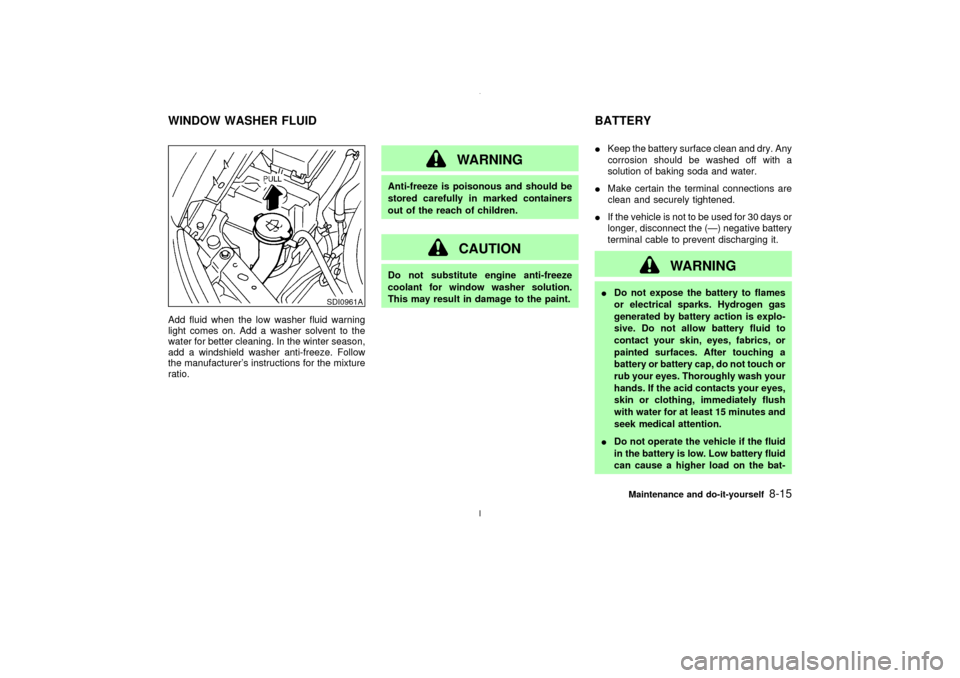
Add fluid when the low washer fluid warning
light comes on. Add a washer solvent to the
water for better cleaning. In the winter season,
add a windshield washer anti-freeze. Follow
the manufacturer's instructions for the mixture
ratio.
WARNING
Anti-freeze is poisonous and should be
stored carefully in marked containers
out of the reach of children.
CAUTION
Do not substitute engine anti-freeze
coolant for window washer solution.
This may result in damage to the paint.IKeep the battery surface clean and dry. Any
corrosion should be washed off with a
solution of baking soda and water.
IMake certain the terminal connections are
clean and securely tightened.
IIf the vehicle is not to be used for 30 days or
longer, disconnect the (Ð) negative battery
terminal cable to prevent discharging it.
WARNING
IDo not expose the battery to flames
or electrical sparks. Hydrogen gas
generated by battery action is explo-
sive. Do not allow battery fluid to
contact your skin, eyes, fabrics, or
painted surfaces. After touching a
battery or battery cap, do not touch or
rub your eyes. Thoroughly wash your
hands. If the acid contacts your eyes,
skin or clothing, immediately flush
with water for at least 15 minutes and
seek medical attention.
IDo not operate the vehicle if the fluid
in the battery is low. Low battery fluid
can cause a higher load on the bat-
SDI0961A
WINDOW WASHER FLUID BATTERY
Maintenance and do-it-yourself
8-15
Z
02.7.12/A33-D/V5.0
X