2003 NISSAN FRONTIER light
[x] Cancel search: lightPage 119 of 272
Compact disc (CD) player operation
Turn the ignition key to the ACC or ON position,
and carefully insert the compact disc into the slot
with the label side up. The compact disc is auto-
matically pulled into the slot and starts to play.
If the radio is already operating, it automatically
turns off and the compact disc begins to play.
CAUTION
Do not force a compact disc into the CD
insert slot. This could damage the CD
and/or CD changer/player.
CD button
When the CD button is pushed with a compact
disc loaded and the radio playing, the radio turns
off and the compact disc starts to play.
Track up/down, FF/REV
(rewind) buttons
Track up/down
When the
button is pushed and released
while the compact disc is playing, the selection
following the present one starts to play from the
beginning. Push the
button several times to
skip several selections. Each time the button is
pushed, the CD advances 1 additional selection.
The number appears in the display window.(When the last selection on the compact disc is
skipped, the first selection is played.)
When the
button is pushed and released, the
selection being played returns to the beginning.
Push the
button several times to skip back
several selections. Each time the button is
pushed, the CD moves back 1 selection.
If the play pattern is in MIX mode when the
orbutton is pushed the next selection will be
chosen at random.
FF (Fast Forward)/REV (Reverse)
When the
orbutton is pushed and held
while the compact disc is playing, the compact
disc plays at an increased speed while fast for-
warding or rewinding. When the button is re-
leased, the compact disc returns to normal play
speed.
MENU
When the
button is pushed while the com-
pact disc is playing, the play pattern changes as
follows:
RPT:The current selection is repeated.
MIX:Selections are played at random, not fol-
lowing the sequence on the compact disc. The
same program may be repeated twice. If the
button is pushed in the MIX mode, selections will
be chosen at random.Blank(no symbol): All selections are played
repeatedly in sequence.
When a new compact disc is inserted, the
play pattern automatically changes to ALL.
CD EJECT button
When the
button is pushed with a com-
pact disc loaded, the compact disc ejects.
When the
button is pushed while the com-
pact disc is playing, the compact disc ejects and
the system turns off.
If the compact disc ejects and is not re-
moved within 10 seconds, it is pulled back
into the slot.
DISC indicator light
This light
comes on when a compact disc
is loaded into the player.
Heater, air conditioner and audio systems4-15
ZREVIEW COPY:Ð2003 Truck/Frontier(d22)
Owners Manual(owners)ÐUSA English(nna)
01/15/03Ðarosenma
X
Page 137 of 272
cKeep your engine tuned up. Malfunc-
tions in the ignition, fuel injection, or
electrical systems can cause overrich
fuel flow into the three-way catalyst,
causing it to overheat. Do not keep driv-
ing if the engine misfires, or if notice-
able loss of performance or other un-
usual operating conditions are
detected. Have the vehicle inspected
promptly by a NISSAN dealer.
cAvoid driving with an extremely low fuel
level. Running out of fuel could cause
the engine to misfire, damaging the
three-way catalyst.
cDo not race the engine while warming it
up.
cDo not push or tow your vehicle to start
the engine.
LOW TIRE PRESSURE WARNING
SYSTEM (if so equipped)
The low tire pressure warning system monitors
tire pressure of all tires (except the spare tire) .
The low tire pressure warning system will activate
only when the vehicle is driven at speeds above
20 MPH (32 km/h) . Also, this system may not
detect a sudden drop in tire pressure (for ex-
ample a flat tire while driving) .Frequently check the tire pressure and adjust
pressure of each tire properly.
Flat tire warning
If the vehicle is being driven with very low tire
pressure (lower than 27 psi, 190 kPa) , the low
tire pressure warning light comes on and the
chime sounds for about 10 seconds.
For additional information regarding the above
warning, see “Warning/indicator lights and au-
dible reminders” in the “Instruments and con-
trols” section.
WARNING
cIf the low tire pressure warning light
comes on while driving, avoid sudden
steering maneuvers or abrupt braking,
reduce vehicle speed, pull off the road
to a safe location and stop the vehicle
as soon as possible. Serious vehicle
damage could occur and may lead to an
accident and could result in serious
personal injury. Check the tire pressure
for all four tires and adjust the pressure
to the COLD tire pressure shown on the
tire placard. If you have a flat tire, re-
place it with a spare tire as soon as
possible. (See “Flat tire” in the “In case
of emergency” section for changing a
flat tire.)
cWhen a spare tire is mounted or a wheel
is replaced, tire pressure will not be
indicated and the low tire pressure
warning system will not function. Con-
tact your NISSAN dealer as soon as
possible for tire replacement and/or
system resetting.
cDo not inject any tire liquid or aerosol
tire sealant into the tires, as this may
cause a malfunction of the tire pressure
sensors.
Starting and driving5-3
ZREVIEW COPY:Ð2003 Truck/Frontier(d22)
Owners Manual(owners)ÐUSA English(nna)
01/15/03Ðarosenma
X
Page 139 of 272
DRINKING ALCOHOL/DRUGS AND
DRIVING
WARNING
Never drive under the influence of alcohol
or drugs. Alcohol in the bloodstream re-
duces coordination, delays reaction time
and impairs judgement. Driving after
drinking alcohol increases the likelihood
of being involved in an accident injuring
yourself and others. Additionally, if you
are injured in an accident, alcohol can
increase the severity of the injury.
NISSAN is committed to safe driving. However,
you must choose not to drive under the influence
of alcohol. Every year thousands of people are
injured or killed in alcohol-related accidents. Al-
though the local laws vary on what is considered
to be legally intoxicated, the fact is that alcohol
affects all people differently and most people
underestimate the effects of alcohol.
Remember, drinking and driving don’t mix! And
that is true for drugs, too (over-the-counter, pre-
scription, and illegal drugs) . Don’t drive if your
ability to operate your vehicle is impaired by alco-
hol, drugs, or some other physical condition.
DRIVING SAFETY PRECAUTIONS
Your NISSAN is designed for both normal and
off-road use. However, avoid driving in deep wa-
ter or mud as your NISSAN is mainly designed for
leisure use, unlike a conventional off-road ve-
hicle.
Remember that two-wheel drive models are less
capable than four-wheel drive models for rough
road driving and extrication when stuck in deep
snow or mud, or the like.
Please observe the following precautions:
WARNING
cDrive carefully when off the road and
avoid dangerous areas. Every person
who drives or rides in this vehicle
should be seated with their seat belt
fastened. This will keep you and your
passengers in position when driving
over rough terrain.
cDo not drive across steep slopes. In-
stead drive either straight up or straight
down the slopes. Off-road vehicles can
tip over sideways much more easily
than they can forward or backward.cMany hills are too steep for any vehicle.
If you drive up them, you may stall. If
you drive down them, you may not be
able to control your speed. If you drive
across them, you may roll over.
cDo not shift gears while driving on
downhill grades as this could cause
loss of control of the vehicle.
cStay alert when driving to the top of a
hill. At the top there could be a drop-off
or other hazard that could cause an
accident.
cIf your engine stalls or you cannot make
it to the top of a steep hill, never at-
tempt to turn around. Your vehicle
could tip or roll over. Always back
straight down in R (Reverse) gear. Never
back down in N (Neutral) or with the
clutch depressed (manual transmission
vehicles) , using only the brake, as this
could cause loss of control.
cHeavy braking going down a hill could
cause your brakes to overheat and fade,
resulting in loss of control and an acci-
dent. Apply brakes lightly and use a low
gear to control your speed.
Starting and driving5-5
ZREVIEW COPY:Ð2003 Truck/Frontier(d22)
Owners Manual(owners)ÐUSA English(nna)
01/15/03Ðarosenma
X
Page 141 of 272
AUTOMATIC TRANSMISSION
On automatic transmission models, the ignition
lock is designed so the key cannot be turned to
LOCK position and removed until the shift selec-
tor lever is moved to the P (Park) position.
When removing the key from the ignition, make
sure the shift selector lever is in the P (Park)
position.
If the key cannot be turned to the LOCK position,
proceed as follows to remove the key.
1. Move the shift selector lever into the P (Park)
position.2. Turn the ignition key slightly toward the ON
position.
3. Turn the key to the LOCK position.
4. Remove the key.
The shift selector lever is designed so it cannot
moved out of P (Park) and into any of the other
gear positions if the ignition key is turned to OFF
position or if the key is removed from the switch.
The shift selector lever can be moved if the
ignition switch is in the ACC position. This
allows the vehicle to be moved if the bat-
tery is discharged. The shift selector lever
can also be moved if the ignition switch is
in the ON position and the foot brake pedal
is depressed.
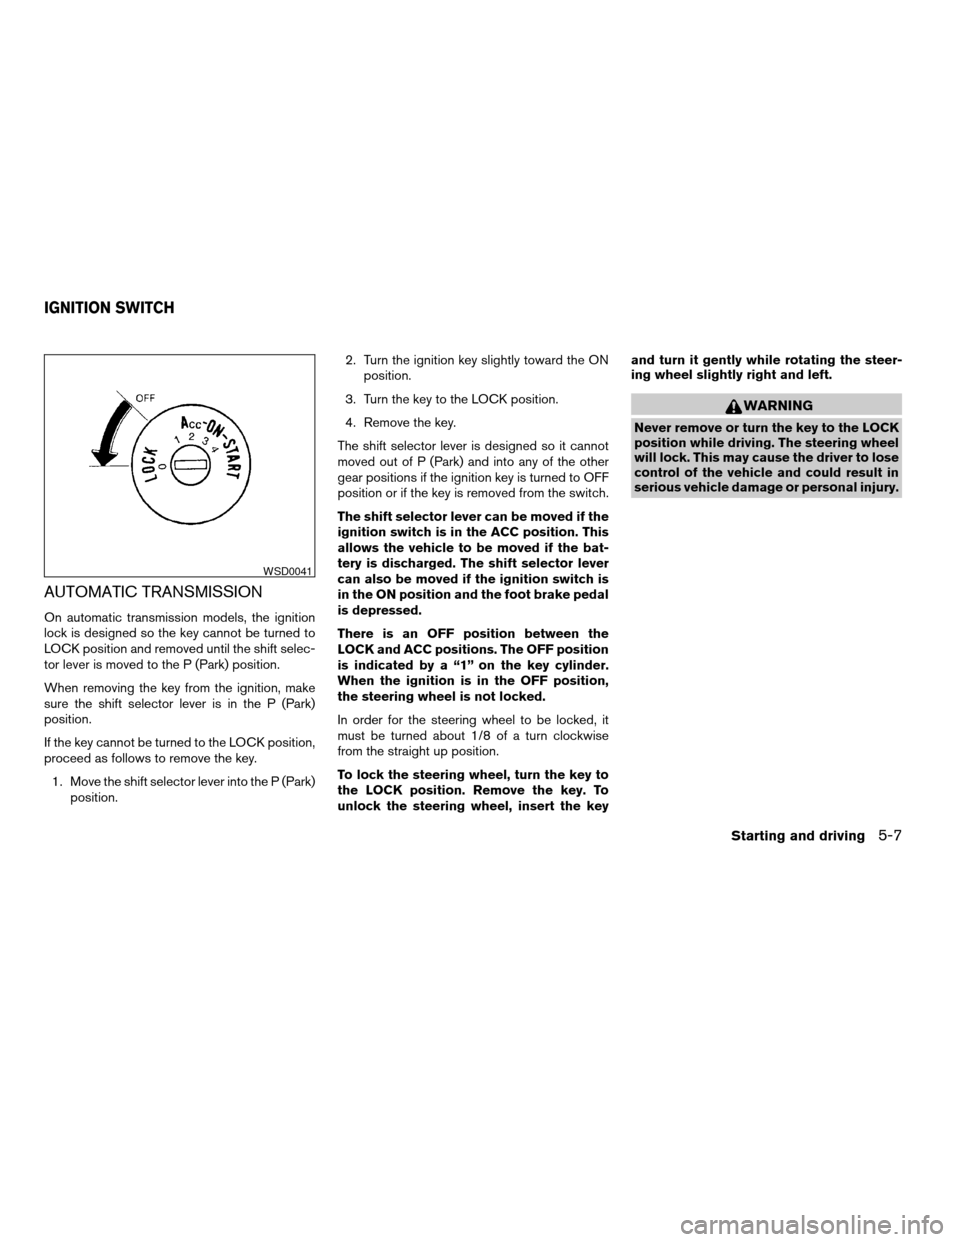
There is an OFF position between the
LOCK and ACC positions. The OFF position
is indicated by a “1” on the key cylinder.
When the ignition is in the OFF position,
the steering wheel is not locked.
In order for the steering wheel to be locked, it
must be turned about 1/8 of a turn clockwise
from the straight up position.
To lock the steering wheel, turn the key to
the LOCK position. Remove the key. To
unlock the steering wheel, insert the keyand turn it gently while rotating the steer-
ing wheel slightly right and left.
WARNING
Never remove or turn the key to the LOCK
position while driving. The steering wheel
will lock. This may cause the driver to lose
control of the vehicle and could result in
serious vehicle damage or personal injury.
WSD0041
IGNITION SWITCH
Starting and driving5-7
ZREVIEW COPY:Ð2003 Truck/Frontier(d22)
Owners Manual(owners)ÐUSA English(nna)
01/15/03Ðarosenma
X
Page 142 of 272
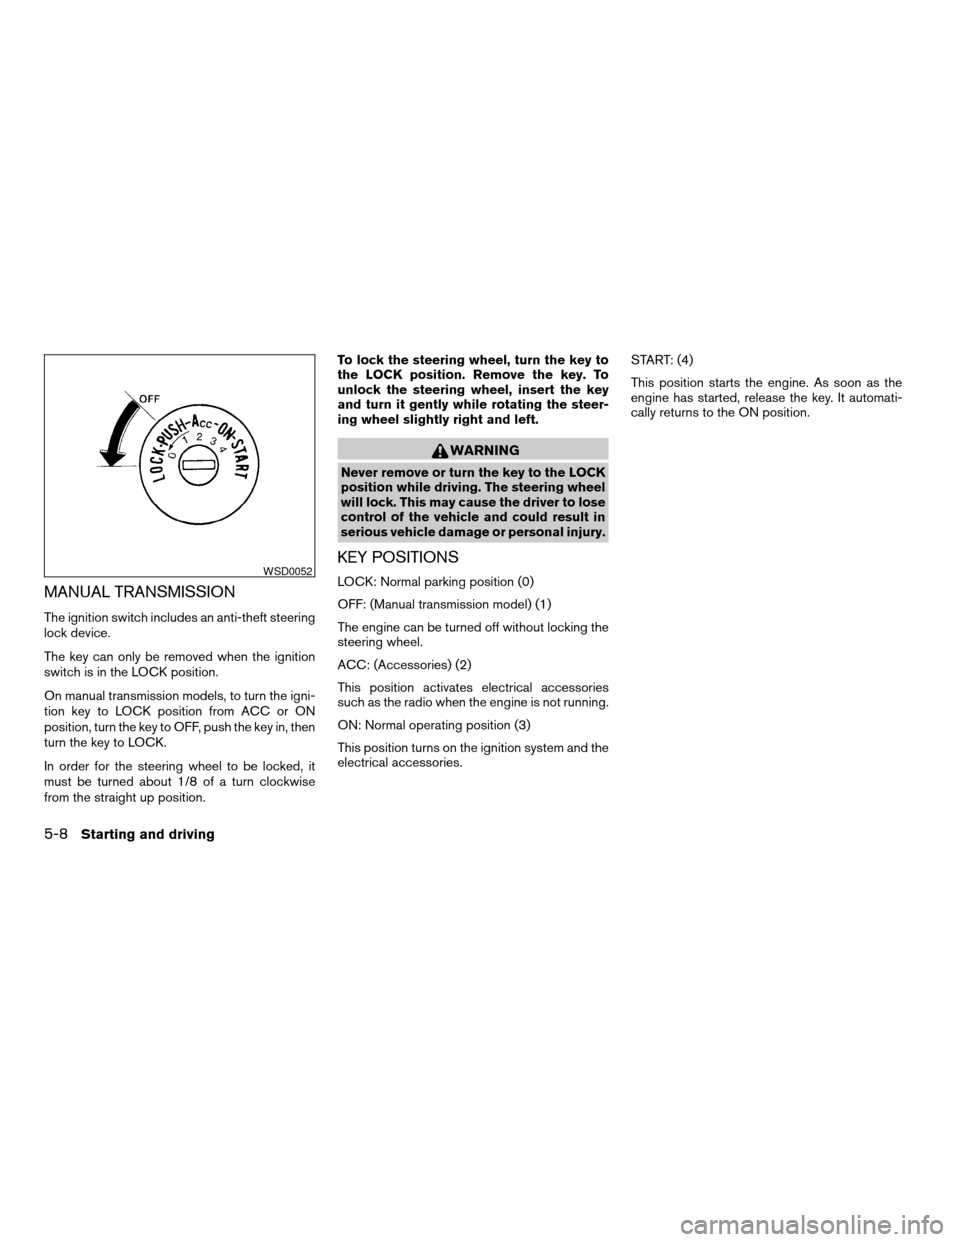
MANUAL TRANSMISSION
The ignition switch includes an anti-theft steering
lock device.
The key can only be removed when the ignition
switch is in the LOCK position.
On manual transmission models, to turn the igni-
tion key to LOCK position from ACC or ON
position, turn the key to OFF, push the key in, then
turn the key to LOCK.
In order for the steering wheel to be locked, it
must be turned about 1/8 of a turn clockwise
from the straight up position.To lock the steering wheel, turn the key to
the LOCK position. Remove the key. To
unlock the steering wheel, insert the key
and turn it gently while rotating the steer-
ing wheel slightly right and left.
WARNING
Never remove or turn the key to the LOCK
position while driving. The steering wheel
will lock. This may cause the driver to lose
control of the vehicle and could result in
serious vehicle damage or personal injury.
KEY POSITIONS
LOCK: Normal parking position (0)
OFF: (Manual transmission model) (1)
The engine can be turned off without locking the
steering wheel.
ACC: (Accessories) (2)
This position activates electrical accessories
such as the radio when the engine is not running.
ON: Normal operating position (3)
This position turns on the ignition system and the
electrical accessories.START: (4)
This position starts the engine. As soon as the
engine has started, release the key. It automati-
cally returns to the ON position.WSD0052
5-8Starting and driving
ZREVIEW COPY:Ð2003 Truck/Frontier(d22)
Owners Manual(owners)ÐUSA English(nna)
01/15/03Ðarosenma
X
Page 143 of 272
cMake sure the area around the vehicle is clear.
cCheck fluid levels such as engine oil, coolant,
brake and clutch fluid, and window washer
fluid as frequently as possible, or at least
whenever you refuel.
cCheck that all windows and lights are clean.
cVisually inspect tires for their appearance and
condition. Also check tires for proper inflation.
cLock all doors.
cPosition seat and adjust head restraints.
cAdjust inside and outside mirrors.
cFasten seat belts and ask all passengers to do
likewise.
cCheck the operation of warning lights when
the key is turned to the ON (3) position. See
“Warning/indicator lights and audible remind-
ers” in the “Instruments and controls” section
of this manual.1. Apply the parking brake.
2.Automatic transmission:
Move the shift selector lever to P (Park) or N
(Neutral) . P (Park) is recommended.
The shift selector lever cannot be
moved out of P (Park) and into any of
the other gear positions if the ignition
key is turned to the OFF position or if
the key is removed from the ignition
switch.
The starter is designed not to operate if
the shift selector lever is in any of the
driving positions.
Manual transmission:
Move the shift lever to N (Neutral) . Depress
the clutch pedal to the floor while cranking
the engine.
The starter is designed not to operate
unless the clutch pedal is fully de-
pressed.
3. Crank the enginewith your foot off the
accelerator pedalby turning the ignition
key to START. Release the key when the
engine starts. If the engine starts, but fails to
run, repeat the above procedure.cWhen the engine is very hard to start in
extremely cold weather or when restart-
ing, depress the accelerator pedal a little
(approximately 1/5 to the floor) and hold it
and then crank the engine. Release the
key and the accelerator pedal when the
engine starts.
cWhen the engine is very hard to start
because it is flooded, depress the accel-
erator pedal all the way to the floor and
hold it. Crank the engine for 5-6 seconds.
After cranking the engine, release the ac-
celerator pedal. Crank the enginewith
your foot off the accelerator pedalby
turning the ignition key to START. Release
the key when the engine starts. If the
engine starts, but fails to run, repeat the
above procedure.
CAUTION
Do not operate the starter for more than
15 seconds at a time. If the engine does
not start, turn the key off and wait 10
seconds before cranking again, otherwise
the starter could be damaged.
4. Allow the engine to idle for at least 30 sec-
onds after starting. Drive at moderate speed
for a short distance first, especially in cold
weather.
BEFORE STARTING THE ENGINE STARTING THE ENGINE
Starting and driving5-9
ZREVIEW COPY:Ð2003 Truck/Frontier(d22)
Owners Manual(owners)ÐUSA English(nna)
01/16/03Ðcathy
X
Page 149 of 272

OFF: For driving up and down long
slopes where engine braking is nec-
essary push the switch OFF
.
The indicator light in the instrument
panel comes on at this time. When
cruising at a low speed or climbing
a gentle slope, you may feel uncom-
fortable shift shocks as the trans-
mission repeatedly shifts between
3rd and overdrive. In this case, set
the overdrive switch in the
OFF
position.
When driving conditions change, reset the over-
drive switch in the ONposition to turn the
overdrive on. The indicator light goes out at this
time.
Remember not to drive at high speeds for ex-
tended periods of time with the overdrive switch
set in the OFF
position. This reduces fuel
economy.
Overdrive switch (KA24DE engine
type b)
Each time your vehicle is started, the transmis-
sion is automatically “reset” to overdrive ON.
ON: For normal driving the overdrive
switch is engaged. The transmission
is upshifted into overdrive as the
vehicle speed increases.
The overdrive does not engage until the
engine has reached operating temperature.
OFF: For driving up and down long
slopes where engine braking is
necessary, push the overdrive
switch once. The O/D OFF indicator
light illuminates at this time.
When cruising at a low speed or climbing a
gentle slope, you may feel uncomfortable shift
shocks as the transmission shifts between 3rd
gear and overdrive repeatedly. In this case, press
the overdrive switch.
When driving conditions change, press the over-
drive switch to turn the Overdrive on. The O/D
OFF indicator light goes out.
Remember not to drive at high speeds for ex-
tended periods of time with the O/D OFF light
illuminated. This reduces fuel economy.
WSD0070
Starting and driving5-15
ZREVIEW COPY:Ð2003 Truck/Frontier(d22)
Owners Manual(owners)ÐUSA English(nna)
01/15/03Ðarosenma
X
Page 150 of 272
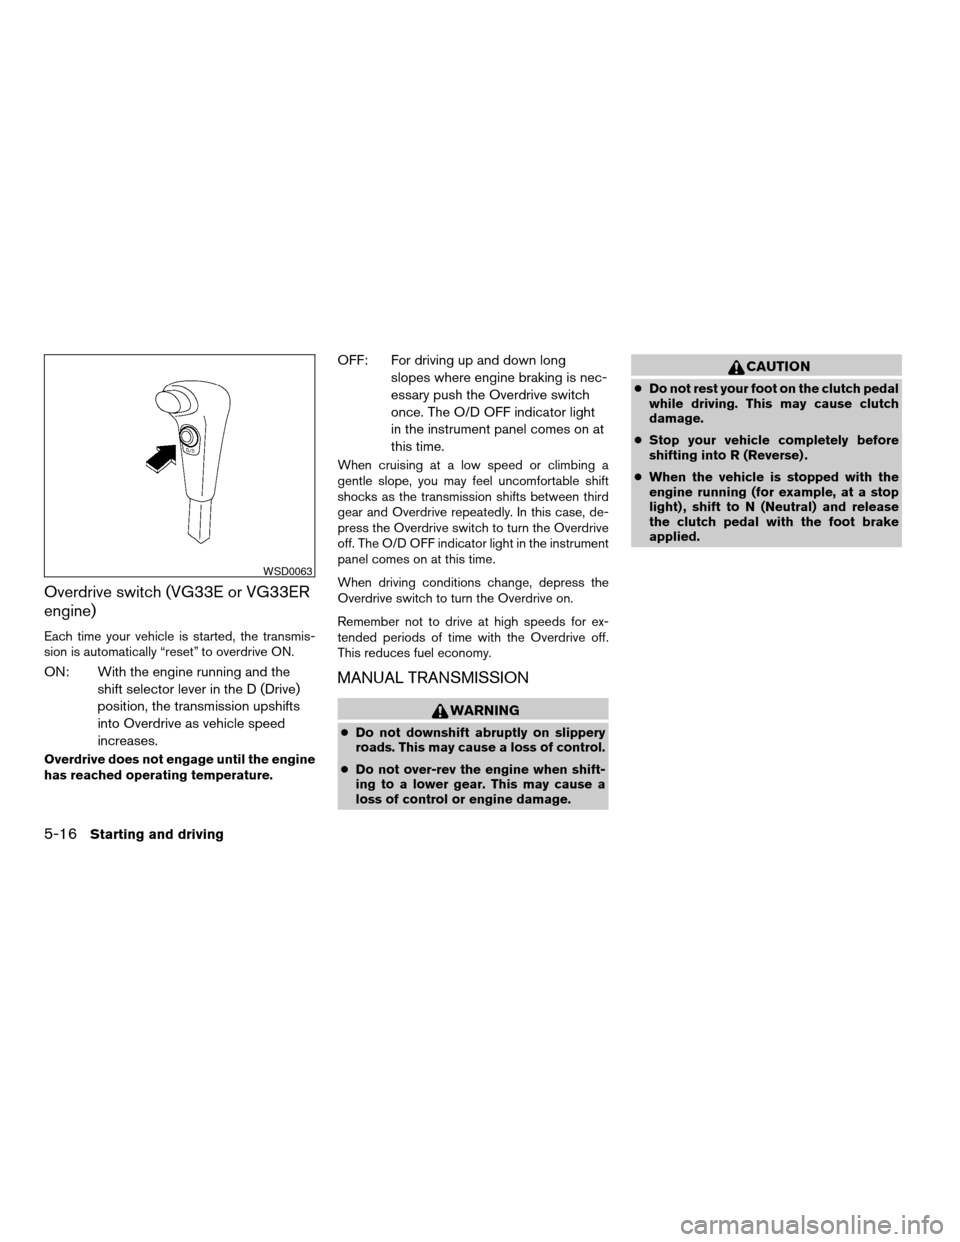
Overdrive switch (VG33E or VG33ER
engine)
Each time your vehicle is started, the transmis-
sion is automatically “reset” to overdrive ON.
ON: With the engine running and the
shift selector lever in the D (Drive)
position, the transmission upshifts
into Overdrive as vehicle speed
increases.
Overdrive does not engage until the engine
has reached operating temperature.
OFF: For driving up and down long
slopes where engine braking is nec-
essary push the Overdrive switch
once. The O/D OFF indicator light
in the instrument panel comes on at
this time.
When cruising at a low speed or climbing a
gentle slope, you may feel uncomfortable shift
shocks as the transmission shifts between third
gear and Overdrive repeatedly. In this case, de-
press the Overdrive switch to turn the Overdrive
off. The O/D OFF indicator light in the instrument
panel comes on at this time.
When driving conditions change, depress the
Overdrive switch to turn the Overdrive on.
Remember not to drive at high speeds for ex-
tended periods of time with the Overdrive off.
This reduces fuel economy.
MANUAL TRANSMISSION
WARNING
cDo not downshift abruptly on slippery
roads. This may cause a loss of control.
cDo not over-rev the engine when shift-
ing to a lower gear. This may cause a
loss of control or engine damage.
CAUTION
cDo not rest your foot on the clutch pedal
while driving. This may cause clutch
damage.
cStop your vehicle completely before
shifting into R (Reverse) .
cWhen the vehicle is stopped with the
engine running (for example, at a stop
light) , shift to N (Neutral) and release
the clutch pedal with the foot brake
applied.
WSD0063
5-16Starting and driving
ZREVIEW COPY:Ð2003 Truck/Frontier(d22)
Owners Manual(owners)ÐUSA English(nna)
01/15/03Ðarosenma
X