2003 NISSAN FRONTIER window
[x] Cancel search: windowPage 84 of 272

MANUAL WINDOWS
The side windows can be opened or closed by
turning the hand crank on each door.
REAR SLIDING WINDOW (if so
equipped)
Squeeze the handles of the levers1, then slide
the window open
s2.Each interior light has a three-position switch and
operates regardless of ignition key position.
cWhen the switch is in the ON positions1, the
interior light illuminates, regardless of door
position.
cWhen the switch is in the center O or DOOR
position
s3, the interior light illuminates by
opening a door.
cWhen the switch is in the OFF position
s2, the
interior light does not illuminate, regardless of
door position.
WIC0263WIC0352Dome light — Type A
WIC0367
INTERIOR LIGHTS
2-30Instruments and controls
ZREVIEW COPY:Ð2003 Truck/Frontier(d22)
Owners Manual(owners)ÐUSA English(nna)
01/15/03Ðarosenma
X
Page 90 of 272

CHILD SAFETY REAR DOOR LOCK
(Crew Cab models only)
Child safety locks help prevent the rear doors
from being opened accidentally, especially when
small children are in the vehicle.
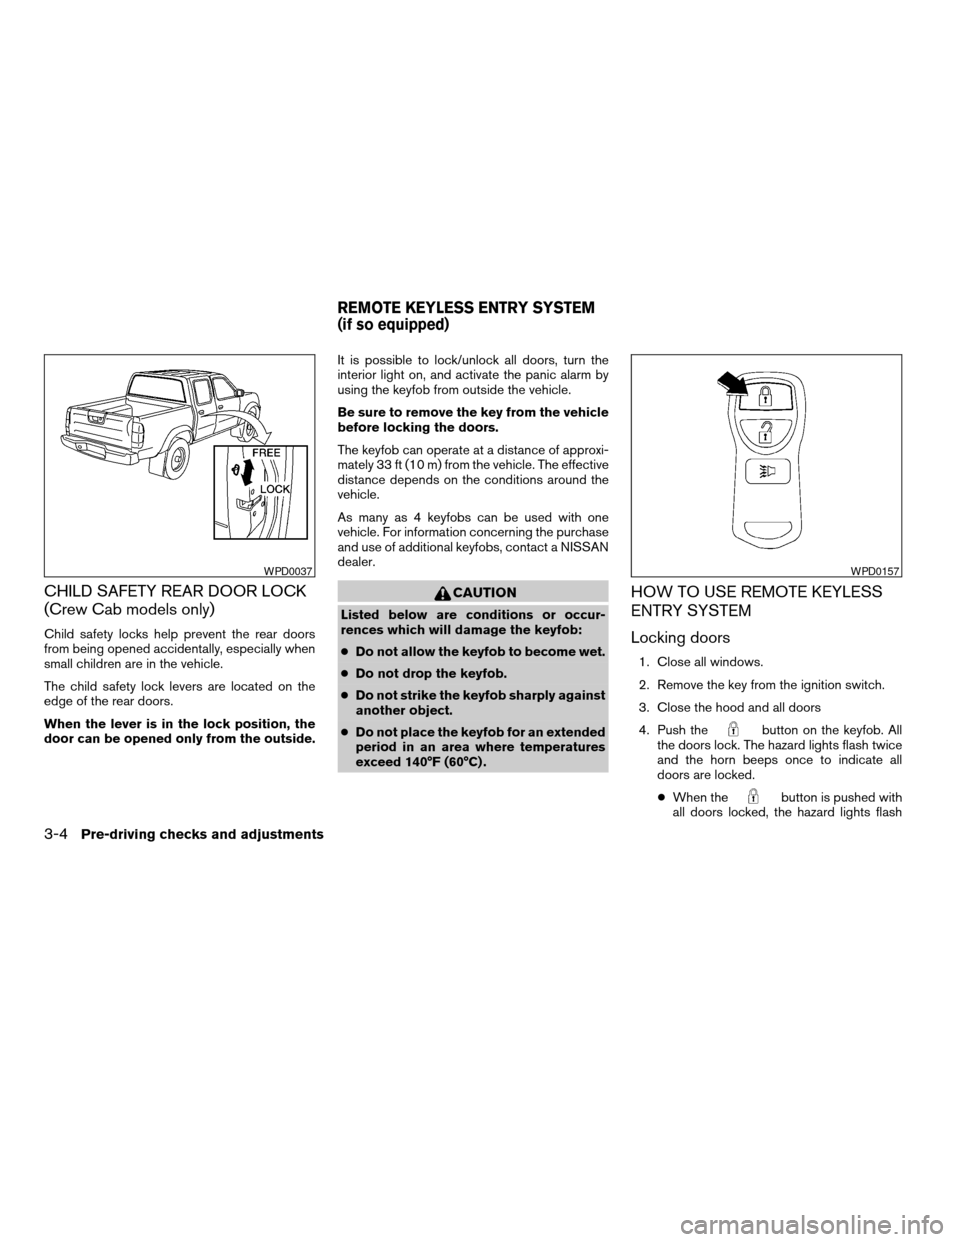
The child safety lock levers are located on the
edge of the rear doors.
When the lever is in the lock position, the
door can be opened only from the outside.It is possible to lock/unlock all doors, turn the
interior light on, and activate the panic alarm by
using the keyfob from outside the vehicle.
Be sure to remove the key from the vehicle
before locking the doors.
The keyfob can operate at a distance of approxi-
mately 33 ft (10 m) from the vehicle. The effective
distance depends on the conditions around the
vehicle.
As many as 4 keyfobs can be used with one
vehicle. For information concerning the purchase
and use of additional keyfobs, contact a NISSAN
dealer.
CAUTION
Listed below are conditions or occur-
rences which will damage the keyfob:
cDo not allow the keyfob to become wet.
cDo not drop the keyfob.
cDo not strike the keyfob sharply against
another object.
cDo not place the keyfob for an extended
period in an area where temperatures
exceed 140°F (60°C) .
HOW TO USE REMOTE KEYLESS
ENTRY SYSTEM
Locking doors
1. Close all windows.
2. Remove the key from the ignition switch.
3. Close the hood and all doors
4. Push the
button on the keyfob. All
the doors lock. The hazard lights flash twice
and the horn beeps once to indicate all
doors are locked.
cWhen the
button is pushed with
all doors locked, the hazard lights flash
WPD0037WPD0157
REMOTE KEYLESS ENTRY SYSTEM
(if so equipped)
3-4Pre-driving checks and adjustments
ZREVIEW COPY:Ð2003 Truck/Frontier(d22)
Owners Manual(owners)ÐUSA English(nna)
01/15/03Ðarosenma
X
Page 106 of 272

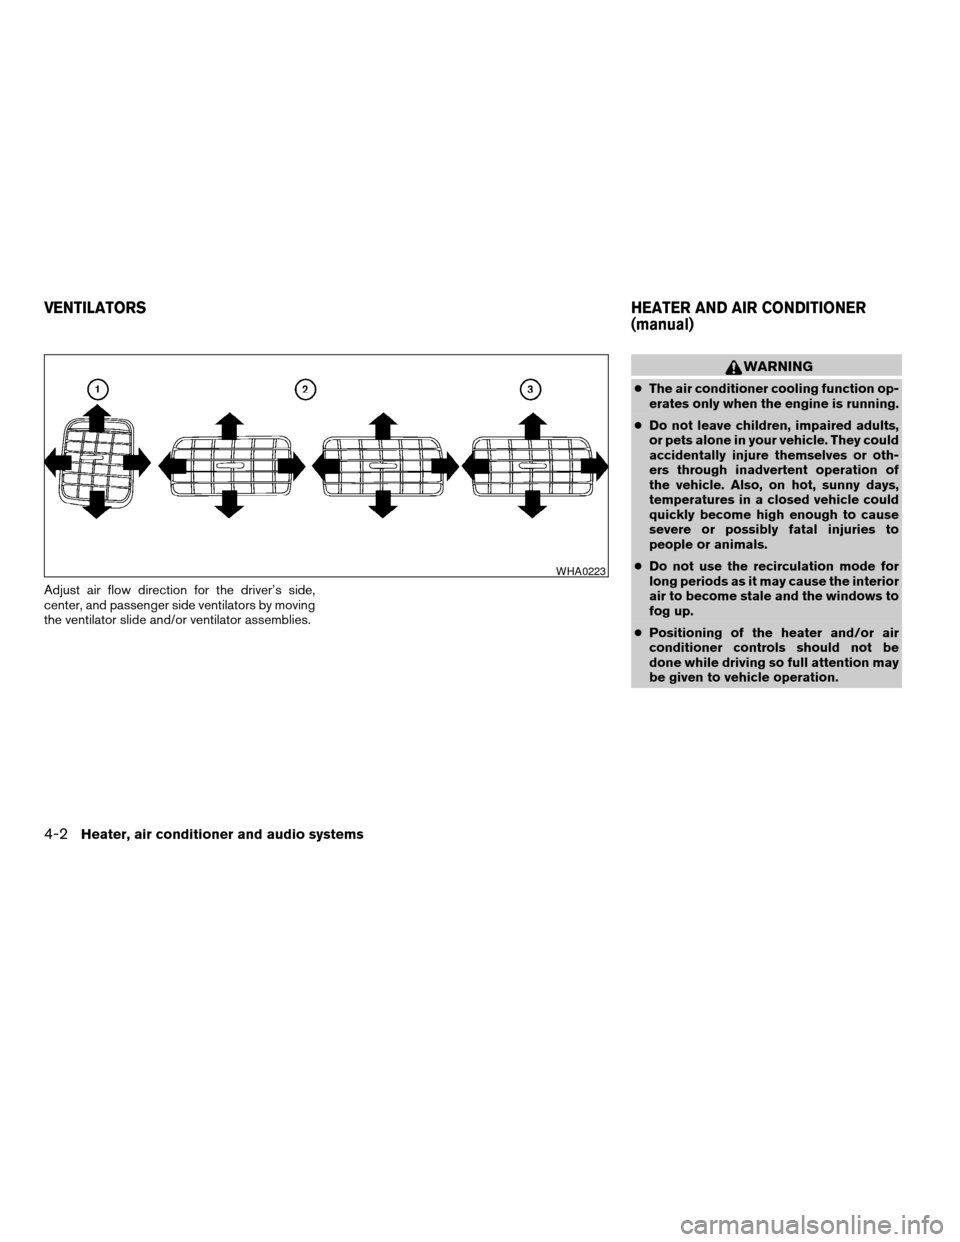
Adjust air flow direction for the driver’s side,
center, and passenger side ventilators by moving
the ventilator slide and/or ventilator assemblies.
WARNING
cThe air conditioner cooling function op-
erates only when the engine is running.
cDo not leave children, impaired adults,
or pets alone in your vehicle. They could
accidentally injure themselves or oth-
ers through inadvertent operation of
the vehicle. Also, on hot, sunny days,
temperatures in a closed vehicle could
quickly become high enough to cause
severe or possibly fatal injuries to
people or animals.
cDo not use the recirculation mode for
long periods as it may cause the interior
air to become stale and the windows to
fog up.
cPositioning of the heater and/or air
conditioner controls should not be
done while driving so full attention may
be given to vehicle operation.
WHA0223
VENTILATORSHEATER AND AIR CONDITIONER
(manual)
4-2Heater, air conditioner and audio systems
ZREVIEW COPY:Ð2003 Truck/Frontier(d22)
Owners Manual(owners)ÐUSA English(nna)
01/15/03Ðarosenma
X
Page 107 of 272

1. Fan control dial
2. Temperature control dial
3. Rear window defroster switch (if so
equipped)
4. Air flow control dial
5. Air conditioner button (if so equipped)
6. Air recirculation button (if so equipped)
CONTROLS
Fan control dial
The fan control dial turns the fan on and off, and
controls fan speed.
Air flow control dial
The air flow control dial allows you to select the
air flow outlets.
— Air flows from center and side
ventilators.
— Air flows from center and side
ventilators and foot outlets.
— Air flows mainly from foot outlets.
— Air flows from defroster outlets
and foot outlets.
— Air flows mainly from defroster
outlets.
The air flow control dial also has intermediate
positions which allow the air flow to be distrib-
uted between 2 of the icon positions on the air
flow control dial.
Temperature control dial
The temperature control dial allows you to adjust
the temperature of the outlet air.
Air recirculation button (if so
equipped)
NOTE:
The air recirculation feature is available
only on those vehicles equipped with air
conditioning.
ON position (Indicator light on):
Interior air is recirculated inside the vehicle.
Push the
button to the on position when:
cdriving on a dusty road.
cto prevent traffic fumes from entering the pas-
senger compartment.
cfor maximum cooling when using the air con-
ditioner.
OFF position (Indicator light off):
Outside air is drawn into the passenger compart-
ment and distributed through the selected outlet.
Use the off position for normal heater or air con-
ditioner operation.
Air conditioner button (if so
equipped)
The button is provided only on vehicles equipped
with an air conditioner.
WHA0235
Heater, air conditioner and audio systems4-3
ZREVIEW COPY:Ð2003 Truck/Frontier(d22)
Owners Manual(owners)ÐUSA English(nna)
01/15/03Ðarosenma
X
Page 108 of 272

Start the engine, turn the fan control dial to the
desired (1 - 4) position and push the
button to turn on the air conditioner. The indicator
light comes on when the air conditioner is oper-
ating. To turn off the air conditioner, push
the
button again.
The air conditioner cooling function oper-
ates only when the engine is running.
Rear window defroster switch (if so
equipped)
For more information about the rear window de-
froster switch, see “Rear window defroster
switch” in the “Instruments and controls” section
of this manual.
HEATER OPERATION
Heating
This mode is used to direct heated air to the foot
outlets. Some air also flows from the defrost
outlets.
1. Push the
button (if so equipped) to
the off position for normal heating.
2. Turn the air flow control dial to the
position.
3. Turn the fan control dial to the desired posi-
tion.4. Turn the temperature control dial to the de-
sired position between the middle and the
hot position.
Ventilation
This mode directs outside air to the side and
center ventilators.
1. Push the
button (if so equipped) to
the off position.
2. Turn the air flow control dial to the
position.
3. Turn the fan control dial to the desired posi-
tion.
4. Turn the temperature control dial to the de-
sired position.
Defrosting or defogging
This mode directs the air to the defrost outlets to
defrost/defog the windows.
1. Turn the air flow control dial to the
position.
2. Turn the fan control dial to the desired posi-
tion.
3. Turn the temperature control dial to the de-
sired position between the middle and the
hot position.cTo quickly remove ice or fog from the windows,
turn the fan control dial to 4 and the tempera-
ture control lever to the full HOT position.
cWhen the
position is selected, the air
conditioner automatically turns on (however,
the indicator light will not illuminate) if the
outside temperature is more than 36 - 37°F (2
- 3°C) . The air conditioning system will con-
tinue to operate until the fan control dial is
turned to OFF or the vehicle is shut off, even if
the air flow control dial is turned to a position
other than the
position. This dehumidi-
fies the air which helps defog the windshield.
The
mode automatically turns off, allow-
ing outside air to be drawn into the passenger
compartment to further improve the defogging
performance.
Bi-level heating
This mode directs cooler air from the side and
center vents and warmer air from the floor outlets.
When the temperature control dial is moved to
the full hot or full cool position, the air between
the vents and the floor outlets is the same tem-
perature.
1. Push the
button (if so equipped) to
the off position.
2. Turn the air flow control dial to the
position.
4-4Heater, air conditioner and audio systems
ZREVIEW COPY:Ð2003 Truck/Frontier(d22)
Owners Manual(owners)ÐUSA English(nna)
01/15/03Ðarosenma
X
Page 110 of 272

Dehumidified defogging
This mode is used to defog the windows and
dehumidify the air.
1. Turn the air flow control dial to the
position.
2. Turn the fan control dial to the desired posi-
tion.
3. Push the
button. The indicator light
comes on.
When the
,or positions in between
are selected, the air conditioner automatically
turns on (however, the indicator light will not
illuminate) if the outside temperature is more than
36 - 37°F (2 - 3°C) . The air conditioning system
will continue to operate until the fan control dial is
turned to OFF or the vehicle is shut off, even if the
air flow control dial is turned to a position other
than the
position. This dehumidifies the air
which helps defog the windshield. The
mode automatically turns off, allowing outside air
to be drawn into the passenger compartment to
further improve the defogging performance.4. Turn the temperature control dial to the de-
sired position.
Operating tips
cKeep the windows closed while the air condi-
tioner is in operation.
cAfter parking in the sun, drive for 2 or 3 min-
utes with the windows open to vent hot air
from the passenger compartment. Then, close
the windows. This allows the air conditioner to
cool the interior more quickly.
cThe air conditioning system should be
operated for approximately 10 minutes
at least once a month. This helps prevent
damage to the system due to lack of
lubrication.
cIf the engine coolant temperature gauge
indicates engine coolant temperature
over the normal range, turn the air con-
ditioner off. See “If your vehicle over-
heats” in the “In case of emergency”
section of this manual.
AIR FLOW CHARTS
The following charts show the button and dial
positions forMAXIMUM AND QUICKheating,
cooling or defrosting.The air recirculation
button should always be in the OFF posi-
tion for heating and defrosting.
4-6Heater, air conditioner and audio systems
ZREVIEW COPY:Ð2003 Truck/Frontier(d22)
Owners Manual(owners)ÐUSA English(nna)
01/15/03Ðarosenma
X
Page 118 of 272

pressed, and stops at the next broadcasting sta-
tion. If using thebutton, once the highest
broadcasting station is reached, the radio contin-
ues in the SEEK mode at the lowest broadcasting
station. If using the
button, once the lowest
broadcasting station is reached, the radio contin-
ues in the SEEK mode at the highest broadcast-
ing station.
Manual tuning
Use the
andbuttons for manual
tuning. To move quickly through the channels,
hold either of the tuning buttons down.
SCAN tuning
Push and hold the SEEK/TRACK tuning button
(
or) for more than 1.5 seconds.
SCAN illuminates in the display window, and the
radio station blinks. SCAN tuning begins from
low to high frequencies or high to low frequen-
cies, depending on which button is pressed.
SCAN tuning stops at each broadcasting station
for 5 seconds. When scanning, SCAN is solid
and the radio station blinks. When temporarily
stopped on a station, SCAN blinks and the sta-
tion display is solid. Pushing the button again
during this 5 second period stops SCAN tuning
and the radio remains tuned to that station.
0
Station memory operations
Each preset mode (A, B or C) has 6 presets,
capable of storing any combination of AM and FM
stations.Press the PRESET ABC button to change be-
tween the presets:
A!B!C
The radio displays icon A, B or C to indicate
which set of presets is active.
To store a radio station in a preset:
1. Select the desired preset by pressing PRE-
SET ABC.
2. Tune to the desired station.
3. Press the desired station select button for
more than 3 seconds. For example, in the
illustrations, ch2 is to be memorized. The
radio mutes when the select button is
pushed.
4. When the indicator illuminates in the display
and the sound resumes, memorizing is com-
plete.
5. Other station select buttons can be set in
the same manner.
If the battery cable is disconnected, or if the radio
fuse opens, the radio memory is canceled. In that
case, reset the desired stations.
LHA0119
4-14Heater, air conditioner and audio systems
ZREVIEW COPY:Ð2003 Truck/Frontier(d22)
Owners Manual(owners)ÐUSA English(nna)
01/15/03Ðarosenma
X
Page 119 of 272

Compact disc (CD) player operation
Turn the ignition key to the ACC or ON position,
and carefully insert the compact disc into the slot
with the label side up. The compact disc is auto-
matically pulled into the slot and starts to play.
If the radio is already operating, it automatically
turns off and the compact disc begins to play.
CAUTION
Do not force a compact disc into the CD
insert slot. This could damage the CD
and/or CD changer/player.
CD button
When the CD button is pushed with a compact
disc loaded and the radio playing, the radio turns
off and the compact disc starts to play.
Track up/down, FF/REV
(rewind) buttons
Track up/down
When the
button is pushed and released
while the compact disc is playing, the selection
following the present one starts to play from the
beginning. Push the
button several times to
skip several selections. Each time the button is
pushed, the CD advances 1 additional selection.
The number appears in the display window.(When the last selection on the compact disc is
skipped, the first selection is played.)
When the
button is pushed and released, the
selection being played returns to the beginning.
Push the
button several times to skip back
several selections. Each time the button is
pushed, the CD moves back 1 selection.
If the play pattern is in MIX mode when the
orbutton is pushed the next selection will be
chosen at random.
FF (Fast Forward)/REV (Reverse)
When the
orbutton is pushed and held
while the compact disc is playing, the compact
disc plays at an increased speed while fast for-
warding or rewinding. When the button is re-
leased, the compact disc returns to normal play
speed.
MENU
When the
button is pushed while the com-
pact disc is playing, the play pattern changes as
follows:
RPT:The current selection is repeated.
MIX:Selections are played at random, not fol-
lowing the sequence on the compact disc. The
same program may be repeated twice. If the
button is pushed in the MIX mode, selections will
be chosen at random.Blank(no symbol): All selections are played
repeatedly in sequence.
When a new compact disc is inserted, the
play pattern automatically changes to ALL.
CD EJECT button
When the
button is pushed with a com-
pact disc loaded, the compact disc ejects.
When the
button is pushed while the com-
pact disc is playing, the compact disc ejects and
the system turns off.
If the compact disc ejects and is not re-
moved within 10 seconds, it is pulled back
into the slot.
DISC indicator light
This light
comes on when a compact disc
is loaded into the player.
Heater, air conditioner and audio systems4-15
ZREVIEW COPY:Ð2003 Truck/Frontier(d22)
Owners Manual(owners)ÐUSA English(nna)
01/15/03Ðarosenma
X