2003 NISSAN 350Z window
[x] Cancel search: windowPage 16 of 227
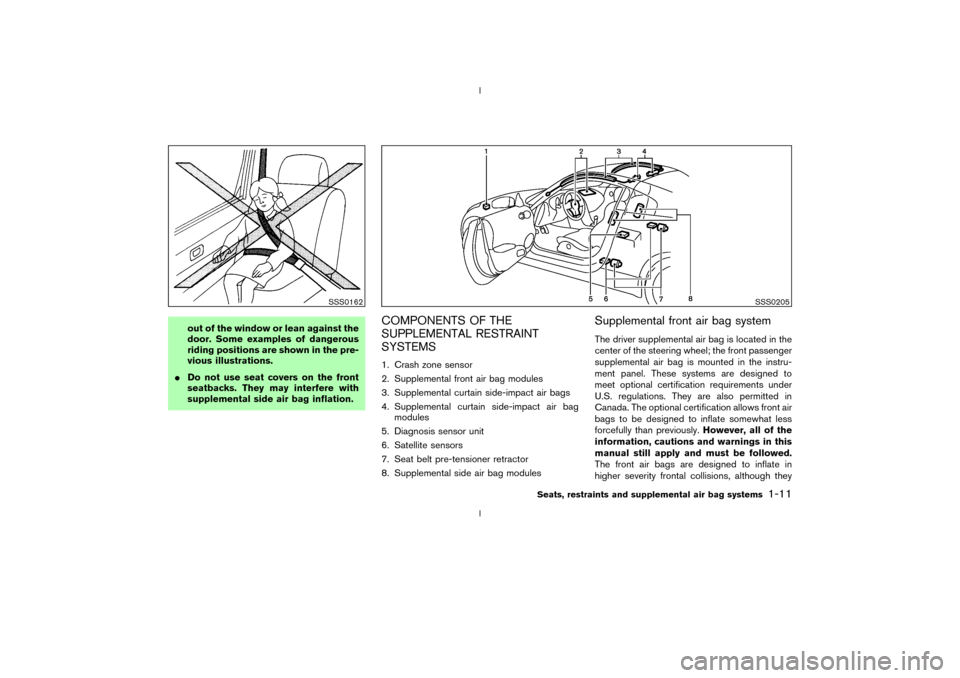
out of the window or lean against the
door. Some examples of dangerous
riding positions are shown in the pre-
vious illustrations.
IDo not use seat covers on the front
seatbacks. They may interfere with
supplemental side air bag inflation.
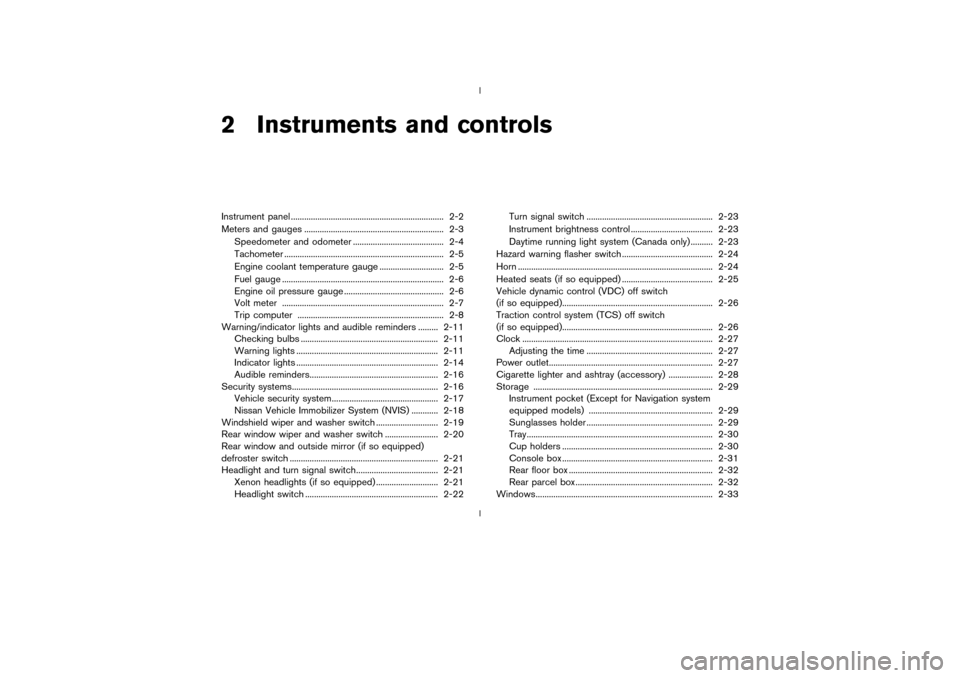
COMPONENTS OF THE
SUPPLEMENTAL RESTRAINT
SYSTEMS1. Crash zone sensor
2. Supplemental front air bag modules
3. Supplemental curtain side-impact air bags
4. Supplemental curtain side-impact air bag
modules
5. Diagnosis sensor unit
6. Satellite sensors
7. Seat belt pre-tensioner retractor
8. Supplemental side air bag modules
Supplemental front air bag systemThe driver supplemental air bag is located in the
center of the steering wheel; the front passenger
supplemental air bag is mounted in the instru-
ment panel. These systems are designed to
meet optional certification requirements under
U.S. regulations. They are also permitted in
Canada. The optional certification allows front air
bags to be designed to inflate somewhat less
forcefully than previously.However, all of the
information, cautions and warnings in this
manual still apply and must be followed.
The front air bags are designed to inflate in
higher severity frontal collisions, although they
SSS0162
SSS0205
Seats, restraints and supplemental air bag systems
1-11
Z
02.9.13/Z33-D/V5.0
X
Page 39 of 227
2 Instruments and controlsInstrument panel ..................................................................... 2-2
Meters and gauges ............................................................... 2-3
Speedometer and odometer ......................................... 2-4
Tachometer ........................................................................ 2-5
Engine coolant temperature gauge ............................. 2-5
Fuel gauge ......................................................................... 2-6
Engine oil pressure gauge ............................................. 2-6
Volt meter ......................................................................... 2-7
Trip computer .................................................................. 2-8
Warning/indicator lights and audible reminders ......... 2-11
Checking bulbs .............................................................. 2-11
Warning lights ................................................................ 2-11
Indicator lights ................................................................ 2-14
Audible reminders.......................................................... 2-16
Security systems.................................................................. 2-16
Vehicle security system................................................ 2-17
Nissan Vehicle Immobilizer System (NVIS) ............ 2-18
Windshield wiper and washer switch ............................ 2-19
Rear window wiper and washer switch ........................ 2-20
Rear window and outside mirror (if so equipped)
defroster switch ................................................................... 2-21
Headlight and turn signal switch..................................... 2-21
Xenon headlights (if so equipped) ............................ 2-21
Headlight switch ............................................................ 2-22Turn signal switch ......................................................... 2-23
Instrument brightness control ..................................... 2-23
Daytime running light system (Canada only) .......... 2-23
Hazard warning flasher switch ......................................... 2-24
Horn ........................................................................................ 2-24
Heated seats (if so equipped) ......................................... 2-25
Vehicle dynamic control (VDC) off switch
(if so equipped).................................................................... 2-26
Traction control system (TCS) off switch
(if so equipped).................................................................... 2-26
Clock ...................................................................................... 2-27
Adjusting the time ......................................................... 2-27
Power outlet.......................................................................... 2-27
Cigarette lighter and ashtray (accessory) .................... 2-28
Storage ................................................................................. 2-29
Instrument pocket (Except for Navigation system
equipped models) ........................................................ 2-29
Sunglasses holder ......................................................... 2-29
Tray.................................................................................... 2-30
Cup holders .................................................................... 2-30
Console box .................................................................... 2-31
Rear floor box ................................................................. 2-32
Rear parcel box .............................................................. 2-32
Windows................................................................................ 2-33
Z
02.9.13/Z33-D/V5.0
X
Page 40 of 227

Power windows.............................................................. 2-33
Automatic adjusting function ...................................... 2-34
Interior light ........................................................................... 2-35
Spot light ......................................................................... 2-35
Vanity mirror light (if so equipped) ................................. 2-36
Luggage compartment light .............................................. 2-36
HomeLink
universal transceiver (if so equipped) ...... 2-36
Programming HomeLink
............................................ 2-37Programming HomeLink
for Canadian
customers ........................................................................ 2-38
Operating the HomeLinkuniversal transceiver.... 2-39
Programming trouble diagnosis ................................. 2-39
Clearing the programmed information...................... 2-39
Reprogramming a single HomeLink
button .......... 2-39
If your vehicle is stolen................................................. 2-39
Z
02.9.13/Z33-D/V5.0
X
Page 41 of 227
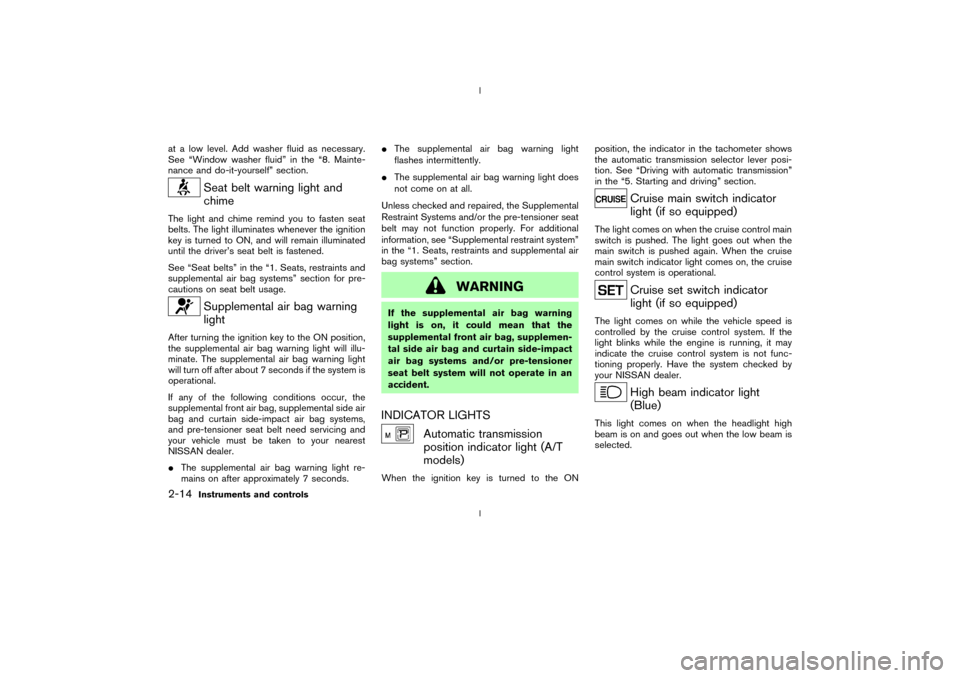
1. Headlight and turn signal switch (P.2-21)
2. Instrument brightness control switch
(P.2-23)
3. Driver supplemental air bag (P.1-6)/Horn
(P.2-24)
4. Meters/gauges (P.2-3)5. Cruise control main/set switch (P.5-15)
6. Trip computer mode/setting switch (P.2-8)
7. Windshield wiper/washer switch (P.2-19)
8. Center ventilator (P.4-2)
9. Cup holder (P.2-30)
10. Passenger supplemental air bag (P.1-6)11. Side ventilator (P.4-2)
12. VDC (Vehicle dynamic control) OFF switch
(P.2-26) or TCS (Traction control system)
OFF switch (P.2-26)
13. Fuel filler lid opener switch (P.3-10)
14. Hood lock release handle (P.3-8)
15. Fuse box (P.8-23)
16. Tilting steering wheel lock lever (P.3-12)
17. Ignition switch/steering lock (P.5-5)
18. Navigation system* or Instrument pocket
(P.2-29)
19. Rear window and outside mirror (if so
equipped) defroster switch (P.2-21)
20. Heater/air conditioner control (P.4-3)
21. Audio system (P.4-6)/Clock (P.2-27)
22. Heated seat switch (P.2-25)
23. Hazard warning flasher switch (P.2-24)
24. Ashtray (P.2-28) or Tray (P.2-30)
See the page indicated in parentheses for
operating details.
*: Refer to the separate Navigation System
Owner's Manual.
SIC1943
INSTRUMENT PANEL2-2
Instruments and controls
Z
02.9.13/Z33-D/V5.0
X
Page 53 of 227
at a low level. Add washer fluid as necessary.
See ªWindow washer fluidº in the ª8. Mainte-
nance and do-it-yourselfº section.
Seat belt warning light and
chime
The light and chime remind you to fasten seat
belts. The light illuminates whenever the ignition
key is turned to ON, and will remain illuminated
until the driver's seat belt is fastened.
See ªSeat beltsº in the ª1. Seats, restraints and
supplemental air bag systemsº section for pre-
cautions on seat belt usage.
Supplemental air bag warning
light
After turning the ignition key to the ON position,
the supplemental air bag warning light will illu-
minate. The supplemental air bag warning light
will turn off after about 7 seconds if the system is
operational.
If any of the following conditions occur, the
supplemental front air bag, supplemental side air
bag and curtain side-impact air bag systems,
and pre-tensioner seat belt need servicing and
your vehicle must be taken to your nearest
NISSAN dealer.
IThe supplemental air bag warning light re-
mains on after approximately 7 seconds.IThe supplemental air bag warning light
flashes intermittently.
IThe supplemental air bag warning light does
not come on at all.
Unless checked and repaired, the Supplemental
Restraint Systems and/or the pre-tensioner seat
belt may not function properly. For additional
information, see ªSupplemental restraint systemº
in the ª1. Seats, restraints and supplemental air
bag systemsº section.
WARNING
If the supplemental air bag warning
light is on, it could mean that the
supplemental front air bag, supplemen-
tal side air bag and curtain side-impact
air bag systems and/or pre-tensioner
seat belt system will not operate in an
accident.INDICATOR LIGHTS
Automatic transmission
position indicator light (A/T
models)
When the ignition key is turned to the ONposition, the indicator in the tachometer shows
the automatic transmission selector lever posi-
tion. See ªDriving with automatic transmissionº
in the ª5. Starting and drivingº section.
Cruise main switch indicator
light (if so equipped)
The light comes on when the cruise control main
switch is pushed. The light goes out when the
main switch is pushed again. When the cruise
main switch indicator light comes on, the cruise
control system is operational.
Cruise set switch indicator
light (if so equipped)
The light comes on while the vehicle speed is
controlled by the cruise control system. If the
light blinks while the engine is running, it may
indicate the cruise control system is not func-
tioning properly. Have the system checked by
your NISSAN dealer.
High beam indicator light
(Blue)
This light comes on when the headlight high
beam is on and goes out when the low beam is
selected.
2-14
Instruments and controls
Z
02.9.13/Z33-D/V5.0
X
Page 56 of 227
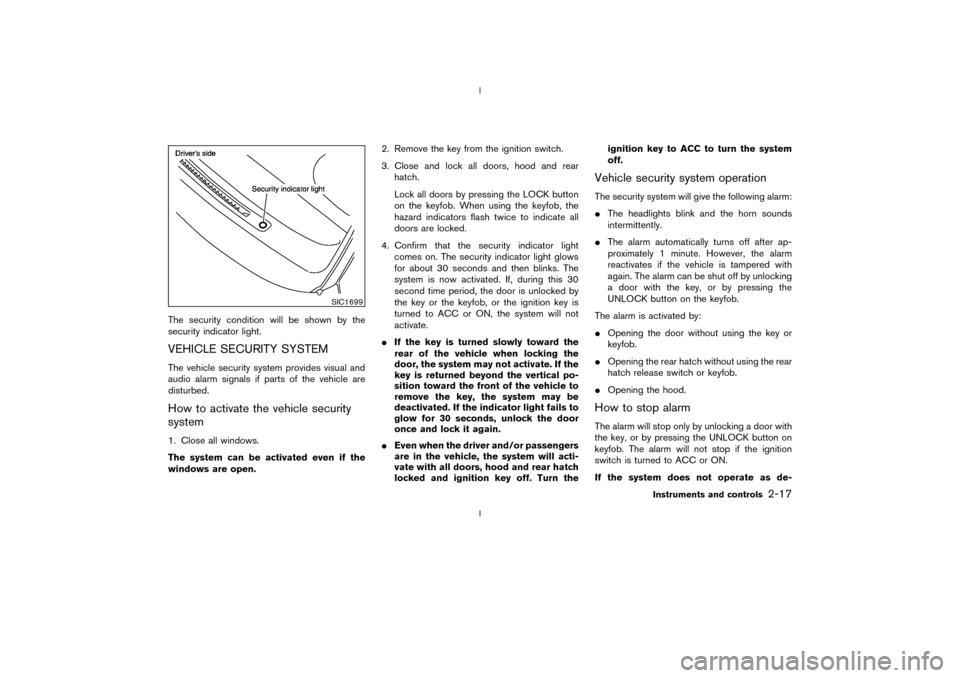
The security condition will be shown by the
security indicator light.VEHICLE SECURITY SYSTEMThe vehicle security system provides visual and
audio alarm signals if parts of the vehicle are
disturbed.How to activate the vehicle security
system1. Close all windows.
The system can be activated even if the
windows are open.2. Remove the key from the ignition switch.
3. Close and lock all doors, hood and rear
hatch.
Lock all doors by pressing the LOCK button
on the keyfob. When using the keyfob, the
hazard indicators flash twice to indicate all
doors are locked.
4. Confirm that the security indicator light
comes on. The security indicator light glows
for about 30 seconds and then blinks. The
system is now activated. If, during this 30
second time period, the door is unlocked by
the key or the keyfob, or the ignition key is
turned to ACC or ON, the system will not
activate.
IIf the key is turned slowly toward the
rear of the vehicle when locking the
door, the system may not activate. If the
key is returned beyond the vertical po-
sition toward the front of the vehicle to
remove the key, the system may be
deactivated. If the indicator light fails to
glow for 30 seconds, unlock the door
once and lock it again.
IEven when the driver and/or passengers
are in the vehicle, the system will acti-
vate with all doors, hood and rear hatch
locked and ignition key off. Turn theignition key to ACC to turn the system
off.
Vehicle security system operationThe security system will give the following alarm:
IThe headlights blink and the horn sounds
intermittently.
IThe alarm automatically turns off after ap-
proximately 1 minute. However, the alarm
reactivates if the vehicle is tampered with
again. The alarm can be shut off by unlocking
a door with the key, or by pressing the
UNLOCK button on the keyfob.
The alarm is activated by:
IOpening the door without using the key or
keyfob.
IOpening the rear hatch without using the rear
hatch release switch or keyfob.
IOpening the hood.How to stop alarmThe alarm will stop only by unlocking a door with
the key, or by pressing the UNLOCK button on
keyfob. The alarm will not stop if the ignition
switch is turned to ACC or ON.
If the system does not operate as de-
SIC1699
Instruments and controls
2-17
Z
02.9.13/Z33-D/V5.0
X
Page 59 of 227
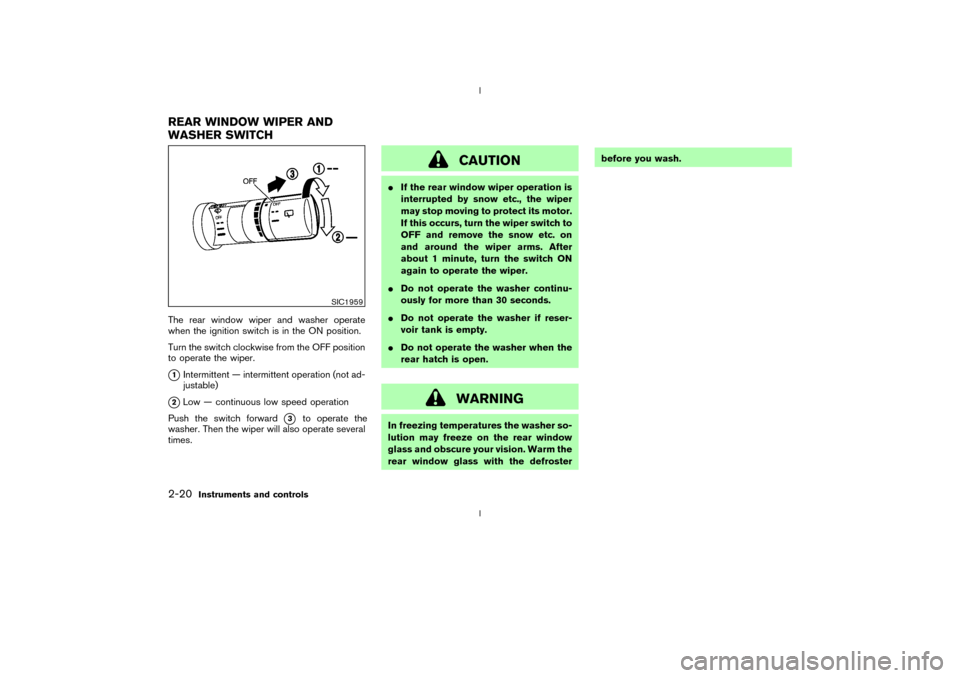
The rear window wiper and washer operate
when the ignition switch is in the ON position.
Turn the switch clockwise from the OFF position
to operate the wiper.q1Intermittent Ð intermittent operation (not ad-
justable)
q2Low Ð continuous low speed operation
Push the switch forward
q3
to operate the
washer. Then the wiper will also operate several
times.
CAUTION
IIf the rear window wiper operation is
interrupted by snow etc., the wiper
may stop moving to protect its motor.
If this occurs, turn the wiper switch to
OFF and remove the snow etc. on
and around the wiper arms. After
about 1 minute, turn the switch ON
again to operate the wiper.
IDo not operate the washer continu-
ously for more than 30 seconds.
IDo not operate the washer if reser-
voir tank is empty.
IDo not operate the washer when the
rear hatch is open.
WARNING
In freezing temperatures the washer so-
lution may freeze on the rear window
glass and obscure your vision. Warm the
rear window glass with the defrosterbefore you wash.
SIC1959
REAR WINDOW WIPER AND
WASHER SWITCH2-20
Instruments and controls
Z
02.9.13/Z33-D/V5.0
X
Page 60 of 227

To defog/defrost the rear window glass and
outside mirrors (if so equipped), start the engine
and push the switch on. The indicator light will
come on. Push the switch again to turn the
defroster off.
It will automatically turn off in approximately 15
minutes.
CAUTION
When cleaning the inner side of the rear
window, be careful not to scratch or
damage the rear window defroster.
XENON HEADLIGHTS (if so
equipped)
WARNINGHIGH VOLTAGE
IWhen xenon headlights are on, they
produce a high voltage. To prevent an
electric shock, never attempt to
modify or disassemble. Always have
your xenon headlights replaced at a
NISSAN dealer.
IXenon headlights provide consider-
ably more light than conventional
headlights. If they are not correctly
aimed, they might temporarily blind
an oncoming driver or the driver
ahead of you and cause a serious
accident. If headlights are not aimed
correctly, immediately take your ve-
hicle to a NISSAN dealer and have
the headlights adjusted correctly.
When the xenon headlight is initially turned on,
its brightness or color varies slightly. However,
the color and brightness will soon stabilize.IThe life of xenon headlights will be
shortened by frequent on-off operation.
It is generally desirable not to turn off
the headlights for short intervals (for
example, when the vehicle stops at a
traffic signal). Even when the daytime
running lights are active (Canada only),
the xenon headlights do not turn on.
This way the life of the xenon headlights
is not reduced.
IIf the xenon headlight bulb is close to
burning out, the brightness will drasti-
cally decrease, the light will start blink-
ing, or the color of the light will become
reddish. If one or more of the above
signs appear, contact a NISSAN dealer.
SIC1960
REAR WINDOW AND OUTSIDE
MIRROR (if so equipped)
DEFROSTER SWITCHHEADLIGHT AND TURN SIGNAL
SWITCH
Instruments and controls
2-21
Z
02.9.13/Z33-D/V5.0
X