2003 NISSAN 350Z radio controls
[x] Cancel search: radio controlsPage 75 of 227

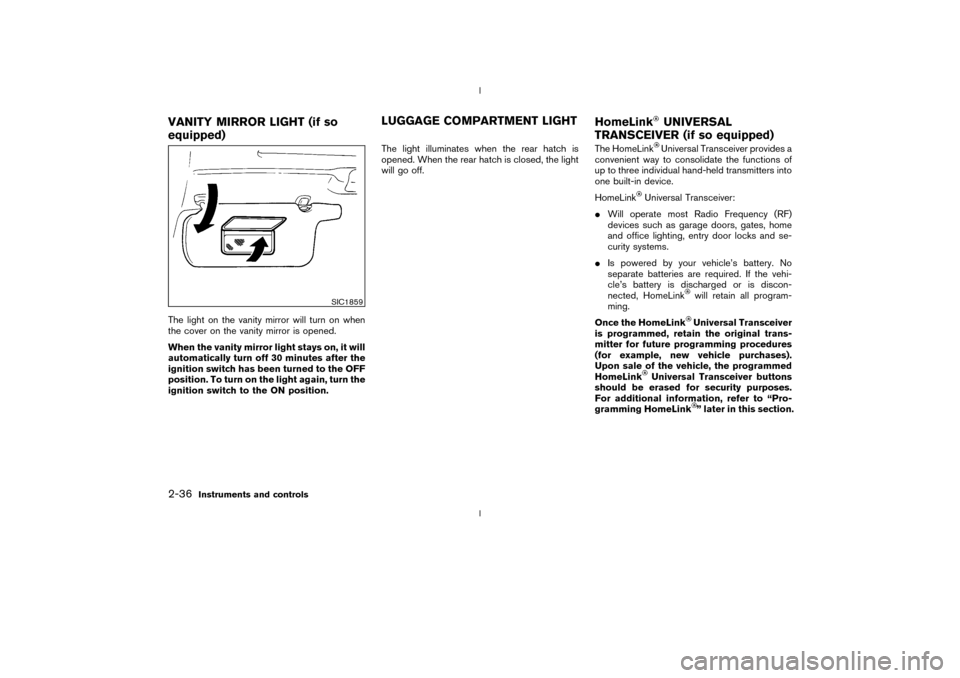
The light on the vanity mirror will turn on when
the cover on the vanity mirror is opened.
When the vanity mirror light stays on, it will
automatically turn off 30 minutes after the
ignition switch has been turned to the OFF
position. To turn on the light again, turn the
ignition switch to the ON position.The light illuminates when the rear hatch is
opened. When the rear hatch is closed, the light
will go off.The HomeLink
Universal Transceiver provides a
convenient way to consolidate the functions of
up to three individual hand-held transmitters into
one built-in device.
HomeLink
Universal Transceiver:
IWill operate most Radio Frequency (RF)
devices such as garage doors, gates, home
and office lighting, entry door locks and se-
curity systems.
IIs powered by your vehicle's battery. No
separate batteries are required. If the vehi-
cle's battery is discharged or is discon-
nected, HomeLink
will retain all program-
ming.
Once the HomeLinkUniversal Transceiver
is programmed, retain the original trans-
mitter for future programming procedures
(for example, new vehicle purchases).
Upon sale of the vehicle, the programmed
HomeLink
Universal Transceiver buttons
should be erased for security purposes.
For additional information, refer to ªPro-
gramming HomeLink
º later in this section.
SIC1859
VANITY MIRROR LIGHT (if so
equipped)LUGGAGE COMPARTMENT LIGHT
HomeLink
UNIVERSAL
TRANSCEIVER (if so equipped)
2-36
Instruments and controls
Z
02.9.13/Z33-D/V5.0
X
Page 107 of 227

Audio main operationON×OFF/Volume control:
Turn the ignition key to ACC or ON, and then
push the ON×OFF/VOL (Volume) control knob
while the system is off to call up the mode (radio
or CD) which was playing immediately before
the system was turned off. When no CD is
loaded, the radio will come on. While the system
is on, pushing the ON×OFF/VOL control knob
turns the system off.
Turn the ON×OFF/VOL control knob to adjust
the volume.
AUDIO button (BASS, TREBLE, FADER,
BALANCE):
Press the AUDIO button to change the selecting
mode as follows.
BASS®TREBLE®FADER®BALANCE
To adjust Bass, Treble, Fader and Balance,
press the AUDIO button until the desired mode
(BASS, TREBLE, FADER or BALANCE) ap-
pears in the display. Press the TUNE
(
,
) or SEEK (
,
) button
to adjust Bass and Treble to the desired level.
Use the TUNE or SEEK button also to adjust
Fader or Balance modes. Fader adjusts the
sound level between the front and rear speakersand Balance adjusts the sound between the
right and left speakers.
After 10 seconds, the radio or CD display
reappears. Once the sound quality is set to the
desired level, press the AUDIO button repeat-
edly until the radio or CD display appears.
DISP DISPLAY CHANGE:
Push the DISP button for more than 1.5 seconds
to adjust the digital clock display. See ªClockº in
the ª2. Instruments and controlsº section for the
clock adjustment operation.
When the DISP button is pushed for less than
1.5 seconds while the compact disc is being
played, the display will show the CD play time.FM-AM radio operation
FM/AM band select:
Pushing the FM band select button will change
the band as follows:
FM1®FM2®FM1
To select the AM band, push the AM band select
button.
When FM or AM band select button is pushed
while the ignition switch is in the ACC or ON, the
radio will come on at the station last played.
The last station played will also come on whenthe power knob is turned to ON.
If a compact disc is playing when the FM or AM
band select button is turned to ON, the compact
disc will automatically be turned off and the last
radio station played will come on.
The FM stereo indicator ST will glow during FM
stereo reception. When the stereo broadcast
signal is weak, the radio will automatically
change from stereo to monaural reception.
TUNE (Tuning):WARNING
The radio should not be tuned while
driving so full attention may be given to
vehicle operation.
Use the TUNE button
or
for manual
tuning. To move quickly through the channels,
hold either side of the TUNE button down for
more than 0.5 seconds.
SEEK tuning:
Push the SEEK button
or
to tune
from high to low or low to high frequencies and
stops at the next broadcasting station.
4-10
Heater, air conditioner and audio systems
Z
02.9.13/Z33-D/V5.0
X
Page 111 of 227

Audio main operationHead unit:
The tape deck employs a permalloy head which
allows for improved reproduction of high fre-
quency ranges. Noise is also greatly reduced by
the combined use of the Dolby NR (Noise
Reduction) system. The auto loudness circuit
enhances the low frequency range automatically
in both radio reception and tape and CD play-
back.
ON×OFF/Volume control:
Turn the ignition key to ACC or ON, and then
push the ON×OFF/VOL (Volume) control knob
while the system is off to call up the mode (radio,
tape or CD) which was playing immediately
before the system was turned off. When no CD
or tape is loaded, the radio will come on. While
the system is on, pushing the ON×OFF/VOL
control knob turns the system off.
Turn the ON×OFF/VOL control knob to adjust
the volume.
AUDIO button (BASS, TREBLE, FADER,
BALANCE and NR (Dolby)):
Press the AUDIO button to change the selecting
mode as follows.
BASS®TREBLE®FADER®BALANCE®
NR (when cassette playing)To adjust Bass, Treble, Fader and Balance,
press the AUDIO button until the desired mode
(BASS, TREBLE, FADER or BALANCE) ap-
pears in the display. Press the TUNE
(
,
) or SEEK (
,
) button
to adjust Bass and Treble to the desired level.
Use the TUNE or SEEK button also to adjust
Fader or Balance modes. Fader adjusts the
sound level between the front and rear speakers
and Balance adjusts the sound between the
right and left speakers.
To change the NR (Dolby) mode to OFF or ON,
press the
or
(TUNE) button while
cassette tape is playing. When Dolby is ON, the
display indicates themark.
After 10 seconds, the radio, tape or CD display
reappears. Once the sound quality is set to the
desired level, press the AUDIO button repeat-
edly until the radio, tape or CD display appears.
Dolby noise reduction manufactured under li-
cense from Dolby Laboratories Licensing Cor-
poration. Dolby NR and the double-D symbol
are trademarks of Dolby Laboratories Li-
censing Corporation.
Metal or chrome tape usage:
The cassette player will be automatically set to
high performance play when playing a metal or
chrome cassette tape.
DISP DISPLAY CHANGE:
Push the DISP button for more than 1.5 seconds
to adjust the digital clock display. See ªClockº in
the ª2. Instruments and controlsº section for the
clock adjustment operation.
When the DISP button is pushed for less than
1.5 seconds while the compact disc is being
played, the display will show the CD play time.FM-AM radio operation
FM/AM band select:
Pushing the FM/AM band select button will
change the band as follows:
AM®FM1®FM2®AM
When FM/AM band select button is pushed
while the ignition switch is in the ACC or ON, the
radio will come on at the station last played.
The last station played will also come on when
the ON×OFF/VOL control knob is pushed to ON.
If a compact disc or tape is playing when the
FM/AM band select button is turned to ON, the
compact disc or tape will automatically be
turned off and the last radio station played will
come on.
The FM stereo indicator ST will glow during FM
stereo reception. When the stereo broadcast
signal is weak, the radio will automatically
4-14
Heater, air conditioner and audio systems
Z
02.9.13/Z33-D/V5.0
X
Page 221 of 227

Controls, Heater and air conditioner controls
(automatic) ..................................................................... 4-3
Coolant
Capacities and recommended fuel/
lubricants ................................................................. 9-2
Changing engine coolant .................................... 8-9
Checking engine coolant level........................... 8-8
Corrosion protection ................................................... 7-5
Cruise control............................................................. 5-15
Cup holders ................................................................ 2-30
Curtain side-impact air bag system (See
supplemental side air bag and curtain side-impact
air bag system) .......................................................... 1-13
D
Daytime running light system ................................. 2-23
Defroster switch, Rear window and outside mirror
defroster switch ......................................................... 2-21
Dimensions and weights ............................................ 9-9
Door open warning light .......................................... 2-12
Drive belts ................................................................... 8-17
Driving
Cold weather driving ......................................... 5-24
Driving with automatic transmission........ 5-5, 5-9
Driving with manual transmission .......... 5-6, 5-12
Precautions when starting and driving ............ 5-2
E
Economy, Fuel............................................................ 5-17
Emission control information label ........................ 9-11
Emission control system warranty......................... 9-20Engine
Before starting the engine .................................. 5-8
Capacities and recommended fuel/
lubricants ................................................................. 9-2
Changing engine coolant .................................... 8-9
Changing engine oil and filter ......................... 8-10
Checking engine coolant level........................... 8-8
Checking engine oil level ................................. 8-10
Coolant temperature gauge ............................... 2-5
Engine block heater ........................................... 5-25
Engine compartment check locations.............. 8-7
Engine cooling system ......................................... 8-8
Engine oil .............................................................. 8-10
Engine oil and oil filter recommendation......... 9-5
Engine oil viscosity ............................................... 9-5
Engine serial number ......................................... 9-11
Engine specifications ........................................... 9-8
If your vehicle overheats ...................................... 6-9
Starting the engine ............................................... 5-8
Exhaust gas (Carbon monoxide).............................. 5-2
F
F.M.V.S.S. certification label................................... 9-11
Filter, Air cleaner housing filter .............................. 8-18
Flashers (See hazard warning flasher switch) ... 2-24
Flat tire............................................................................ 6-2
Low tire pressure warning system .................... 5-3
Floor mat cleaning ....................................................... 7-4
Fluid
Automatic transmission fluid (ATF) ................ 8-12
Brake and clutch fluid ....................................... 8-13
Brake fluid............................................................. 8-13Capacities and recommended fuel/
lubricants ................................................................. 9-2
Engine coolant ....................................................... 8-8
Engine oil .............................................................. 8-10
Power steering fluid ........................................... 8-13
Window washer fluid ......................................... 8-14
FM-AM radio with cassette player and Compact
Disc (CD) changer.................................................... 4-13
Front air bag system (See supplemental restraint
system) ......................................................................... 1-11
Front manual seat adjustment .................................. 1-3
Front power seat adjustment .................................... 1-4
Fuel
Capacities and recommended fuel/
lubricants ................................................................. 9-2
filler cap................................................................. 3-10
filler lid ................................................................... 3-10
Fuel economy ...................................................... 5-17
Fuel octane rating ................................................. 9-3
Fuel recommendation ........................................... 9-3
Gauge ...................................................................... 2-6
Fuses ............................................................................ 8-22
Fusible links ................................................................ 8-23
G
Garage door opener, HomeLink
Universal
Transceiver .................................................................. 2-36
Gas cap ....................................................................... 3-10
Gauge ............................................................................. 2-3
Engine coolant temperature gauge .................. 2-5
Fuel gauge .............................................................. 2-6
Odometer ................................................................ 2-4
Speedometer .......................................................... 2-4
Z
02.9.13/Z33-D/V5.0
X
10-2