Page 131 of 174
160 miles
(256 km)approx. 2,240
miles
(approx. 1,792 km)
128,000 feet
(40,000 m)40 miles
(64 km)approx. 560 miles
(approx.")
Height of viewDistance
between gridsDepth of distance
512,000 feet
(160,000 m)160 miles
(256 km)approx. 2,240
miles
(approx. 1,792 km)
128,000 feet
(40,000 m)40 miles
(64 km)approx. 560 miles
(approx. 896 km)
64,000 feet
(20,000 m)20 miles
(32 km)approx. 280 miles
(approx. 448 km)
32,000 feet
(10,000 m)10 miles
(16 km)approx. 140 miles
(approx. 224 km)
16,000 feet
(4,800 m)4.0 miles
(8 km)approx. 70 miles
(approx. 112 km)
8,000 feet
(2,400 m)2.0 miles
(4 km)approx. 35 miles
(approx. 56 km)
4,000 feet
(1,200 m)1.0 mile
(2 km)approx. 17-1/2
miles
(approx. 28 km)
2,000 feet
(600 m)1/2 mile
(1 km)approx. 8-3/4
miles
(approx. 14 km)
1,000 feet
(300 m)1/4 mile
(500 m)approx. 4-3/8
miles
(approx. 7 km)
Height of view: 1,000 feet (300 m)
Height of view: 16,000 feet
(4,800 m)
SWITCHING BETWEEN Bird-
viewTMand PLANVIEW DIS-
PLAYS
The BirdviewTMmode displays the view from
above, looking down toward the direction the
vehicle is traveling. This combines the detailed
display close to the vehicle and the long dis-
tance view in one screen.
INV1688
INV1689
INV1690
HOW DO I ADJUST THE DISPLAY?
11-3
Page 132 of 174
T o change between the BirdviewTMand
Planview, proceed as follows:
1. Press the SETTING button.2. Select the
Navigation key .
INV1691
INI0036
INV1466
HOW DO I ADJUST THE DISPLAY?
11-4
Page 133 of 174
![NISSAN 350Z 2003 Z33 Navigation Manual 3. The display shows the [NAVIGA TION SET -
TINGS] screen.
Select the
View key .4. Select the
Birdview orPlan View key .
INFO:
Some locations or buildings may be labeled
differently in the Planview di](/manual-img/5/658/w960_658-132.png "NISSAN 350Z 2003 Z33 Navigation Manual 3. The display shows the [NAVIGA TION SET -
TINGS] screen.
Select the
View key .4. Select the
Birdview orPlan View key .
INFO:
Some locations or buildings may be labeled
differently in the Planview di")
3. The display shows the [NAVIGA TION SET -
TINGS] screen.
Select the
View key .4. Select the
Birdview orPlan View key .
INFO:
Some locations or buildings may be labeled
differently in the Planview display and
Birdview
TMdisplay .
About Birdview
TMdisplay
The destination (waypoints) cannot be set in
the Birdview
TMdisplay using the map method.
Set them in the Planview display .�It always appears with the current forward
direction up.
�When the system is re-drawing the display
in the Birdview
TMdisplay , the distance the
vehicle travels becomes longer , and/or the
degree the vehicle turns becomes larger
than in the Planview display in order to
complete re-drawing.
�The names of the roads and locations may
differ , depending on where the names ap-
pear on the screen.
�In order to avoid having too much detail on
the map, all road names are not always
shown on the screen. When the display re-
draws the map, a road name which is shown
on the previous screen may not appear on
the new screen.
INV1451INV1694
HOW DO I ADJUST THE DISPLAY?
11-5
Page 134 of 174
 to the widest vie")
ZOOMING IN AND OUT OF
THE MAP
Use the ZOOM IN / ZOOM OUT buttons
to change the scale of the display and height
view.
Nine map scales are available from the most
detailed (1 : 10,000) to the widest view (1 :
20.48 million).
Each time the ZOOM IN button is pressed,
the map scale will change one level to display
a more detailed map.
Each time the ZOOM OUT button is
pressed, the map scale will change one level
to display a map that shows a wider area.
The chosen map scale will be displayed on the
left side of the screen.
INFO:
By pressing the button repeatedly , you can skip
the levels to reach the map of desired scale.Scale level on the Planview display
Map scale Actual distance
1 : 20.48 million 160 miles (256 km)
1 : 5.12 million 40 miles (64 km)
1 : 1.28 million 10 miles (16 km)
1 : 320,000 2.5 miles (4 km)
1 : 160,000 1 mile (2 km)
1 : 80,000 1/2 mile (1 km)
1 : 40,000 1/4 mile (500 m)
1 : 20,000 1/8 mile (200 m)
1 : 10,000 1/16 mile (100 m)
Scales on the BirdviewTMdisplay are listed on
page 11-3. The most detailed level (1: 10,000)
The widest level (1: 20.48 million)
INV1695
INV1696
HOW DO I ADJUST THE DISPLAY?
11-6
Page 135 of 174
CHANGING THE DISPLA Y
DIRECTION (IN PLANVIEW
DISPLA Y)
1. Press the SETTING button.
2. Select the
Navigation key on the [SET -
TINGS] screen.3. Select the
Heading key on the [NAVIGA-
TION SETTINGS] screen.
The [HEADING] screen will be displayed.4. Select theHeading up key or the
North up key .
The map is displayed as follows:
Heading up : The map shows the current for-
ward direction up.
North up : The map shows North up.
INV1466
INV1698INV1699
HOW DO I ADJUST THE DISPLAY?
11-7
Page 136 of 174
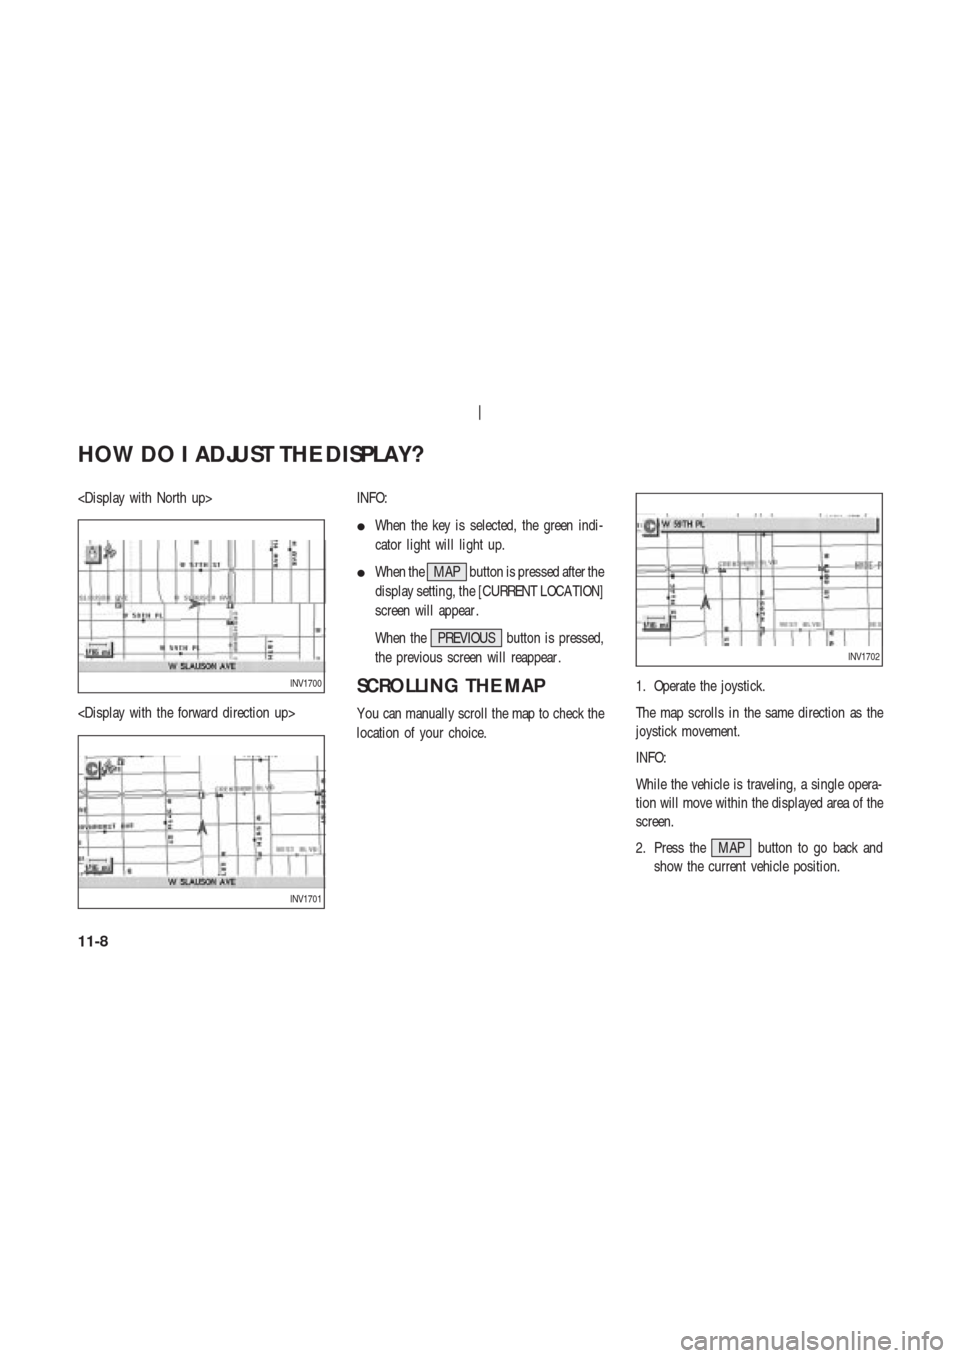
INFO:
�When the key is selected, the green indi-
cator light will light up.
�When the MAP button is pressed after the
display setting, the [CURRENT LOCA TION]
screen will appear .
When the PREVIOUS button is pressed,
the previous screen will reappear .
SCROLLING THE MAP
Y ou can manually scroll the map to check the
location of your choice.1. Operate the joystick.
The map scrolls in the same direction as the
joystick movement.
INFO:
While the vehicle is traveling, a single opera-
tion will move within the displayed area of the
screen.
2. Press the MAP button to go back and
show the current vehicle position.
INV1700
INV1701
INV1702
HOW DO I ADJUST THE DISPLAY?
11-8
Page 137 of 174
INFO:
Y ou can also select the PREVIOUS button to
go back.DISPLA YING THE COM-
PLETE ROUTE TO THE DES-
TINA TION
Y ou can request to display the complete sug-
gested route to the destination.
1. Press the ROUTE button.
Keys will be displayed on the screen.2. Select the
Route Info key .
3. Select the
Complete Route key .INV1703INV1704
INV1705
HOW DO I ADJUST THE DISPLAY?
11-9
Page 138 of 174
The complete suggested route to the destina-
tion will be displayed.
DISPLA YING TURN LIST
Y ou can display the list of guide points to the
destination during route calculation.
1. Press the ROUTE button.
2. Select the
Route Info key .3. Select the
T urn List key .
A list of destinations, waypoints and guide
INV1706
INV1704
INV1708
INV1709
HOW DO I ADJUST THE DISPLAY?
11-10

![NISSAN 350Z 2003 Z33 Navigation Manual CHANGING THE DISPLA Y
DIRECTION (IN PLANVIEW
DISPLA Y)
1. Press the SETTING button.
2. Select the
Navigation key on the [SET -
TINGS] screen.3. Select the
Heading key on the [NAVIGA-
TION SETTINGS] sc](/manual-img/5/658/w960_658-134.png "NISSAN 350Z 2003 Z33 Navigation Manual CHANGING THE DISPLA Y
DIRECTION (IN PLANVIEW
DISPLA Y)
1. Press the SETTING button.
2. Select the
Navigation key on the [SET -
TINGS] screen.3. Select the
Heading key on the [NAVIGA-
TION SETTINGS] sc")