Page 129 of 174

11 HOW DO I ADJUST THE DISPLAY?
Screen informa tion — Planview
displa y ....................................................... 11-2
Screen informa tion — Birdview
TM
displa y ....................................................... 11-2
Switching between BirdviewTMand Plan-
view displa ys ........................................ 11-3
Zooming in and out of the map ................ 11-6
Changing the displa y direction (in Planview
displa y) ...................................................... 11-7
Scrolling the map ...................................... 11-8
Displa ying the complete route to the
destina tion ................................................. 11-9
Displa ying turn list .................................. 11-10
Requesting the simula tion drive to the
destina tion ............................................... 11-11
Cancel simulation ............................... 11-12Displa ying the track................................. 11-12
GPS informa tion displa y ......................... 11-13
Upda ting the current vehicle loca tion and the
direction .................................................. 11-14
Setting automatic beep sound................. 11-16
Setting the display mode......................... 11-17
Adjusting the display brightness ........ 11-17
Adjusting the display contrast............ 11-18
Switching the display color ................ 11-19
How to use theD/Nbutton............. 11-19
Display off .......................................... 11-20
Setting display duration ..................... 11-21
How to handle the displa y ...................... 11-21
Characteristics of liquid cryst al
displa y ................................................ 11-21
Maintenance of the displa y ................ 11-22
Page 132 of 174
T o change between the BirdviewTMand
Planview, proceed as follows:
1. Press the SETTING button.2. Select the
Navigation key .
INV1691
INI0036
INV1466
HOW DO I ADJUST THE DISPLAY?
11-4
Page 135 of 174
CHANGING THE DISPLA Y
DIRECTION (IN PLANVIEW
DISPLA Y)
1. Press the SETTING button.
2. Select the
Navigation key on the [SET -
TINGS] screen.3. Select the
Heading key on the [NAVIGA-
TION SETTINGS] screen.
The [HEADING] screen will be displayed.4. Select theHeading up key or the
North up key .
The map is displayed as follows:
Heading up : The map shows the current for-
ward direction up.
North up : The map shows North up.
INV1466
INV1698INV1699
HOW DO I ADJUST THE DISPLAY?
11-7
Page 136 of 174
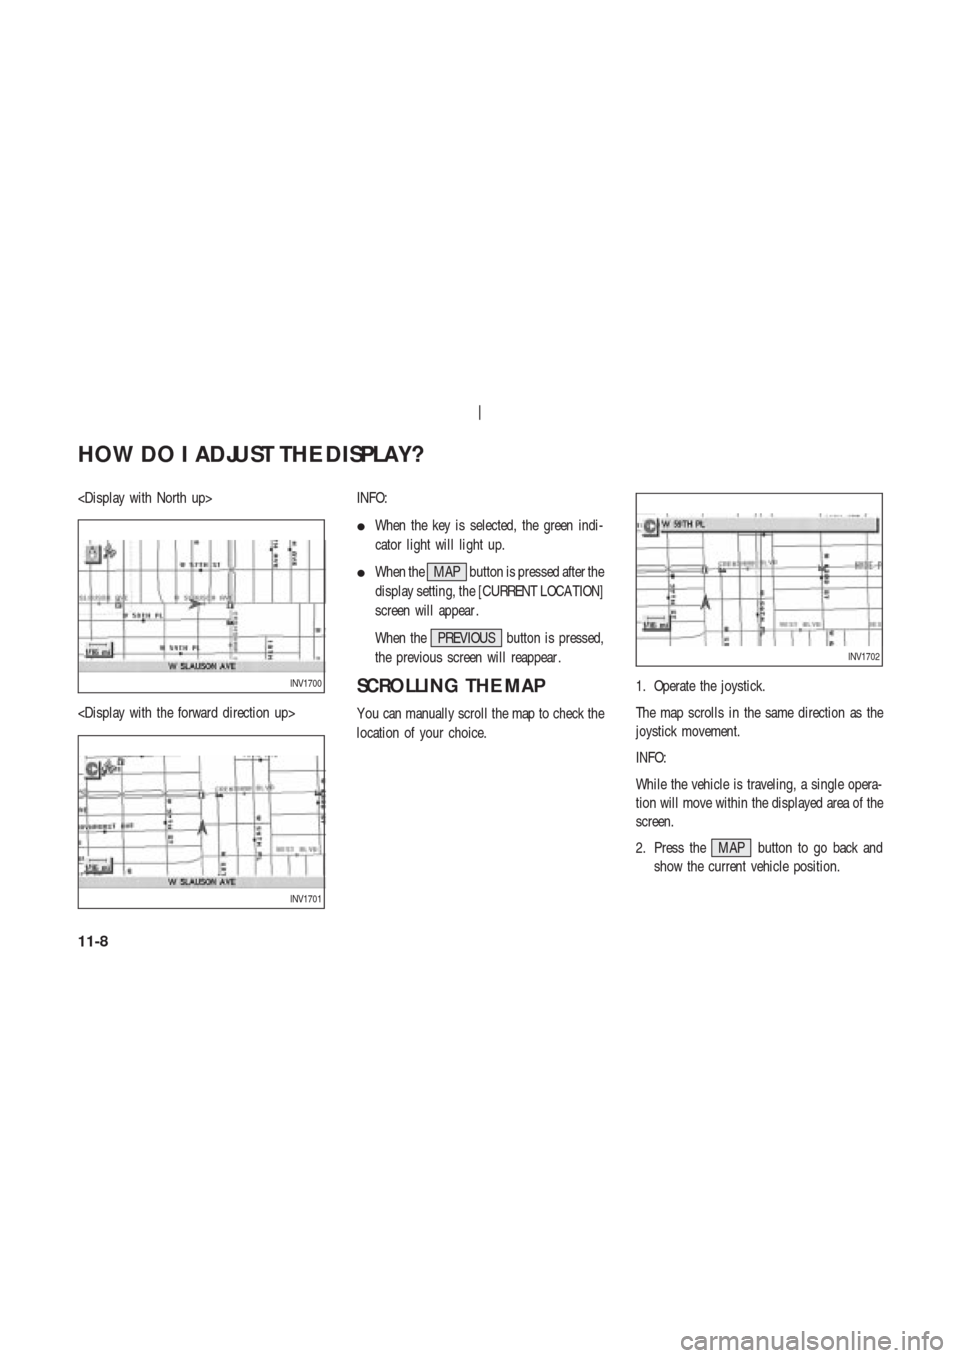
INFO:
�When the key is selected, the green indi-
cator light will light up.
�When the MAP button is pressed after the
display setting, the [CURRENT LOCA TION]
screen will appear .
When the PREVIOUS button is pressed,
the previous screen will reappear .
SCROLLING THE MAP
Y ou can manually scroll the map to check the
location of your choice.1. Operate the joystick.
The map scrolls in the same direction as the
joystick movement.
INFO:
While the vehicle is traveling, a single opera-
tion will move within the displayed area of the
screen.
2. Press the MAP button to go back and
show the current vehicle position.
INV1700
INV1701
INV1702
HOW DO I ADJUST THE DISPLAY?
11-8
Page 140 of 174
voice guidance on the suggested route to the
destination.
4. When the CANCEL or DEST button is
pressed, or the vehicle starts to run, the
route simulation will be canceled.
CANCEL SIMULATION
1. Press the ROUTE button during simula-
tion.
Select the
Route Info key .2. The [ROUTE INFO.] screen will be dis-
played.
Select the
Cancel Simulation key .
INFO:
When the CANCEL or DEST button is
pressed, or the vehicle starts to run, the route
simulation will be canceled.
INFO:
If you select the
Pause key , simulation ispaused. If you select the key again, the simu-
lation will restart.
DISPLA YING THE TRACK
Y ou can have the system track the road you
have taken, and display it with indication marks
(�).
1. Press the SETTING button.
2. Select the
Navigation key on the [SET -
TINGS] screen.
INV1713
INV1714
INV1466
HOW DO I ADJUST THE DISPLAY?
11-12
Page 141 of 174
3. Select theT racking On/Off key .
4. Select the
On key .5. Press the MAP button.
The location of the vehicle will be displayed.
INFO:
�Y ou can select the
On key to display the
indication marks (�), and the
Off key to
stop displaying them.
�The indication marks (�) may be spaced
differently , according to the scale of the
map.
�If you reset the current vehicle location, theindication marks (�) will be cleared.
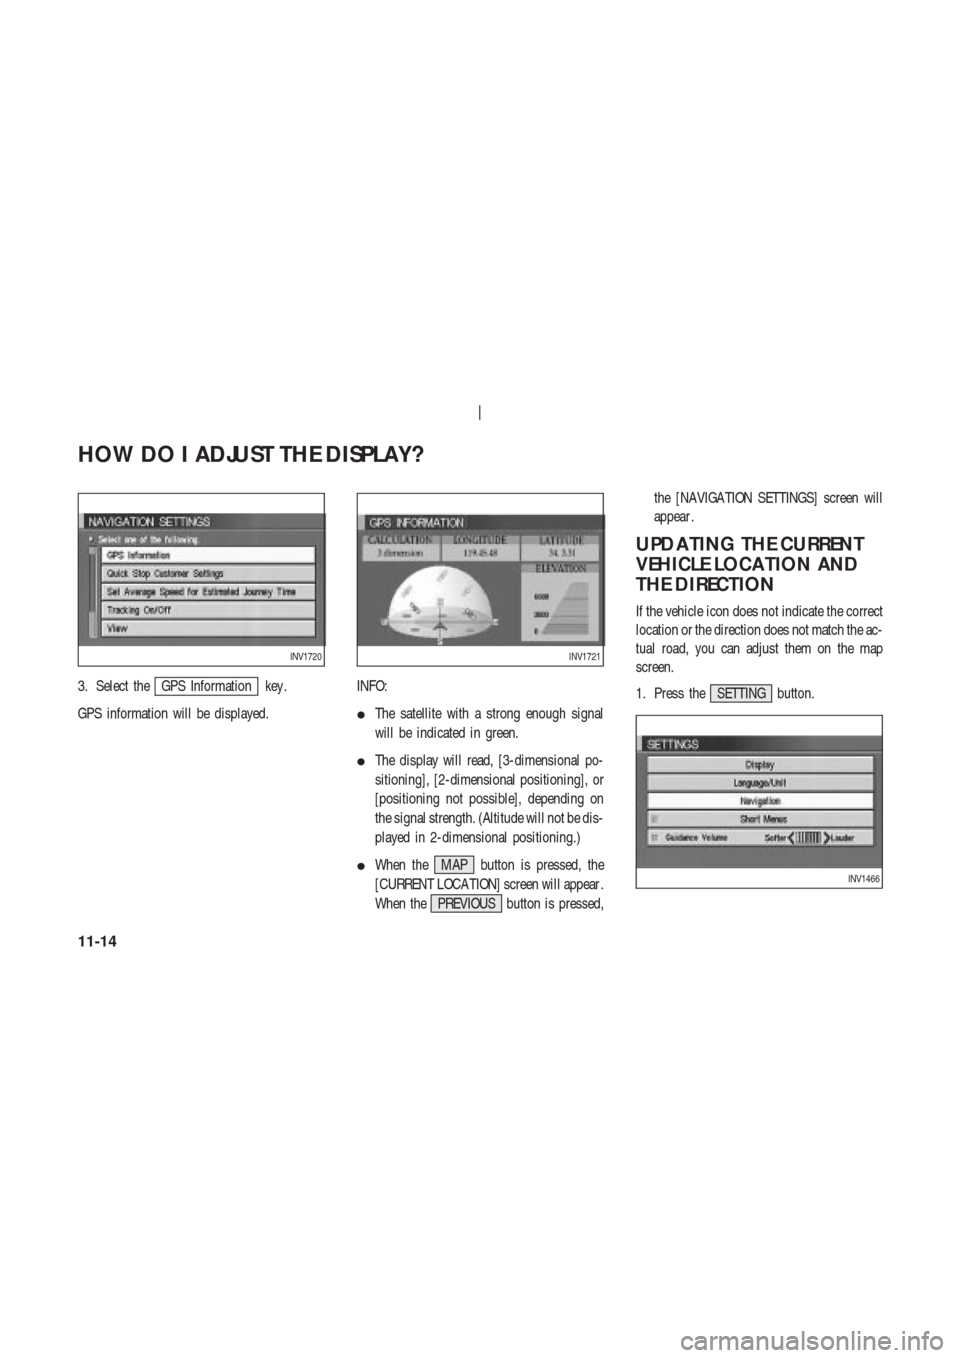
GPS INFORMA TION DIS-
PLA Y
The following GPS information will be dis-
played on the screen: latitude, longitude, alti-
tude, signal reception, and satellite locations.
1. Press the SETTING button.
2. Select the
Navigation key on the [SET -
TINGS] screen.
INV1716
INV1717
INV1718
INV1466
HOW DO I ADJUST THE DISPLAY?
11-13
Page 142 of 174
3. Select theGPS Information key .
GPS information will be displayed.INFO:
�The satellite with a strong enough signal
will be indicated in green.
�The display will read, [3-dimensional po-
sitioning], [2-dimensional positioning], or
[positioning not possible], depending on
the signal strength. (Altitude will not be dis-
played in 2-dimensional positioning.)
�When the MAP button is pressed, the
[CURRENT LOCA TION] screen will appear .
When the PREVIOUS button is pressed,the [NAVIGA TION SETTINGS] screen will
appear .
UPDA TING THE CURRENT
VEHICLE LOCA TION AND
THE DIRECTION
If the vehicle icon does not indicate the correct
location or the direction does not match the ac-
tual road, you can adjust them on the map
screen.
1. Press the SETTING button.
INV1720INV1721
INV1466
HOW DO I ADJUST THE DISPLAY?
11-14
Page 143 of 174
2. Select theNavigation key on the
[SETTINGS] screen.
3. Select the
Adjust Current Location key
on the [NAVIGA TION SETTINGS] screen.4. Align the correct location to the cross point
on the map using the joystick, and select
theSet key . The current location will be
corrected, and the direction adjustment
screen will appear .5. Adjust the direction using the
and
keys.
The arrow on the display shows the direction
of the vehicle icon.
6. Select the
Set key .
INV1723
INV1724INV1725
HOW DO I ADJUST THE DISPLAY?
11-15

![NISSAN 350Z 2003 Z33 Navigation Manual CHANGING THE DISPLA Y
DIRECTION (IN PLANVIEW
DISPLA Y)
1. Press the SETTING button.
2. Select the
Navigation key on the [SET -
TINGS] screen.3. Select the
Heading key on the [NAVIGA-
TION SETTINGS] sc](/manual-img/5/658/w960_658-134.png "NISSAN 350Z 2003 Z33 Navigation Manual CHANGING THE DISPLA Y
DIRECTION (IN PLANVIEW
DISPLA Y)
1. Press the SETTING button.
2. Select the
Navigation key on the [SET -
TINGS] screen.3. Select the
Heading key on the [NAVIGA-
TION SETTINGS] sc")

![NISSAN 350Z 2003 Z33 Navigation Manual 2. Select theNavigation key on the
[SETTINGS] screen.
3. Select the
Adjust Current Location key
on the [NAVIGA TION SETTINGS] screen.4. Align the correct location to the cross point
on the map using t](/manual-img/5/658/w960_658-142.png "NISSAN 350Z 2003 Z33 Navigation Manual 2. Select theNavigation key on the
[SETTINGS] screen.
3. Select the
Adjust Current Location key
on the [NAVIGA TION SETTINGS] screen.4. Align the correct location to the cross point
on the map using t")