2003 MITSUBISHI SHOGUN weight
[x] Cancel search: weightPage 11 of 392

Modifications / alterations to
the electric or fuel systems
EB11A-D
MITSUBISHI has always manufactured
safe, high quality vehicles. In order to main-
tain this safety and quality, it is important
that any accessory that is to be fitted, or
any modifications carried out which involve
the electric or fuel systems, should be car-
ried out in accordance with MITSUBISHI
guidelines.
CAUTION
Please consult an authorized MIT-
SUBISHI dealer concerning any such
fitment or modification.
If the wires interfere with the vehicle
body or improper installation meth-
ods are used (protective fuses not
included, etc.), electronic devices
may be adversely affected, result-
ing in a fire or other accident.
C31I031A
Loading a roof carrier
EB10A-N
CAUTION
Do not load luggage directly on the
roof. Use a roof carrier that prop-
erly fits your vehicle.
For installation, refer to the instruc-
tion manual accompanying the roof
carrier.
Roof carrier precaution
EB10A-R
CAUTION
(1) Make sure that the weight of the
luggage does not exceed the
allowable roof load.
If the allowable roof load is
exceeded, this may cause dam-
age to the vehicle.
The roof load is the total allow-
able load on the roof (the weight
of the roof carrier plus the
weight of luggage placed on the
roof carrier).
For specific figures, please refer
to the“Maximum roof load”on
page 10-7.
General information
1-11
Div:
Out put date:
Page 12 of 392

CAUTION
(2) When luggage is loaded onto the
vehicle, please make sure to
drive slowly and avoid exces-
sive maneuvers such as sud-
den braking or quick turning.
In addition, place the luggage on
the carrier so that its weight is
distributed evenly with the heavi-
est items on the bottom. Do not
load items that are wider than
the roof carrier.
The additional weight on the roof
could heighten the vehicle’s cen-
tre of gravity and affect the
vehicle handling characteris-
tics.
As a result, driving errors or
emergency maneuvers could
lead to a loss of control and
result in an accident.
(3) Before driving and after travel-
ling a short distance, always
check the load to make sure it is
securely fastened to the roof
carrier.
Check periodically during your
travel that the load remains
secure. If the load is not secure,
it could fall from the vehicle and
damage your vehicle, another
vehicle or create road hazard.NOTE
(1) To prevent wind noise or reduction in
gas mileage, remove the roof carrier
when not in use.
(2) Before using an automatic car wash,
check with the attendant to deter-
mine if the roof carrier should be
removed.
(3) Be sure that adequate clearance is
maintained for raising the sunroof when
installing a roof carrier. (For vehicle with
sunroof)
Genuine parts
EB05A-Fj
Don’t play around with substitutes.
MITSUBISHI has gone to great lengths to
bring you a superbly crafted vehicle offer-
ing the highest quality and dependability.
Don’t reduce that quality and dependabil-
ity by using substitute parts.
Always use MITSUBISHI Genuine Parts
designed and manufactured to maintain
your MITSUBISHI vehicle at top perfor-
mance. The operation of vehicle compo-
nents can be less efficient in case of using
Non-Genuine Parts.
Failure to use Genuine Parts may invali-
date any future warranty claim.
MITSUBISHI will not be liable for any mal-
function of your vehicle that may have been
caused by the use of substitute parts in
place of MITSUBISHI Genuine Parts.
At the MITSUBISHI dealer you can also get
appropriate advice and the assembling of
Genuine Parts will be handled profession-
ally.
MITSUBISHI Genuine Parts are identi-
fied by this mark, and are available at all
authorized MITSUBISHI dealers.
General information
1-12Div:
Out put date:
Page 53 of 392

G24F014A
CAUTION
(1) When folding the seat away into
the luggage floor box, hold the
seat by hand and fold it slowly.
If the seat is not held properly, it
might fall under its own weight
during folding and pinch your
hand.
(2) Ensure that the lever (G) is not
operated while the seat is occu-
pied. The folding action of the
seat in such a situation could
result in an unexpected acci-
dent.
(3) When folding the seat, be sure
not to trap your hands between
seat and luggage floor box.
G24E033A
6. Fold down the stand (H).
7. Refit the luggage floor board.
G24E024A
To replace
1. Remove the luggage floor board. And
then raise the stand.
2. Raise the seat forward until you hear a
“click”and the seat locks securely.
Seat and seat belts
3-21
Div:
Out put date:
Page 57 of 392

CAUTION
Do not sit or place luggage on the
removed seat. Any weight placed on
the folded seat could deform the seat
mountings, preventing the seat from
being locked securely onto the floor.
NOTE
During the removal procedure, ensure that
both ends of the seat are moved evenly
while the seat is being pulled out. If this
procedure is not followed, the seat could
catch on its securing fixtures, making it dif-
ficult to remove.
G24F023E
Refitting procedure
1. Push the seat mounting arms into the
luggage compartment’s fixtures.
G24F026A
A
2. Confirm that the seat mounting arms are
secured by the hooks (A).
3. Fold the stands forward from the seat
side, while lifting the front end of the
seat.
4. Refit the covers on both sides of the lug-
gage room.
Seat and seat belts
3-25
Div:
Out put date:
Page 67 of 392
G28B005A
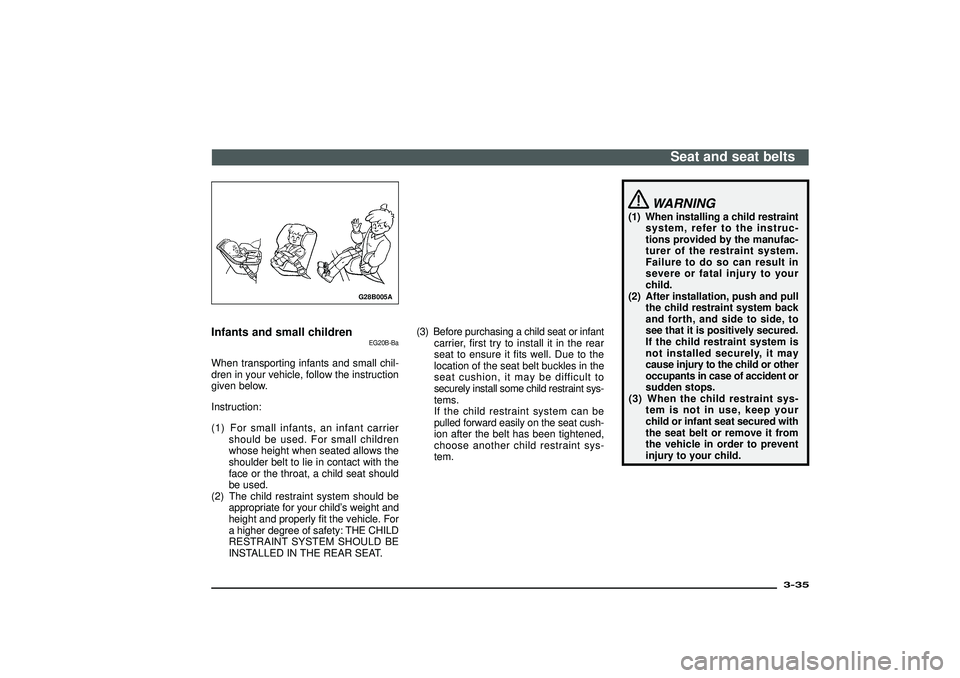
Infants and small children
EG20B-Ba
When transporting infants and small chil-
dren in your vehicle, follow the instruction
given below.
Instruction:
(1) For small infants, an infant carrier
should be used. For small children
whose height when seated allows the
shoulder belt to lie in contact with the
face or the throat, a child seat should
be used.
(2) The child restraint system should be
appropriate for your child’s weight and
height and properly fit the vehicle. For
a higher degree of safety: THE CHILD
RESTRAINT SYSTEM SHOULD BE
INSTALLED IN THE REAR SEAT.(3) Before purchasing a child seat or infant
carrier, first try to install it in the rear
seat to ensure it fits well. Due to the
location of the seat belt buckles in the
seat cushion, it may be difficult to
securely install some child restraint sys-
tems.
If the child restraint system can be
pulled forward easily on the seat cush-
ion after the belt has been tightened,
choose another child restraint sys-
tem.
WARNING
(1) When installing a child restraint
system, refer to the instruc-
tions provided by the manufac-
turer of the restraint system.
Failure to do so can result in
severe or fatal injury to your
child.
(2) After installation, push and pull
the child restraint system back
and forth, and side to side, to
see that it is positively secured.
If the child restraint system is
not installed securely, it may
cause injury to the child or other
occupants in case of accident or
sudden stops.
(3) When the child restraint sys-
tem is not in use, keep your
child or infant seat secured with
the seat belt or remove it from
the vehicle in order to prevent
injury to your child.
Seat and seat belts
3-35
Div:
Out put date:
Page 71 of 392
G18C055A
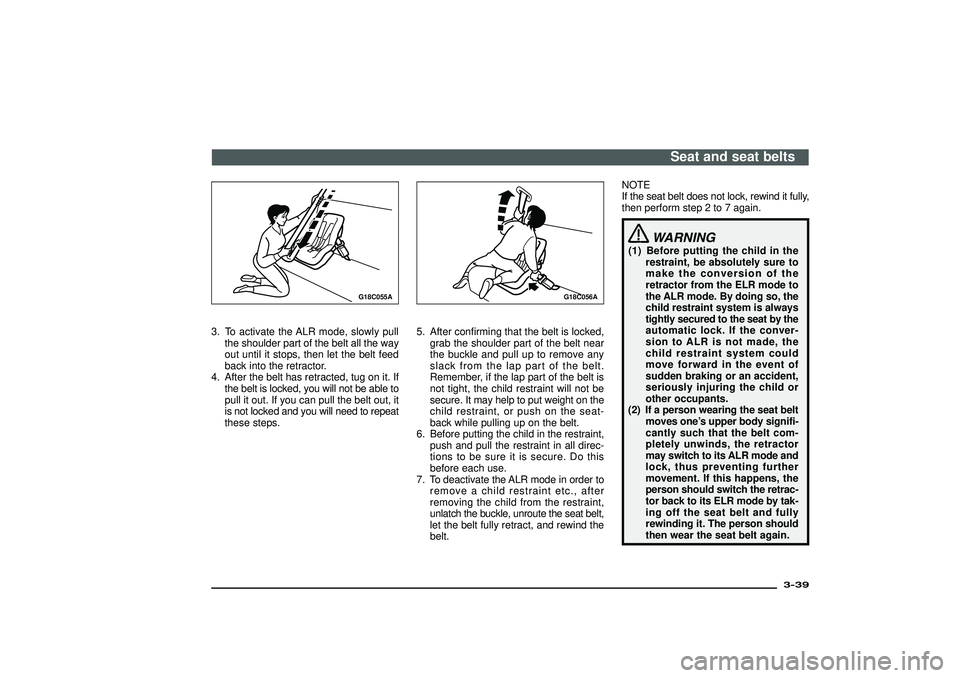
3. To activate the ALR mode, slowly pullthe shoulder part of the belt all the way
out until it stops, then let the belt feed
back into the retractor.
4. After the belt has retracted, tug on it. If the belt is locked, you will not be able to
pull it out. If you can pull the belt out, it
is not locked and you will need to repeat
these steps.
G18C056A
5. After confirming that the belt is locked,grab the shoulder part of the belt near
the buckle and pull up to remove any
slack from the lap part of the belt.
Remember, if the lap part of the belt is
not tight, the child restraint will not be
secure. It may help to put weight on the
child restraint, or push on the seat-
back while pulling up on the belt.
6. Before putting the child in the restraint, push and pull the restraint in all direc-
tions to be sure it is secure. Do this
before each use.
7. To deactivate the ALR mode in order to remove a child restraint etc., after
removing the child from the restraint,
unlatch the buckle, unroute the seat belt,
let the belt fully retract, and rewind the
belt. NOTE
I
f th e sea tbel tdoe sno tlock ,rewin dit full y,
then perform step 2 to 7 again.
WARNING
(1) Before putting the child in the restraint, be absolutely sure to
make the conversion of the
retractor from the ELR mode to
the ALR mode. By doing so, the
child restraint system is always
tightly secured to the seat by the
automatic lock. If the conver-
sion to ALR is not made, the
child restraint system could
move forward in the event of
sudden braking or an accident,
seriously injuring the child or
other occupants.
(2) If a person wearing the seat belt moves one ’s upper body signifi-
cantly such that the belt com-
pletely unwinds, the retractor
may switch to its ALR mode and
lock, thus preventing further
movement. If this happens, the
person should switch the retrac-
tor back to its ELR mode by tak-
ing off the seat belt and fully
rewinding it. The person should
then wear the seat belt again.
Seat and seat belts
3-39
Div:
Out put date:
Page 166 of 392

(7)Load
Do not drive with unnecessary articles
in the luggage compartment. Espe-
cially during city driving where fre-
quent starting and stopping is
necessary, the increased weight of the
vehicle will greatly affect fuel consump-
tion. Also avoid driving with unneces-
sary luggage, etc., on the roof; the
increased air resistance will increase
fuel consumption.
(8)Cold engine starting
Starting of a cold engine consumes
more fuel.
Unnecessary fuel consumption is also
caused by keeping a hot engine run-
ning. After the engine is started, com-
mence driving as soon as possible.
(9)Air conditioning*
The use of the air conditioning will
increase the fuel consumption.(10)Driving techniques for
engine
To take maximum advantage of the
fuel efficiency and other benefits of
the
engine, please
observe the following guidelines:
•TheECO indication lamp
in the meter cluster illuminates when
the vehicle is driven in a
fuel-efficient, environment-friendly
manner. Try to drive such that the
lamp is illuminated as much as pos-
sible. In particular, you should avoid
sudden starts and rapid accelera-
tion.
ECO indication lamp
→P.4-13
•Use of the air conditioner causes
fuel consumption and
carbon-dioxide emissions to
increase significantly. Avoid using
the air conditioner to cool the cabin
more than necessary.
*:is a trademark of MIT-
SUBISHI Motors Corporation.
Trailer towing
EC21AOIa
In order to tow a trailer with your vehicle,
have a trailer towing device that meets all
relevant regulations in your area, mounted
at an authorized MITSUBISHI dealer.
The regulations concerning the towing of a
trailer may differ from country to country.
You are advised to obey the regulations in
each area.
CAUTION
Danger of Accident!
A towing bar should be fitted by an
authorized MITSUBISHI dealer.
[For super select 4WD models]
When you are going to tow a trailer,
move the transfer shift lever to“4H”
position.
Selecting“2H”drive may increase
the differential oil temperature, result-
ing in possible damage to the driv-
ing system.
Further, the drive train will be sub-
jected to excessive loading possi-
bly leading to oil leakage, component
seizure, or other serious faults.
NOTE
Fitting of a towing bar requires special-
ized skills and equipment.
Contact an authorized MITSUBISHI dealer
for details. If you are going to tow a trailer,
pay careful attention to the following points.
Starting and driving
5-8Div:
Out put date:
Page 167 of 392

Maximum towable weight with brake
and maximum trailer-nose weightNever exceed the maximum towable
weight with brake and the maximum
trailer-nose weight as listed in the specifi-
cations. (Refer to page 10-7,10-8)
If you tow a trailer at an altitude of more
than 1000m above sea-level, reduce your
weight by 10% of the gross combination
weight for every increase of 1000m above
sea-level, as the engine output is low-
ered owing to decrease in atmospheric
pressure.
C21A056E
Towing bar mounting specifica-
tionsSee the following table for fixing points (A)
for the towing bar.
C21A057E
Starting and driving
5-9
Div:
Out put date: