Page 153 of 376

153 Controls in detail
Automatic climate control
Rear window defroster
The rear window defroster uses a large
amount of power. To keep the battery
drain to a minimum, switch off the defrost-
er as soon as the rear window is clear. The
defroster is automatically deactivated af-
ter approximately 6 to 17 minutes of oper-
ation depending on the outside
temperature.
Activating�
Press button
F
(�page 148).
The indicator lamp on the button lights
up.Deactivating
�
Press button
F
(�page 148) again.
The indicator lamp on the button goes
out.
Warning!
G
Any accumulation of snow and ice should be
removed from the rear window before driv-
ing. Visibility could otherwise be impaired,
endangering you and others.!The rear window defroster cannot be
switched on when the retractable hard-
top is open. The indicator lamp will
start blinking if the hardtop is open.�
Close the retractable hardtop.
The rear window defroster can again be
turned on.
!If the rear window defroster switches
off too soon and the indicator lamp
starts blinking, this means that too
many electrical consumers are operat-
ing simultaneously and there is insuffi-
cient voltage in the battery. The system
responds automatically by deactivating
the rear window defroster.
As soon as the battery has sufficient
voltage, the rear window defroster au-
tomatically turns itself back on.
Page 155 of 376

155 Controls in detail
Automatic climate control
Reactivating
There are several ways to reactivate the
automatic climate control system:�
Press any button on the automatic cli-
mate control panel (
�page 148).
The indicator lamp on button
M
switches off.
or
�
Turn one of the control knobs on the
automatic climate control.
The indicator lamp on button
M
switches off.
Air conditioning
The air conditioning is operational while
the engine is running and cools the interior
air to the temperature set by the operator.
Deactivating
It is possible to deactivate the air condi-
tioning (cooling) function of the automatic
climate control system. The air in the vehi-
cle will then no longer be cooled or dehu-
midified.�
Press button AC
OFF
(�page 148).
The indicator lamp on the
buttonAC
OFF
lights up.Activating
Moist air can fog up the windows. You can
dehumidify the air with the air condition-
ing.
�
Press AC
OFF
again (
�page 148).
The indicator lamp on the
buttonAC
OFF
goes out.
The air conditioning uses the refrigerant
R134A. This refrigerant is free of CFCs
which are harmful to the ozone layer.
iCondensation may drip out from under-
neath the vehicle. This is normal and
not an indication of a malfunction.
!If the AC
OFF
button on the automatic
climate control panel starts to blink,
this indicates that the air conditioning
is losing refrigerant. The compressor
has turned itself off. The air condition-
ing cannot be turned on again.
�
Have the air conditioner checked at
the nearest authorized
Mercedes-Benz Center.
Page 165 of 376
165 Controls in detail
Retractable hardtop
Indicator lamp in the retractable hard-
top switch lights when vehicle is
stopped
If the indicator lamp in the retractable
hardtop switch lights while the vehicle is
standing still and the switch was not acti-
vated, then the retractable hardtop is not
locked.�
Properly lock the retractable hardtop
(�page 162) before continuing to
drive.
The retractable hardtop will not lock
There is a malfunction in the retractable
hardtop system.
�
Notify an authorized Mercedes-Benz
Center.Wind screen
The wind screen deflects drafts away from
the driver and passenger when the hardtop
is lowered. It is stored in a separate stor-
age bag.
Installing
�
Leave the wind screen folded and place
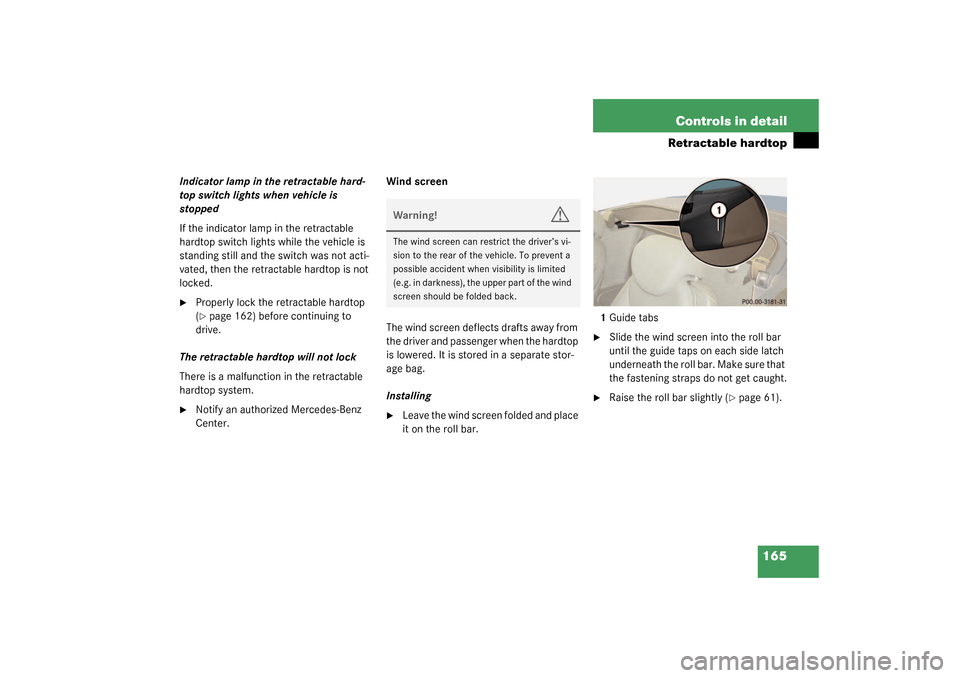
it on the roll bar.1Guide tabs
�
Slide the wind screen into the roll bar
until the guide taps on each side latch
underneath the roll bar. Make sure that
the fastening straps do not get caught.
�
Raise the roll bar slightly (
�page 61).
Warning!
G
The wind screen can restrict the driver’s vi-
sion to the rear of the vehicle. To prevent a
possible accident when visibility is limited
(e.g. in darkness), the upper part of the wind
screen should be folded back.
Page 173 of 376
173 Controls in detail
Driving systems
Distronic displays in the speedometer
dial
If Distronic detects a vehicle directly
ahead, the DTR indicator lamp
E
in the
speedometer dial lights up white.
If the distance to the vehicle ahead is too
small for the DTR to be able to maintain the
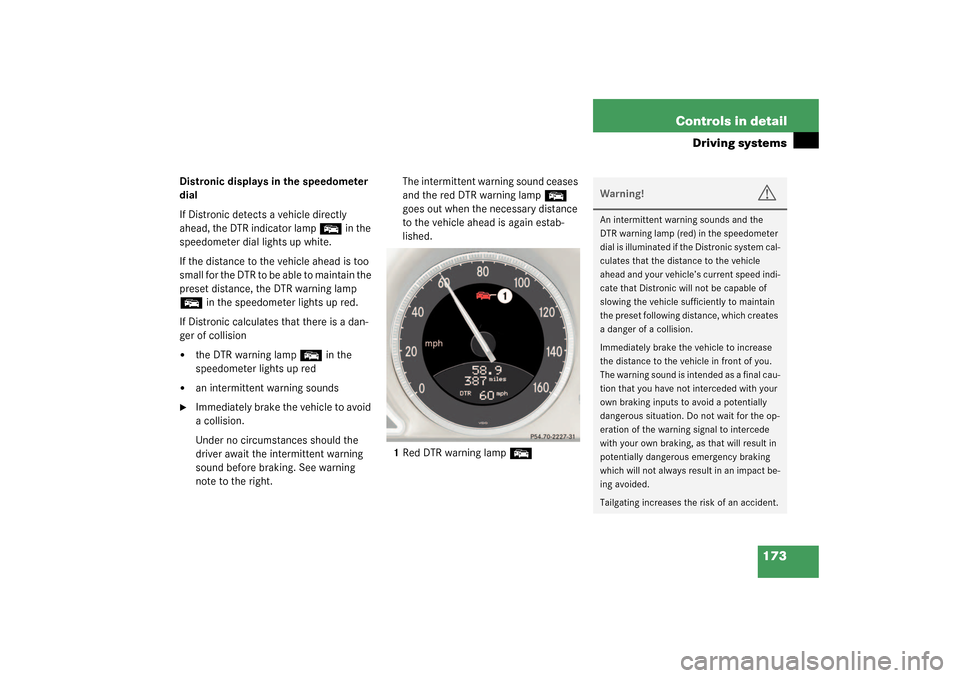
preset distance, the DTR warning lamp
E
in the speedometer lights up red.
If Distronic calculates that there is a dan-
ger of collision
�
the DTR warning lamp
E
in the
speedometer lights up red
�
an intermittent warning sounds
�
Immediately brake the vehicle to avoid
a collision.
Under no circumstances should the
driver await the intermittent warning
sound before braking. See warning
note to the right. The intermittent warning sound ceases
and the red DTR warning lamp
E
goes out when the necessary distance
to the vehicle ahead is again estab-
lished.
1Red DTR warning lamp
E
Warning!
G
An intermittent warning sounds and the
DTR warning lamp (red) in the speedometer
dial is illuminated if the Distronic system cal-
culates that the distance to the vehicle
ahead and your vehicle’s current speed indi-
cate that Distronic will not be capable of
slowing the vehicle sufficiently to maintain
the preset following distance, which creates
a danger of a collision.
Immediately brake the vehicle to increase
the distance to the vehicle in front of you.
The warning sound is intended as a final cau-
tion that you have not interceded with your
own braking inputs to avoid a potentially
dangerous situation. Do not wait for the op-
eration of the warning signal to intercede
with your own braking, as that will result in
potentially dangerous emergency braking
which will not always result in an impact be-
ing avoided.
Tailgating increases the risk of an accident.
Page 179 of 376
179 Controls in detail
Driving systems
1Distance warning function on/off
switch
2Thumbwheel for setting distance
Increasing distance
Increasing the distance setting tells Dis-
tronic to maintain a greater following dis-
tance to the vehicle ahead.�
Turn thumbwheel2 towards
¯
.Decreasing distance
Decreasing the distance setting tells Dis-
tronic to maintain a smaller following dis-
tance to the vehicle ahead.
�
Turn thumbwheel2 towards
®
.Distance warning function
When Distronic is deactivated, this func-
tion will continue to warn you if you are fol-
lowing too close to the vehicle ahead:
�
The DTR warning lamp
E
lights up
red.
�
An intermittent warning will sound if
necessary.
If these warnings are issued, you must
brake manually to maintain a safe distance
and avoid a collision with the vehicle
ahead.
Page 180 of 376
180 Controls in detailDriving systems
Activating�
Press switch1.
The indicator lamp on the switch lights
up. A loudspeaker symbol appears in
the speedometer display (
�page 174).
Deactivating
�
Press switch1.
The indicator lamp on the switch goes
out. No loudspeaker symbol appears in
the speedometer display.Driving with Distronic
This section describes a number of driving
situations where special precaution is re-
quired on the part of the driver. Be pre-
pared to brake in such situations. This will
deactivate the Distronic system.
Warning!
G
If the DTR warning lamp (red)
E
in the
speedometer dial lights up while driving
and/or an intermittent warning sounds, im-
mediate attention on the part of the driver is
required.
As required by the traffic situation, apply the
brakes and navigate around a possible ob-
stacle. However, do not drive by relying on
the distance warning function, as this will re-
sult in an emergency braking application.
Especially depending on road surface condi-
tions and driver reaction, this will not always
enable you to avoid a collision.
iComplex driving situations are not al-
ways fully recognized by Distronic. This
could result in wrong or missing dis-
tance warnings.
Page 188 of 376
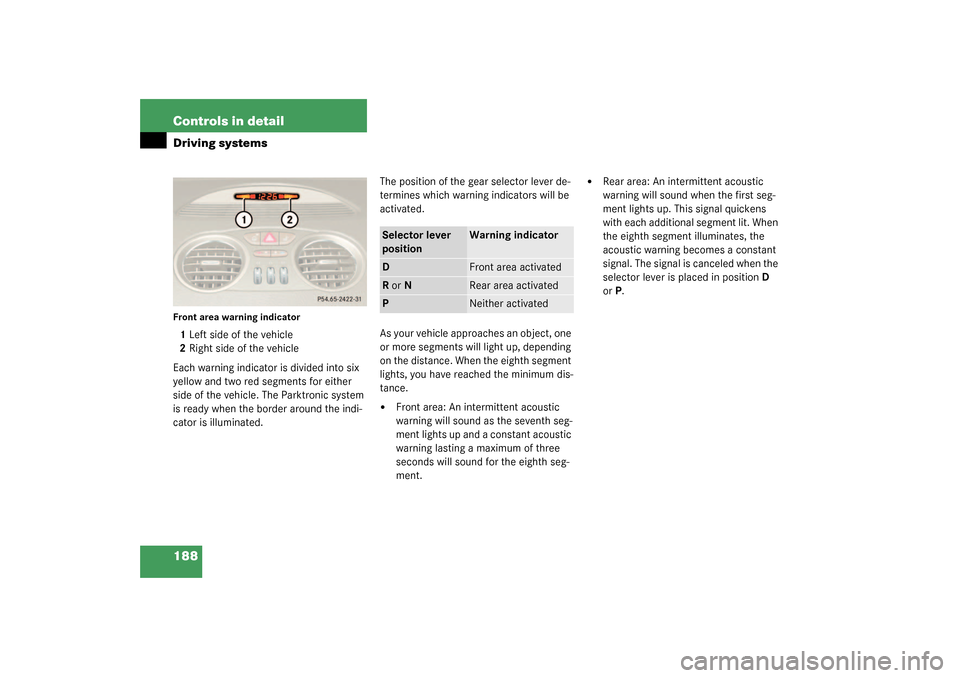
188 Controls in detailDriving systemsFront area warning indicator1Left side of the vehicle
2Right side of the vehicle
Each warning indicator is divided into six
yellow and two red segments for either
side of the vehicle. The Parktronic system
is ready when the border around the indi-
cator is illuminated.The position of the gear selector lever de-
termines which warning indicators will be
activated.
As your vehicle approaches an object, one
or more segments will light up, depending
on the distance. When the eighth segment
lights, you have reached the minimum dis-
tance.
�
Front area: An intermittent acoustic
warning will sound as the seventh seg-
ment lights up and a constant acoustic
warning lasting a maximum of three
seconds will sound for the eighth seg-
ment.
�
Rear area: An intermittent acoustic
warning will sound when the first seg-
ment lights up. This signal quickens
with each additional segment lit. When
the eighth segment illuminates, the
acoustic warning becomes a constant
signal. The signal is canceled when the
selector lever is placed in positionD
orP.
Selector lever
position
Warning indicator
D
Front area activated
R or N
Rear area activated
P
Neither activated
Page 189 of 376
189 Controls in detail
Driving systems
Switching the Parktronic system
on/off
You can switch off the Parktronic system
manually.
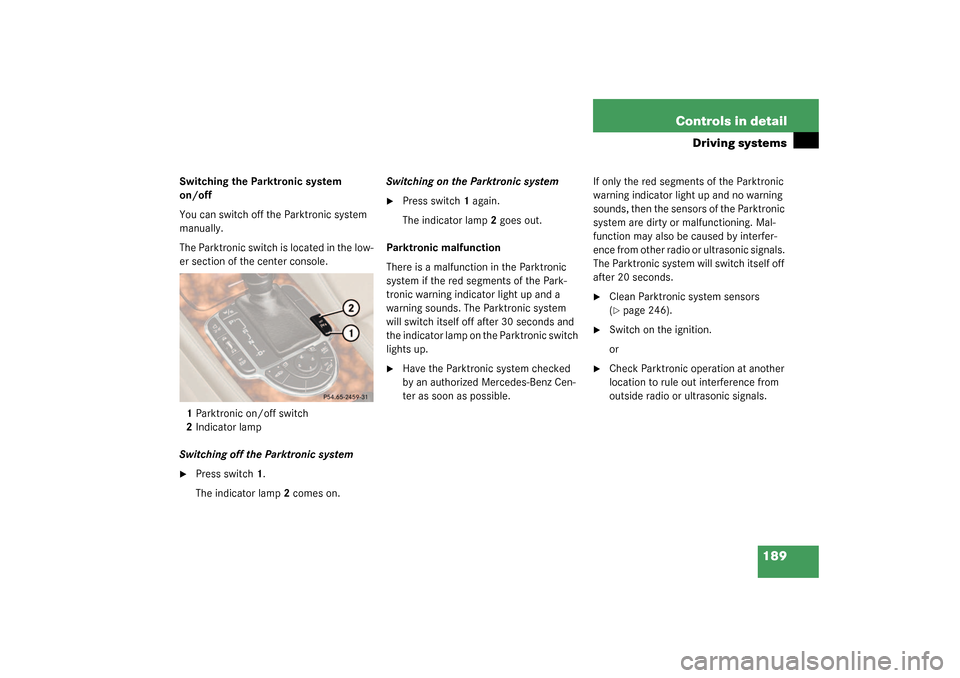
The Parktronic switch is located in the low-
er section of the center console.
1Parktronic on/off switch
2Indicator lamp
Switching off the Parktronic system�
Press switch1.
The indicator lamp2 comes on.Switching on the Parktronic system
�
Press switch1 again.
The indicator lamp2 goes out.
Parktronic malfunction
There is a malfunction in the Parktronic
system if the red segments of the Park-
tronic warning indicator light up and a
warning sounds. The Parktronic system
will switch itself off after 30 seconds and
the indicator lamp on the Parktronic switch
lights up.
�
Have the Parktronic system checked
by an authorized Mercedes-Benz Cen-
ter as soon as possible.If only the red segments of the Parktronic
warning indicator light up and no warning
sounds, then the sensors of the Parktronic
system are dirty or malfunctioning. Mal-
function may also be caused by interfer-
ence from other radio or ultrasonic signals.
The Parktronic system will switch itself off
after 20 seconds.
�
Clean Parktronic system sensors
(�page 246).
�
Switch on the ignition.
or
�
Check Parktronic operation at another
location to rule out interference from
outside radio or ultrasonic signals.