Page 159 of 376

159 Controls in detail
Retractable hardtop
Retractable hardtop
Opening and closing the retractable hardtop
For safety reasons, the retractable hardtop
can only be opened and closed when the
vehicle is standing still.Warning!
G
Before operating the switch for the retract-
able hardtop, make sure that no persons are
injured by the moving parts (retractable
roof, roof frame, and trunk lid) due to inat-
tention.
Hands must never be placed near the roof
frame, upper windshield area, hardtop, shelf
behind roll bars, or trunk lid while the re-
tractable hardtop is being raised or lowered.
Serious personal injury may occur.
If potential danger exists, release the re-
tractable hardtop switch. This immediately
interrupts the raising or lowering procedure.
You then can operate the hardtop switch to
raise or lower the hardtop away from the
danger zone.
Warning!
G
When leaving the vehicle, always remove the
key from starter switch, take the KEY-
LESS-GO
* card (if so equipped) with you,
and lock your vehicle. Do not leave children
unattended in the vehicle, or with access to
an unlocked vehicle. Unsupervised use of
vehicle equipment can cause an accident
and/or serious personal injury.
!Never sit or place heavy objects on the
rear shelf. Doing so could cause dam-
age to the retractable hardtop and the
rear shelf.
!When opening and closing the retract-
able roof, make sure that�
there is sufficient clearance for the
hardtop to move up and the trunk
lid to move back
�
the luggage cover is extended and
closed
�
the trunk lid is closed
�
no roof luggage carrier is installed
�
the outside temperature is above
+5°F (–15°C)
Otherwise the roof and trunk of the ve-
hicle could be damaged.
Page 160 of 376
160 Controls in detailRetractable hardtopLuggage cover
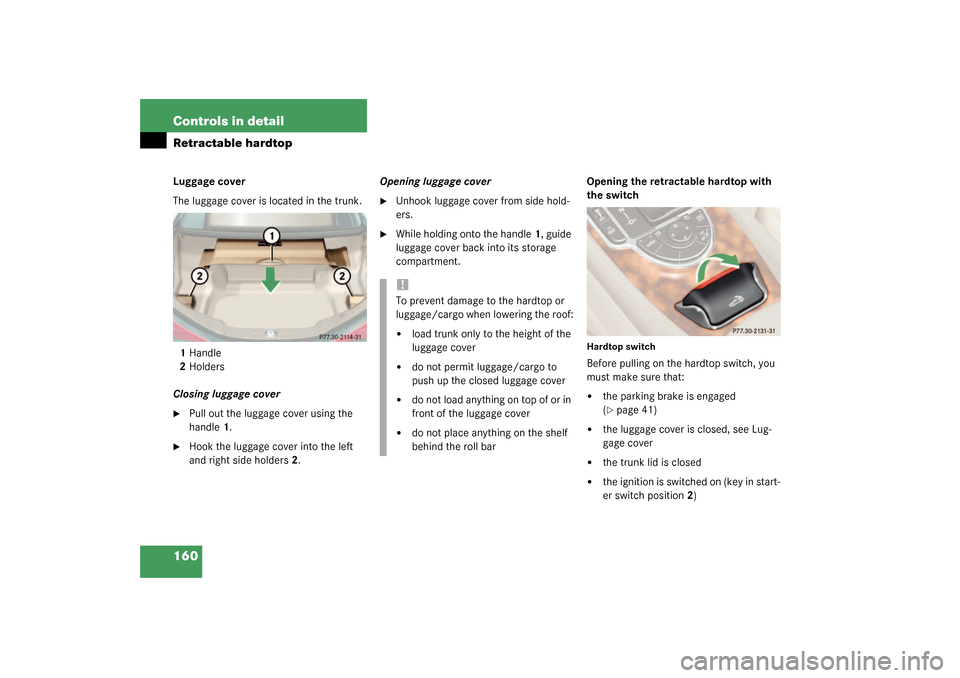
The luggage cover is located in the trunk.
1Handle
2Holders
Closing luggage cover�
Pull out the luggage cover using the
handle1.
�
Hook the luggage cover into the left
and right side holders2.Opening luggage cover
�
Unhook luggage cover from side hold-
ers.
�
While holding onto the handle1, guide
luggage cover back into its storage
compartment. Opening the retractable hardtop with
the switch
Hardtop switchBefore pulling on the hardtop switch, you
must make sure that:�
the parking brake is engaged
(�page 41)
�
the luggage cover is closed, see Lug-
gage cover
�
the trunk lid is closed
�
the ignition is switched on (key in start-
er switch position2)
!To prevent damage to the hardtop or
luggage/cargo when lowering the roof:�
load trunk only to the height of the
luggage cover
�
do not permit luggage/cargo to
push up the closed luggage cover
�
do not load anything on top of or in
front of the luggage cover
�
do not place anything on the shelf
behind the roll bar
Page 161 of 376
161 Controls in detail
Retractable hardtop
�
Pull up on the hardtop switch as indi-
cated by the arrow until the hardtop is
completely lowered into its trunk stor-
age compartment and the indicator
lamp in the hardtop switch goes out.
The multifunction display will briefly
show the message
Hardtop open
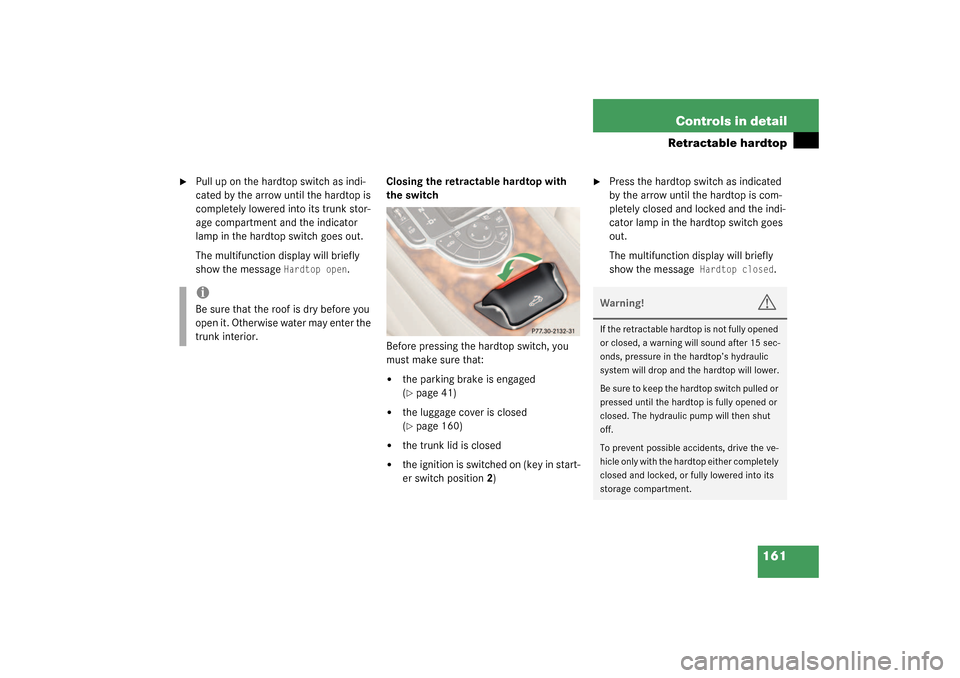
.Closing the retractable hardtop with
the switch
Before pressing the hardtop switch, you
must make sure that:
�
the parking brake is engaged
(�page 41)
�
the luggage cover is closed
(�page 160)
�
the trunk lid is closed
�
the ignition is switched on (key in start-
er switch position2)
�
Press the hardtop switch as indicated
by the arrow until the hardtop is com-
pletely closed and locked and the indi-
cator lamp in the hardtop switch goes
out.
The multifunction display will briefly
show the message
Hardtop closed
.
iBe sure that the roof is dry before you
open it. Otherwise water may enter the
trunk interior.
Warning!
G
If the retractable hardtop is not fully opened
or closed, a warning will sound after 15 sec-
onds, pressure in the hardtop’s hydraulic
system will drop and the hardtop will lower.
Be sure to keep the hardtop switch pulled or
pressed until the hardtop is fully opened or
closed. The hydraulic pump will then shut
off.
To prevent possible accidents, drive the ve-
hicle only with the hardtop either completely
closed and locked, or fully lowered into its
storage compartment.
Page 162 of 376
162 Controls in detailRetractable hardtopLocking the retractable hardtop after
raising/lowering
If the retractable hardtop is not properly
locked, lock it as described below.Unlocked status noticed when stopped
�
Switch on the ignition.
�
To lock the hardtop in its fully closed
position, press hardtop switch forward.
The message
Hardtop Closed
will be
shown in the multifunction display.
or:
�
To lock the hardtop in its fully opened
position, pull up on the hardtop switch.
The message
Hardtop Open
will be
shown in the multifunction display.
Unlocked status noticed while driving
�
Stop the vehicle.
�
Leave the ignition switched on.
�
To lock the hardtop in its fully closed
position, press hardtop switch forward.
The message
Hardtop Closed
will be
shown in the multifunction display.
or:
�
To lock the hardtop in its fully opened
position, pull up on the hardtop switch.
The message
Hardtop Open
will be
shown in the multifunction display.
Warning!
G
The hardtop is not fully closed and locked or
not fully opened and locked if:�
the indicator light in the hardtop switch
remains lit
�
the message
Hardtop in operation!
is shown in the multifunction display
and the indicator lamp in the hardtop
switch does not go out
�
the indicator lamp blinks and a warning
sounds for 10 seconds and the message Lock hardtop
is shown in the multi-
function display when starting to drive
Warning!
G
Stop the vehicle and lock the hardtop before
continuing to drive. You could otherwise en-
danger yourself and others.
Page 164 of 376

164 Controls in detailRetractable hardtopClosing the retractable hardtop with
the key�
Aim the transmitter eye at the door
handle.
�
Press and hold button
‹
until the
retractable hardtop is completely
closed.
The retractable hardtop and the side
windows close. In the tachometer dis-
play you will see the message Hardtop
closed
.Problems when operating the retract-
able hardtop
Indicator lamp in the retractable hard-
top switch is blinking
Several problems may cause the indicator
lamp in the hardtop switch to blink when
activated:
�
The luggage cover in the trunk is not
closed.�
Close the luggage cover in the
trunk.
�
The trunk lid is open.�
Close the trunk lid.
�
The battery voltage is too low.�
Start engine and let run while acti-
vating switch.
�
The hardtop drive system has shut it-
self down. For safety reasons, no more
than five consecutive attempts may be
made to raise or lower the hardtop.�
After about ten minutes you may
again attempt to open or close the
retractable hardtop again.
If the indicator lamp in the retractable
hardtop switch blinks when starting off or
while driving and you hear a warning sound
for a maximum of 10 seconds, the retract-
able hardtop is not locked.
�
Properly lock the retractable hardtop
(�page 162) before continuing to
drive.
If the indicator lamp continues to blink af-
ter you have carried out the above actions,
there is a malfunction.
�
Have the retractable hardtop system
checked at an authorized
Mercedes-Benz Center.
Warning!
G
If the retractable hardtop does not com-
pletely open or close a warning sounds and
the retractable hardtop switch blinks. In the
speedometer display you will see
K
, in
the tachometer display you will see the mes-
sage
being lowered!
. After about
15 seconds the roof hydraulics lose pres-
sure.
Properly lock the retractable hardtop
(
�page 162) before continuing to drive.
Page 175 of 376
175 Controls in detail
Driving systems
Distronic activated
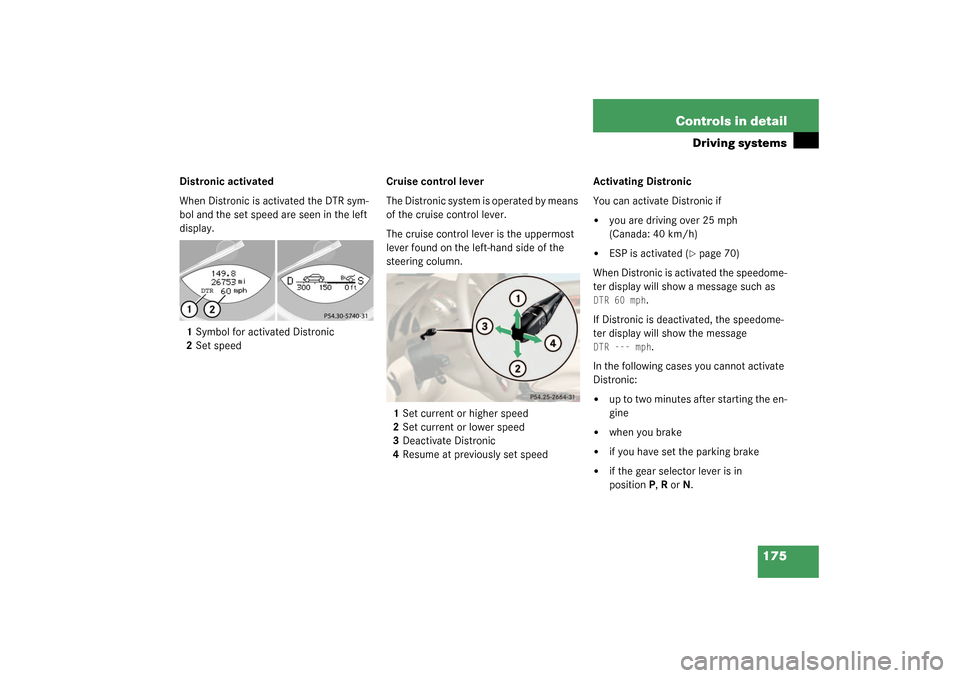
When Distronic is activated the DTR sym-
bol and the set speed are seen in the left
display.
1Symbol for activated Distronic
2Set speedCruise control lever
The Distronic system is operated by means
of the cruise control lever.
The cruise control lever is the uppermost
lever found on the left-hand side of the
steering column.
1Set current or higher speed
2Set current or lower speed
3Deactivate Distronic
4Resume at previously set speedActivating Distronic
You can activate Distronic if
�
you are driving over 25 mph
(Canada: 40 km/h)
�
ESP is activated (
�page 70)
When Distronic is activated the speedome-
ter display will show a message such as
DTR60mph
.
If Distronic is deactivated, the speedome-
ter display will show the message
DTR --- mph
.
In the following cases you cannot activate
Distronic:
�
up to two minutes after starting the en-
gine
�
when you brake
�
if you have set the parking brake
�
if the gear selector lever is in
positionP, R or N.
Page 183 of 376
183 Controls in detail
Driving systems
Active Body Control (ABC)
The ABC system automatically selects the
optimum suspension tuning and ride
height for your vehicle.
Suspension tuning
The suspension tuning is set according to:�
Your driving style
�
Road surface conditions
�
The vehicle loading
�
Your choice of suspension style,
“sporty” or “regular”, which you select
using the ABC switch.
The selected suspension style is stored
in memory, even after the key is re-
moved from the starter switch.The ABC switch with the indicator lamp is
located in the lower section of the center
console.
1ABC switch
2Indicator lamp
�
Start the engine.Suspension for sporty driving style
The setting for sporty driving is selected
when the indicator lamp2 is illuminated.
�
Press switch1.
The indicator lamp2 comes on.
Suspension for regular driving style
The setting for regular driving is selected
when the indicator lamp2 is off.
�
Press switch1.
The indicator lamp2 goes out.
Page 185 of 376
185 Controls in detail
Driving systems
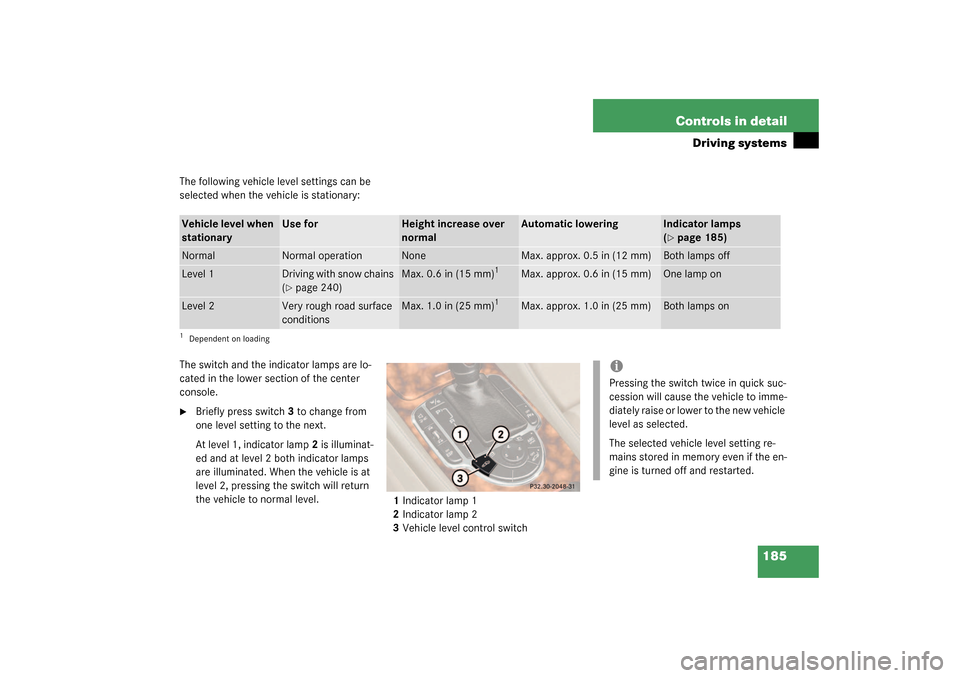
The following vehicle level settings can be
selected when the vehicle is stationary:
The switch and the indicator lamps are lo-
cated in the lower section of the center
console.�
Briefly press switch3 to change from
one level setting to the next.
At level 1, indicator lamp2 is illuminat-
ed and at level 2 both indicator lamps
are illuminated. When the vehicle is at
level 2, pressing the switch will return
the vehicle to normal level.
1Indicator lamp 1
2Indicator lamp 2
3Vehicle level control switch
Vehicle level when
stationary
Use for
Height increase over
normal
Automatic lowering
Indicator lamps
(�page 185)
Normal
Normal operation
None
Max. approx. 0.5 in (12 mm)
Both lamps off
Level 1
Driving with snow chains
(�page 240)
Max. 0.6 in (15 mm)
1
Max. approx. 0.6 in (15 mm)
One lamp on
Level 2
Very rough road surface
conditions
Max. 1.0 in (25 mm)
1
Max. approx. 1.0 in (25 mm)
Both lamps on
1Dependent on loading
iPressing the switch twice in quick suc-
cession will cause the vehicle to imme-
diately raise or lower to the new vehicle
level as selected.
The selected vehicle level setting re-
mains stored in memory even if the en-
gine is turned off and restarted.