Page 134 of 416
134 Controls in detailControl systemMenus, submenus and functions
Menu 1
Menu 2
Menu 3
Menu 4
Menu 5
Menu 6
Menu 7
Menu 8
Commands/submenusStandard dis-
play
AUDIO
Telephone*
NAVI
Distronic*
Trip computer
Malfunction
memory
Settings
Call up FSS
Select radio
station
Load phone
book
Activate
route guid-
ance
Call up set-
tings
Fuel consumption
statistics after
start
Call up malfunc-
tion messages
Reset to factory
settings
Check tire pres-
sure*
Operate CD
player
Search for
name in
phone book
Fuel consumption
statistics since
the last reset
Instrument clus-
ter submenu
Check engine oil
level
Call up range
Lighting sub-
menu
Digital speed-
ometer
Vehicle sub-
menuConvenience
submenu
Page 143 of 416
143 Controls in detail
Control system
Distronic activated
When Distronic is activated,
DISTRONIC
and the set speed are seen in the display.
1Distronic activated
Trip computer menu
Use the trip computer menu to call up sta-
tistical data on your vehicle. The following
information is available:Fuel consumption statistics after start
�
Press button
ÿ
or
è
repeatedly
until you see the first function of the
Trip computer menu.
�
Press button
j
or
k
repeatedly
until you see this message in the left
display:
AFTER START
.
1Distance driven since start
2Time elapsed since start
3Average fuel consumption since start
4Average speed since start
Function
Page
Fuel consumption statistics after
start
see
below
Fuel consumption statistics
since last reset
144
Call up range (distance to empty)
145
Page 144 of 416

144 Controls in detailControl system
Fuel consumption since last reset�
Press button
ÿ
or
è
repeatedly
until you see the first function of the
trip computer menu.
�
Press button
j
or
k
repeatedly
until you see this message in the dis-
play:
AFTER RESET
.
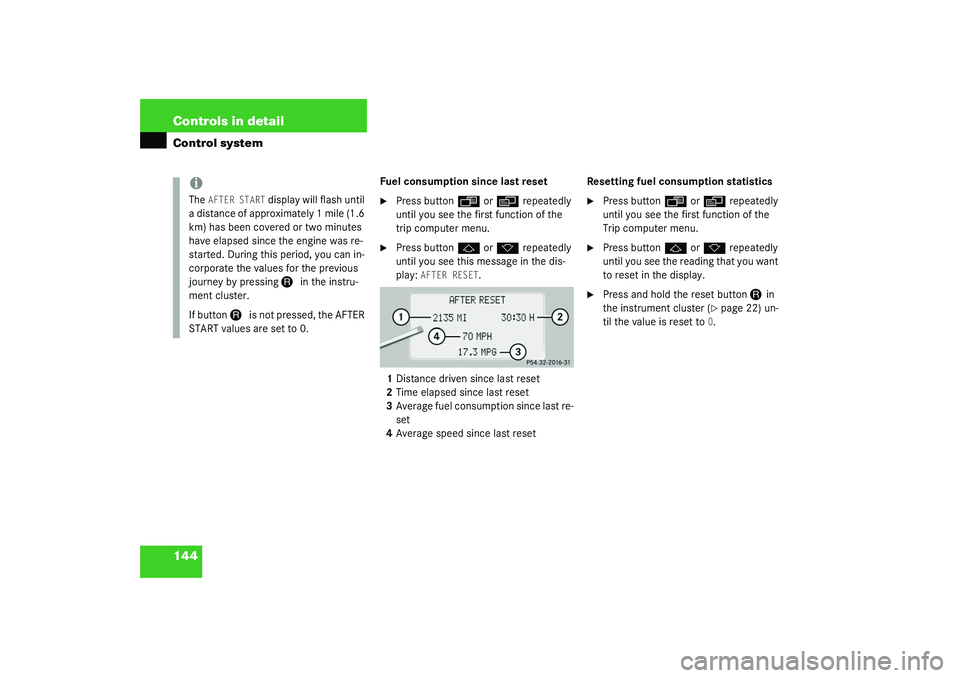
1Distance driven since last reset
2Time elapsed since last reset
3Average fuel consumption since last re-
set
4Average speed since last resetResetting fuel consumption statistics
�
Press button
ÿ
or
è
repeatedly
until you see the first function of the
Trip computer menu.
�
Press button
j
or
k
repeatedly
until you see the reading that you want
to reset in the display.
�
Press and hold the reset button
J
in
the instrument cluster (
�page 22) un-
til the value is reset to
0.
iThe
AFTER START
display will flash until
a distance of approximately 1 mile (1.6
km) has been covered or two minutes
have elapsed since the engine was re-
started. During this period, you can in-
corporate the values for the previous
journey by pressing
J
in the instru-
ment cluster.
If button
J
is not pressed, the AFTER
START values are set to 0.
Page 212 of 416

212 Controls in detailDriving systemsVehicle level control with AIRMATIC
Your vehicle automatically adjusts its ride
height to:�
reduce fuel consumption
�
increase vehicle safety
The vehicle chassis ride height is raised or
lowered according to the selected level
setting and to the vehicle speed:
�
With increasing speed, ride height is re-
duced by up to approximately
3/4inch
(20 mm).
�
With decreasing speed, the ride height
is again raised to the selected vehicle
level.The following vehicle level settings can be
selected when the vehicle is stationary:
Select the "Raised" level setting only when
required by current driving conditions.
Otherwise:
�
Fuel consumption may increase
�
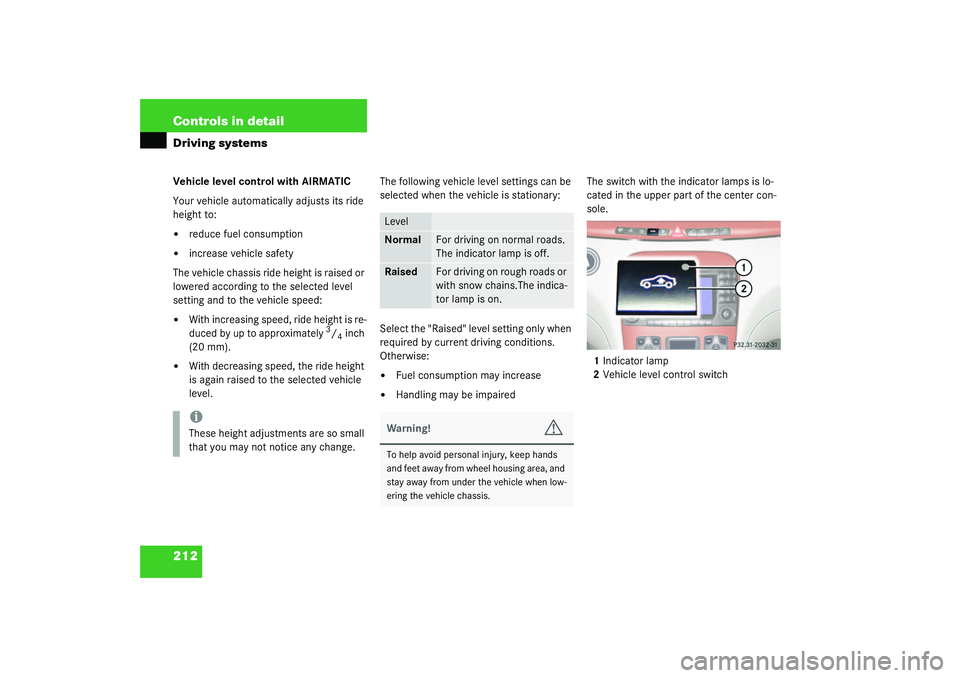
Handling may be impairedThe switch with the indicator lamps is lo-
cated in the upper part of the center con-
sole.
1Indicator lamp
2Vehicle level control switch
iThese height adjustments are so small
that you may not notice any change.
LevelNormal
For driving on normal roads.
The indicator lamp is off.
Raised
For driving on rough roads or
with snow chains.The indica-
tor lamp is on.
Warning!
G
To help avoid personal injury, keep hands
and feet away from wheel housing area, and
stay away from under the vehicle when low-
ering the vehicle chassis.
Page 215 of 416
215 Controls in detail
Driving systems
Vehicle level control with ABC*
Your vehicle automatically adjusts its ride
height to:�
reduce fuel consumption
�
increase vehicle safety
The vehicle chassis ride height is raised or
lowered according to the selected level
setting and to the vehicle speed:
�
W it h incre as ing s pee d, rid e hei ght i s re -
duced by up to approximately 1.4 inch
(35 mm).
�
With decreasing speed, the ride height
is again raised to the selected vehicle
level.Select the level 1 and 2 settings only when
required by current driving conditions.
Otherwise:
�
Fuel consumption may increase
�
Handling may be impairediThese height adjustments are so small
that you may not notice any change.
Warning!
G
To help avoid personal injury, keep hands
and feet away from wheel housing area, and
stay away from under the vehicle when low-
ering the vehicle chassis.
Page 251 of 416

251 Operation
Driving instructions
Driving instructions
Drive sensibly – save fuel
Fuel consumption, to a great extent, de-
pends on driving habits and operating con-
ditions.
To save fuel you should:�
Keep tires at the recommended infla-
tion pressures.
�
Remove unnecessary loads.
�
Remove roof rack when not in use.
�
Allow engine to warm up under low
load use.
�
Avoid frequent acceleration and decel-
eration.
�
Have all maintenance work performed
at regular intervals by an authorized
Mercedes-Benz Center.
Fuel consumption is also increased by driv-
ing in cold weather, in stop-and-go traffic,
on short trips, and in hilly country.
Drinking and driving
PedalsPower assistance
Warning!
G
Drinking and driving and/or taking drugs
and driving are a very dangerous combina-
tion. Even a small amount of alcohol or
drugs can affect your reflexes, perceptions,
and judgement.
The possibility of a serious or even fatal ac-
cident is sharply increased when you drink
or take drugs and drive.
Please don’t drink or take drugs and drive or
allow anyone to drive after drinking or taking
drugs.
Warning!
G
Keep driver’s foot area clear at all times. Ob-
jects stored in this area may impair pedal
movement.Warning!
G
With the engine not running, there is no
power assistance for the brake and steering
systems. In this case, it is important to keep
in mind that a considerably higher degree of
effort is necessary to brake and steer the ve-
hicle.
Page 364 of 416
364 Technical dataRims and tires
Rims and tiresUse only tires and rims which have been
specifically developed for your vehicle and
tested and approved by Mercedes-Benz.
Other tires and rims can have detrimental
effects, such as:�
Poor handling characteristics
�
Increased noise
�
Increased fuel consumption
!Moreover, tires and rims not approved
by Mercedes-Benz may, under load, ex-
hibit dimensional variations and differ-
ent tire deformation characteristics
that could cause them to come into
contact with the vehicle body or axle
parts. Damage to the tires or the vehi-
cle can be the result.
iFurther information on tires and rims is
available at any authorized
Mercedes-Benz Center. A tire inflation
pressure table is located on the fuel fill-
er cap of the vehicle. The tire pressure
should be checked regularly and
should only be adjusted on cold tires.
Follow tire manufacturer’s mainte-
nance recommendation included with
vehicle.
Page 395 of 416

395 Index
Fog lamps, front
Messages in display 314
Replacing bulbs 332
Switching on 122
Folding electrically
Exterior rear view mirrors
170
Four wheel electronic traction system
(4MATIC)
with ESP 81
4MATIC 81
Front airbags 61
Front lamps
Messages in display 313–315
Replacing bulbs 331, 333
Switching on 120
Front seat head restraints
Installing 106
Power seat 105
Removing 105
FSS (Flexible Service System) 280, 383
Fuel 261
Fuel reserve warning lamp 294
Premium unleaded gasoline 261
Fuel consumption statistics
After start 143Since last reset 144
Fuel filler flap 261
Locking 261
Opening 329
Unlocking 261
Fuel reserve tank
Message in display 311
Fuel tank
Filler flap 261
Fuels, coolants, lubricants etc. 371
Functions (control system) 131, 134
Resetting 147
Fuse box 353, 354
Fuse chart 323
Fuses 353
Auxiliary fuse box in trunk 353
Fuse box in engine compartment 354
Fuse box in passenger compartment
353
Fuse boxes in the engine compartment
355
Fuse chart 323
Fuse extractor 323
Spare fuses 323G
Garage door opener 245
Erasing in remote control 247
Integrated remote control 246
Rolling code programming 246
Gasoline see Fuel 261
Gear range 383
Automatic transmission 162
Limiting 162
Shifting into optimal 161
Gear range limit
Canceling 161
Gear selector lever
Cleaning 287
Position 163
Global
Locking 87
Unlocking 87
Global Positioning System (GPS) 383
Glove box 224
Closing 224
Opening 224
Good visibility 168
GPS 383
GPS see COMAND* 243