Page 104 of 321

104 Controls in detailLightingNight security illumination
When you turn off the engine and the last
door has been closed, the following lamps
will remain lit:�
Parking lamps
�
Tail lamps
�
License plate lamps
�
Front fog lamps
The combination switch must be set to
position
U
(�page 102).Deactivating night security illumination
temporarily
�
Before leaving the vehicle turn the key
in the steering lock to position0 then
turn it to position2 and back to0.
The night security illumination is deac-
tivated. It will reactivate as soon as you
reinsert the key in the steering lock.
Setting illumination time
1Switch for fog lamps
�
Stop the vehicle.
�
Make sure that the ignition is switched
on.
All the lamps in the instrument cluster
light up.
�
Turn combination switch to
position
M
.
�
Press upper part1 of switch until the
clock, located in the instrument clus-
ter, displays the actual illumination
time.
�
Press upper part1 of switch again.
Each time the switch is pressed, the il-
lumination time increases by
15 seconds. You can set the illumina-
tion time between 0 (off) and
60 seconds.
Approximately five seconds after pressing
the switch, the illumination time is set and
the clock is displayed again.
iYou can reactivate this function within
ten minutes by opening a door or the
liftgate.
If you do not open a door or the liftgate
after turning off the engine, the lamps
will automatically switch off after
60 seconds.
Page 115 of 321
115 Controls in detail
Automatic transmission
Gear selector lever position
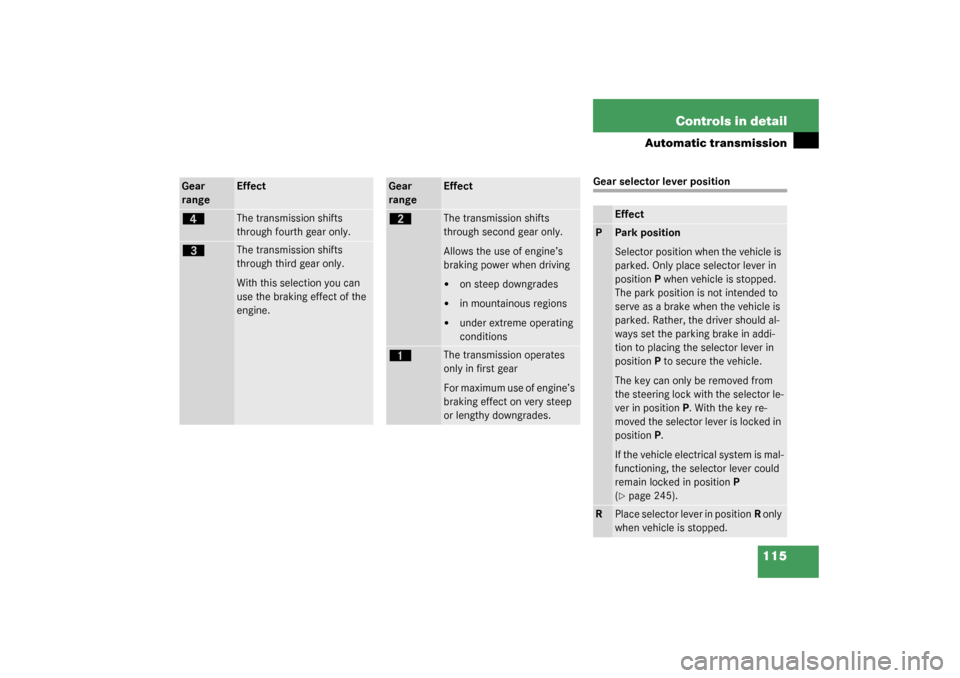
Gear
range
Effect
é
The transmission shifts
through fourth gear only.
è
The transmission shifts
through third gear only.
With this selection you can
use the braking effect of the
engine.
Gear
range
Effect
ç
The transmission shifts
through second gear only.
Allows the use of engine’s
braking power when driving�
on steep downgrades
�
in mountainous regions
�
under extreme operating
conditions
æ
The transmission operates
only in first gear
For maximum use of engine’s
braking effect on very steep
or lengthy downgrades.
Effect
P
Park position
Selector position when the vehicle is
parked. Only place selector lever in
positionP when vehicle is stopped.
The park position is not intended to
serve as a brake when the vehicle is
parked. Rather, the driver should al-
ways set the parking brake in addi-
tion to placing the selector lever in
positionP to secure the vehicle.
The key can only be removed from
the steering lock with the selector le-
ver in positionP. With the key re-
moved the selector lever is locked in
positionP.
If the vehicle electrical system is mal-
functioning, the selector lever could
remain locked in positionP
(�page 245).
R
Place selector lever in positionR only
when vehicle is stopped.
Page 118 of 321
118 Controls in detailTransmission control – LOW RANGE mode
Transmission control – LOW RANGE modeIn the following situations you should
switch to LOW RANGE mode: �
during off-road driving
�
when crossing water
�
when towing up or down on steep gra-
dients
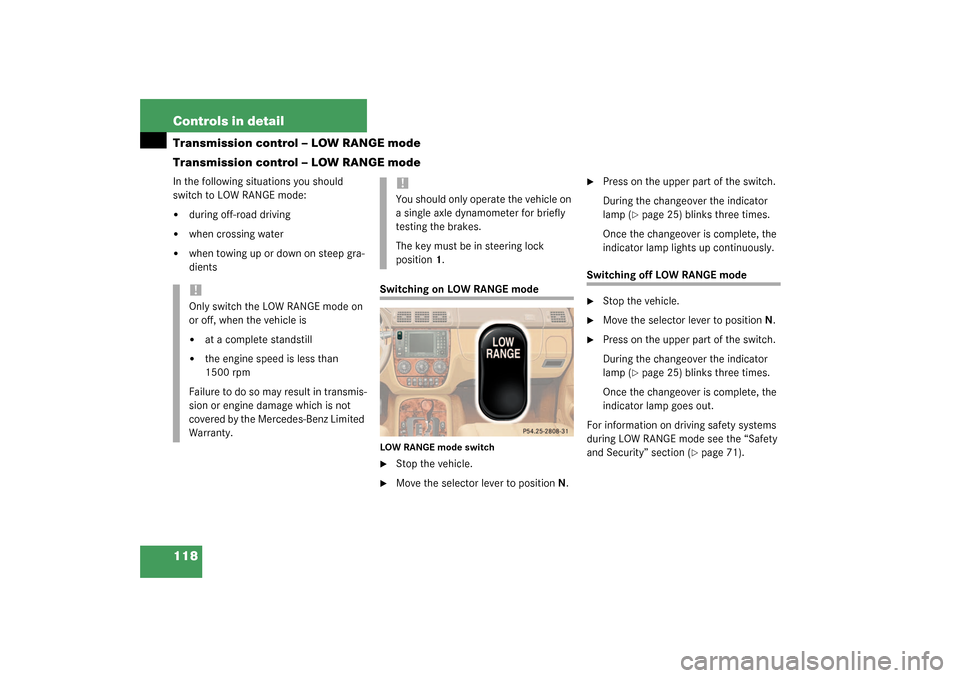
Switching on LOW RANGE modeLOW RANGE mode switch�
Stop the vehicle.
�
Move the selector lever to positionN.
�
Press on the upper part of the switch.
During the changeover the indicator
lamp (
�page 25) blinks three times.
Once the changeover is complete, the
indicator lamp lights up continuously.
Switching off LOW RANGE mode�
Stop the vehicle.
�
Move the selector lever to positionN.
�
Press on the upper part of the switch.
During the changeover the indicator
lamp (
�page 25) blinks three times.
Once the changeover is complete, the
indicator lamp goes out.
For information on driving safety systems
during LOW RANGE mode see the “Safety
and Security” section (
�page 71).
!Only switch the LOW RANGE mode on
or off, when the vehicle is�
at a complete standstill
�
the engine speed is less than
1500 rpm
Failure to do so may result in transmis-
sion or engine damage which is not
covered by the Mercedes-Benz Limited
Warranty.
!You should only operate the vehicle on
a single axle dynamometer for briefly
testing the brakes.
The key must be in steering lock
position1.
Page 139 of 321
139 Controls in detail
Loading
Loading
Loading instructions
The total load weight including vehicle oc-
cupants and luggage / cargo should not ex-
ceed the vehicle capacity weight indicated
on the certification label which can be
found on the left door pillar.
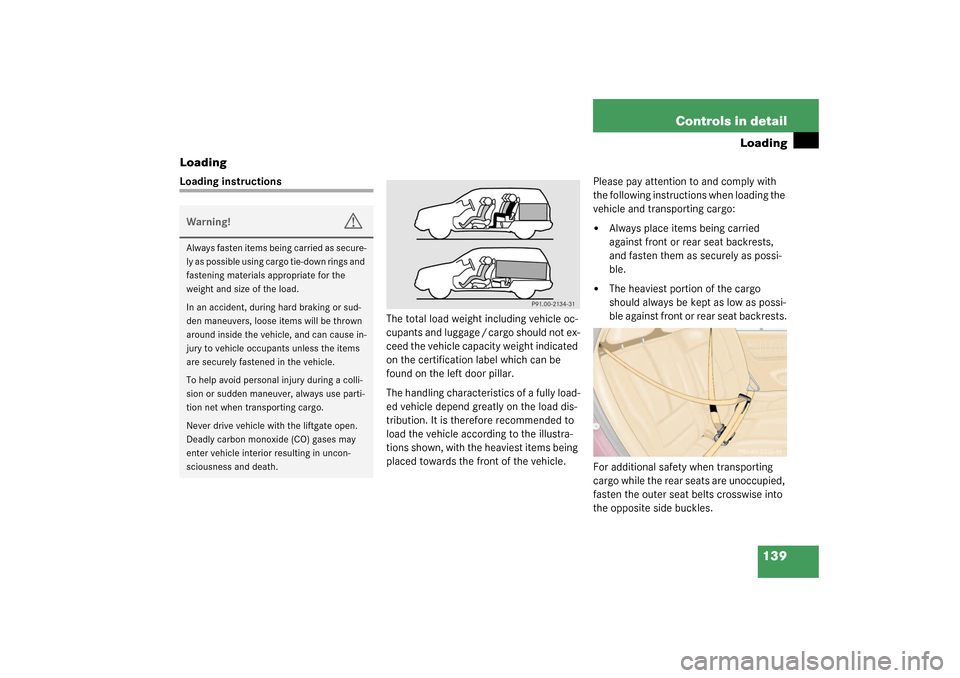
The handling characteristics of a fully load-
ed vehicle depend greatly on the load dis-
tribution. It is therefore recommended to
load the vehicle according to the illustra-
tions shown, with the heaviest items being
placed towards the front of the vehicle.Please pay attention to and comply with
the following instructions when loading the
vehicle and transporting cargo:
�
Always place items being carried
against front or rear seat backrests,
and fasten them as securely as possi-
ble.
�
The heaviest portion of the cargo
should always be kept as low as possi-
ble against front or rear seat backrests.
For additional safety when transporting
cargo while the rear seats are unoccupied,
fasten the outer seat belts crosswise into
the opposite side buckles.
Warning!
G
Always fasten items being carried as secure-
ly as possible using cargo tie-down rings and
fastening materials appropriate for the
weight and size of the load.
In an accident, during hard braking or sud-
den maneuvers, loose items will be thrown
around inside the vehicle, and can cause in-
jury to vehicle occupants unless the items
are securely fastened in the vehicle.
To help avoid personal injury during a colli-
sion or sudden maneuver, always use parti-
tion net when transporting cargo.
Never drive vehicle with the liftgate open.
Deadly carbon monoxide (CO) gases may
enter vehicle interior resulting in uncon-
sciousness and death.
Page 140 of 321
140 Controls in detailLoadingCargo tie-down rings
The cargo area is provided with four
tie-down rings. Additional two rings are lo-
cated at the rear of front seats.Cargo tie-down ring
Carefully secure cargo by applying even
load on all rings with rope of sufficient
strength to hold down the cargo.Hooks
Four hooks located on the rear compart-
ment trim panels, two on each side.
HooksUse the hooks to secure light weight items.
The maximum permissible weight per hook
is 9lbs.(4kg).
iThe trunk is the preferred place to carry
objects. The enlarged cargo area
should only be used for items which do
not fit in the trunk alone.
iWhile the partition net (
�page 141)
will help protect you from smaller ob-
jects, it cannot prevent the movement
of large, heavier objects into the pas-
senger area in an accident. Such items
must be properly secured using the
cargo tie-down rings in the cargo area
floor.
Page 141 of 321
141 Controls in detail
Loading
Partition net*Use of the partition net is a particularly im-
portant safety factor when the vehicle is
loaded higher than the top of the seat
backrests with smaller objects.
The partition net can be installed behind
the backrests of the front or rear seats.
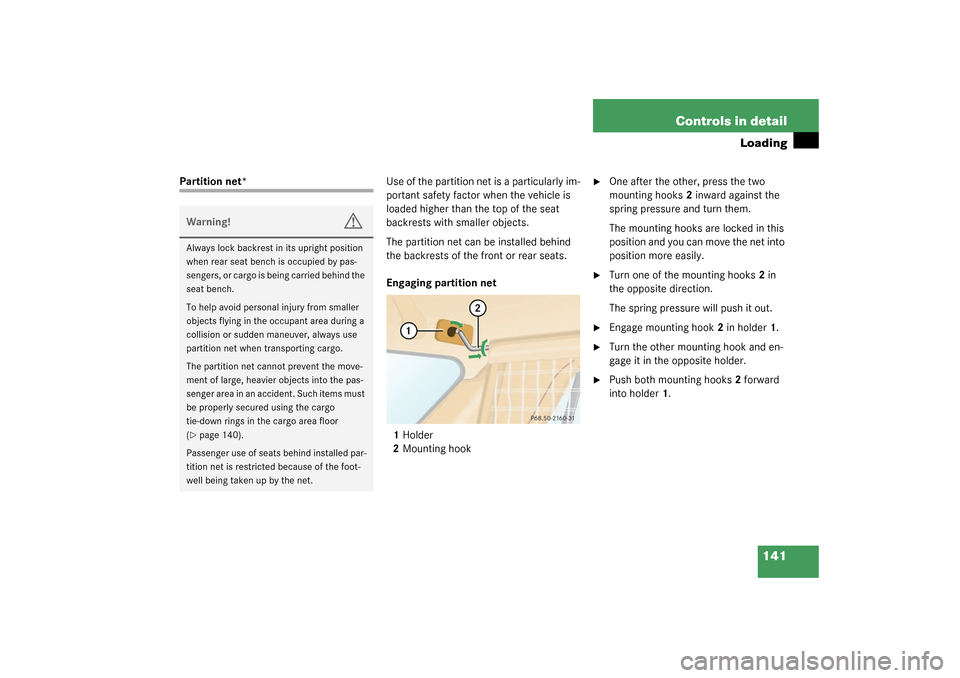
Engaging partition net
1Holder
2Mounting hook
�
One after the other, press the two
mounting hooks2 inward against the
spring pressure and turn them.
The mounting hooks are locked in this
position and you can move the net into
position more easily.
�
Turn one of the mounting hooks2 in
the opposite direction.
The spring pressure will push it out.
�
Engage mounting hook2 in holder1.
�
Turn the other mounting hook and en-
gage it in the opposite holder.
�
Push both mounting hooks2 forward
into holder1.
Warning!
G
Always lock backrest in its upright position
when rear seat bench is occupied by pas-
sengers, or cargo is being carried behind the
seat bench.
To help avoid personal injury from smaller
objects flying in the occupant area during a
collision or sudden maneuver, always use
partition net when transporting cargo.
The partition net cannot prevent the move-
ment of large, heavier objects into the pas-
senger area in an accident. Such items must
be properly secured using the cargo
tie-down rings in the cargo area floor
(�page 140).
Passenger use of seats behind installed par-
tition net is restricted because of the foot-
well being taken up by the net.
Page 146 of 321
146 Controls in detailDriving systems
Driving systemsThe driving systems of your vehicle are de-
scribed on the following pages:�
Cruise control, with which the vehicle
can maintain a preset speed
�
Parktronic*, with which you can assist
your parking maneuvers.
The driving systems BAS, ABS, ESP, EBB
and 4-ETS, are described in the “Safety
and Security” section (
�page 71).
Cruise control
Cruise control automatically maintains the
speed you set for your vehicle.
Use of cruise control is recommended for
driving at a constant speed for extended
periods of time. You can set any speed
over 20 mph (30 km/h).
The cruise control function is operated by
means of the cruise control lever.
The cruise control lever is the uppermost
lever found on the left-hand side of the
steering column (
�page 23).
Warning!
G
Cruise control is a convenience system de-
signed to assist the driver during vehicle op-
eration. The driver is and must remain
responsible for the vehicle speed and for
safe brake operation.
Only use cruise control if the road, traffic
and weather conditions make it advisable to
travel at a steady speed.�
The use of cruise control can be danger-
ous on winding roads or in heavy traffic
because conditions do not allow safe
driving at a steady speed.
�
The use of cruise control can be danger-
ous on slippery roads. Rapid changes in
tire traction can result in wheel spin and
loss of control.
�
Deactivate cruise control when driving
in fog.
The “Resume” function should only be oper-
ated if the driver is fully aware of the previ-
ously set speed and wishes to resume this
particular preset speed.
Page 152 of 321
152 Controls in detailUseful features
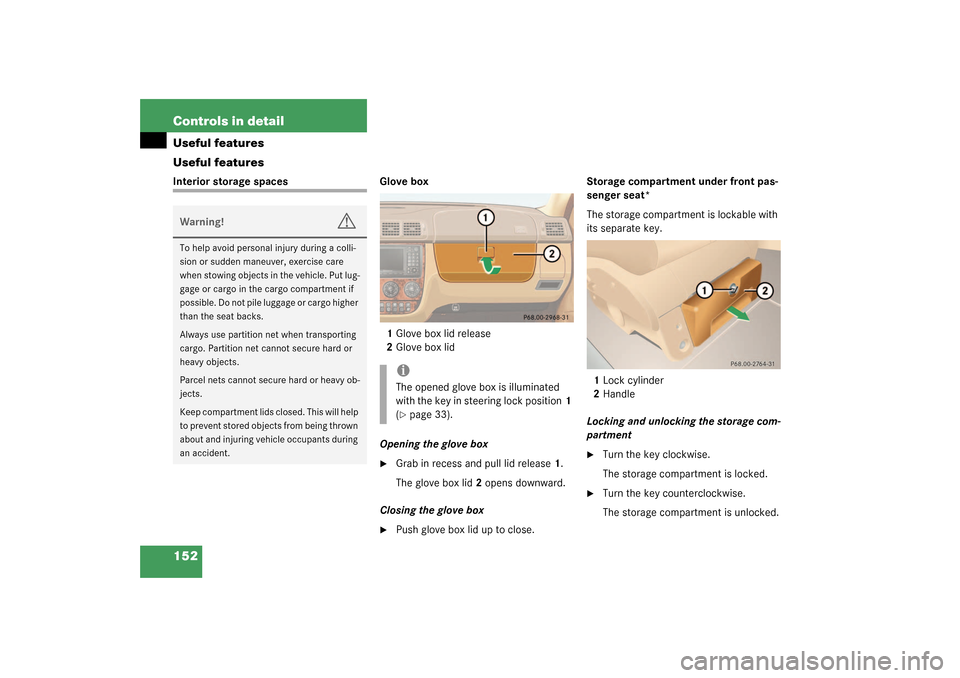
Useful featuresInterior storage spaces Glove box
1Glove box lid release
2Glove box lid
Opening the glove box
�
Grab in recess and pull lid release1.
The glove box lid2 opens downward.
Closing the glove box
�
Push glove box lid up to close.Storage compartment under front pas-
senger seat*
The storage compartment is lockable with
its separate key.
1Lock cylinder
2Handle
Locking and unlocking the storage com-
partment
�
Turn the key clockwise.
The storage compartment is locked.
�
Turn the key counterclockwise.
The storage compartment is unlocked.
Warning!
G
To help avoid personal injury during a colli-
sion or sudden maneuver, exercise care
when stowing objects in the vehicle. Put lug-
gage or cargo in the cargo compartment if
possible. Do not pile luggage or cargo higher
than the seat backs.
Always use partition net when transporting
cargo. Partition net cannot secure hard or
heavy objects.
Parcel nets cannot secure hard or heavy ob-
jects.
Keep compartment lids closed. This will help
to prevent stored objects from being thrown
about and injuring vehicle occupants during
an accident.
iThe opened glove box is illuminated
with the key in steering lock position1
(�page 33).