Page 22 of 150

19 At a glance
Quick reference MCS
Switching on
�Press .
The unlock code menu will appear.Entering the unlock code
�Use the number keys from to
to enter the unlock code.
Asterisks instead of digits appear in the
input line.
If the code entered is correct and the
phone is registered in a network, the
phone is ready for use.
Outgoing call
Enter a telephone number
�Use the number keys from to
to enter the telephone number.
The menu changes when the first digit
is entered.Begin dialing
�If you have entered the correct num-
ber, press .
Dialing will begin. If the phone number
and name are stored in the phone
book, the name appears on the screen.
The active audio source will switch to
mute.
Conducting a call
When the call is initiated, the call time will
be displayed.
Ending a call
�Press .
Refer to (
�page 68) “Telephone mode” for
additional information.
Telephone operation*
i
Timeport phones use a three-digit code.
V60 phones use a four-digit code. The
head unit will unlock the phone using
the first three digits of the four-digit
V60 unlock code.
Page 25 of 150
22 At a glance
Quick reference MCS
Entering a city name
The input screen appears. If you have se-
lected the city name menu, the current city
name appears.
1Text window
2Keypad
3List button
4Delete button
5Space button�If you want to choose another city, use
the joystick to select the first character
of the city name from the keypad 2
2and
press .
The character appears in the text win-
dow 1
1.
�To enter more characters, repeat
above step.
If a character is not available, it will
automatically be shaded out.
�To correct the last character, use the
joystick to select “Delete”4
4 and
press .
�When you have entered the city name,
use the joystick to select “List”3
3and
press .
or
�Use the joystick to enter the first few
characters of the city name, select
“List”3
3and press .
�Select the desired city name from the
name list and press .
�The Input Street Name menu appears.
P82.85-9568-31
Page 26 of 150
23 At a glance
Quick reference MCS
Entering a street name
The input screen appears.
1Text window
2Keypad
3List button
4Delete button
5Space button�To enter the street name, use the joy-
stick to select the first character from
the keypad 2
2 and press .
The character will appear in the text
window 1
1.
�To enter more characters, repeat
above step.
If a character is not available, it will
automatically be shaded out.
�To correct the last character, use the
joystick to select “Delete”4
4 and
press .
�When you have entered the street
name, use the joystick to select
“List”3
3and press .
or
�Use the joystick to enter the first few
characters of the street name, select
“List”3
3and press .
�Use the joystick to select the desired
street name from the name list and
press .
�The Address Number menu appears. P82.85-9563-31
Page 27 of 150

24 At a glance
Quick reference MCS
Entering an address number
The input screen appears if you have en-
tered the street name and the address
numbers for this street are stored on the
navigation DVD.
�Use the joystick to select the first num-
ber of the desired address number and
press .
The character will appear in the num-
ber window.
�To enter more characters, repeat the
above step.
�To correct the last character, use the
joystick to select “Delete” and press
.
�When the address number is displayed,
use the joystick to select “Done” and
press .
If the city name was not previously en-
tered, the City Name menu will appear.
�Once you have entered the complete
address, the Confirm Destination menu
appears.
�Use the joystick to select “OK to
Proceed” and press .
The MCS begins calculating the route.
P82.85-9564-31
i
Numbers can also be entered using the
number keypad.
If a character is not available, it will au-
tomatically be shaded out. Use “N”, “E”,
“W” or “S” only if the address number
contains such a character. The MCS will
automatically differentiate north, east,
west and south street names.
P82.85-9565-31
Page 30 of 150
27 Audio
Radio operation
FunctionPage
1Switches radio operation
on30
2Color display
3Press to:
Switch the MCS on and
off
Turn to:
Adjust the volume
14
16
4Selecting a station (pre-
sets)
Selecting a station via di-
rect frequency entry
Saving a station
Selecting a station from
the preset menu FM/AM
Selecting a station from
the WB preset menu
36
34
37
5Joystick
: Automatic seek
tuning, ascending
: Automatic seek
tuning, descending
: Manual tuning,
ascending
: Manual tuning,
descending
33
33
33
33
6Softkeys
“LIST”: Preset menu
“AM”, “FM”: Changing ra-
dio band
“WB”: Weather Band
“AUTO”: Automatically
saves stations
“ADJ”: Audio adjust-
ment
“SCAN”: Scan
37
31
32
33
63
35
FunctionPage
Page 33 of 150
30 Audio
Radio operation
This chapter will provide detailed informa-
tion on:
�Radio operation
�Tape operation
�CD operation* and
�Sound adjustments
If you have not done so already, please
familiarize yourself with these functions by
reading the “At a glance” chapter.
Main FM radio menu
�Press .
The radio is switched on and the sta-
tion last tuned to will begin to play.
�Press any system key, e.g. .
MCS will switch to the tape mode.
Switching radio operation on
i
You can operate the telephone and the
navigation system while the radio is on.
Switching another system on
Page 34 of 150
31 Audio
Radio operation
You can select between FM-, AM- and WB-
Band.FM Band
�Press the softkey “FM”. “FM” is
displayed in the upper left hand corner
of the display.
The FM station last tuned to begins to
play and the frequency appears in the
display.AM Band�Press the softkey “AM”. “AM” is
displayed in the upper left hand corner
of the display.
The AM station last tuned to begins to
play and the frequency appears in the
display.
Changing the Radio band
Frequency band
FM
AMFrequency range
87.5 - 108.0 FM
530 - 1710 AM
Page 35 of 150
32 Audio
Radio operation
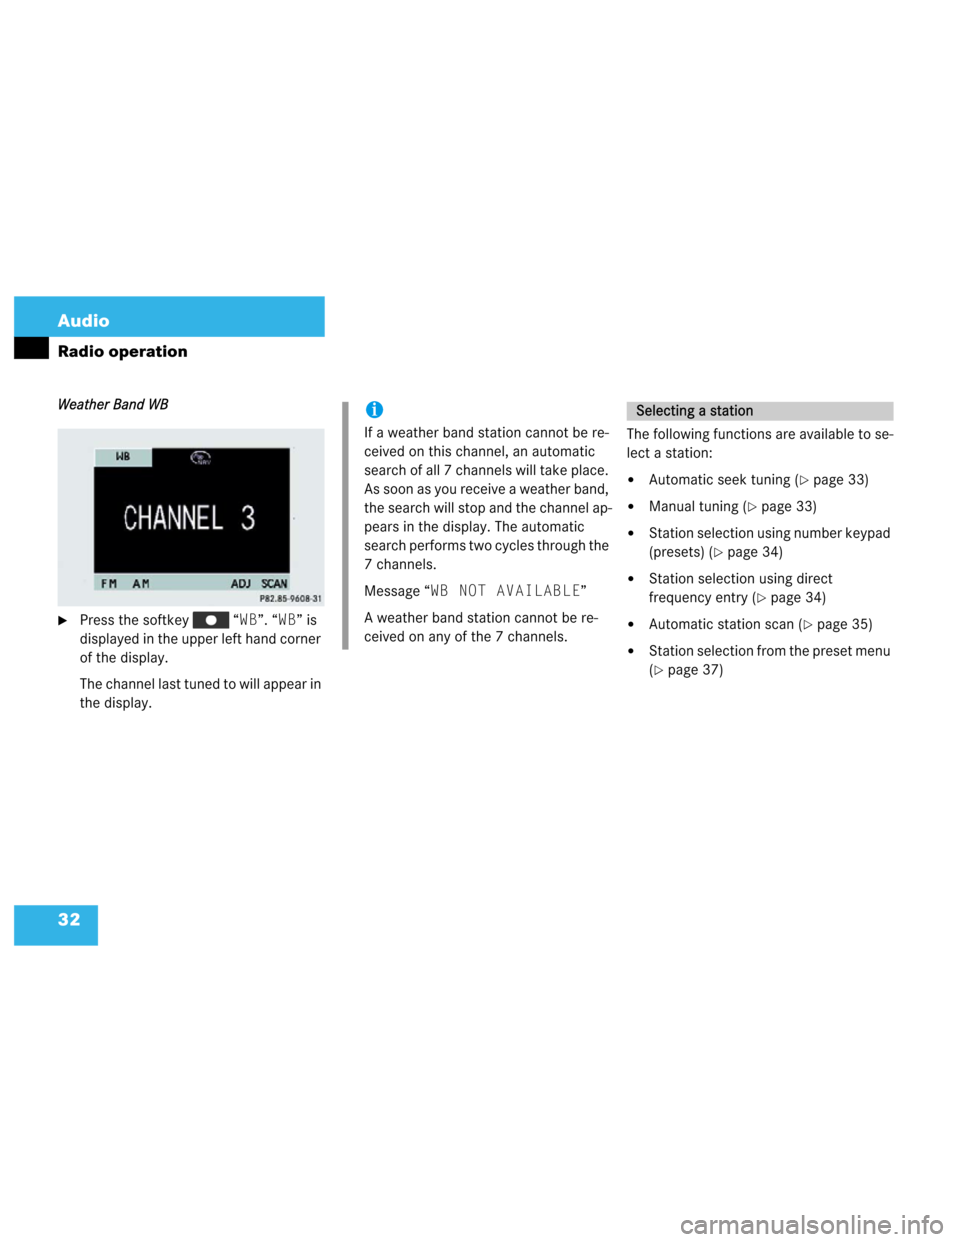
Weather Band WB
�Press the softkey “WB”. “WB” is
displayed in the upper left hand corner
of the display.
The channel last tuned to will appear in
the display.The following functions are available to se-
lect a station:
�Automatic seek tuning (�page 33)
�Manual tuning (�page 33)
�Station selection using number keypad
(presets) (
�page 34)
�Station selection using direct
frequency entry (
�page 34)
�Automatic station scan (�page 35)
�Station selection from the preset menu
(
�page 37)
i
If a weather band station cannot be re-
ceived on this channel, an automatic
search of all 7 channels will take place.
As soon as you receive a weather band,
the search will stop and the channel ap-
pears in the display. The automatic
search performs two cycles through the
7 channels.
Message “WB NOT AVAILABLE”
A weather band station cannot be re-
ceived on any of the 7 channels.
Selecting a station


Selecting a")