Page 101 of 360

101 Controls in detail
Lighting
Manual headlamp mode
The low beam headlamps and parking
lamps can be switched on and off with the
exterior lamp switch. For exterior lamp
switch, see above.
Automatic headlamp mode
The parking lamps, low beam headlamps
and license plate lamps switch on and off
automatically depending on the brightness
of the ambient light.�
Turn the exterior lamp switch to
U
.
Warning!
G
In automatic headlamp mode, the head-
lamps will not be automatically switched on
under foggy conditions. To minimize risk to
you and to others, activate headlamps by
turning exterior lamp switch to
B
.
The driver is responsible for the operation of
the vehicle’s lights at all times. The automat-
ic headlamp feature is only an aid to the driv-
er. Switch on the vehicle lights manually
when driving or when traffic conditions re-
quire you to do so.
iWith the daytime running lamp mode
activated, the low beam headlamps will
not be switched off automatically.
iFront fog lamps and rear fog lamp can
not be switched on manually with exte-
rior lamp switch in position
U
. To
activate the fog lamps, turn exterior
lamp switch to position
B
.
iIf you drive in countries where vehicles
drive on the other side of the road than
the country where the vehicle is regis-
tered, you must have the headlamps
modified for symmetrical low beams.
Relevant information can be obtained
at your authorized Mercedes-Benz
Light Truck Center.
Page 102 of 360

102 Controls in detailLightingDaytime running lamp mode�
Turn exterior lamp switch to
position
M
or
U
.
When the engine is running, the low beam
headlamps are automatically switched on.
In low ambient light conditions the parking
lamps will also switch on.
Canada only
When you shift from a driving position to
positionN orP, the low beam switches off
(three minutes delay).
For nighttime driving, you should turn the
exterior lamp switch to position
B
to
permit activation of the high beam head-
lamps.
USA only
The high beam headlamps can also be ac-
tivated when driving with the daytime run-
ning lamp mode activated and exterior
lamp switch in position
M
.To activate the daytime running lamp
mode, see “Setting daytime running lamp
mode” (
�page 124).
Locator lighting and night security illu-
mination
Locator lighting and night security illumi-
nation are described in the control system
section under “Setting locator lighting”
(
�page 125) and “Setting night security il-
lumination” (
�page 125).
Exterior rear view mirror lamps
If the vehicle is centrally unlocked in the
darkness, the lamps in the exterior rear
view mirrors light up.If a door is opened, the lamp on this side
goes out. If no doors are opened, the
lamps go out:
�
when the ignition is switched on
�
after a maximum of 40 seconds
Switching on front fog lamps
�
Check that the low beam headlamps
are switched on.
�
Pull out exterior lamp switch to first
stop.
The green indicator lamp
‡
in the
lamp switch lights up.
iSee notes on the exterior lamp switch
(�page 100).
iFog lamps will operate with the parking
lamps and/or the low beam headlamps
on. Fog lamps should only be used in
conjunction with low beam headlamps.
Consult your State or Province Motor
Vehicle Regulations regarding allow-
able lamp operation.
Page 103 of 360
103 Controls in detail
Lighting
Switching on rear fog lamp�
Check that the low beam headlamps
are switched on.
�
Pull out exterior lamp switch to second
stop.
The yellow indicator lamp
†
in the
lamp switch lights up.
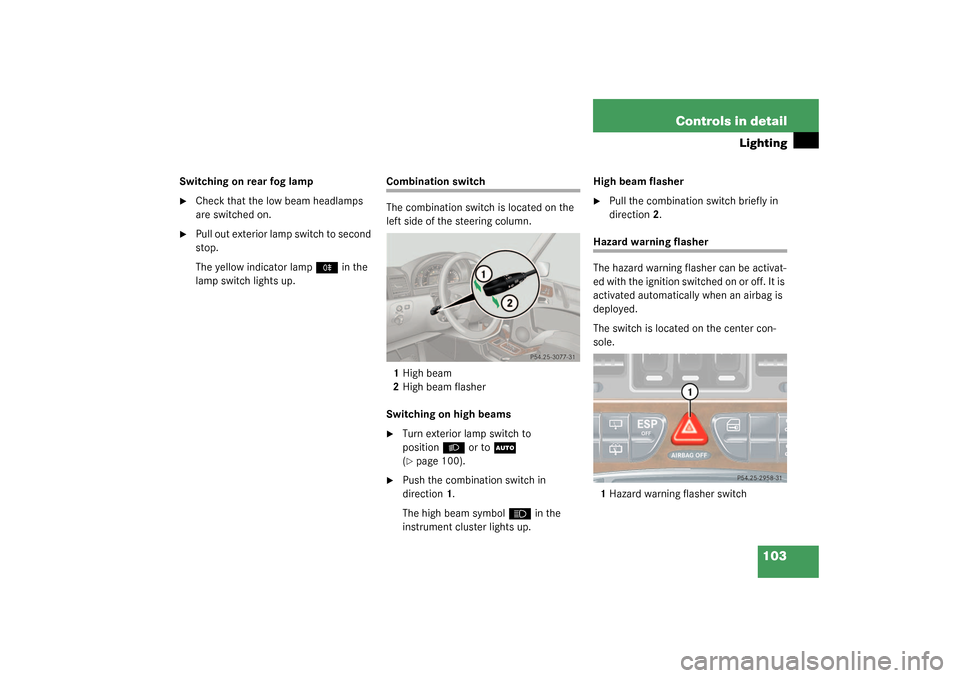
Combination switch
The combination switch is located on the
left side of the steering column.
1High beam
2High beam flasher
Switching on high beams�
Turn exterior lamp switch to
position
B
or to
U
(
�page 100).
�
Push the combination switch in
direction1.
The high beam symbol
A
in the
instrument cluster lights up.High beam flasher
�
Pull the combination switch briefly in
direction2.
Hazard warning flasher
The hazard warning flasher can be activat-
ed with the ignition switched on or off. It is
activated automatically when an airbag is
deployed.
The switch is located on the center con-
sole.
1Hazard warning flasher switch
Page 125 of 360

125 Controls in detail
Control system
Setting locator lighting
During darkness, the following lamps will
come on when the exterior lamp switch is
in position
U
, the locator lighting fea-
ture is activated, and the vehicle is un-
locked by remote control:
�
parking lamps
�
tail lamps
�
license plate lamps
�
front fog lamps
The locator lighting switches off when the
driver’s door is opened. It switches off au-
tomatically after a period of approximately
40 seconds.
�
Move the selection marker with
the
æ
or
ç
button to the
LIGHTING
submenu.
�
Press button
j
or
k
repeatedly
until you see this message in the dis-
play:
LOCATOR LIGHTING
.
The selection marker is on the current
setting.
�
Press
æ
or
ç
to select the de-
sired setting.
The locator lighting will be switched on
or off.Setting night security illumination
(Exterior lamps delayed switch-off)
Use the
HEADLAMPS DELAYED SWITCH-OFF
function to set whether and for how long
you would like the exterior lamps to illumi-
nate during darkness after all doors are
closed. When the delayed shut-off feature
is activated and the exterior lamp switch is
in position
U
, the following lamps will
remain lit after you remove the key from
the starter switch:
�
parking lamps
�
tail lamps
�
license plate lamps
�
front fog lamps
Page 157 of 360

157 Controls in detail
Climate control
Air conditioning
The air conditioning is operational while
the engine is running and cools the interior
air to the temperature set by the operator.
Deactivating
It is possible to deactivate the air condi-
tioning (cooling) function of the climate
control system. The air in the vehicle will
then no longer be cooled or dehumidified.�
Press button
°
(�page 151).
The indicator lamp on the button
°
lights up.Activating
Moist air can fog up the windows. You can
dehumidify the air with the air conditioner.
�
Press button
°
again (
�page 151).
The indicator lamp on the button
°
goes out.
The air conditioner uses the refrigerant
R134a. This refrigerant is free of CFCs
which are harmful to the ozone layer.Rear passenger compartment adjust-
able air vents
1Air volume control for center air vents
2Left center air vent, adjustable
3Right center air vent, adjustable
iCondensation may drip out from under-
neath the vehicle. This is normal and
not an indication of a malfunction.
!If the
°
button on the climate con-
trol panel starts to blink, this indicates
that the air conditioner is losing refrig-
erant. The compressor has turned itself
off. The air conditioner cannot be
turned on again.
�
Have the air conditioner checked at
the nearest authorized
Mercedes-Benz Center.
Page 260 of 360

260 Practical hintsWhat to do if …Display
Possible cause
Suggested solution
Category
.
BRAKE LAMP
VISIT WORKSHOP!
Brake lamp illumination is delayed or
lamp is permanently on.
�
Visit an authorized
Mercedes-Benz Light Truck
Center as soon as possible.
2
BRAKE LAMP, L
CHECK LAMP!
The left brake lamp is malfunction-
ing.
�
Visit an authorized
Mercedes-Benz Center as
soon as possible.
2
BRAKE LAMP, R
CHECK LAMP!
The right brake lamp is malfunction-
ing.
�
Visit an authorized
Mercedes-Benz Center as
soon as possible.
2
DISPLAY DEFECTIVE
VISIT WORKSHOP!
The display for the lamps or the sys-
tem is malfunctioning.
�
Visit an authorized
Mercedes-Benz Light Truck
Center as soon as possible.
2
FRONT FOGLAMP, L
CHECK LAMP!
The left front fog lamp is malfunc-
tioning.
�
Replace the bulb as soon as
possible.
2
FRONT FOGLAMP, R
CHECK LAMP!
The right front fog lamp is malfunc-
tioning.
�
Replace the bulb as soon as
possible.
2
HIGH BEAM, L
CHECK LAMP!
The left high beam lamp is malfunc-
tioning.
�
Replace the bulb as soon as
possible.
2
HIGH BEAM, R
CHECK LAMP!
The right high beam lamp is malfunc-
tioning.
�
Replace the bulb as soon as
possible.
2
Page 262 of 360

262 Practical hintsWhat to do if …Display
Possible cause
Suggested solution
Category
.
REAR FOGLAMP
CHECK LAMP!
The rear fog lamp is malfunctioning.
�
Replace the bulb as soon as
possible.
2
REAR FOGLAMP
TURN OFF
SUBSTITUTE LAMP ON!
A lamp is malfunctioning. A backup
bulb is being used.
�
Turn the rear fog lamp off.
2
REVERSE LAMP
CHECK LAMP!
The backup lamp is malfunctioning.
�
Replace the bulb as soon as
possible.
2
RIGHT FRT. PARK LAMP
CHECK LAMP!
SUBSTITUTE LAMP ON!
The right parking lamps are malfunc-
tioning. A backup bulb is being used.
�
Replace the bulb as soon as
possible.
2
SIDE MARKER LAMP, LF
CHECK LAMP!
The left front side marker lamp is
malfunctioning.
�
Replace the bulb as soon as
possible.
2
SIDE MARKER LAMP, RF
CHECK LAMP!
The right front side marker lamp is
malfunctioning.
�
Replace the bulb as soon as
possible.
2
TAIL LIGHT, L
CHECK LAMP!
SUBSTITUTE LAMP ON!
The left tail lamp is malfunctioning. A
backup bulb is being used.
�
Replace the bulb as soon as
possible.
2
TAIL LIGHT, R
CHECK LAMP!
SUBSTITUTE LAMP ON!
The right tail lamp is malfunctioning.
A backup bulb is being used.
�
Replace the bulb as soon as
possible.
2
Page 279 of 360
279 Practical hints
Replacing bulbs
Replacing bulbs
Safe vehicle operation depends on proper
exterior lighting and signaling. It is there-
fore essential that all bulbs and lamp as-
semblies are in good working order at all
times.
Correct headlamp adjustment is extremely
important. Have headlamps checked and
readjusted at regular intervals and when a
bulb has been replaced. See your autho-
rized Mercedes-Benz Light Truck Center
for headlamp adjustment.
Bulbs Front lamps
iBackup bulbs will be brought into use
when the following lamps malfunction:�
Parking lamps
�
Turn signal lamps
�
Tail lamps
Lamp
Type
1
Additional turn sig-
nal lamp
LED
2
S i d e t u r n s i g na l l a m p
WY 5 W
3
Turn signal lamp
1156 NA
4
High and low beam
H4 60 (55 W)
Parking and stand-
ing lamps
T 4 W
5
Side marker lamp
T 4 W
6
Fog lamp
H3 (55 W)