Page 270 of 360
270 Practical hintsWhere will I find ...?Spare wheel
The spare wheel is located under a cover
on the outside of the vehicle’s tailgate.
The spare wheel rim is mounted with a full
size tire of the same type as on the vehicle,
and is fully functional.
For rim and tire specifications, refer to
(�page 313).
Removing cover
1Cover ring
2Key
3Tab
�
Open lock for cover ring1 with key2
for the spare wheel cover.
�
Fold tab3 downwards.
4Cover plate
�
Pull cover ring1 slightly outwards in di-
rection of arrows and remove.
�
Pull cover plate4 upward towards you.5Catch
6Recess
iWhen replacing cover plate4, make
sure that catch5 engages in recess6.
Ensure that the lock faces downwards
when mounting cover ring1.
For safety reasons, check regularly that
the spare wheel is securely fastened.
Page 271 of 360
271 Practical hints
Where will I find ...?
Removing the spare wheel
1Mounting screws�
Unscrew mounting screws1.
�
Remove the spare wheel.Please also refer to the “Flat tire” section
when changing the wheel (
�page 290).
Warning!
G
Make sure that no one is injured when re-
moving the spare wheel.
Grip wheel from the sides.
Keep hands from beneath the wheel.
iAfter changing the wheel, secure the
replaced wheel on the spare wheel car-
rier. Make sure that the wheel cannot
come loose.
Cover the wheel with the cover plate.
Repair or replace damaged tire as soon
as possible and return spare tire as
original spare.
Page 278 of 360
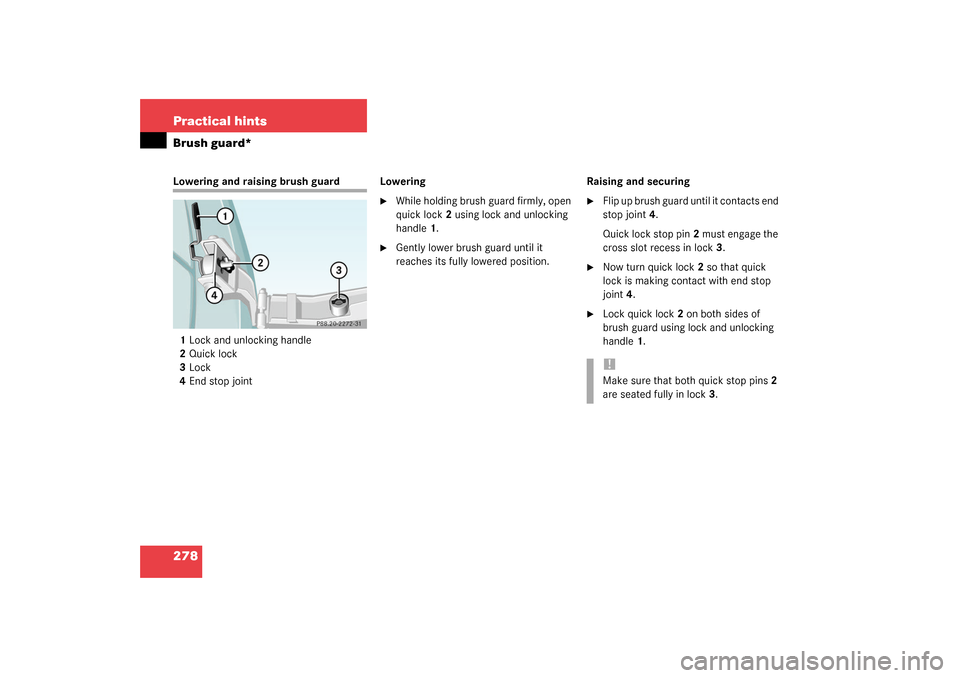
278 Practical hintsBrush guard*Lowering and raising brush guard
1Lock and unlocking handle
2Quick lock
3Lock
4End stop jointLowering
�
While holding brush guard firmly, open
quick lock2 using lock and unlocking
handle1.
�
Gently lower brush guard until it
reaches its fully lowered position.Raising and securing
�
Flip up brush guard until it contacts end
stop joint4.
Quick lock stop pin2 must engage the
cross slot recess in lock3.
�
Now turn quick lock2 so that quick
lock is making contact with end stop
joint4.
�
Lock quick lock2 on both sides of
brush guard using lock and unlocking
handle1.!Make sure that both quick stop pins2
are seated fully in lock3.
Page 281 of 360
281 Practical hints
Replacing bulbs
Replacing bulbs for front lamps
Headlamp assembly (halogen)Removing
Left headlamp, right headlamp laterally re-
versed1Securing screw (trim panel)
2Head lamp trim panel
3Headlamp�
Switch off the lights.
�
Unscrew securing screws1.
�
Remove head lamp trim panel2 and
seal.4Securing screw (headlamp)
�
Unscrew headlamp-securing screws4.
�
Remove headlamp3.
Installing
�
Insert headlamp3 and screw in head-
lamp-securing screws4.
�
Install head lamp trim panel2 and seal
and screw in securing screws1.
iFor vehicles with brush guard*:
Fold the brush guard* down before re-
placing bulbs (
�page 277).
G55AMG:
Remove the protective grille before re-
placing the bulbs.
Page 283 of 360
283 Practical hints
Replacing bulbs
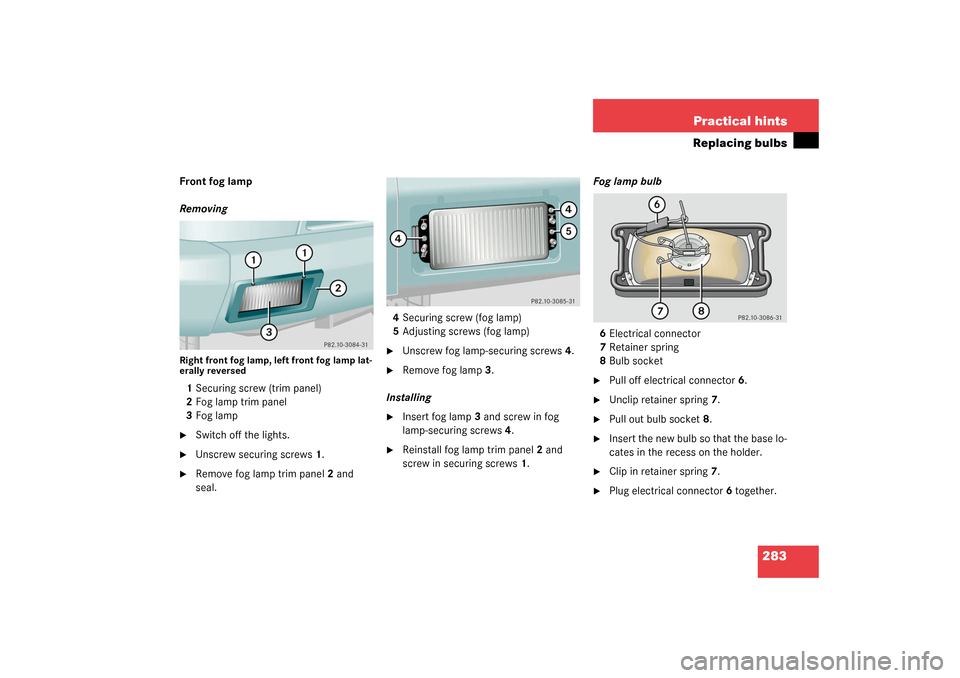
Front fog lamp
RemovingRight front fog lamp, left front fog lamp lat-
erally reversed1Securing screw (trim panel)
2Fog lamp trim panel
3Fog lamp�
Switch off the lights.
�
Unscrew securing screws1.
�
Remove fog lamp trim panel2 and
seal.4Securing screw (fog lamp)
5Adjusting screws (fog lamp)
�
Unscrew fog lamp-securing screws4.
�
Remove fog lamp3.
Installing
�
Insert fog lamp3 and screw in fog
lamp-securing screws4.
�
Reinstall fog lamp trim panel2 and
screw in securing screws1.Fog lamp bulb
6Electrical connector
7Retainer spring
8Bulb socket
�
Pull off electrical connector6.
�
Unclip retainer spring7.
�
Pull out bulb socket8.
�
Insert the new bulb so that the base lo-
cates in the recess on the holder.
�
Clip in retainer spring7.
�
Plug electrical connector6 together.
Page 284 of 360
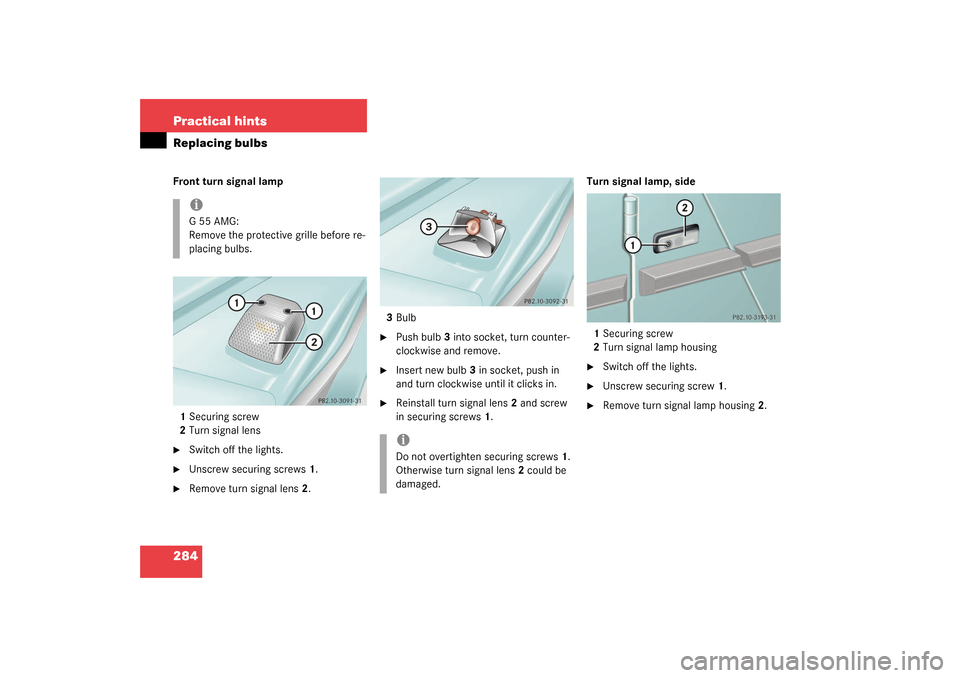
284 Practical hintsReplacing bulbsFront turn signal lamp
1Securing screw
2Turn signal lens�
Switch off the lights.
�
Unscrew securing screws1.
�
Remove turn signal lens2.3Bulb
�
Push bulb3 into socket, turn counter-
clockwise and remove.
�
Insert new bulb3 in socket, push in
and turn clockwise until it clicks in.
�
Reinstall turn signal lens2 and screw
in securing screws1.Turn signal lamp, side
1Securing screw
2Turn signal lamp housing
�
Switch off the lights.
�
Unscrew securing screw1.
�
Remove turn signal lamp housing2.
iG55AMG:
Remove the protective grille before re-
placing bulbs.
iDo not overtighten securing screws1.
Otherwise turn signal lens2 could be
damaged.
Page 285 of 360
285 Practical hints
Replacing bulbs
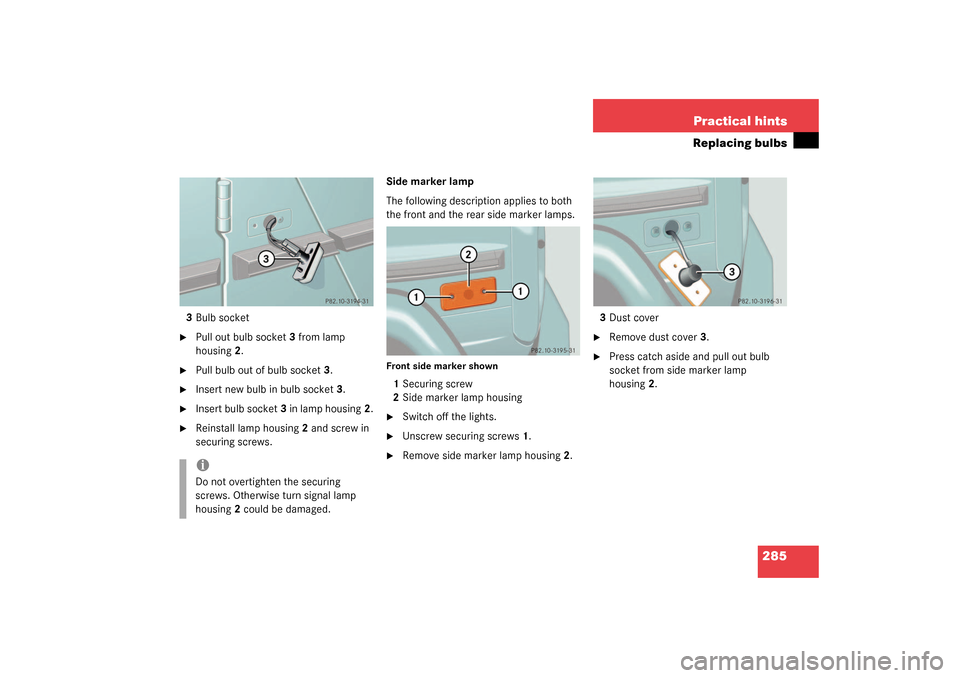
3Bulb socket�
Pull out bulb socket3 from lamp
housing2.
�
Pull bulb out of bulb socket3.
�
Insert new bulb in bulb socket3.
�
Insert bulb socket3 in lamp housing2.
�
Reinstall lamp housing2 and screw in
securing screws.Side marker lamp
The following description applies to both
the front and the rear side marker lamps.
Front side marker shown1Securing screw
2Side marker lamp housing�
Switch off the lights.
�
Unscrew securing screws1.
�
Remove side marker lamp housing2.3Dust cover
�
Remove dust cover3.
�
Press catch aside and pull out bulb
socket from side marker lamp
housing2.
iDo not overtighten the securing
screws. Otherwise turn signal lamp
housing2 could be damaged.
Page 286 of 360
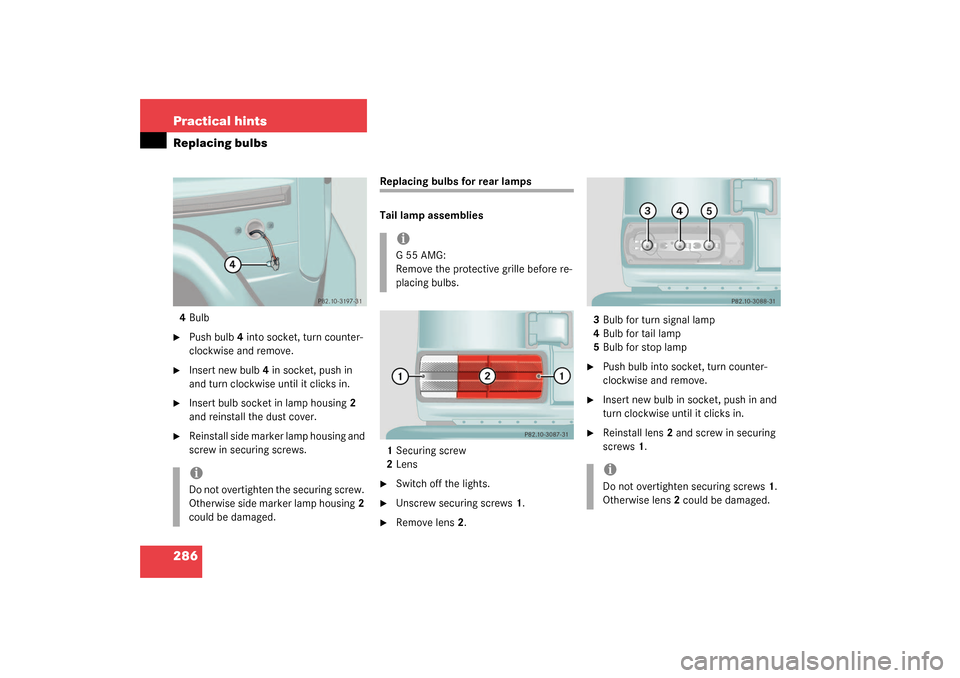
286 Practical hintsReplacing bulbs4Bulb�
Push bulb4 into socket, turn counter-
clockwise and remove.
�
Insert new bulb4 in socket, push in
and turn clockwise until it clicks in.
�
Insert bulb socket in lamp housing2
and reinstall the dust cover.
�
Reinstall side marker lamp housing and
screw in securing screws.
Replacing bulbs for rear lamps
Tail lamp assemblies
1Securing screw
2Lens�
Switch off the lights.
�
Unscrew securing screws1.
�
Remove lens2.3Bulb for turn signal lamp
4Bulb for tail lamp
5Bulb for stop lamp
�
Push bulb into socket, turn counter-
clockwise and remove.
�
Insert new bulb in socket, push in and
turn clockwise until it clicks in.
�
Reinstall lens2 and screw in securing
screws1.
iDo not overtighten the securing screw.
Otherwise side marker lamp housing2
could be damaged.
iG55AMG:
Remove the protective grille before re-
placing bulbs.
iDo not overtighten securing screws1.
Otherwise lens2 could be damaged.


Removing
Left headlamp, right headlamp laterally re-
versed1Securing screw (trim panel)
2Head lamp trim")