Page 105 of 384

105 Controls in detail
Memory function
Memory function
The memory button and stored position
switch are located on the door.
You can store up to three different settings
per SmartKey or KEYLESS-GO* card.
The following settings are saved for each
stored position:�
Driver’s seat and seat backrest posi-
tion
�
Settings for multicontour seat*
�
Steering wheel position
�
Inside rear view mirror position
�
Exterior rear view mirror position
�
Automatic climate control
These key dependent memory settings can
be deactivated if desired (
�page 140).
1, 2, 3 Stored position button
MMemory button
�
Make sure that the ignition is switched
on or the relevant door is open and the
SmartKey is inserted in the starter
switch.
!Prior to operating the vehicle, the driv-
er should check and adjust the seat
height, seat position fore and aft, and
seat backrest angle if necessary, to en-
sure adequate control, reach and com-
fort. The head restraint should also be
adjusted for proper height. Also see
“Airbag” section (
�page 55) for proper
seat positioning.
In addition, adjust the steering wheel to
ensure adequate control, reach, opera-
tion and comfort. Both the inside and
outside rear view mirrors should be ad-
justed for adequate rear vision.
Fasten seat belts. Infants and small
children should be seated in a properly
secured restraint system that complies
with U.S. Federal Motor Vehicle Safety
Standards 213 and 225 and Canadian
Motor Vehicle Safety Standards 213
and 210.2.
Warning!
G
Do not activate the memory function while
driving. Activating the memory function
while driving could cause the driver to lose
control of the vehicle.
Page 107 of 384

107 Controls in detail
Memory function
Storing exterior rear view mirror park-ing position
For easier parking you can adjust the pas-
senger exterior rear view mirror so that you
can see the right rear wheel as soon as you
engage reverse gearR.
For information on activating the parking
position, see “Setting parking position for
exterior rear view mirror” (
�page 142).The buttons are located on the driver’s
door.
1Exterior rear view mirror
2Adjustment button
MMemory button
�
Stop the vehicle.
�
Switch ignition on (if not already on).
�
Press button1.
The passenger-side exterior rear view
mirror is selected.
�
Adjust the exterior rear view mirror
with button2 so that you see the rear
wheel and the road curb.
�
Press memory button M.
�
Within three seconds, press bottom of
adjustment button2.
The parking position is stored if the
mirror does not move.
iYou can store a parking position for the
passenger-side exterior rear view mir-
ror for each key or KEYLESS-GO* card.
iIf the mirror does move, repeat the
above steps. After the setting is stored
you can move the mirror again.
Page 138 of 384

138 Controls in detailControl systemYou can temporarily deactivate the de-
layed shut-off feature:�
Before leaving the vehicle, turn the key
in the starter switch to position0.
�
Turn the key in the starter switch to
position2 and back to0.
The delayed shut-off feature is deacti-
vated. It will reactivate as soon as you
reinsert the key in the starter switch.
Vehicles with KEYLESS-GO*:
�
Press the KEYLESS-GO start/stop but-
ton on the gear selector lever
(�page 33).Interior lighting delayed shut-off
Use this function to set whether and for
how long you would like the interior light-
ing to remain lit during darkness after the
key is removed from the starter switch.
�
Move the selection marker with
the
æ
or
ç
button to the
LIGHT-
ING
submenu.
�
Press button
j
or
k
repeatedly
until you see this message in the dis-
play:
INT. LIGHTING DELAYED
SHUT-OFF
.
The selection marker is on the current
setting.
�
Press
æ
or
ç
to select the de-
sired lamp-on time period. You can se-
lect:
�
0 S
, the delayed shut-off feature is
deactivated.
�
5 S,
10 S
, 15 S,
or
20 S
, the de-
layed shut-off feature is activated.
Page 147 of 384

147 Controls in detail
Automatic transmission
Program mode selector switch
1Program mode selector switch
S Sport For standard driving
C Comfort For comfort driving
�
Press the program mode selector
switch repeatedly until the letter of the
desired shift program appears in the ta-
chometer display (
�page 22).
Select Cfor comfort driving:
�
The vehicle starts out in second
gear (both forward and reverse) for
gentler starts. This does not apply if
full throttle is applied or gear
range1 is selected.
�
Traction and driving stability are im-
proved on icy roads.
�
Upshifts occur earlier even when
you give more gas. The engine then
operates at lower rpms and the
wheels are less likely to spin.
�
The power transmission ratio for se-
lector lever positionR changes de-
pending on the program mode
selected (C or S).
Warning!
G
When leaving the vehicle, always remove the
key from the starter switch, take the
KEYLESS-GO* card with you and lock the ve-
hicle. Do not leave children unattended in
the vehicle, or with access to an unlocked
vehicle. Children could move the selector le-
ver from positionP, which could result in an
accident and / or serious personal injury.
!Never change the program mode when
the selector lever is out of positionP.
This could result in a change of driving
characteristics for which you may not
be prepared.
Page 156 of 384
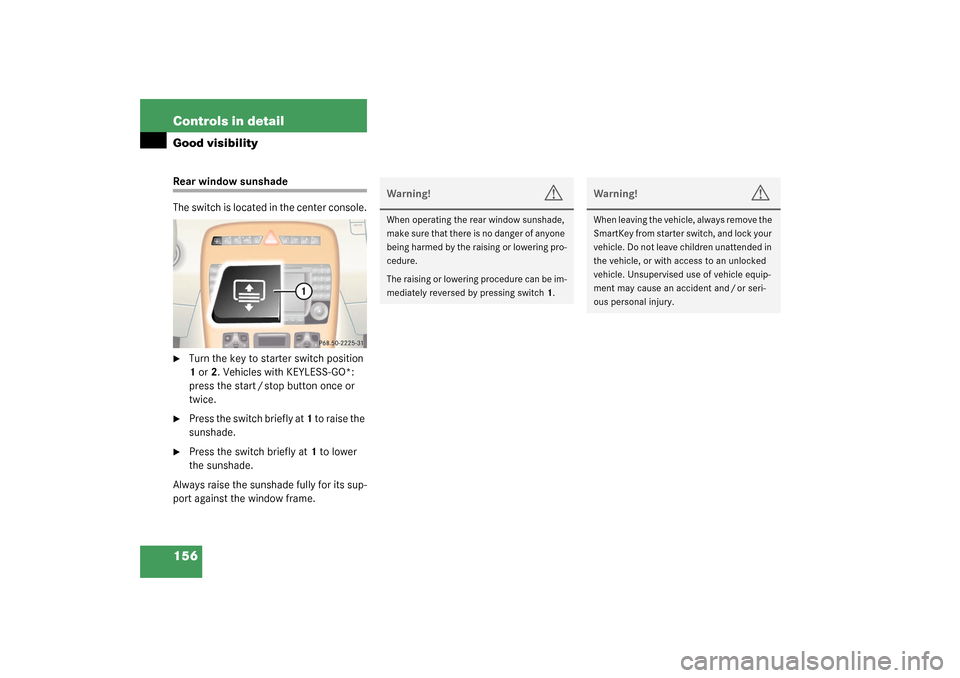
156 Controls in detailGood visibilityRear window sunshade
The switch is located in the center console.�
Turn the key to starter switch position
1 or 2. Vehicles with KEYLESS-GO*:
press the start / stop button once or
twice.
�
Press the switch briefly at 1 to raise the
sunshade.
�
Press the switch briefly at 1 to lower
the sunshade.
Always raise the sunshade fully for its sup-
port against the window frame.
Warning!
G
When operating the rear window sunshade,
ma ke s ur e th at t h ere is no dan ge r o f an y on e
being harmed by the raising or lowering pro-
cedure.
The raising or lowering procedure can be im-
mediately reversed by pressing switch1.
Warning!
G
When leaving the vehicle, always remove the
SmartKey from starter switch, and lock your
vehicle. Do not leave children unattended in
the vehicle, or with access to an unlocked
vehicle. Unsupervised use of vehicle equip-
ment may cause an accident and / or seri-
ous personal injury.
Page 160 of 384

10for the left side or8 for the right side to
separately adjust the air temperature on")
160 Controls in detailAutomatic climate control
Setting the temperature
Use temperature controls (
�page 159)
10for the left side or8 for the right side to
separately adjust the air temperature on
each side of the passenger compartment.
You should raise or lower the temperature
setting in small increments, preferably
starting at 72°F (22°C).
Increasing / decreasing
�
Press button 10 or 8 repeatedly up or
down until the display shows the de-
sired temperature.
The automatic climate control system
will accordingly adjust the interior air
temperature.Adjusting the temperature for center
air vents
When outside temperatures are low, you
can manually raise the air temperature for
the center and side air vents. The
thumbwheel4 is located between the cen-
ter air vents (
�page 157).
Automatic temperature control
�
Turn thumbwheel 4 to A.
The indicator lamp above the thumb-
wheel lights up. The temperature is au-
tomatically adjusted to the set value.
Turning on warm air
�
Turn thumbwheel4 in the direction of
the white marking.
Warm air will enter from the center air
vent.
iThe current climate control settings
(ON / OFF, temperature, air volume, ac-
tivated charcoal filter, etc.) are stored
for each electronic key before it is re-
moved from the starter switch or when
the vehicle is locked using the
KEYLESS-GO* card (
�page 105).
If the vehicle interior is hot, ventilate
the interior before driving off.
Keep the air intake grille in front of the
windshield free of snow, leaves, sticks
and any other debris.
Do not obstruct air volume by placing
objects on the air volume-through ex-
haust slots below the rear window.
iWhen operating the climate control
system in automatic mode, you will
only rarely need to adjust the tempera-
ture, air volume and air distribution.
Page 169 of 384

169 Controls in detail
Power windows
Power windows
Opening and closing the windows
The side windows can be opened and
closed electrically. The switches for all the
side windows are on the driver’s door. The
switches for the respective windows are
on the passenger door and on the rear cen-
ter console.
1Left front window
2Right front window
3Right rear window
4Left rear windowAdditional switches for the rear windows
are located on the rear center console.
1Left rear window
2Right rear window
Warning!
G
When closing the windows, make sure that
there is no danger of anyone being harmed
by the closing procedure.
The closing of the door windows can be im-
mediately halted by releasing the switch or,
if switch was pressed past the resistance
point and released, by pressing the respec-
tive switch.
If the window encounters an obstruction
t h a t b l o c k s i t s p a t h i n a c i r c u m s t a n c e w h e r e
you pressed the switch past the resistance
point and released it to close the window,
the automatic reversal function will stop the
window and open it slightly.
If the window encounters an obstruction
t h a t b l o c k s i t s p a t h i n a c i r c u m s t a n c e w h e r e
you are closing the window by pressing and
holding the switch, by pressing and holding
button
‹
on the SmartKey, or by press-
ing and holding the lock button
(vehicles with KEYLESS-GO*) on the door
handle, the automatic reversal function will
not operate.
When leaving the vehicle, always remove the
key from starter switch, take the SmartKey
with KEYLESS-GO* with you, and lock your
vehicle. Do not leave children unattended in
the vehicle, or with access to an unlocked
vehicle. Unsupervised use of vehicle equip-
ment can cause an accident and/or serious
personal injury.
Page 172 of 384
 until the side windows and
the sliding / pop-up")
172 Controls in detailPower windowsClosing the side windows and sliding /
pop-up roof with KEYLESS-GO*�
Press and hold lock button at door
(�page 52) until the side windows and
the sliding / pop-up roof are closed.
Synchronizing power windows
The power windows must be resynchro-
nized each time after the battery has been
disconnected:�
Push the power window switches until
the side windows are closed and hold
the switches for approximately one
second.
Warning!
G
When closing the windows and the sliding /
pop-up roof, make sure that there is no dan-
ger of anyone being harmed by the closing
procedure.
The windows will not automatically re-open
if blocked during convenience closing.
If potential danger exists, proceed as fol-
lows:
SmartKey�
Release the
‹
button.
�
Press and hold the
Œ
button until
the windows and the sliding / pop-up
roof open again.
KEYLESS-GO*
�
Release the lock button.
�
Pull on the door handle and hold firmly.
The side windows and the
sliding / pop-up roof will open for as long
as the door handle is held but the door
not opened.