Page 117 of 225
109 Telephone
Service numbers
�
Turn the right-hand rotary/push-button
v to highlight “Change 1” in the
“Service No.” menu and press to con-
firm.
The “Change Service No. 1” menu will
appear.
�
Enter the new service number with
number keys 1 through 0.
�
Press the right-hand rotary/push-
button v to confirm the service num-
ber.
The new service number is now stored
in the “Service No.” menu.
Returning to the menu “Service No.”
The menu “Service No.” will appear auto-
matically after 7 seconds
or
�
Press *.
Changing personal service numberTEL Change Service No. 1Please enter the
new personal
service number:
1800_
OK
P82.85-9421-31US
iPressing the right-hand rotary/push-
button v and inserting an empty input
line will delete the personal service
number.
Page 118 of 225
110 TelephoneService numbers�
Turn the right-hand rotary/push-button
v to highlight “Change 2” in the
“Service No.” menu and press to con-
firm.
The “Change Service No. 2” country list
will appear.Select a new country service number from
the list
�
Turn the right-hand rotary/push-button
v to highlight the country abbreviati-
on you want and press to confirm.
The new service number is now stored
in the “Service No.” menu.
Returning to the menu “Service No.”
The menu “Service No.” will appear auto-
matically after 7 seconds
or
�
Press *.
Changing the number for Roadside
AssistanceTEL Change Service No. 2USA
CAN
1800 2220100
1800 3870100
P82.85-9422-31US
Page 121 of 225

113 Navigation
Important notes
Warning
G
The CD reader contains a Class 1 laser pro-
duct. There is a danger of invisible laser ra-
diation if the cover is opened or damaged.
Do not remove the cover. The CD reader
does not contain any parts which can be ser-
viced by the user. For safety reasons, have
any service work which may be necessary
performed only by an authorized
Mercedes-Benz Center.
!COMAND calculates the route with the
help of data that is stored on the navi-
gation CD.
Only use Mercedes-Benz navigation
CDs. Using other navigation CDs might
lead to malfunctions.
Because of changes in local traffic pat-
terns (e.g. road works) and/or incom-
plete data, errors in calculation may
occur.
As a result, the recommended route
may deviate from the ideal route. The
data stored on the CD only reflects lo-
cal conditions at the time of CD pro-
duction. CD maps do not cover all
areas nor all routes within an area.
iThe CD drive can read navigation CDs
and playback audio CDs.
If an audio CD is in the CD drive and
b is pressed, the message “No CD
available. Insert NAVI-CD type DX only”
will be displayed.�
Remove the audio CD and insert a
navigation CD (
�page 119).
Page 125 of 225

117 Navigation
Quick reference
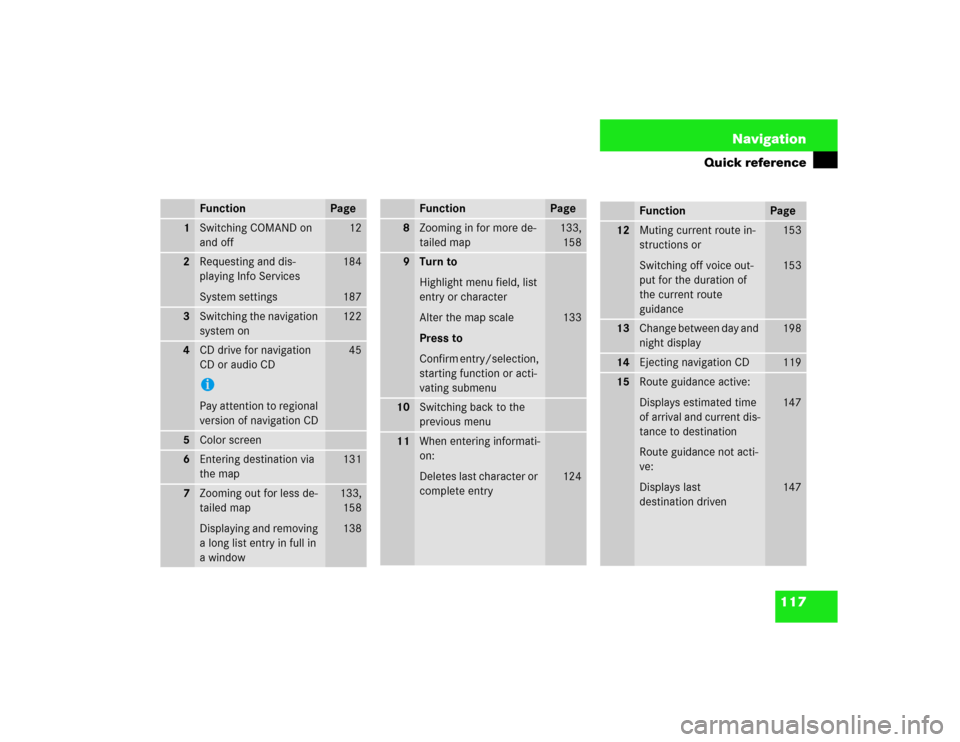
Function
Page
1
Switching COMAND on
and off
12
2
Requesting and dis-
playing Info Services
System settings
184
187
3
Switching the navigation
system on
122
4
CD drive for navigation
CD or audio CDiPay attention to regional
version of navigation CD
45
5
Color screen
6
Entering destination via
the map
131
7
Zooming out for less de-
tailed map
Displaying and removing
a long list entry in full in
a window
133,
158
138
8
Zooming in for more de-
tailed map
133,
158
9
Turn to
Highlight menu field, list
entry or character
Alter the map scale
Press to
Confirm entry/selection,
starting function or acti-
vating submenu
133
10
Switching back to the
previous menu
11
When entering informati-
on:
Deletes last character or
complete entry
124
Function
Page
Function
Page
12
Muting current route in-
structions or
Switching off voice out-
put for the duration of
the current route
guidance
153
153
13
Change between day and
night display
198
14
Ejecting navigation CD
119
15
Route guidance active:
Displays estimated time
of arrival and current dis-
tance to destination
Route guidance not acti-
ve:
Displays last
destination driven
147
147
Page 191 of 225
183
Info Services/System settings
Info Services*
System settings
Auxiliary audio source
Page 192 of 225

184 Info Services/System settingsInfo Services*
� Info Services*In chapter “Info Services/System set-
tings” you will find detailed information on
the following topics:�
Requesting and displaying Info Services
�
Adjusting the brightness
�
Selecting the language for the menu
text displays and the voice output
�
Setting the date and time
�
Selecting beep tones
�
Setting the display dimming characteri-
stics (day and night display)
�
Resetting all settings to the factory set-
tings
�
Switching an auxiliary audio source on
and offIf you have not done so already, please fa-
miliarize yourself with these functions by
reading the chapter “At a glance”
(
�page 6).
When you subscribe to Info Services, you
can download information directly to your
COMAND. You can select from news, wea-
ther, sports, stocks, and calendar remin-
ders.
To personalize your selections visit
�
www.MBUSA.com or call
�
1-800-FOR-MERCedes.
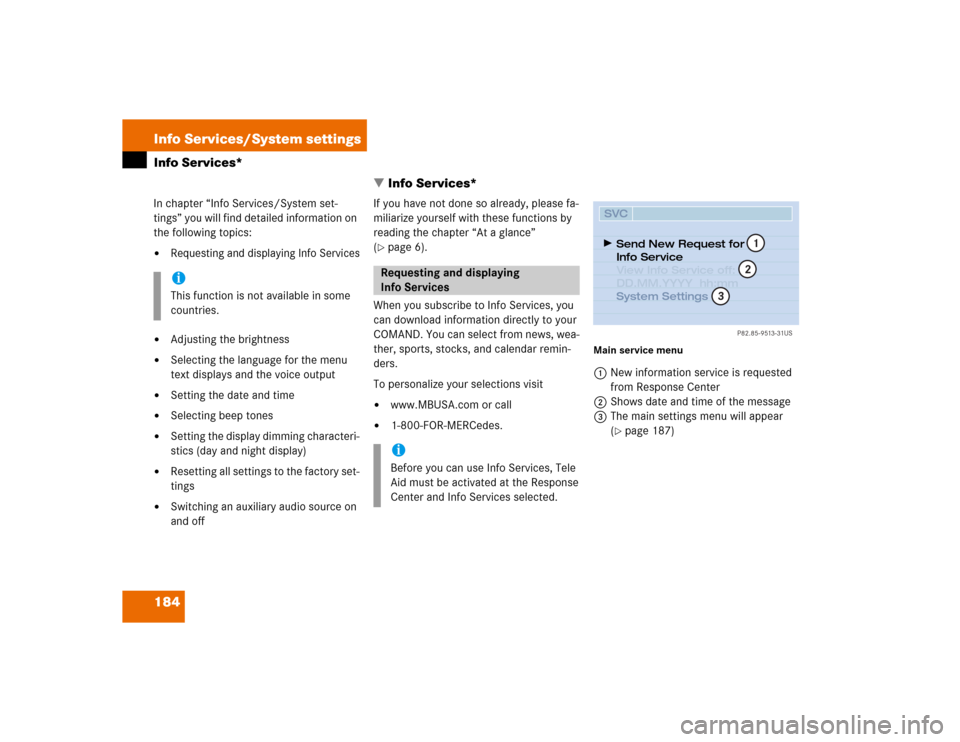
Main service menu1New information service is requested
from Response Center
2Shows date and time of the message
3The main settings menu will appear
(
�page 187)
iThis function is not available in some
countries.
Requesting and displaying
Info ServicesiBefore you can use Info Services, Tele
Aid must be activated at the Response
Center and Info Services selected.
P82.85-9513-31US
SVCSend New Request for
Info Service
System Settings View Info Service off:
DD.MM.YYYY hh:mm
12
3
Page 193 of 225
185 Info Services/System settings
Info Services*
�
Press ( in any menu.
The main service menu will appear.
�
Press the right-hand rotary/push-
button v to confirm 1.
New information service is requested
from the Response Center.4This message appears
5Cancels the requestYou will hear a beep tone if there is a new
incoming message.
There are three ways to cancel the request
and switch to a main menu, e.g. radio main
menu:
�
Press the right-hand rotary/push-
button v and confirm “Cancel”.
�
Press *.
or
�
Automatically after 15 seconds.
iThe characters are displayed in light
grey
In 1 During an active request trans-
mission
In 2 If no information is available
P82.85-9514-31US
SVCConnect. counter since
01. 01. 02 reset?
037 Connections
New Info Service
Request Transmitted
Cancel
4
5
Page 194 of 225

186 Info Services/System settingsInfo Services*
iIf information cannot be retrieved, one
of the following messages will be dis-
played:�
“Data Connection Cannot be Estab-
lished”
Request has failed because Re-
sponse Center cannot be accessed.
Try again later.
�
“No Cellular Connection Available”
Vehicle may be in a cellular weak si-
gnal area. Try again later.
�
“Cellular System Busy”
Request has failed because cellular
system is busy. Try again later.
�
“Data transmission failure”
Request has failed because a data
transfer error has occured. Try again
later.
i�
“Tele Aid Call in Progress”
Request has failed because SOS or
Roadside Assistance call is in pro-
gress.
�
“Tele Aid. Please visit workshop”
A hardware error has been detected.
Contact your Mercedes-Benz Cen-
ter.
�
“To subscribe to information ser-
vices dial phone number”
You have not yet subscribed to ser-
vice.
�
“No information available at this ti-
me. Press SVC.”
No new information is available.
Warning
G
A driver’s attention to the road must always
be his/her primary focus when driving.
For your safety and the safety of others, we
recommend that you pull over to a safe loca-
tion and stop the vehicle before requesting
or receiving any info services.