Page 274 of 370
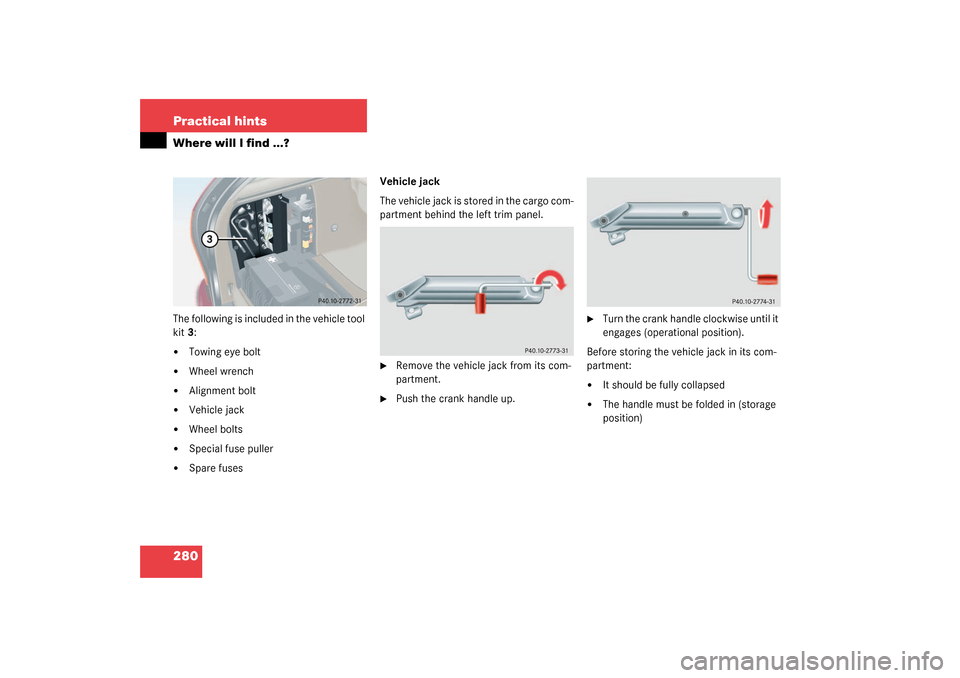
280 Practical hintsWhere will I find ...?The following is included in the vehicle tool
kit3:�
Towing eye bolt
�
Wheel wrench
�
Alignment bolt
�
Vehicle jack
�
Wheel bolts
�
Special fuse puller
�
Spare fusesVehicle jack
The vehicle jack is stored in the cargo com-
partment behind the left trim panel.
�
Remove the vehicle jack from its com-
partment.
�
Push the crank handle up.
�
Turn the crank handle clockwise until it
engages (operational position).
Before storing the vehicle jack in its com-
partment:
�
It should be fully collapsed
�
The handle must be folded in (storage
position)
S203 MY03_A.book Page 280 Tuesday, January 28, 2003 2:22 PM
Page 275 of 370

281 Practical hints
Where will I find ...?
Spare wheel
Your vehicle is equipped with either a
spare wheel with full size tire or a Mini-
spare wheel. Full size spare tire has mark-
ing “205/55 R16” on sidewall. Minispare
has marking “T125/90 R16” on sidewall.
Identify the spare tire in your vehicle and
follow appropriate instructions.
Vehicles with full size tire spare wheel
The spare wheel is located under the cargo
floor.�
Open storage compartment under car-
go floor (
�page 197).1Spare wheel
2Luggage bowl
Removing the spare wheel
�
Turn luggage bowl2 counterclockwise.
�
Remove spare wheel1.
Storing the spare wheel
�
Place spare wheel1 in wheel well.
�
Turn luggage bowl2 clockwise to its
stop to secure the spare wheel.
Warning!
G
The jack is designed exclusively for jacking
up the vehicle at the jack take-up brackets
built into both sides of the vehicle. To help
avoid personal injury, use the jack only to lift
the vehicle during a wheel change. Never
get beneath the vehicle while it is supported
by the jack. Keep hands and feet away from
the area under the lifted vehicle. Always
firmly set parking brake and block wheels
before raising vehicle with jack.
Do not disengage parking brake while the
vehicle is raised. Be certain that the jack is
always vertical (plumb line) when in use, es-
pecially on hills. Always try to use the jack
on level surface. Make sure that the jack
arm is fully seated in the jack take-up brack-
et. Always lower the vehicle onto sufficient
capacity jackstands before working under
the vehicle.
S203 MY03_A.book Page 281 Tuesday, January 28, 2003 2:22 PM
Page 277 of 370

283 Practical hints
Where will I find ...?
3Arrow
4Minispare wheel
5Luggage bowl�
Remove luggage bowl5.
�
Remove Minispare wheel4.Storing the Minispare wheel
�
Place Minispare wheel4 in wheel well.
�
Place luggage bowl5 in Minispare
wheel.
�
Place storage well casing2 and turn
the retaining screw1 clockwise as far
as it will go to secure the Minispare
wheel.
In the case of a flat tire, you may tempo-
rarily use the Minispare wheel when ob-
serving the following restrictions:
�
Do not exceed a vehicle speed of
50 mph (80 km/h).
�
Drive to the nearest tire repair facility
to have the flat tire repaired or re-
placed as appropriate.
�
Do not operate vehicle with more than
one Minispare wheel mounted.
More information can be found in the
“Technical data” section (
�page 317).
iThe arrow3 on luggage bowl5 must
point in the direction of travel, other-
wise you cannot place the storage well
casing on top and secure the Minispare
wheel with the retaining screw.
Warning!
G
The dimensions of the Minispare wheel are
different from those of the road wheels. As
a result, the vehicle handling characteristics
change when driving with a Minispare wheel
mounted.
The spare wheel should only be used tempo-
rarily, and replaced with a regular road
wheel as quick as possible.
S203 MY03_A.book Page 283 Tuesday, January 28, 2003 2:22 PM
Page 279 of 370
285 Practical hints
Unlocking/locking in an emergency
Unlocking/locking in an emergency
Unlocking the vehicle
Unlocking the driver’s door
If you are unable to unlock the driver’s
door using the SmartKey, open the door
using the mechanical key.
1Mechanical key locking tab
2Mechanical key
�
Move locking tab1 in direction of ar-
row and slide the mechanical key out of
the housing.3Unlocking
4Locking
�
Unlock the door with the mechanical
key. To do so, push the mechanical key
in the lock until it stops and turn it to
the left3.
iUnlocking your vehicle with the me-
chanical key will trigger the anti-theft
alarm system. To cancel the alarm, do
one of the following:�
Press button
Œ
or
‹
on the
SmartKey
�
Insert the key in the starter switch
S203 MY03_A.book Page 285 Tuesday, January 28, 2003 2:22 PM
Page 280 of 370
286 Practical hintsUnlocking/locking in an emergencyUnlocking the tailgate
If you are unable to unlock the tailgate with
the key, you can use the emergency re-
lease on the inside of the tailgate to unlock
it.
1 Release lever
2Cover
�
Remove cover2 from the trim on the
tailgate.
�
Push release lever1 all the way to the
right.
�
Open the tailgate.
Locking the vehicle
If you are unable to lock the vehicle with
the SmartKey, lock it with the mechanical
key as follows:�
Close the passenger doors and the tail-
gate.
�
Press the central locking switch in the
cockpit (
�page 89).
�
Check to see whether the locking
knobs on the passenger doors are still
visible. If necessary push them down
manually.
�
Lock the driver’s door with the me-
chanical key.
!The tailgate swings open upwards. Al-
ways make sure that there is sufficient
overhead clearance.
S203 MY03_A.book Page 286 Tuesday, January 28, 2003 2:22 PM
Page 281 of 370
287 Practical hints
Unlocking/locking in an emergency
Changing batteries
If the batteries in the SmartKey are dis-
charged, the vehicle can no longer be
locked or unlocked. It is recommended to
have the batteries replaced at an autho-
rized Mercedes-Benz Center.Batteries contain materials that can harm
the environment if disposed of improperly.
Recycling of batteries is the preferred
method of disposal. Many states require
sellers of batteries to accept old batteries
for recycling.SmartKey
1Mechanical key
2Battery compartment
Replacement batteries: Lithium, type
CR 2025 or equivalent.Warning!
G
Keep the batteries out of reach of children.
If a battery is swallowed, seek medical help
immediately.
iWhen changing batteries, always re-
place both batteries.
The required replacement batteries are
available at any Mercedes-Benz
Center.
S203 MY03_A.book Page 287 Tuesday, January 28, 2003 2:22 PM
Page 282 of 370
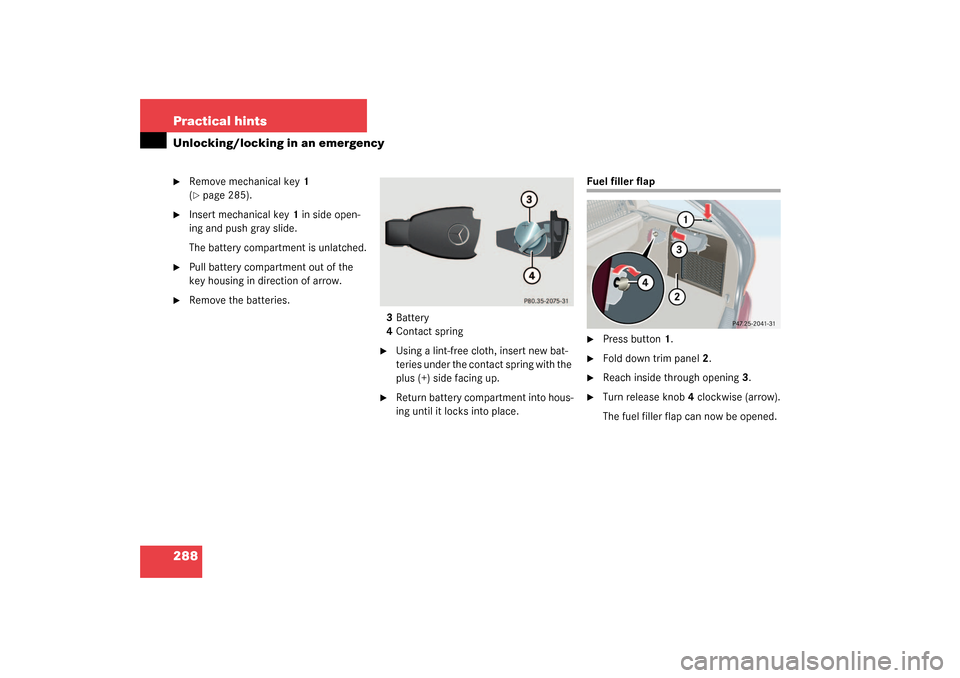
288 Practical hintsUnlocking/locking in an emergency�
Remove mechanical key1
(�page 285).
�
Insert mechanical key1 in side open-
ing and push gray slide.
The battery compartment is unlatched.
�
Pull battery compartment out of the
key housing in direction of arrow.
�
Remove the batteries.
3Battery
4Contact spring
�
Using a lint-free cloth, insert new bat-
teries under the contact spring with the
plus (+) side facing up.
�
Return battery compartment into hous-
ing until it locks into place.
Fuel filler flap�
Press button1.
�
Fold down trim panel2.
�
Reach inside through opening3.
�
Turn release knob4 clockwise (arrow).
The fuel filler flap can now be opened.
S203 MY03_A.book Page 288 Tuesday, January 28, 2003 2:22 PM
Page 283 of 370
289 Practical hints
Unlocking/locking in an emergency
Manually unlocking the transmission selector lever
In the case of power failure the transmis-
sion selector lever can be manually un-
locked, e.g. to tow the vehicle.�
Open the storage compartment in front
of the center armrest.
�
Release coin holder1 (e.g. using a
small coin).
�
Swing coin holder1 aside.
�
Insert a tool2 (e.g. the screwdriver)
into the opening.
�
Perform the following two steps simul-
taneously:�
Push the tool down.
�
Move selector lever from
positionP.
�
Reinstall the coin holder after removing
the tool from the opening.iThe selector lever is locked again when
moving it to positionP.
S203 MY03_A.book Page 289 Tuesday, January 28, 2003 2:22 PM