Page 194 of 370

200 Controls in detailLoading�
Pull release handle4 on the left or right
backrest as required.
�
Fold the rear seat backrests5 forward.Folding the backrest rearward
�
Fold the backrest5 rearward until it
engages.
�
Fold the seat cushions2 rearward until
they lock into position.If the backrest is not locked into position,
a red indicator6 will be visible.
�
Check for secure locking by pushing
and pulling on the backrest.
iWith the twin-reel roller blind installed: �
When folding the backrest forward,
fold the right section first and then
the left section.
�
If only the left section is to be fold-
ed, first remove the twin-reel roller
blind (
�page 198).
Warning!
G
If a red indicator is visible with the backrest
up, then the backrest is not properly locked
into position.
Always lock backrest in its upright position
when rear seat bench is occupied, or the ex-
tended cargo compartment is not in use.
Check for secure locking by pushing and
S203 MY03_A.book Page 200 Tuesday, January 28, 2003 2:22 PM
Page 195 of 370

201 Controls in detail
Loading
Loading instructions
The total load weight including vehicle oc-
cupants and luggage/cargo should not ex-
ceed the vehicle capacity weight indicated
on the certification tag which can be found
on the left door pillar.
The handling characteristics of a fully load-
ed vehicle depend greatly on the load dis-
tribution. It is therefore recommended to
load the vehicle according to the illustra-
tions shown, with the heaviest items being
placed towards the front of the vehicle.
Always place items being carried against
front or rear seat backrests, and fasten
them as securely as possible.The heaviest portion of the cargo should al-
ways be kept as low as possible since it in-
fluences the handling characteristics of
the vehicle.
pulling on the backrest.
In an accident, during hard braking or sud-
den maneuvers, loose items will be thrown
around inside the vehicle, and cause injury
to vehicle occupants unless the items are
securely fastened in the vehicle.
To help avoid personal injury during a colli-
sion or sudden maneuver, exercise care
when transporting cargo.
Warning!
G
Always fasten items being carried as secure-
ly as possible.
In an accident, during hard braking or sud-
den maneuvers, loose items will be thrown
around inside the vehicle and can cause in-
jury to vehicle occupants unless the items
are securely fastened in the vehicle.
To help avoid personal injury during a colli-
sion or sudden maneuver, exercise care
when transporting cargo.
Never drive vehicle with tailgate open.
Deadly carbon monoxide (CO) gases may
enter vehicle interior resulting in uncon-
sciousness and death.
S203 MY03_A.book Page 201 Tuesday, January 28, 2003 2:22 PM
Page 197 of 370

203 Controls in detail
Useful features
Useful features
Interior storage spaces Glove box
1Glove box lid release
2Glove box
Opening the glove box
�
Pull lid release1.
The glove box lid opens downward.
Closing the glove box
�
Push lid up to close.Locking the glove box
�
Insert mechanical key into the glove
box lock and turn it to position2.
Unlocking the glove box
�
Turn mechanical key in the glove box
lock to position1.
Warning!
G
To help avoid personal injury during a colli-
sion or sudden maneuver, exercise care
when stowing objects in the vehicle. Put lug-
gage or cargo in the cargo compartment if
possible. Do not pile luggage or cargo higher
than the seat backs.
Always use partition net when transporting
cargo. Partition net cannot secure hard or
heavy objects.
Parcel nets cannot secure hard or heavy ob-
jects.
Keep compartment lids closed. This will help
to prevent stored objects from being thrown
about and injuring vehicle occupants during
an accident.
iPrior to closing the glove box, close the
compartment for glasses first.
S203 MY03_A.book Page 203 Tuesday, January 28, 2003 2:22 PM
Page 198 of 370
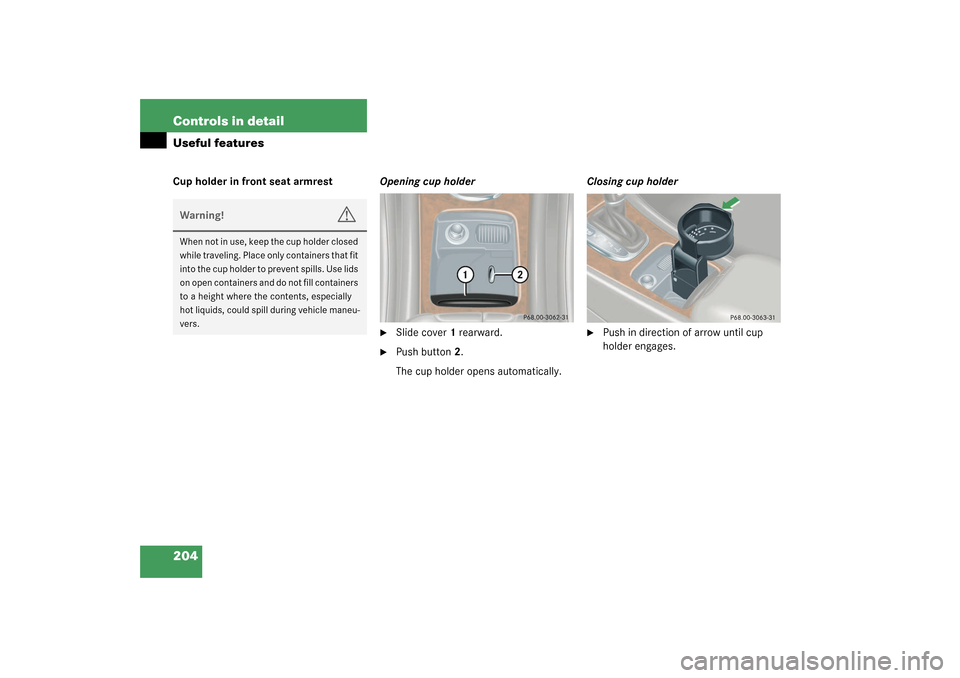
204 Controls in detailUseful featuresCup holder in front seat armrestOpening cup holder
�
Slide cover1 rearward.
�
Push button2.
The cup holder opens automatically.Closing cup holder
�
Push in direction of arrow until cup
holder engages.
Warning!
G
When not in use, keep the cup holder closed
while traveling. Place only containers that fit
into the cup holder to prevent spills. Use lids
on open containers and do not fill containers
to a height where the contents, especially
hot liquids, could spill during vehicle maneu-
vers.
S203 MY03_A.book Page 204 Tuesday, January 28, 2003 2:22 PM
Page 199 of 370
205 Controls in detail
Useful features
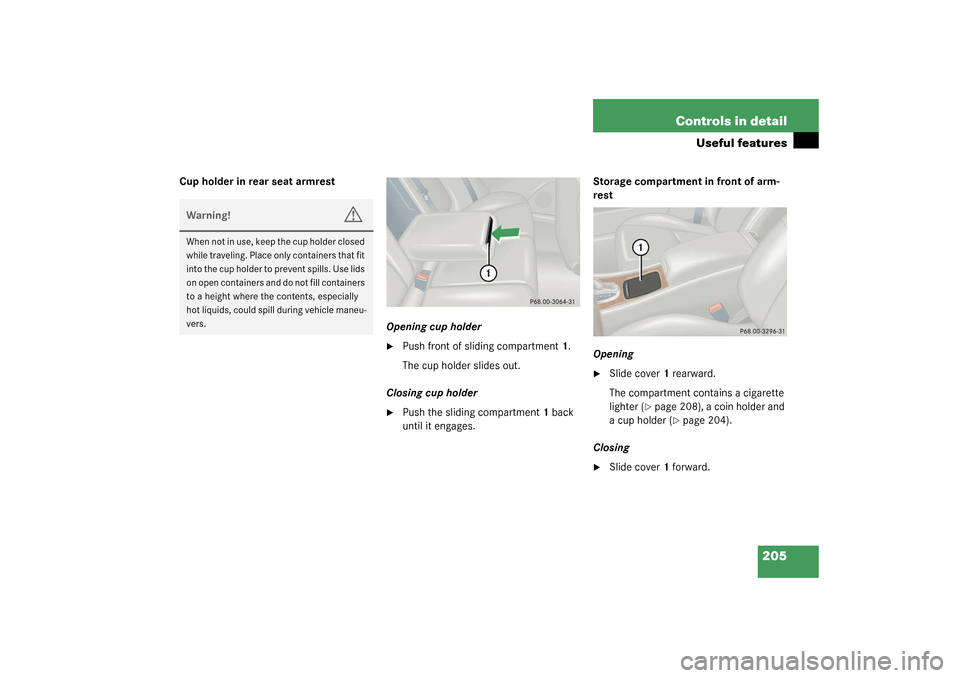
Cup holder in rear seat armrest
Opening cup holder
�
Push front of sliding compartment1.
The cup holder slides out.
Closing cup holder
�
Push the sliding compartment1 back
until it engages.Storage compartment in front of arm-
rest
Opening
�
Slide cover1 rearward.
The compartment contains a cigarette
lighter (
�page 208), a coin holder and
a cup holder (
�page 204).
Closing
�
Slide cover1 forward.
Warning!
G
When not in use, keep the cup holder closed
while traveling. Place only containers that fit
into the cup holder to prevent spills. Use lids
on open containers and do not fill containers
to a height where the contents, especially
hot liquids, could spill during vehicle maneu-
vers.
S203 MY03_A.book Page 205 Tuesday, January 28, 2003 2:22 PM
Page 201 of 370

207 Controls in detail
Useful features
Ashtrays
Center console ashtray
Opening ashtray�
Briefly touch cover plate1.
The ashtray opens automatically.Removing ashtray insert
�
Secure vehicle from movement by set-
ting the parking brake. Move the selec-
tor lever to positionN.
Now you have more room to take out
the insert.
�
Slide ashtray insert in direction of
arrow2 until it disengages.
�
Grip ashtray at indents (arrows3) and
remove insert from ashtray frame.
Reinstalling the ashtray insert
�
Install insert by pushing back into
frame until it engages again.Rear seat ashtray
Opening ashtray
�
Pull at top of cover1 to open ashtray.
Removing ashtray insert
�
Press latch2 to disengage ashtray in-
sert and remove it.
Reinstalling the ashtray insert
�
Install ashtray insert.
�
Close the ashtray.
Warning!
G
Remove front ashtray only with vehicle
standing still. Set the parking brake to se-
cure vehicle from movement. Move gear se-
lector lever to positionN. With gear selector
lever in positionN, turn off the engine.
S203 MY03_A.book Page 207 Tuesday, January 28, 2003 2:22 PM
Page 246 of 370

252 OperationVehicle careHard plastic trim items
Pour Mercedes-Benz approved Interior
Care onto soft lint-free cloth and apply
with light pressure.
Headliner
Clean with soft bristle brush, or use a
dry-shampoo cleaner in case of excessive
dirt.
Seat belts
The webbing must not be treated with
chemical cleaning agents. Use only clear,
lukewarm water and soap. Do not dry the
webbing at temperatures above 176°F
(80°C) or in direct sunlight.Leather upholstery
Using aftermarket seat covers or wearing
clothing that have the tendency to give off
coloring (e.g. when wet etc.) may cause
the upholstery to become permanently dis-
colored. By lining the seats with a proper
intermediate cover, contact-discoloration
will be prevented.
Wipe leather upholstery with a damp cloth
and dry thoroughly or clean with
Mercedes-Benz approved Leather Care.
Exercise particular care when cleaning per-
forated leather as its underside should not
become wet.
MB Tex upholstery
Pour Mercedes-Benz approved Interior
Care onto soft lint-free cloth and apply
with light pressure.
Plastic and rubber parts
Do not use oil or wax on these parts.Warning!
G
Do not bleach or dye seat belts as this may
severely weaken them. In a crash they may
not be able to provide adequate protection.
S203 MY03_A.book Page 252 Tuesday, January 28, 2003 2:22 PM
Page 252 of 370

258 Practical hintsWhat to do if …Problem
Possible cause
Suggested solution
?
The yellow “CHECK ENGINE”
malfunction indicator lamp
comes on while driving.
There is a malfunction in:�
The fuel management system
�
The ignition system
�
The emission control system
�
Systems which affect emissions
Such malfunctions may result in excessive
emissions values and may switch the engine
to its Limp-home (emergency operation)
mode.
�
Have the vehicle checked as soon as
possible by an authorized
Mercedes-Benz Center.
An on-board diagnostic connector is
used by the service station to link the
vehicle to the shop diagnostics sys-
tem. It allows the accurate identifica-
tion of system malfunctions through
the readout of diagnostic trouble
codes. It is located in the front left
area of the footwell next to the park-
ing brake pedal.
The fuel cap is not closed tight.
�
Check the fuel cap.
Your gas tank is empty.
�
After refuelling start the engine three
or four times in succession.
The limp-home mode is canceled. You do
not need to have your vehicle checked.
<
The red seat belt warning lamp
blinks for a brief period after
starting the engine.
The warning lamp reminds you to fasten seat
belts.
�
Fasten your seat belt.
The yellow fuel tank reserve warning lamp
lights up while driving.
The fuel level has gone below the reserve
mark.
�
Refuel at the next gas station
(�page 232).
S203 MY03_A.book Page 258 Tuesday, January 28, 2003 2:22 PM