2003 LINCOLN LS ECO mode
[x] Cancel search: ECO modePage 10 of 288
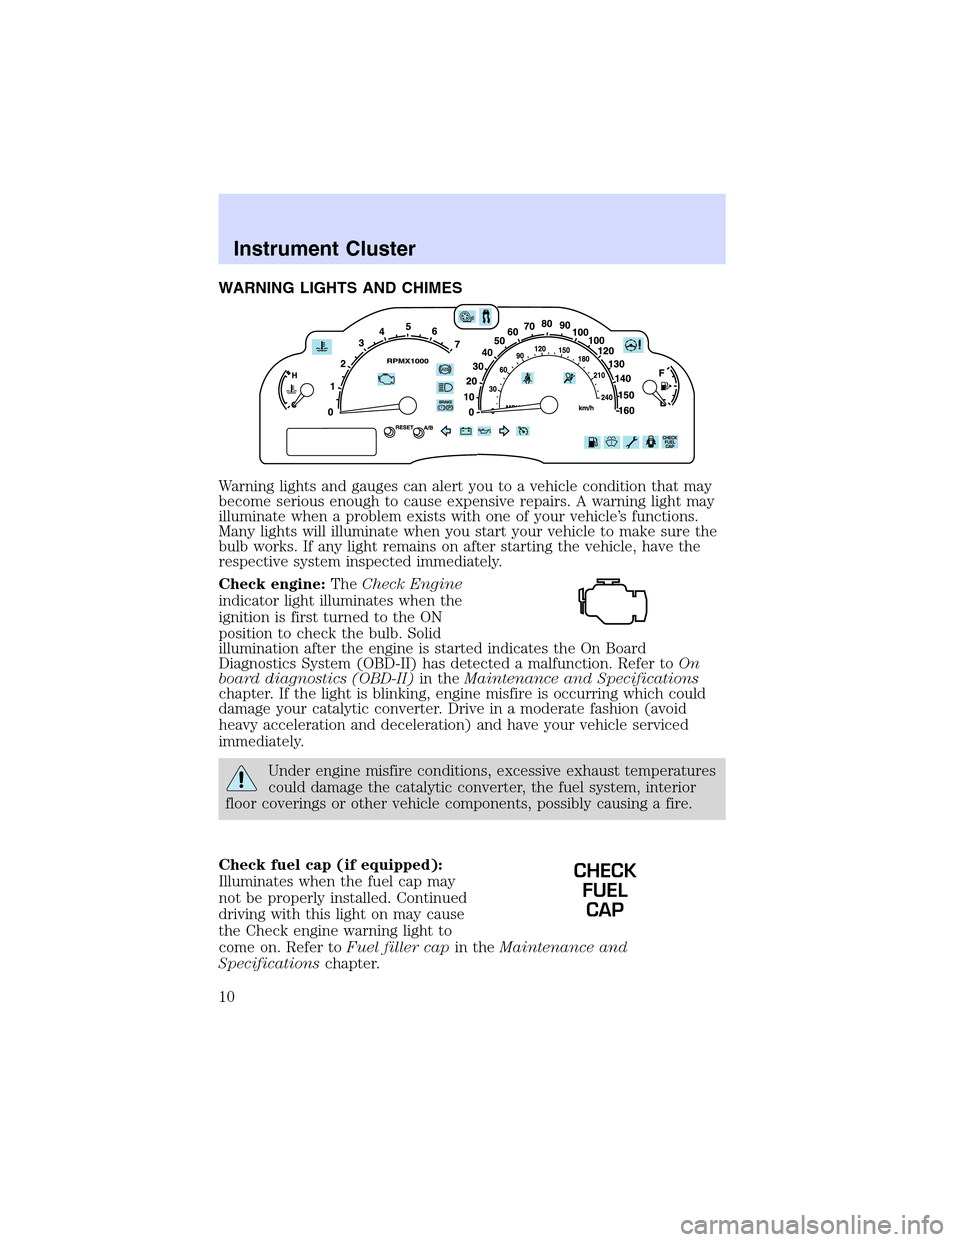
WARNING LIGHTS AND CHIMES
Warning lights and gauges can alert you to a vehicle condition that may
become serious enough to cause expensive repairs. A warning light may
illuminate when a problem exists with one of your vehicle’s functions.
Many lights will illuminate when you start your vehicle to make sure the
bulb works. If any light remains on after starting the vehicle, have the
respective system inspected immediately.
Check engine:TheCheck Engine
indicator light illuminates when the
ignition is first turned to the ON
position to check the bulb. Solid
illumination after the engine is started indicates the On Board
Diagnostics System (OBD-II) has detected a malfunction. Refer toOn
board diagnostics (OBD-II)in theMaintenance and Specifications
chapter. If the light is blinking, engine misfire is occurring which could
damage your catalytic converter. Drive in a moderate fashion (avoid
heavy acceleration and deceleration) and have your vehicle serviced
immediately.
Under engine misfire conditions, excessive exhaust temperatures
could damage the catalytic converter, the fuel system, interior
floor coverings or other vehicle components, possibly causing a fire.
Check fuel cap (if equipped):
Illuminates when the fuel cap may
not be properly installed. Continued
driving with this light on may cause
the Check engine warning light to
come on. Refer toFuel filler capin theMaintenance and
Specificationschapter.
CHECK
FUEL
CAP
Instrument Cluster
10
Page 17 of 288
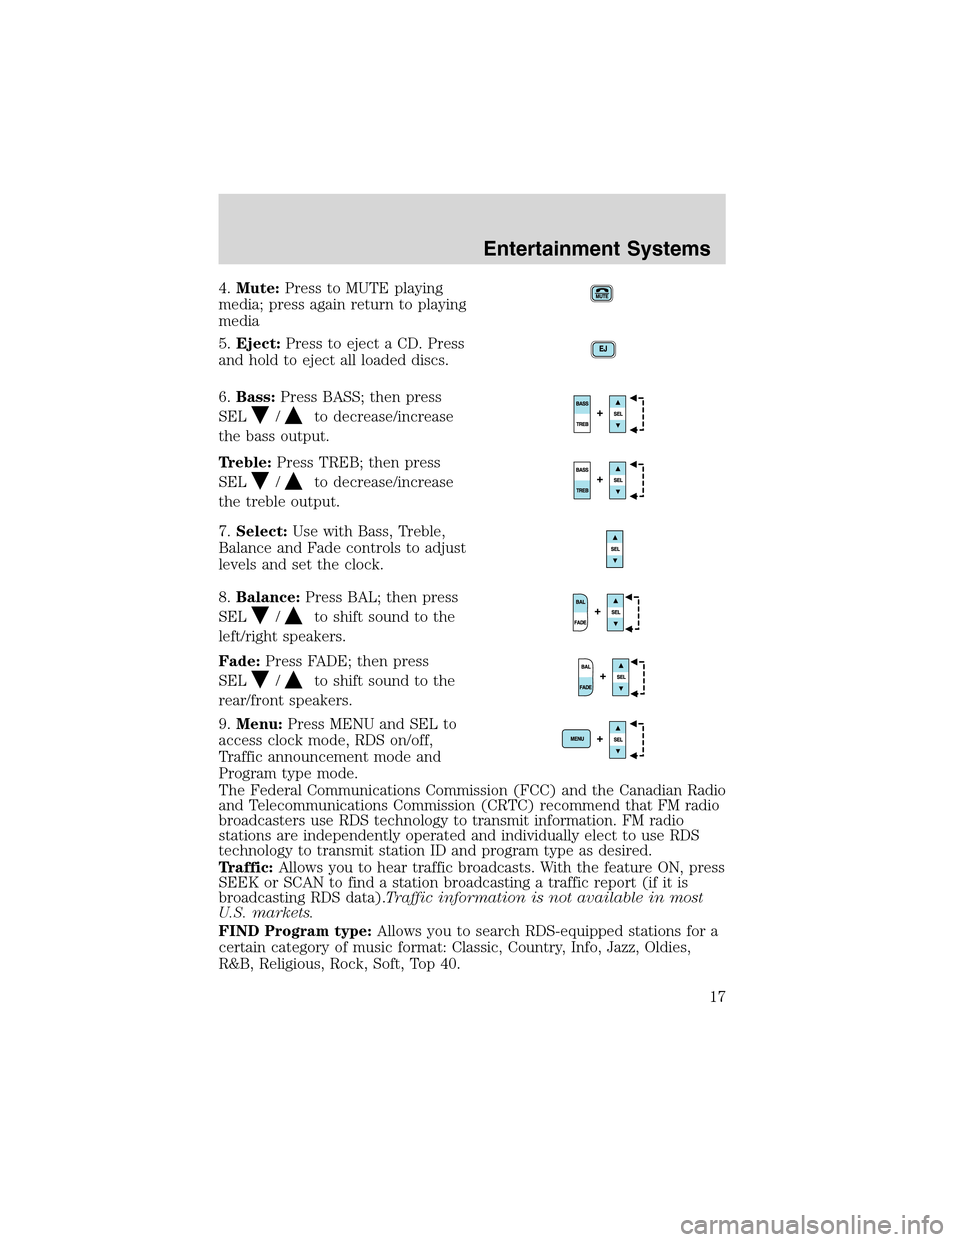
4.Mute:Press to MUTE playing
media; press again return to playing
media
5.Eject:Press to eject a CD. Press
and hold to eject all loaded discs.
6.Bass:Press BASS; then press
SEL
/to decrease/increase
the bass output.
Treble:Press TREB; then press
SEL
/to decrease/increase
the treble output.
7.Select:Use with Bass, Treble,
Balance and Fade controls to adjust
levels and set the clock.
8.Balance:Press BAL; then press
SEL
/to shift sound to the
left/right speakers.
Fade:Press FADE; then press
SEL
/to shift sound to the
rear/front speakers.
9.Menu:Press MENU and SEL to
access clock mode, RDS on/off,
Traffic announcement mode and
Program type mode.
The Federal Communications Commission (FCC) and the Canadian Radio
and Telecommunications Commission (CRTC) recommend that FM radio
broadcasters use RDS technology to transmit information. FM radio
stations are independently operated and individually elect to use RDS
technology to transmit station ID and program type as desired.
Traffic:Allows you to hear traffic broadcasts. With the feature ON, press
SEEK or SCAN to find a station broadcasting a traffic report (if it is
broadcasting RDS data).Traffic information is not available in most
U.S. markets.
FIND Program type:Allows you to search RDS-equipped stations for a
certain category of music format: Classic, Country, Info, Jazz, Oldies,
R&B, Religious, Rock, Soft, Top 40.
Entertainment Systems
17
Page 18 of 288
Show TYPE:Displays the station’s call letters and format.
Compression:Brings soft and loud CD passages together for a more
consistent listening level. Press MENU until compression status is
displayed. Press the SEL control to enable the compression feature when
COMP OFF is displayed. Press the SEL control again to disable the
feature when COMP ON is displayed.
Setting the clock:Press MENU until SELECT HOUR or SELECT
MINUTE is displayed. Use SEL to manually increase (
) or decrease
(
) the hours/minutes. Press MENU again to disengage clock mode.
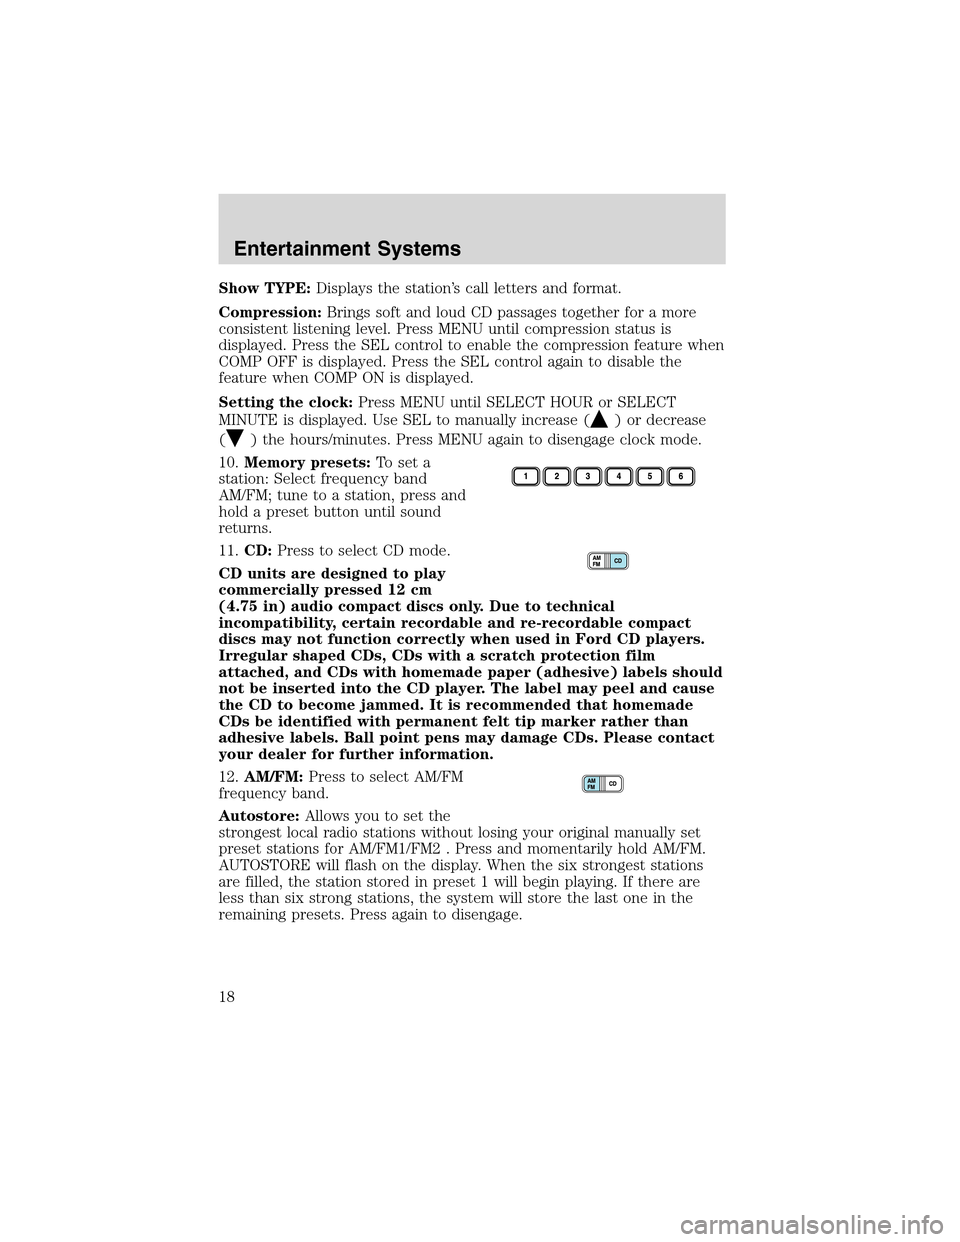
10.Memory presets:To set a
station: Select frequency band
AM/FM; tune to a station, press and
hold a preset button until sound
returns.
11.CD:Press to select CD mode.
CD units are designed to play
commercially pressed 12 cm
(4.75 in) audio compact discs only. Due to technical
incompatibility, certain recordable and re-recordable compact
discs may not function correctly when used in Ford CD players.
Irregular shaped CDs, CDs with a scratch protection film
attached, and CDs with homemade paper (adhesive) labels should
not be inserted into the CD player. The label may peel and cause
the CD to become jammed. It is recommended that homemade
CDs be identified with permanent felt tip marker rather than
adhesive labels. Ball point pens may damage CDs. Please contact
your dealer for further information.
12.AM/FM:Press to select AM/FM
frequency band.
Autostore:Allows you to set the
strongest local radio stations without losing your original manually set
preset stations for AM/FM1/FM2 . Press and momentarily hold AM/FM.
AUTOSTORE will flash on the display. When the six strongest stations
are filled, the station stored in preset 1 will begin playing. If there are
less than six strong stations, the system will store the last one in the
remaining presets. Press again to disengage.
Entertainment Systems
18
Page 22 of 288
Traffic—Allows you to receive traffic announcements and control their
volume level.Traffic information is not available in most U.S.
markets.
Program Type—Allows you to set your audio system to select from
RDS-equipped stations for categories such as: Classic, Country, Info.,
Jazz, Oldies, R&B, Religious, Rock, Soft, Top 40.
Show—Allows you to view the frequency and program type of the
chosen radio station.
The Federal Communications Commission (FCC) and the Canadian Radio
and Telecommunications Commission (CRTC) recommend that FM radio
broadcasters use RDS technology to transmit information. FM radio
stations are independently operated and individually elect to use RDS
technology to transmit station ID and program type as desired.
Setting the clock:Press RDS until SELECT HOUR or SELECT MINS is
displayed. Press SEL to increase (
) or decrease ().
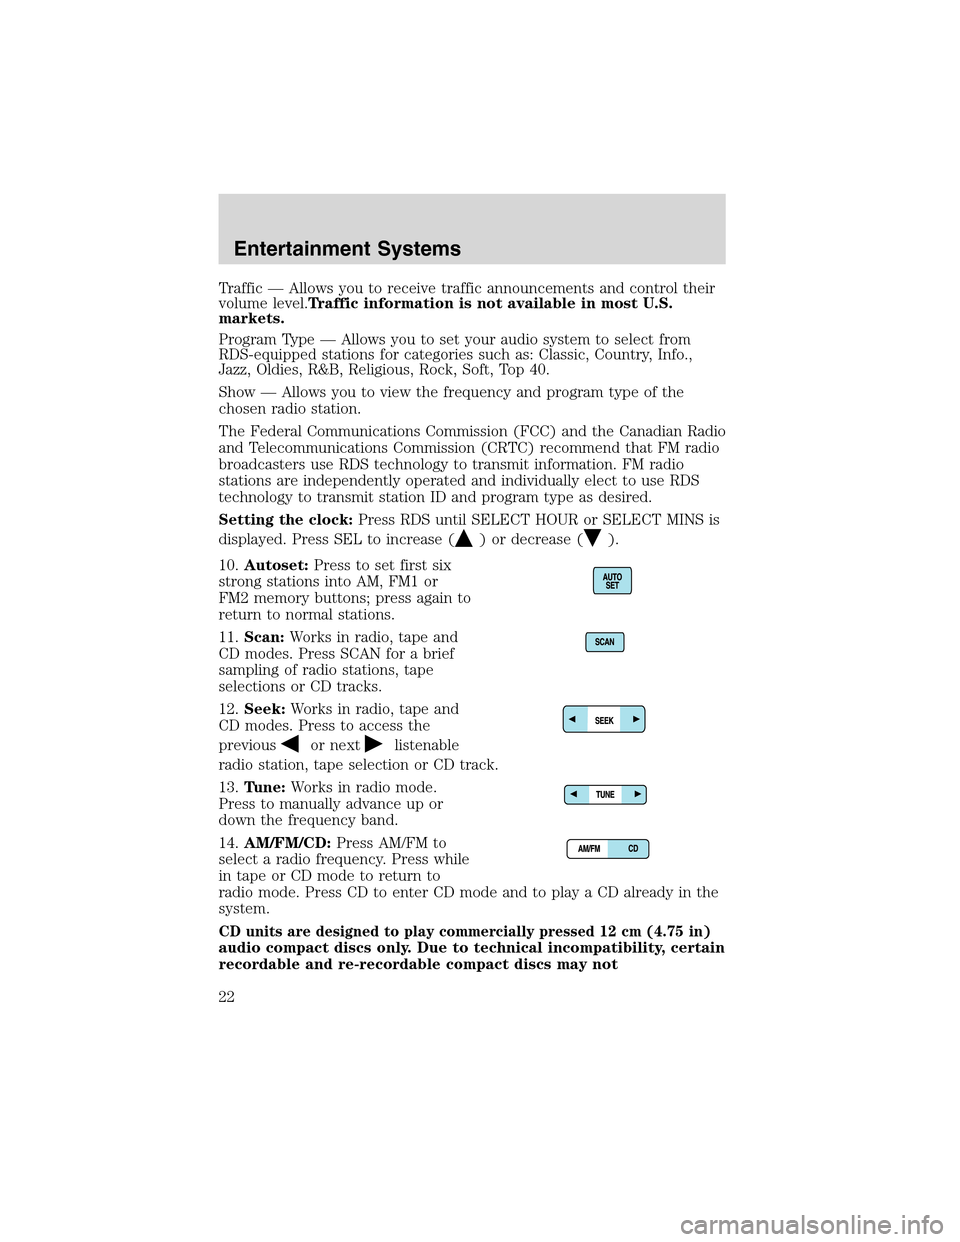
10.Autoset:Press to set first six
strong stations into AM, FM1 or
FM2 memory buttons; press again to
return to normal stations.
11.Scan:Works in radio, tape and
CD modes. Press SCAN for a brief
sampling of radio stations, tape
selections or CD tracks.
12.Seek:Works in radio, tape and
CD modes. Press to access the
previous
or nextlistenable
radio station, tape selection or CD track.
13.Tune:Works in radio mode.
Press to manually advance up or
down the frequency band.
14.AM/FM/CD:Press AM/FM to
select a radio frequency. Press while
in tape or CD mode to return to
radio mode. Press CD to enter CD mode and to play a CD already in the
system.
CD units are designed to play commercially pressed 12 cm (4.75 in)
audio compact discs only. Due to technical incompatibility, certain
recordable and re-recordable compact discs may not
Entertainment Systems
22
Page 72 of 288
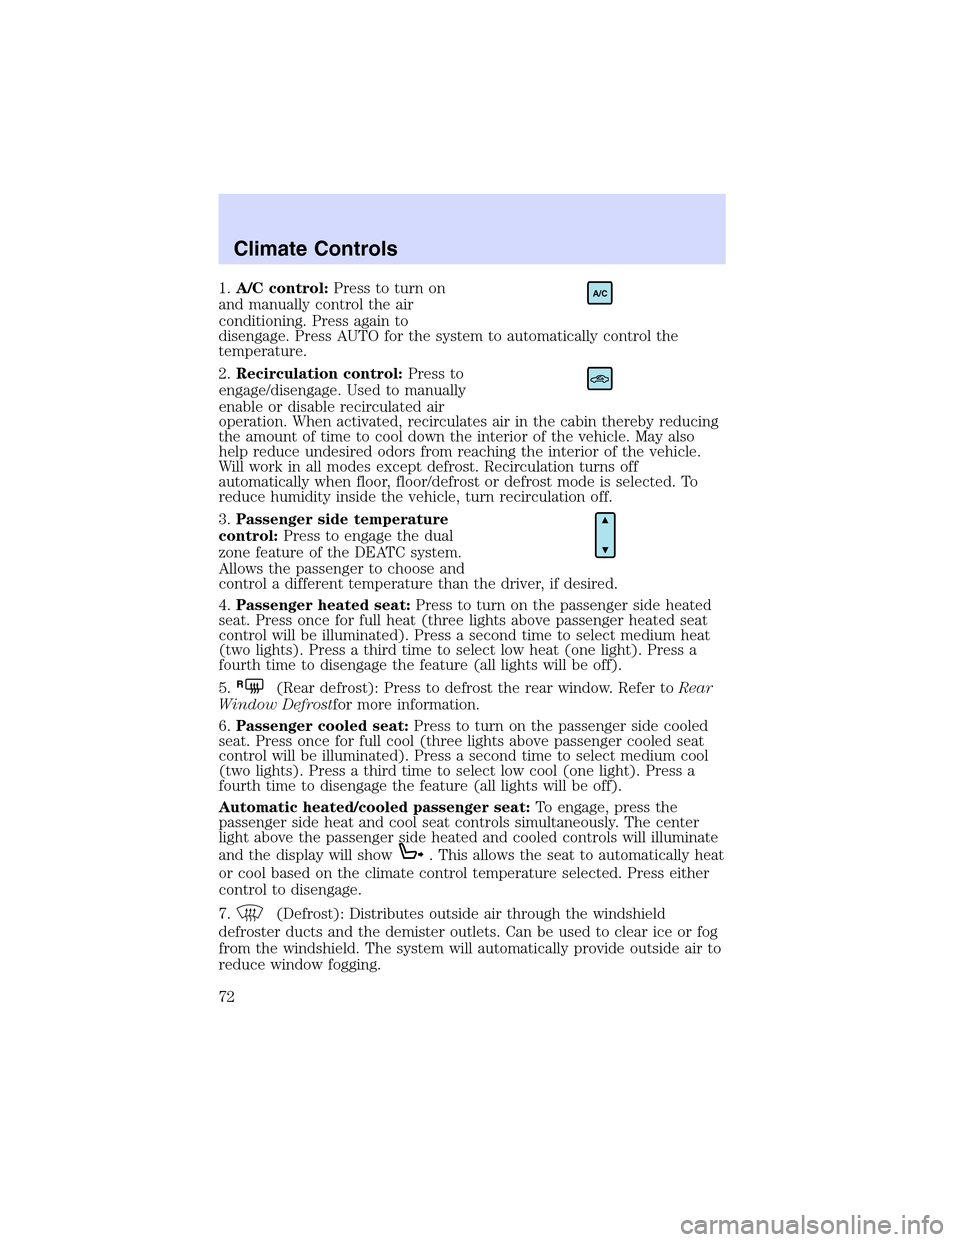
1.A/C control:Press to turn on
and manually control the air
conditioning. Press again to
disengage. Press AUTO for the system to automatically control the
temperature.
2.Recirculation control:Press to
engage/disengage. Used to manually
enable or disable recirculated air
operation. When activated, recirculates air in the cabin thereby reducing
the amount of time to cool down the interior of the vehicle. May also
help reduce undesired odors from reaching the interior of the vehicle.
Will work in all modes except defrost. Recirculation turns off
automatically when floor, floor/defrost or defrost mode is selected. To
reduce humidity inside the vehicle, turn recirculation off.
3.Passenger side temperature
control:Press to engage the dual
zone feature of the DEATC system.
Allows the passenger to choose and
control a different temperature than the driver, if desired.
4.Passenger heated seat:Press to turn on the passenger side heated
seat. Press once for full heat (three lights above passenger heated seat
control will be illuminated). Press a second time to select medium heat
(two lights). Press a third time to select low heat (one light). Press a
fourth time to disengage the feature (all lights will be off).
5.
R(Rear defrost): Press to defrost the rear window. Refer toRear
Window Defrostfor more information.
6.Passenger cooled seat:Press to turn on the passenger side cooled
seat. Press once for full cool (three lights above passenger cooled seat
control will be illuminated). Press a second time to select medium cool
(two lights). Press a third time to select low cool (one light). Press a
fourth time to disengage the feature (all lights will be off).
Automatic heated/cooled passenger seat:To engage, press the
passenger side heat and cool seat controls simultaneously. The center
light above the passenger side heated and cooled controls will illuminate
and the display will show
. This allows the seat to automatically heat
or cool based on the climate control temperature selected. Press either
control to disengage.
7.
(Defrost): Distributes outside air through the windshield
defroster ducts and the demister outlets. Can be used to clear ice or fog
from the windshield. The system will automatically provide outside air to
reduce window fogging.
A/C
Climate Controls
72
Page 73 of 288
8.Airflow direction control:Press to toggle through the air
distribution modes listed below. The selected mode will illuminate in the
display.
—Distributes air through the windshield defroster ducts, demister
outlets and the front and rear seat floor ducts. The system will
automatically provide outside air to reduce window fogging.
:Distributes air through the floor and rear seat floor ducts. The
system will automatically provide outside air to reduce window fogging.
: Distributes air through the instrument panel, center console
registers, and the front and rear seat floor ducts.
:Distributes air through the instrument panel and center console
registers.
9.Off:Outside air is shut out and
the fan will not operate.
10.Manual override controls:Allows you to manually select where
airflow is directed. To return to full automatic control, press AUTO.
11.Auto:Press to engage automatic
temperature control. Use the
temperature control to select the
desired temperature setting. The system will automatically determine fan
speed, airflow location, A/C on or off, and outside or recirculated air to
heat or cool the vehicle, allowing it to reach the desired temperature.
Press and hold AUTO for about two seconds to toggle between single
zone and dual zone temperature control.
12.Driver heated seat:Press to turn on the driver side heated seat.
Press once for full heat (three lights above driver heated seat control will
be illuminated). Press a second time to select medium heat (two lights).
Press a third time to select low heat (one light). Press a fourth time to
disengage the feature (all lights will be off).
13.Driver cooled seat:Press to turn on the driver side cooled seat.
Press once for full cool (three lights above driver cooled seat control will
be illuminated). Press a second time to select medium cool (two lights).
Press a third time to select low cool (one light). Press a fourth time to
disengage the feature (all lights will be off).
Automatic heated/cooled driver seat:To engage, press the driver side
heat and cool seat controls simultaneously. The center light above the
driver side heated and cooled controls will illuminate and the display will
OFF
AUTO
Climate Controls
73
Page 75 of 288

•Remove any snow, ice or leaves from the air intake area at the base of
the windshield.
•With the ignition in the OFF position after operating the vehicle, some
vehicle sounds related to the climate control system may be heard.
•Approximately two minutes after key off, the air distribution doors
may adjust their positions as part of the normal operating process.
•Demisters, located at the far left and right sides of the dash, usually
blow out a small amount of airflow in order to reduce side window
fogging.
•Outboard panel registers, located at the left and right sides of the
dash, blowout a small amount of airflow when in Floor, Floor/Defrost,
and Defrost modes. This also reduces side window fogging.
•Do not place items over the
climate temperature sensor grid.
This may cause improper
operation of the system.
To aid in side window defogging/demisting in cold weather:
1. Select
2. Ensure that recirculation is disengaged.
3. Set the temperature control to full heat.
4. Set the highest fan speed
5. Direct the outer instrument panel vents towards the side windows.
To increase airflow to the outer instrument panel vents, close the vents
located in the middle of the instrument panel.
Do not place objects on top of the instrument panel as these
objects may become projectiles in a collision or sudden stop.
Climate Controls
75
Page 93 of 288
seconds,then display all segments until the magnetized item is removed.
If a“C”is displayed, refer toCompass calibration adjustment.
Most geographic areas (zones) have a magnetic north compass point that
varies slightly from the northerly direction on maps. This variation is four
degrees between adjacent zones and will become noticeable as the
vehicle crosses multiple zones. A correct zone setting will eliminate this
error. Refer toCompass zone adjustment.
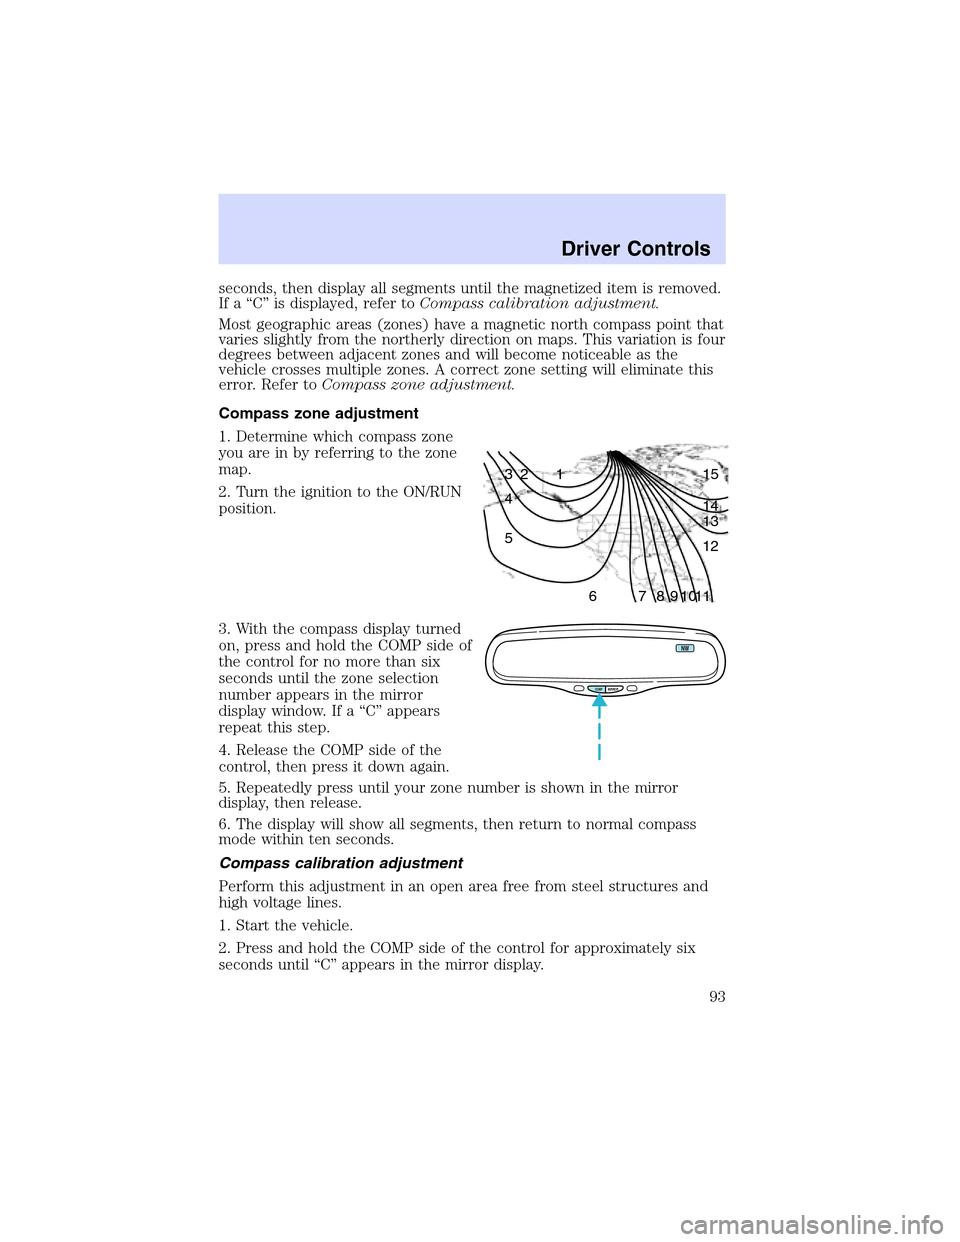
Compass zone adjustment
1. Determine which compass zone
you are in by referring to the zone
map.
2. Turn the ignition to the ON/RUN
position.
3. With the compass display turned
on, press and hold the COMP side of
the control for no more than six
seconds until the zone selection
number appears in the mirror
display window. If a“C”appears
repeat this step.
4. Release the COMP side of the
control, then press it down again.
5. Repeatedly press until your zone number is shown in the mirror
display, then release.
6. The display will show all segments, then return to normal compass
mode within ten seconds.
Compass calibration adjustment
Perform this adjustment in an open area free from steel structures and
high voltage lines.
1. Start the vehicle.
2. Press and hold the COMP side of the control for approximately six
seconds until“C”appears in the mirror display.
1 2 3
4
5
6 7 8 9 101112 13 14 15
COMP MIRROR
NW
Driver Controls
93