Page 8 of 288
These are some of the symbols you may see on your vehicle.
Vehicle Symbol Glossary
Safety Alert
See Owner’s Guide
Fasten Safety BeltAir Bag-Front
Air Bag-SideChild Seat
Child Seat Installation
WarningChild Seat Lower
Anchor
Child Seat Tether
AnchorBrake System
Anti-Lock Brake SystemBrake Fluid -
Non-Petroleum Based
Traction ControlAdvanceTrac
Master Lighting SwitchHazard Warning Flasher
Fog Lamps-FrontFuse Compartment
Fuel Pump ResetWindshield Wash/Wipe
Windshield
Defrost/DemistRear Window
Defrost/Demist
Introduction
8
Page 11 of 288

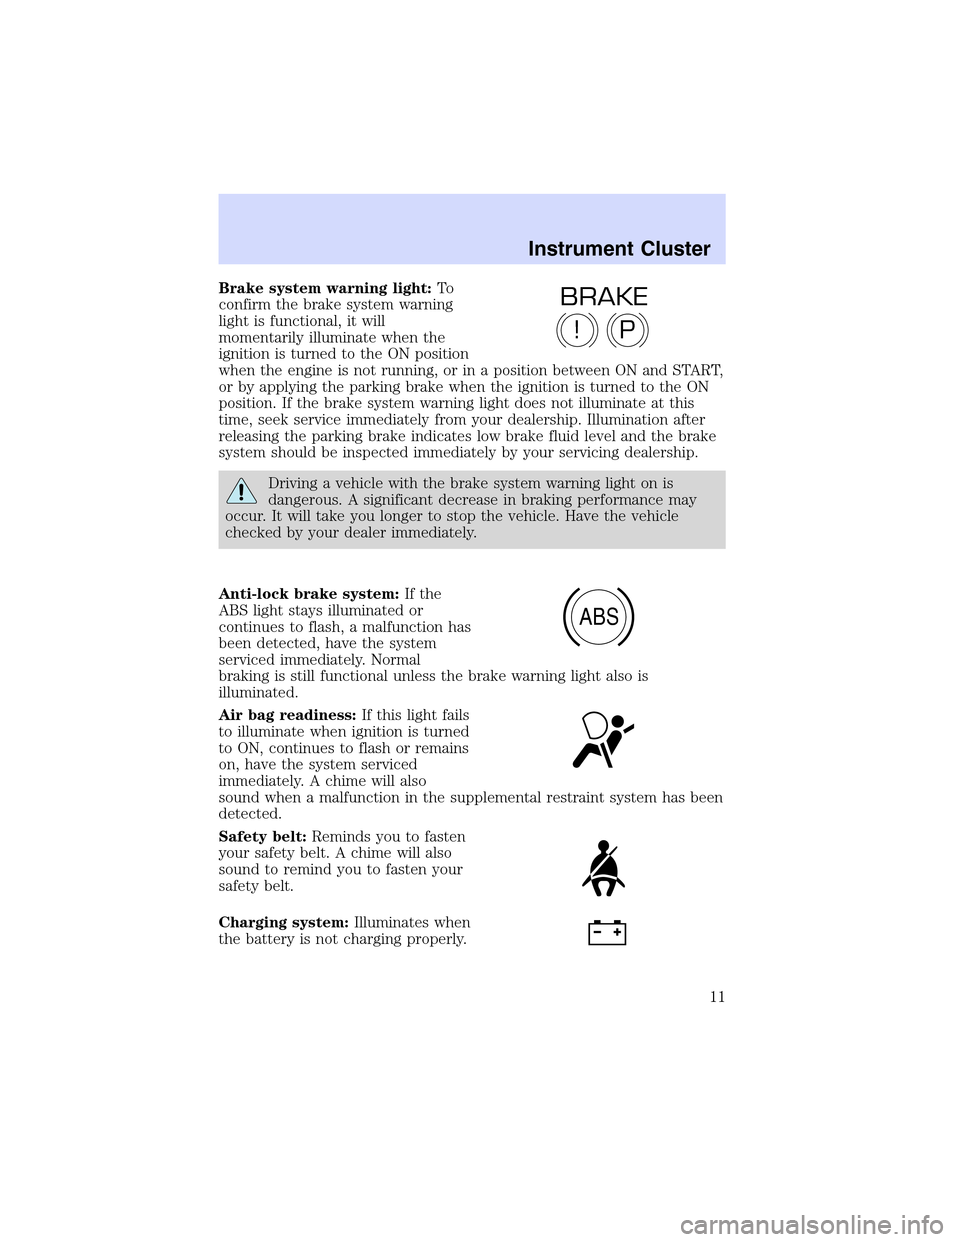
Brake system warning light:To
confirm the brake system warning
light is functional, it will
momentarily illuminate when the
ignition is turned to the ON position
when the engine is not running, or in a position between ON and START,
or by applying the parking brake when the ignition is turned to the ON
position. If the brake system warning light does not illuminate at this
time, seek service immediately from your dealership. Illumination after
releasing the parking brake indicates low brake fluid level and the brake
system should be inspected immediately by your servicing dealership.
Driving a vehicle with the brake system warning light on is
dangerous. A significant decrease in braking performance may
occur. It will take you longer to stop the vehicle. Have the vehicle
checked by your dealer immediately.
Anti-lock brake system:If the
ABS light stays illuminated or
continues to flash, a malfunction has
been detected, have the system
serviced immediately. Normal
braking is still functional unless the brake warning light also is
illuminated.
Air bag readiness:If this light fails
to illuminate when ignition is turned
to ON, continues to flash or remains
on, have the system serviced
immediately. A chime will also
sound when a malfunction in the supplemental restraint system has been
detected.
Safety belt:Reminds you to fasten
your safety belt. A chime will also
sound to remind you to fasten your
safety belt.
Charging system:Illuminates when
the battery is not charging properly.
P!
BRAKE
ABS
Instrument Cluster
11
Page 13 of 288

Low fuel (if equipped):
Illuminates when the fuel level in
the fuel tank is at, or near empty
(refer toFuel gaugein this
chapter).
Speed control:Illuminates when
the speed control is activated. Turns
off when the speed control system
is deactivated.
Low washer fluid (if equipped):
Illuminates when the windshield
washer fluid is low.
Bulb warning (if equipped):
Illuminates when one of the exterior
front turn lamps or rear
brake/turn/tail lamps bulb has
burned out. Depress the RESET control to return to the Trip odometer
display.
Door ajar (if equipped):
Illuminates when the ignition is in
the ON position and any door is
open.
Turn signal:Illuminates when the
left or right turn signal or the
hazard lights are turned on. If the
indicators stay on or flash faster, check for a burned out bulb.
High beams:Illuminates when the
high beam headlamps are turned on.
Electronic throttle control (if
equipped):Illuminates when the
engine has defaulted to a
’limp-home’operation. Report the
fault to a dealer at the earliest opportunity.
Instrument Cluster
13
Page 82 of 288

Function Trade Number
Foglamp 9145
Tail lamp, brakelamp, side lamp 3157K
Rear turn lamp 3157 A/K (amber)
Backup lamp 921
License plate lamp 168
High-mount brakelamp 3W4Z–13A613–AA
Map lamp (with moon roof) 906
Rail lamp (rear) 168
Map lamp (front) 906
Sun visor lighted mirror lamp Part # E9SB-13465-BA
Glove compartment 194
Ashtray 194
Luggage compartment lamp 212-2
All replacement bulbs are clear in color except where noted.
To replace all instrument panel lights - see your dealer.
Interior bulbs
Check the operation of all bulbs frequently.
Map lamps
For bulb replacement, see a qualified service technician or your dealer.
Replacing headlamp bulbs
The headlamp assembly contains the low beam bulb, the high beam bulb,
park/turn lamp bulb and led side marker. To replace any of these items,
the headlamp assembly must be removed from the vehicle as follows:
1. Make sure headlamp switch is in
the OFF position, then open the
hood.
2. Lift the hood and remove the
upper and lower sight shields by
removing the seven plastic retaining
pins.
3. On the headlamp assembly,
remove the three headlamp
attaching bolts (8mm socket).
Lights
82
Page 85 of 288

Replacing foglamp bulbs
1. Make sure the headlamp switch is
in the OFF position and disconnect
the electrical connector from the
foglamp bulb.
2. Rotate the foglamp bulb
counterclockwise and remove from
the foglamp.
Install the new bulb in reverse order.
Replacing high-mount brakelamp bulbs
Your vehicle is equipped with an LED center high-mount stop lamp. It is
designed to last the life of the vehicle. If replacement is required, the
entire assembly must be replaced as follows:
1. Pull down on the headliner, near
the location of the high-mount stop
lamp, to release the dual lock
attachment.
2. Expose enough of the high-mount
stop lamp to disconnect the
electrical wire and remove the two
retaining bolts (8 mm head).
3. Remove and replace the high-mount stop lamp bulb.
Install the new lamp in reverse order.
Replacing tail lamp/backup bulbs
For bulb replacement, see a dealer or qualified technician.
Replacing license plate lamp bulbs
For bulb replacement, see a dealer or qualified technician.
Lights
85
Page 96 of 288
Do not use the speed control in heavy traffic or on roads that
are winding, slippery or unpaved.
Setting speed control
The controls for using your speed
control are located on the steering
wheel for your convenience.
1. Press the ON control and release
it.
2. Accelerate to the desired speed.
3. Press the SET + control and
release it.
4. Take your foot off the accelerator
pedal.
5. The indicator
light on the
instrument cluster will turn on.
Note:
•Vehicle speed may vary momentarily when driving up and down a
steep hill.
•If the vehicle speed increases above the set speed on a downhill, you
may want to apply the brakes to reduce the speed.
•If the vehicle speed decreases more than 16 km/h (10 mph) below
your set speed on an uphill, your speed control will disengage.
Driver Controls
96
Page 114 of 288

CHECK TAIL LAMPS.Displayed when the tail lamps are activated and
at least one is burned out. Check the lamps as soon as safely possible
and have the burned out lamp replaced.
CHECK BRAKE LAMPS.Displayed when the brake lamps are
activated and at least one is burned out. Check the lamps as soon as
safely possible and have the burned out lamp replaced. The center
high-mount brakelamp is not monitored.
CHECK FRT TURN LAMPS.Displayed when the turn signals are
activated and at least one is burned out. Check the lamps as soon as
safely possible and have the burned out lamp replaced.
CHECK SIDE REPEATER LAMPS (if equipped).Displayed when
the turn signals are activated and at least one is burned out. Check the
lamps as soon as possible and have the burned out lamp replaced.
CHECK REAR TURN LAMPS.Displayed when the turn signals are
activated and at least one is burned out. Check the lamps as soon as
possible and have the burned out lamp replaced.
CHECK TRACTION CONTROL.Displayed when the Traction
Control�system is not operating properly. If this message is displayed
on the message centerandthe amber T/C OFF light in the Traction
Control�on/off switch isnotilluminated, the Traction Control�system
will be partially operable. If this warning stays on, contact your dealer for
service as soon as possible. For further information, refer toTraction
control�in theDrivingchapter.
CHECK ADVANCETRAC (if equipped).Displayed when the
AdvanceTrac�system is not operating properly. If this message is
displayed on the message center the AdvanceTrac�system will be
partially operable. If this warning stays on while the engine is running,
contact your dealer for service as soon as possible. For further
information, refer toAdvanceTrac�stability enhancement systemin
theDrivingchapter.
TRUNK AJAR.Displayed when the trunk is not completely closed.
LOW WASHER FLUID.Indicates the washer fluid reservoir is less than
one quarter full. Check the washer fluid level. Refer toChecking and
adding washer fluidin theMaintenance and specificationschapter.
CHECK A/C (cabin) FILTER.Displayed when the A/C cabin filter life
remaining is 5 percent or less. When A/C filter life left is between 5%
and 0%, the CHANGE A/C FILTER SOON message will be displayed.
When A/C filter life left reaches 0%, the A/C FILTER CHANGE
REQUIRED message will be displayed.
Driver Controls
114
Page 119 of 288

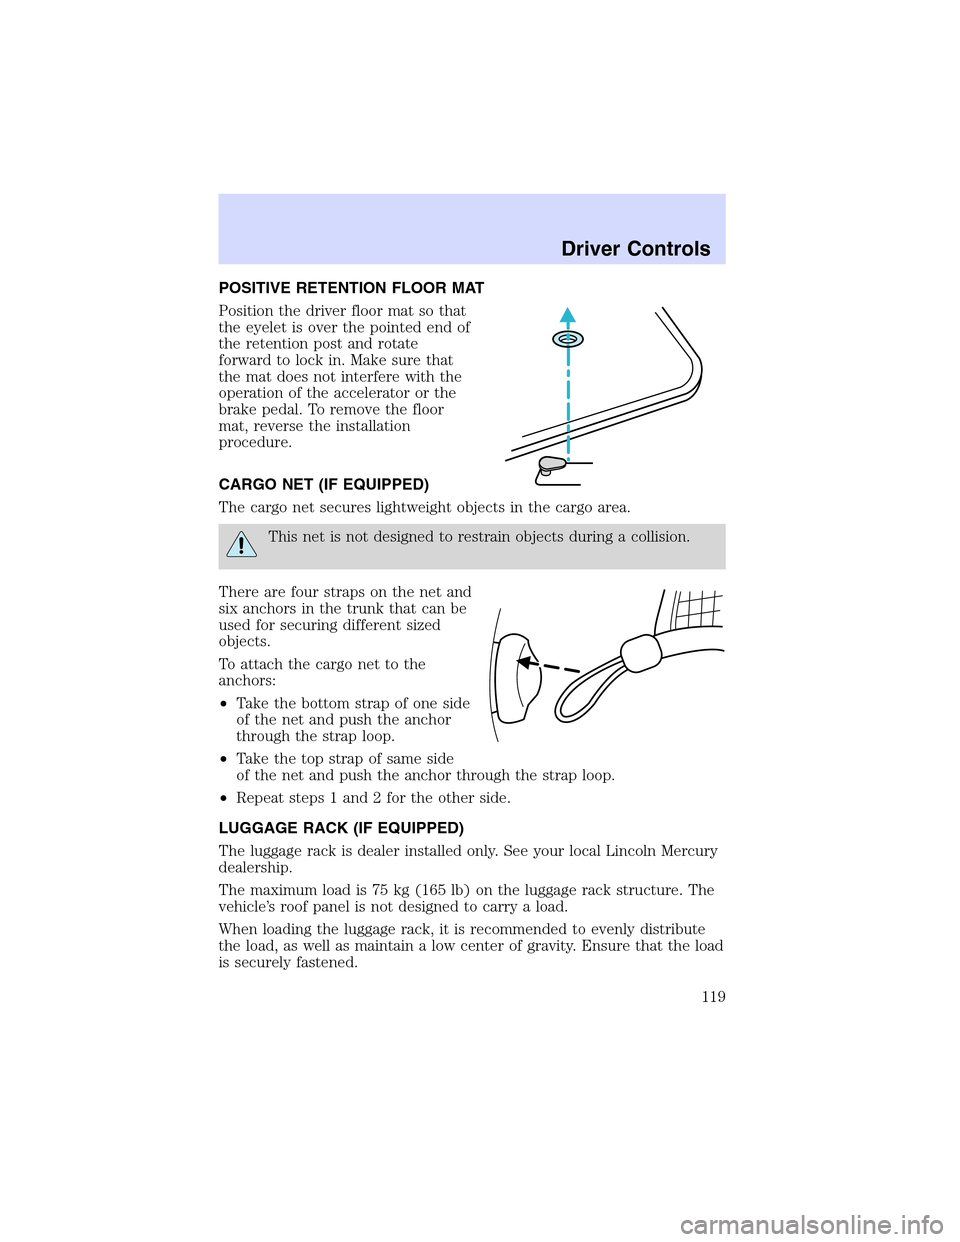
POSITIVE RETENTION FLOOR MAT
Position the driver floor mat so that
the eyelet is over the pointed end of
the retention post and rotate
forward to lock in. Make sure that
the mat does not interfere with the
operation of the accelerator or the
brake pedal. To remove the floor
mat, reverse the installation
procedure.
CARGO NET (IF EQUIPPED)
The cargo net secures lightweight objects in the cargo area.
This net is not designed to restrain objects during a collision.
There are four straps on the net and
six anchors in the trunk that can be
used for securing different sized
objects.
To attach the cargo net to the
anchors:
•Take the bottom strap of one side
of the net and push the anchor
through the strap loop.
•Take the top strap of same side
of the net and push the anchor through the strap loop.
•Repeat steps 1 and 2 for the other side.
LUGGAGE RACK (IF EQUIPPED)
The luggage rack is dealer installed only. See your local Lincoln Mercury
dealership.
The maximum load is 75 kg (165 lb) on the luggage rack structure. The
vehicle’s roof panel is not designed to carry a load.
When loading the luggage rack, it is recommended to evenly distribute
the load, as well as maintain a low center of gravity. Ensure that the load
is securely fastened.
Driver Controls
119