2003 Hyundai Grandeur fuel type
[x] Cancel search: fuel typePage 16 of 235
1- 2 FEATURES OF YOUR HYUNDAI
B010B01A-AAT What About Gasohol? Gasohol (a mixture of 90% unleaded gasoline and 10% ethanol or grain alcohol) may be used in your Hyundai. However, if your engine developsdriveability problems, the use of 100% unleaded gasoline is recommended. Fuels with unspecified quantities ofalcohol, or alcohols other than ethanol, should not be used. B010D01S-AAT Do not Use Methanol Fuels containing methanol (wood al- cohol) should not be used in yourHyundai. This type of fuel can reduce vehicle performance and damage com- ponents of the fuel system. B010E01A-AAT Gasolines for Cleaner Air To help contribute to cleaner air, Hyundai recommends that you use gasolines treated with detergent addi- tives, which help prevent deposit for-mation in the engine. These gasolines will help the engine run cleaner and enhance performance of the EmissionControl System.
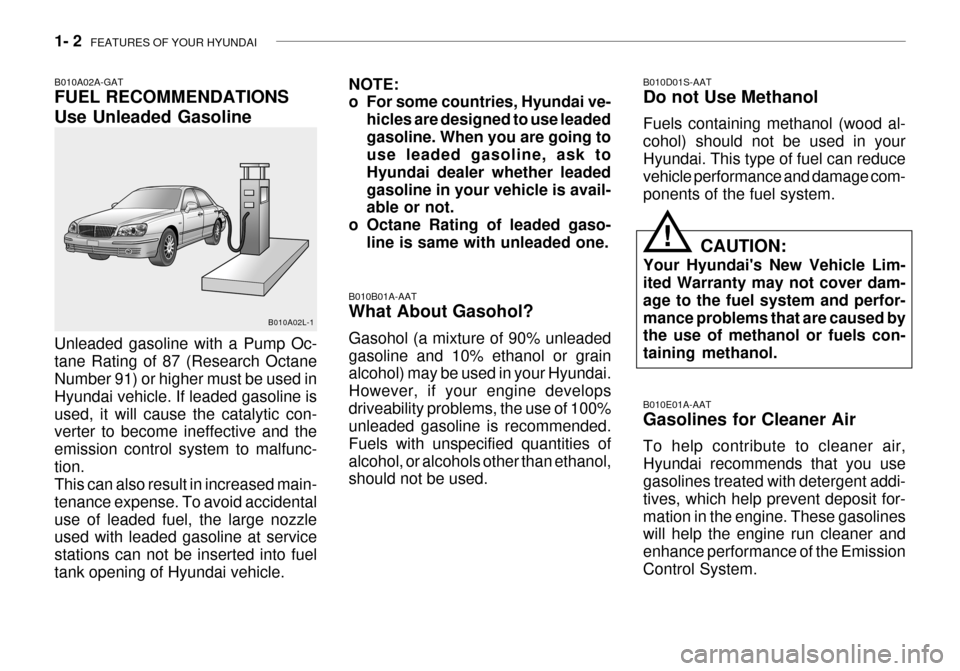
B010A02A-GAT FUEL RECOMMENDATIONS Use Unleaded Gasoline Unleaded gasoline with a Pump Oc- tane Rating of 87 (Research Octane Number 91) or higher must be used in Hyundai vehicle. If leaded gasoline isused, it will cause the catalytic con- verter to become ineffective and the emission control system to malfunc-tion. This can also result in increased main- tenance expense. To avoid accidentaluse of leaded fuel, the large nozzle used with leaded gasoline at service stations can not be inserted into fueltank opening of Hyundai vehicle.
NOTE:
o For some countries, Hyundai ve-
hicles are designed to use leaded gasoline. When you are going to use leaded gasoline, ask to Hyundai dealer whether leadedgasoline in your vehicle is avail- able or not.
o Octane Rating of leaded gaso- line is same with unleaded one.
B010A02L-1
! CAUTION:
Your Hyundai's New Vehicle Lim- ited Warranty may not cover dam- age to the fuel system and perfor-mance problems that are caused by the use of methanol or fuels con- taining methanol.
Page 54 of 235
1- 40 FEATURES OF YOUR HYUNDAI
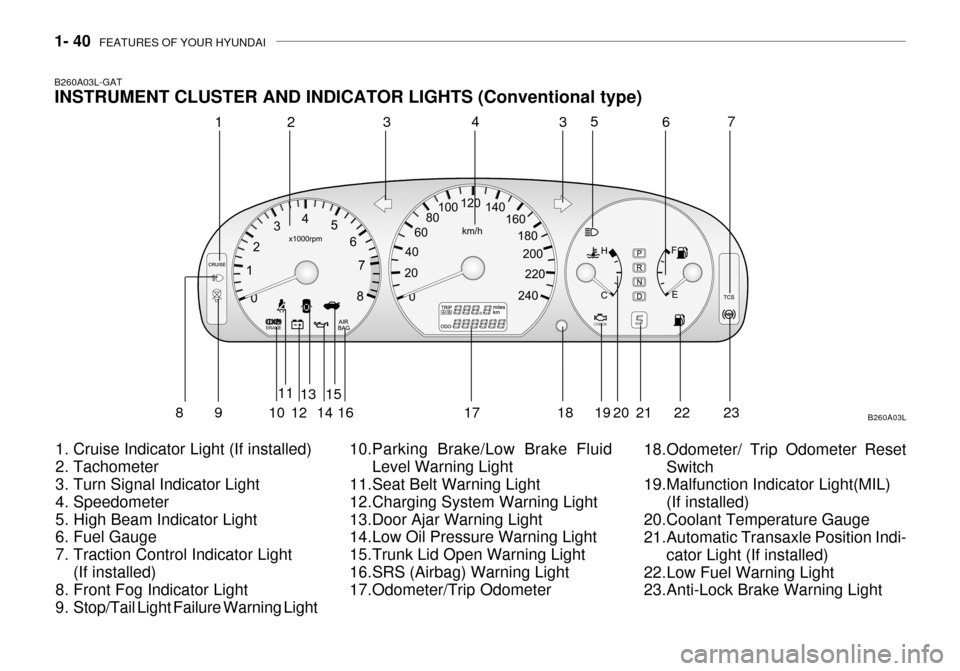
B260A03L-GAT INSTRUMENT CLUSTER AND INDICATOR LIGHTS (Conventional type)
1. Cruise Indicator Light (If installed)
2. Tachometer
3. Turn Signal Indicator Light
4. Speedometer
5. High Beam Indicator Light
6. Fuel Gauge
7. Traction Control Indicator Light (If installed)
8. Front Fog Indicator Light
9. Stop/Tail Light Failure Warning Light 10.Parking Brake/Low Brake Fluid
Level Warning Light
11.Seat Belt Warning Light
12.Charging System Warning Light
13.Door Ajar Warning Light
14.Low Oil Pressure Warning Light
15.Trunk Lid Open Warning Light
16.SRS (Airbag) Warning Light
17.Odometer/Trip Odometer 18.Odometer/ Trip Odometer Reset
Switch
19.Malfunction Indicator Light(MIL)
(If installed)
20.Coolant Temperature Gauge
21.Automatic Transaxle Position Indi-
cator Light (If installed)
22.Low Fuel Warning Light
23.Anti-Lock Brake Warning Light B260A03L
1
2
3435
67
89 1 011
1213
1415
16 17 18 19 20 21 22
23
Page 55 of 235
FEATURES OF YOUR HYUNDAI 1- 41
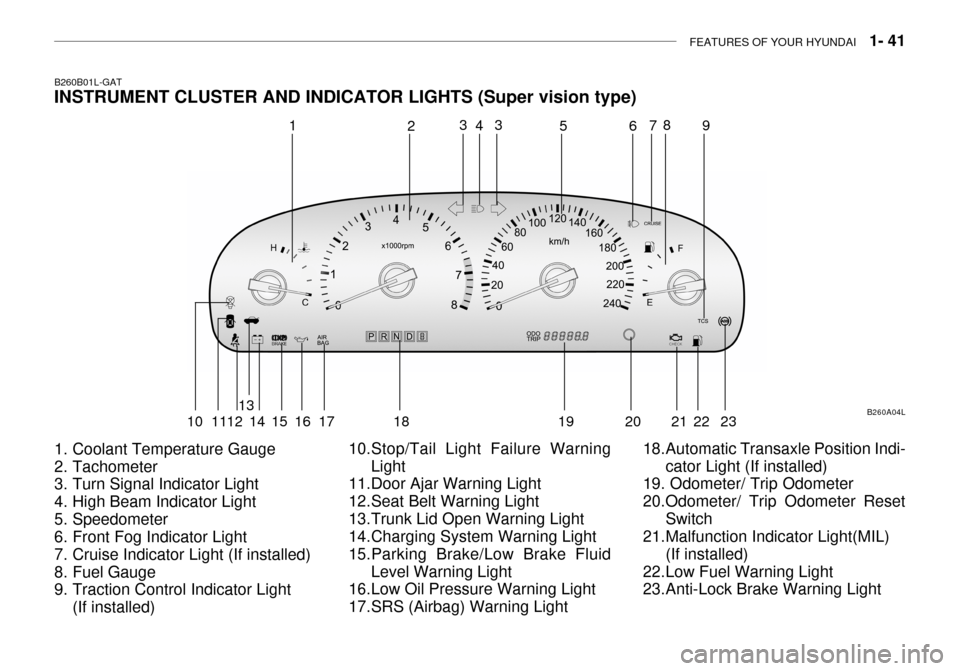
B260B01L-GAT INSTRUMENT CLUSTER AND INDICATOR LIGHTS (Super vision type)
1. Coolant Temperature Gauge
2. Tachometer
3. Turn Signal Indicator Light
4. High Beam Indicator Light
5. Speedometer
6. Front Fog Indicator Light
7. Cruise Indicator Light (If installed)
8. Fuel Gauge
9. Traction Control Indicator Light
(If installed) 10.Stop/Tail Light Failure Warning
Light
11.Door Ajar Warning Light
12.Seat Belt Warning Light
13.Trunk Lid Open Warning Light
14.Charging System Warning Light
15.Parking Brake/Low Brake Fluid
Level Warning Light
16.Low Oil Pressure Warning Light
17.SRS (Airbag) Warning Light 18.Automatic Transaxle Position Indi-
cator Light (If installed)
19. Odometer/ Trip Odometer
20.Odometer/ Trip Odometer Reset
Switch
21.Malfunction Indicator Light(MIL)
(If installed)
22.Low Fuel Warning Light
23.Anti-Lock Brake Warning Light B260A04L
1
2
4
3 3
56 78
9
10 1112 13
14 15 16 17 18 19 20 21 22 23
Page 60 of 235
1- 46 FEATURES OF YOUR HYUNDAI
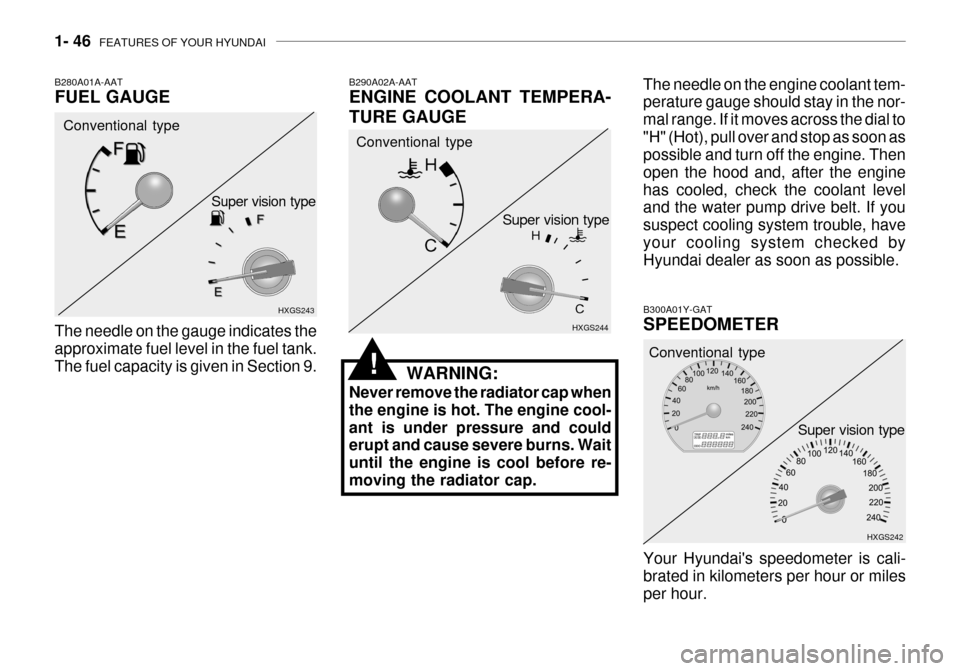
B300A01Y-GAT SPEEDOMETER Your Hyundai's speedometer is cali- brated in kilometers per hour or miles per hour. HXGS242
Conventional type
Super vision type
B280A01A-AAT FUEL GAUGE
B290A02A-AATENGINE COOLANT TEMPERA- TURE GAUGE
WARNING:
Never remove the radiator cap when the engine is hot. The engine cool-ant is under pressure and could erupt and cause severe burns. Wait until the engine is cool before re-moving the radiator cap.
HXGS243
HXGS244
The needle on the gauge indicates theapproximate fuel level in the fuel tank. The fuel capacity is given in Section 9. Conventional type
Conventional type
Super vision type
Super vision type
The needle on the engine coolant tem- perature gauge should stay in the nor- mal range. If it moves across the dial to"H" (Hot), pull over and stop as soon as possible and turn off the engine. Then open the hood and, after the enginehas cooled, check the coolant level and the water pump drive belt. If you suspect cooling system trouble, haveyour cooling system checked by Hyundai dealer as soon as possible.
!
Page 150 of 235
2- 18 DRIVING YOUR HYUNDAI
C190B01S-AAT Trailer Hitches Select the proper hitch and ball combi- nation, making sure that it's location is compatible with that of the trailer or vehicle being towed. Use a quality non-equalizing hitch whichdistributes the tongue load uniformly throughout the chassis. The hitch should be bolted securely to the car and installed by a qualified technician. DO NOT USE A HITCHDESIGNED FOR TEMPORARY IN- STALLATION AND NEVER USE ONE THAT ATTACHES ONLY TO THEBUMPER.
C180A01A-AAT USE OF LIGHTS Check your lights regularly for correct operation and always keep them clean.When driving during the day in condi- tions of poor visibility, it is helpful to drive with headlights on low beam.This enables you to be seen as well as to see. C190A01A-GAT TRAILER OR VEHICLE TOWING If you are considering towing with your car, you should first check with your Province Department of Motor Vehicles to determine their legal requirements.Since laws vary from province to prov- ince the requirements for towing trail- ers, cars, or other types of vehicles orapparatus may differ. Ask your Hyundai dealer for further details before towing.
CAUTION:
Do not do any towing with your carduring its first 2,000 km (1,200 miles) in order to allow the engine to prop-erly break in. Failure to heed this caution may result in serious en- gine or transaxle damage.
!
C170A01A-AAT HIGH SPEED MOTORING Pre-Trip Inspections 1. Tires: Adjust the tire inflation pressures to specification. Low tire inflation pres-sures will result in overheating and possible failure of the tires. Avoid using worn or damaged tireswhich may result in reduced traction or tire failure. NOTE: Never exceed the maximum tire in- flation pressure shown on the tires. 2. Fuel, engine coolant and engine oil: High speed travel consumes more fuel than urban motoring. Do not forget tocheck both engine coolant and engine oil. 3. Drive belt: A loose or damaged drive belt may result in overheating of the engine.
Page 176 of 235

5- 4 VEHICLE MAINTENANCE REQUIREMENTS
NO.
1 2 3 4 5 6 7 8 9 DESCRIPTION
ENGINE CONTROL SYSTEM MAINTENANCE ENGINE OIL & FILTER (SG OR ABOVE) See Note (1)
DRIVE BELT 3.0 V6 / 3.5 V6 (ALT, P/STRG, A/CON) 2.5 V6 (AUTO-TENSIONER)
FUEL FILTER (MFI TYPE) FUEL LINES, FUEL HOSES & CONNECTIONS TIMING BELT VAPOR HOSE & FUEL FILLER CAP VACUUM & CRANKCASE VENTILATION HOSES AIR CLEANER FILTER SPARK PLUGS SPARK PLUGS (PLATINUM COATED)
F030A01A-GAT SCHEDULED MAINTENANCE The following maintenance services must be performed to assure good vehicle control and performance. Keep receipts for all vehicle services to protect your warranty. Where both mileage and time are shown, the frequency of service is determined by whichever occurs first.
F030B02L-GAT R :Replace I : Inspect and, after Inspection, clean, adjust, repair or replace if necessary.105 84
R I I I 120
96
R R I
R
I I I
R
90
72
R I I I
R
I I
R
75
60
R I I I
60 48
R II
R
I I I I
R
45
36
R I I I
30
24
R I I II I
R
15
12
R I I I
KILOMETERS X 1000 MONTHS
Note : (1) SF OR LOWER: EVERY 10,000 KM OR 6 MONTHS : "R"
(2) FOR EVERY 40,000KM : "R" (3) FOR EVERY 100,000KM : "R"
See Note (2) See Note (3)
Page 192 of 235
DO-IT-YOURSELF MAINTENANCE 6- 11
G060B03L-GAT
Replacing the Spark Plugs
The spark plugs should be changed
at the intervals specified in the ve- hicle maintenance schedule in Sec- tion 5 or whenever engine perfor- mance indicates they should bechanged. Symptoms that suggest poor spark plug performance include en- gine misfiring under load, loss of fueleconomy, poor acceleration, etc. When spark plugs are replaced, al- ways use spark plugs recommendedby Hyundai. The use of other spark plugs can result in loss of perfor- mance, radio interference or enginedamage.
NOTE:
o When replacing the spark plug, Genuine Hyundai ReplacementParts are recommended. Recommended Spark Plugs:
NOTE: Do not clean or regap platinum- tipped spark plugs.
o Spark plugs should be tightenedfirmly. Overtightening can dam- age the threads in the aluminum cylinder head. Also, leavingthem too loose can cause the spark plug to get very hot and possibly result in damage to theengine.
o It is recommended that spark
plugs be changed by an autho-rized Hyundai dealer.
!
3.5L/3.0L
2.5L
3.5L/3.0L 2.5L
Type
RC10PYP4(CHAMPION) RC10PYPB4(CHAMPION) PFR5N-11(NGK) RC10PYPB4(CHAMPION) PFR5N-11(NGK) RC10YC4(CHAMPION) BKR5ES(NGK)
Remark
Un-
leaded
LeadedWARNING:
It is recommended that the engine be cool or cold when changing the spark plugs. If the engine is hot,you could burn yourself on the insulated connector, the spark plug or the engine itself.
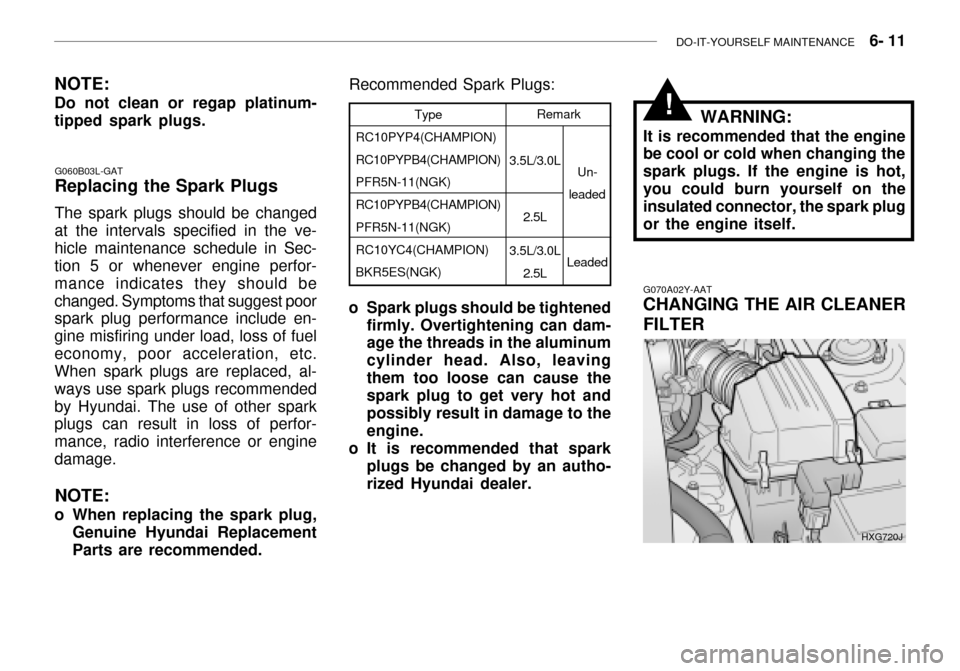
G070A02Y-AAT CHANGING THE AIR CLEANER FILTER
HXG720J
Page 206 of 235
DO-IT-YOURSELF MAINTENANCE 6- 25
Before performing aiming adjustment,
make sure of the following.
1. Keep all tires inflated to the correct
pressure.
2. Place the vehicle on level ground
and press the front bumper & rear bumper down several times. Place the vehicle at a distance of 3 m (118 in.) from the test wall.
3. See that the vehicle is unloaded (except for full levels of coolant,engine oil and fuel, and spare tire,jack, and tools). Have the driver or equivalent weight placed in driver's seat.
4. Clean the head light lenses and
turn on the headlights (low beam).
5. Open the hood.
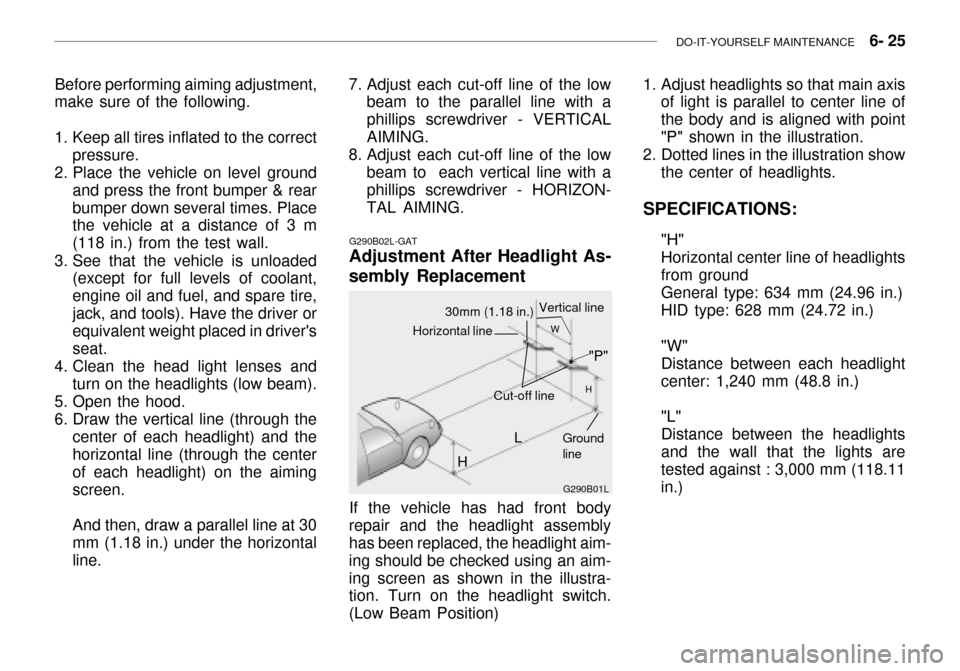
6. Draw the vertical line (through the center of each headlight) and the horizontal line (through the center of each headlight) on the aimingscreen. And then, draw a parallel line at 30 mm (1.18 in.) under the horizontal line.
G290B02L-GAT
Adjustment After Headlight As- sembly Replacement
G290B01L
LW
H
H Cut-off line
Ground line
If the vehicle has had front body
repair and the headlight assembly has been replaced, the headlight aim- ing should be checked using an aim-ing screen as shown in the illustra- tion. Turn on the headlight switch. (Low Beam Position)
"P"
Horizontal line
30mm (1.18 in.) Vertical line
7. Adjust each cut-off line of the low
beam to the parallel line with a phillips screwdriver - VERTICALAIMING.
8. Adjust each cut-off line of the low
beam to each vertical line with a phillips screwdriver - HORIZON- TAL AIMING. 1. Adjust headlights so that main axis
of light is parallel to center line ofthe body and is aligned with point"P" shown in the illustration.
2. Dotted lines in the illustration show the center of headlights.
SPECIFICATIONS: "H"Horizontal center line of headlightsfrom groundGeneral type: 634 mm (24.96 in.) HID type: 628 mm (24.72 in.) "W" Distance between each headlightcenter: 1,240 mm (48.8 in.) "L" Distance between the headlightsand the wall that the lights aretested against : 3,000 mm (118.11 in.)