Page 67 of 235

FEATURES OF YOUR HYUNDAI 1- 53
WARNING:
When the ignition switch is on and the windshield wiper switch is placed in the "AUTO" mode, please use caution in the following casesto avoid any hand injury: As the wiper system may automati- cally activate, the fingers or handmight be caught in the wiper.
o Do not touch the upper end of the windshield glass facing the rain sensor.
o Do not wipe the upper end of the
windshield glass with a cloth.
o Do not put pressure on the wind-
shield glass. HXGS251
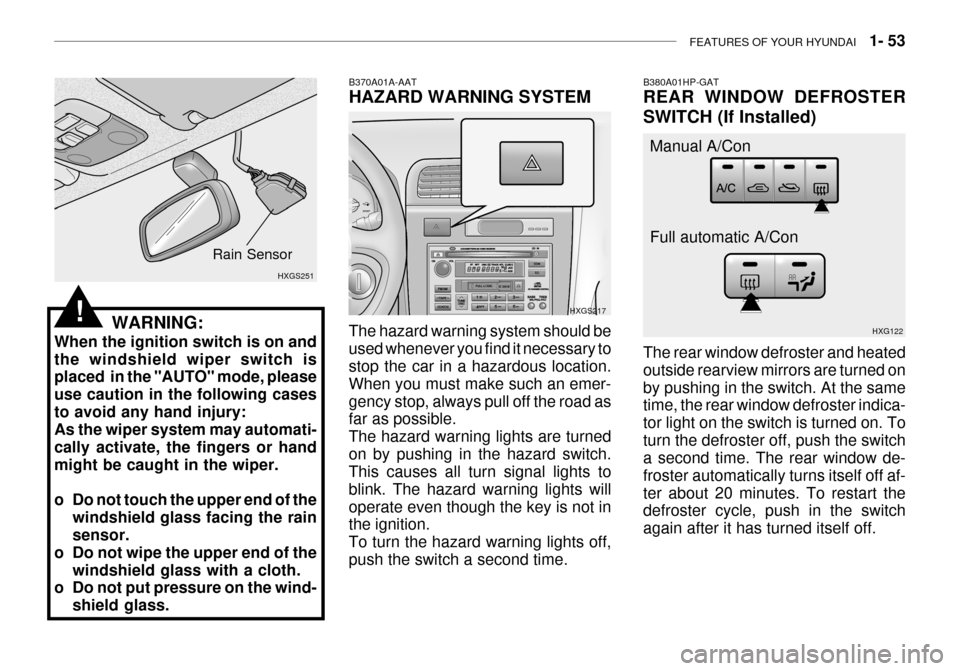
Rain Sensor
The rear window defroster and heated outside rearview mirrors are turned onby pushing in the switch. At the same time, the rear window defroster indica- tor light on the switch is turned on. Toturn the defroster off, push the switch a second time. The rear window de- froster automatically turns itself off af-ter about 20 minutes. To restart the defroster cycle, push in the switch again after it has turned itself off.
B380A01HP-GAT REAR WINDOW DEFROSTER SWITCH (If Installed)
B370A01A-AAT HAZARD WARNING SYSTEM The hazard warning system should be used whenever you find it necessary to stop the car in a hazardous location. When you must make such an emer-gency stop, always pull off the road as far as possible. The hazard warning lights are turnedon by pushing in the hazard switch. This causes all turn signal lights to blink. The hazard warning lights willoperate even though the key is not in the ignition. To turn the hazard warning lights off,push the switch a second time. HXGS217
HXG122
Manual A/Con Full automatic A/Con
!
Page 132 of 235

1- 118 FEATURES OF YOUR HYUNDAI
B870D03L
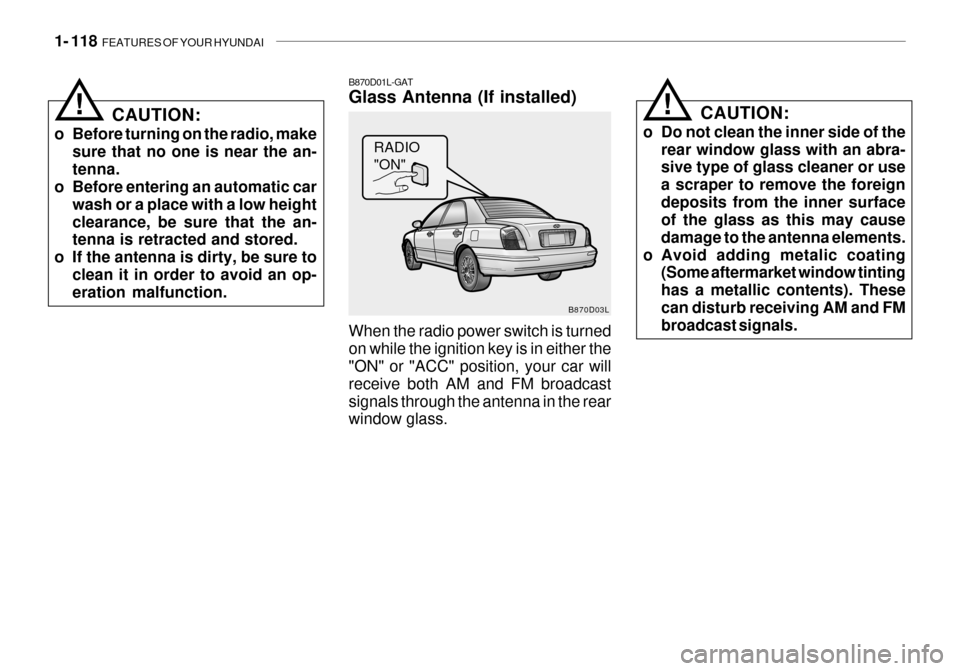
B870D01L-GAT Glass Antenna (If installed) When the radio power switch is turned on while the ignition key is in either the "ON" or "ACC" position, your car will receive both AM and FM broadcastsignals through the antenna in the rear window glass. RADIO "ON"
CAUTION:
o Before turning on the radio, make sure that no one is near the an- tenna.
o Before entering an automatic car
wash or a place with a low heightclearance, be sure that the an- tenna is retracted and stored.
o If the antenna is dirty, be sure to
clean it in order to avoid an op-eration malfunction. CAUTION:
o Do not clean the inner side of the rear window glass with an abra-sive type of glass cleaner or use a scraper to remove the foreigndeposits from the inner surface of the glass as this may cause damage to the antenna elements.
o Avoid adding metalic coating (Some aftermarket window tintinghas a metallic contents). Thesecan disturb receiving AM and FM broadcast signals.
!!
Page 153 of 235

DRIVING YOUR HYUNDAI 2- 21
C190F01Y-GAT Trailer or Vehicle Towing Tips
1. Before towing, check hitch and
safety chain connections as well as proper operation of the trailer run- ning lights, brake lights, and turn signals.
2. Always drive your vehicle at a mod- erate speed (Less than 100 km/h)
3. Trailer towing requires more fuel than normal conditions.
4. To maintain engine braking effi-
ciency and electrical charging per-formance, do not use fifth gear (manual transaxle).
5. Always secure items in the trailer to
prevent load shift while driving.
6. Check the condition and air pres-
sure of all tires on the trailer and your car. Low tire pressure can seriously affect the handling. Also check the spare tire. 10.During your trip, check occasion-
ally to be sure that the load issecure, and that the lights and anytrailer brakes are still working.
11.Avoid jerky starts, sudden accel-
eration or sudden stops.
12.Avoid sharp turns and rapid lane changes.
13.Avoid holding the brake pedal down too long or too frequently. This could cause the brakes to overheat, re- sulting in reduced braking efficien-cy.
14.When going down a hill, shift into a
lower gear and use the engine brak-ing effect. When ascending a long grade, downshift the transaxle to a lowergear and reduce speed to reduce chances of engine overloading and/ or overheating.
15.If you have to stop while going uphill, do not hold the vehicle inplace by pressing on the accelera-tor. This can cause the automatic transaxle to overheat. Use the park- ing brake or footbrake.
7. The vehicle/trailer combination is
more affected by crosswind andbuffeting.When being passed by a large ve- hicle, keep a constant speed and steer straight ahead. If there is toomuch wind buffeting, slow down to get out of the other vehicle's air turbulence.
8. When parking your car and trailer, especially on a hill, be sure to followall the normal precautions. Turnyour front wheel into the curb, set the parking brake firmly, and put the transaxle in 1st or Reverse(manual) or Park (automatic). In addition, place wheel chocks at each of the trailer's tires.
9. If the trailer has electric brakes, start your vehicle and trailer mov-ing, and then apply the trailer brakecontroller by hand to be sure the brakes are working. This lets you check your electrical connection atthe same time.
Page 186 of 235

DO-IT-YOURSELF MAINTENANCE 6- 5
G020A02A-AAT
GENERAL CHECKS Engine Compartment
The following should be checked regu- larly:
o Engine oil level and condition
o Transaxle fluid level and condition
o Brake fluid level
o Clutch fluid level
o Coolant level
o Windshield washer fluid level
o Accessory drive belt condition
o Coolant hose condition
o Fluid leaks (on or below compo- nents)
o Power steering fluid level and con-
dition
o Battery condition
o Air filter condition G020C01A-AAT Vehicle Interior The following should be checked each time when the vehicle is driven:
o Lights operation
o Windshield wiper operation
o Horn operation
o Defroster, heater system operation
(and air conditioning, if installed)
o Steering operation and condition
o Mirror condition and operation
o Turn signal operation
o Accelerator pedal operation
o Brake operation, including parking brake
o Manual transaxle operation, includ- ing clutch operation
o Automatic transaxle operation, in- cluding "Park" mechanism opera-tion
o Seat control condition and opera- tion
o Seat belt condition and operation
o Sunvisor operation If you notice anything that does not operate correctly or appears to befunctioning incorrectly, inspect it care- fully and seek assistance from your Hyundai dealer if service is needed.
G020B01A-AAT
Vehicle Exterior
The following should be checked
monthly:
o Overall appearance and condition
o Wheel condition and wheel nut torgue
o Exhaust system condition
o Light condition and operation
o Windshield glass condition
o Wiper blade condition
o Paint condition and body corrosion
o Fluid leaks
o Door and hood lock condition
o Tire pressure and condition (including spare tire)
Page 207 of 235
6- 26 DO-IT-YOURSELF MAINTENANCE
G260A01L-GAT
REPLACEMENT OF LIGHT BULBS
Before attempting to replace a light bulb, be sure the switch is turned tothe "OFF" position.The next paragraph shows how toreach the light bulbs so they may be changed. Be sure to replace the burned-out bulb with one of the samenumber and wattage rating.See page 6-33 for the wattage de-scriptions.
! CAUTION:
o Keep the lights out of contact with petroleum products, such as oil, gasoline, etc.
o Be sure to replace the LED type equipped bulbs with an assem-bly.Replacement instructions:
1. Allow the bulb to cool. Wear eye protection.
2. Open the engine hood.
3. Always grasp the bulb by its plastic base, avoid touching the glass. G270A03L
G270A02L-GAT
HEADLIGHT AND FRONT TURN SIGNAL LIGHT
High beam Low beam
Turn signal light
G270D01L
4. Using a spanner of the correct size, remove the headlight assem- bly mounting bolts.
G270D02L
5. Disconnect the power cord from the back of the headlight.
Page 208 of 235
DO-IT-YOURSELF MAINTENANCE 6- 27
G270A04L
General type
High beam (H1)
Low beam (H7)
Turn signal light
6. Turn the plastic cover counterclock- wise and remove it.
G270A06L
7. Disconnect the power cord from the bulb base in the back of the headlight.
G270A07L
8. Push the bulb spring to remove the headlight bulb.
9. Remove the protective cap from the replacement bulb and install the new bulb by matching theplastic base with the headlight hole. Retighten the bulb spring and reconnect the power cord.
10. Use the protective cap and carton to promptly dispose of the oldbulb.
11. Check for proper headlight aim.
12. To replace the front turn signal light bulb, take out it from the bulb holder and install the new bulb. G270A08L
1FJB5036
Page 209 of 235
6- 28 DO-IT-YOURSELF MAINTENANCE
G270I01L-GAT
FRONT FOG LIGHT
G270D01L
1. Remove the headlight assembly mounting bolts.
G270D02L
HID type
!
G270A05L
High beam (H7)
Low beam (XENON)Turn signal light
WARNING:
o This halogen bulb contains gas under pressure and if impacted could shatter, resulting in flyingfragments. Always wear eye pro- tection when servicing the bulb. Protect the bulb against abra-sions or scratches and against liquids when lighted. Turn the bulb on only when installing ina headlight. Replace the head- light if damaged or cracked. Keep the bulb out of the reachof children and dispose of the used bulb with care. o You can replace the high beam
(H1 or H7) and front turn signal light. The replacement instruc-tion is same with the general type's one. But you must not replace or inspect the low beam(XENON bulb). It has a danger of an electric shock. If the low beam (XENON bulb) is not working,have your vehicle inspected by your Hyundai Dealer.
Page 210 of 235
DO-IT-YOURSELF MAINTENANCE 6- 29
G270D03L
2. Disconnect the power cord from
the back of the headlight.
3. Take out front fog light from the bulb holder by turning it counter- clockwise.
4. Disconnect the power cord fromthe bulb.
5. Replace with a new bulb. G270D04L
G270D01L-GAT
REAR COMBINATION LIGHT
(Stop /Tail Light and Rear Turn Signal Light)
1. Open the trunk lid.
2. Remove the cover on the inside of
rear luggage trim by unscrewing the screws. G270B01L