Page 161 of 415
The main air f low is divided
between the f loor vents and de-
froster vents at the base of the wind-
shield.
The main air f low is divided
between the dashboard vents and
the f loor vents. The main air flow comes
f rom the f loor vents.
The main air flow comes
f rom the dashboard vents.
Climat e Cont rol Syst em
Comf ort and Convenience Feat ures158
Page 162 of 415
The button directs the main
air f low to the windshield f or f aster
def rosting. It also overrides any
MODE selection you may have made.
When you select , the A/C
turns on automatically and the
system selects Fresh Air mode. If
thefancontroldialisinAUTO,the
f an speed increases automatically. If
it is not in AUTO, manually increase
the f an speed or set the dial to
AUTO. You can increase air f low to
thewindshieldbyclosingtheside
vents in the dashboard.
When you turn of f by
pressing the button again, the
system returns to its former settings.
This button turns the rear window
def ogger on and of f (see page ).87
Climat e Cont rol Syst em
Comf ort and Convenience Feat ures
Rear Window Def ogger Button
159
REAR WINDOW DEFOGGER BUTTON
Page 165 of 415
This button controls the source of
the air going into the system. When
the indicator above this button is lit,
air f rom the vehicle’s interior is sent
through the system again (Recircula-
tion mode). When the indicator is off,
air is brought in f rom outside the
vehicle (Fresh Air mode).
You can, f or example, manually put
the system in recirculation mode
when driving through an area of
smoke or f umes.
You can manually select the f an
speed by pressing any of the f an
control icons.Use the MODE icons to select the
vents the air flows from. Some air
will f low f rom the dashboard corner
vents and the side vents in all modes.
Climat e Cont rol Syst em
Comf ort and Convenience Feat ures
Recirculat ion But t on
Fan Cont rol Icons Mode Icons
162
RECIRCULATION BUTTONMODE ICONS
FAN CONTROL ICONS
Page 166 of 415
CONT INUED
The main air f low is divided
between the f loor vents and de-
froster vents at the base of the wind-
shield.
The main air flow comes
f rom the f loor vents.
The main air f low is divided
between the dashboard vents and
the f loor vents.
The main air flow comes
f rom the dashboard vents.
Climat e Cont rol Syst em
Comf ort and Convenience Feat ures163
Page 167 of 415
The button directs the main
air f low to the windshield f or f aster
def rosting. It also overrides any
MODE selection you may have made.
When you turn of f by
pressing the button again, the
system returns to its former settings. When you select , the A/C
turns on automatically and the
system selects Fresh Air mode. For
f aster def rosting, manually set the
fanspeedtohigh.Youcanalso
increase air f low to the windshield by
closing the side vents in the
dashboard.
This button turns the rear window
def ogger on and of f (see page ).87
Rear Window Def ogger Button
Climat e Cont rol Syst em
Comf ort and Convenience Feat ures164
DEFROST BUTTON
REAR WINDOW DEFOGGER BUTTON
Page 168 of 415
Theclimatecontrolsystemhastwo
sensors. A sunlight sensor is located
in the top of the dashboard and a
temperature sensor is next to the
steering column. Do not cover the
sensors or spill any liquid on them. Sunlight Sensor/T emperature
Sensor
Climat e Cont rol Syst em
Comf ort and Convenience Feat ures165
SUNLIGHT SENSORTEMPERATURE SENSOR
Page 237 of 415

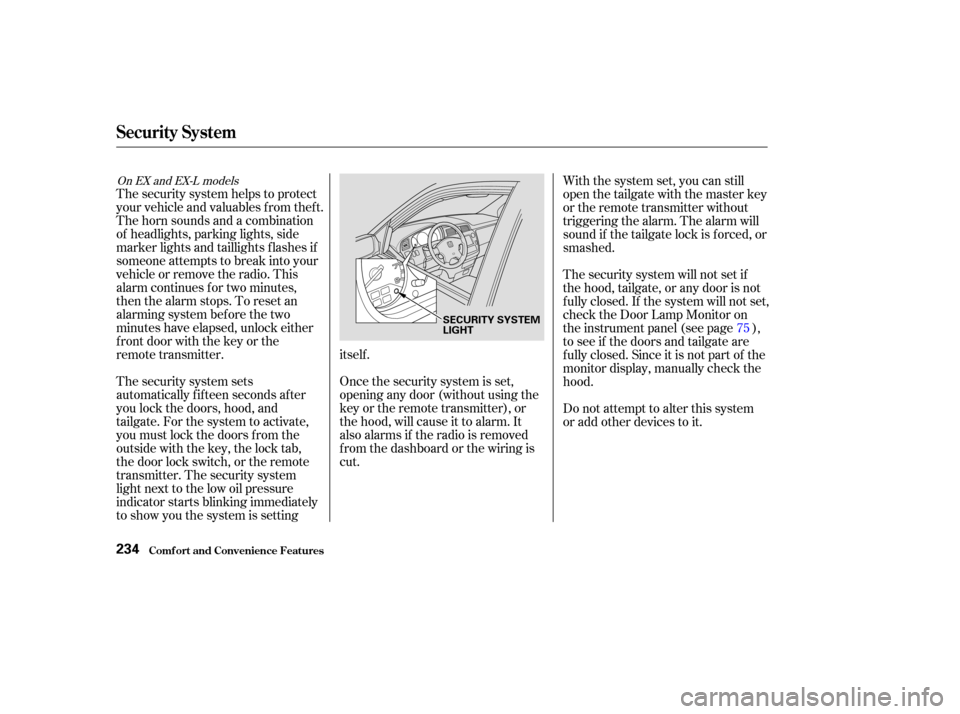
The security system helps to protect
your vehicle and valuables f rom thef t.
The horn sounds and a combination
of headlights, parking lights, side
marker lights and taillights f lashes if
someone attempts to break into your
vehicleorremovetheradio.This
alarm continues f or two minutes,
then the alarm stops. To reset an
alarming system before the two
minutes have elapsed, unlock either
f ront door with the key or the
remote transmitter.
The security system sets
automatically fifteen seconds after
you lock the doors, hood, and
tailgate. For the system to activate,
you must lock the doors f rom the
outside with the key, the lock tab,
the door lock switch, or the remote
transmitter. The security system
light next to the low oil pressure
indicator starts blinking immediately
to show you the system is settingitself .
Once the security system is set,
opening any door (without using the
key or the remote transmitter), or
the hood, will cause it to alarm. It
also alarms if the radio is removed
f rom the dashboard or the wiring is
cut.With the system set, you can still
open the tailgate with the master key
or the remote transmitter without
triggering the alarm. The alarm will
sound if the tailgate lock is f orced, or
smashed.
The security system will not set if
the hood, tailgate, or any door is not
f ully closed. If the system will not set,
check the Door Lamp Monitor on
the instrument panel (see page ),
to see if the doors and tailgate are
f ully closed. Since it is not part of the
monitor display, manually check the
hood.
Do not attempt to alter this system
or add other devices to it.
75
On EX and EX-L models
Security System
Comf ort and Convenience Feat ures234
SECURITY SYSTEM
LIGHT
Page 249 of 415

Remove the f uel f ill cap slowly.
You may hear a hissing sound as
pressure inside the tank escapes.
Place the cap in the holder on the
fuel fill door.
Stop f illing the tank af ter the f uel
nozzle automatically clicks of f . Do
not try to ‘‘top off’’ the tank, leave
some room f or the f uel to expand
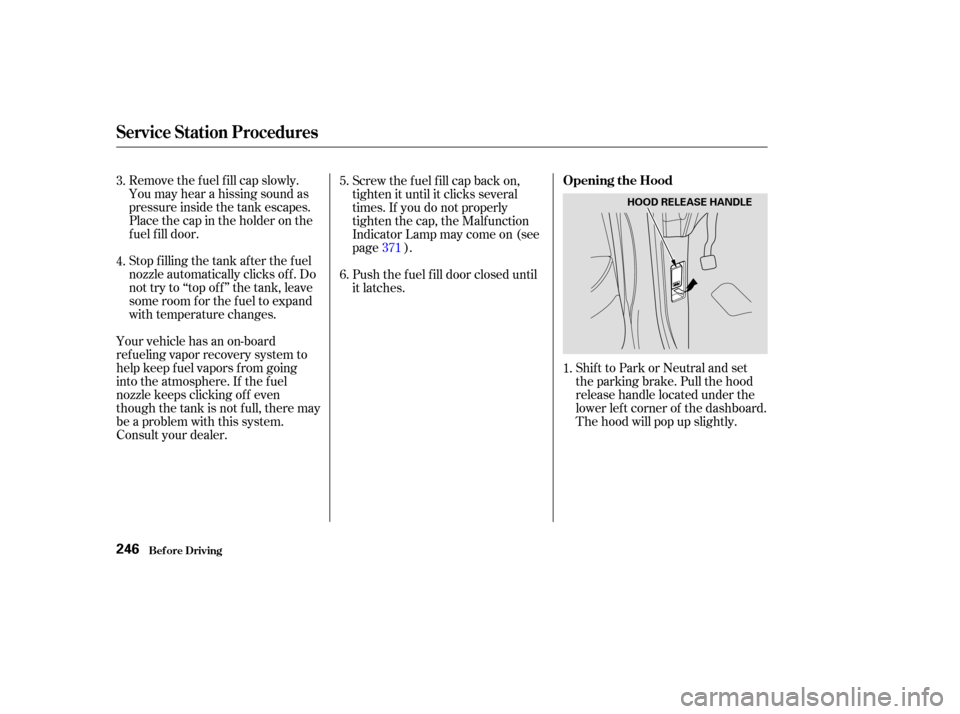
with temperature changes.Shift to Park or Neutral and set
the parking brake. Pull the hood
release handle located under the
lower lef t corner of the dashboard.
The hood will pop up slightly.
Screw the f uel f ill cap back on,
tighten it until it clicks several
times. If you do not properly
tighten the cap, the Malfunction
Indicator Lamp may come on (see
page ).
Push the f uel f ill door closed until
it latches.
Your vehicle has an on-board
ref ueling vapor recovery system to
help keep f uel vapors f rom going
into the atmosphere. If the fuel
nozzle keeps clicking of f even
though the tank is not full, there may
be a problem with this system.
Consult your dealer. 1.
3.
4.
5.
6.
371
Service Station Procedures
Bef ore Driving
Opening the Hood
246
HOOD RELEASE HANDLE