Page 109 of 415

Each power sliding door has an auto-
reverse f eature. If a door meets
resistance while closing, it will beep
three times and automatically
reverse direction. However, the door
may not immediately reverse
direction (like some elevator doors),
and the f orce of a closing door may
cause bruising or discomf ort. Always
make sure passengers and any
objects are well away f rom the power
sliding doors bef ore closing them.
Also check that passengers,
especially children, do not have their
hands on the edge of the sliding door
or on the door pillar. The auto-
reverse f eature stops working when
the door is about to latch so the
motor can pull the door shut.
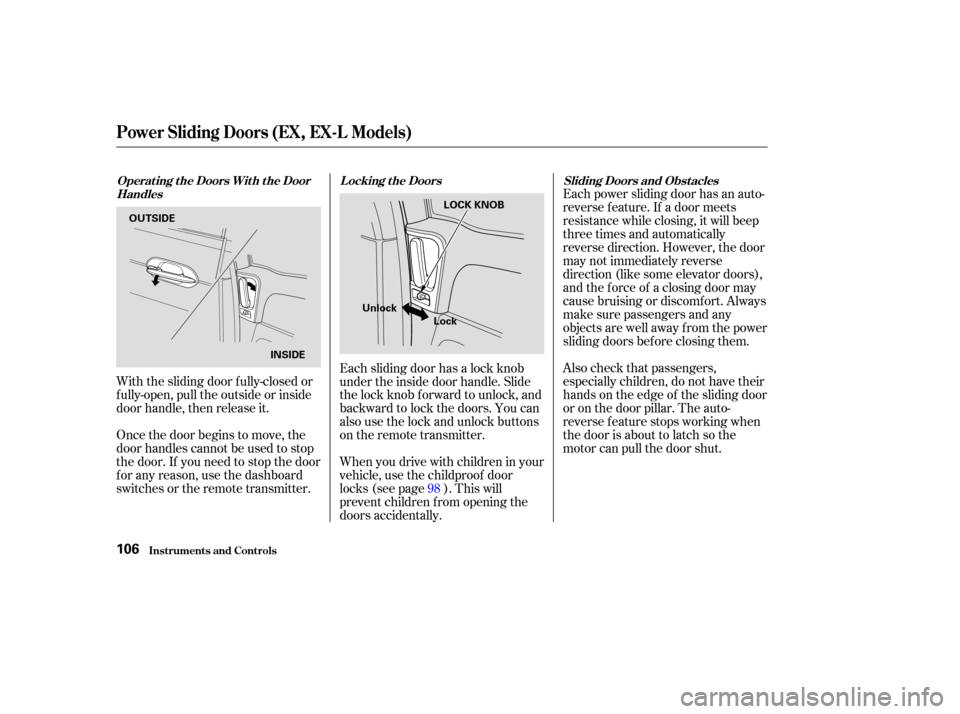
With the sliding door f ully-closed or
f ully-open, pull the outside or inside
door handle, then release it.
Once the door begins to move, the
door handles cannot be used to stop
the door. If you need to stop the door
f or any reason, use the dashboard
switches or the remote transmitter. Each sliding door has a lock knob
under the inside door handle. Slide
the lock knob f orward to unlock, and
backward to lock the doors. You can
also use the lock and unlock buttons
on the remote transmitter.
Whenyoudrivewithchildreninyour
vehicle, use the childproof door
locks (see page ). This will
prevent children f rom opening the
doors accidentally.
98
Operat ing t he Doors Wit h t he Door
Handles L ocking t he Doors
Sliding Doors and Obst acles
Power Sliding Doors (EX, EX-L Models)
Inst rument s and Cont rols106
OUTSIDE
INSIDE LOCK KNOB
Unlock Lock
Page 110 of 415

If a person or object is in the way
af ter the door begins to close, the
door handles cannot be used to stop
the door. To stop the door, use the
dashboard switches or the remote
transmitter.When parking f acing downhill on a
steep grade, the power sliding doors
may not open or close as they do
normally.
Make sure the MAIN switch is in
the ON position. This allows the
power assist to keep the doors
f rom slamming shut.
If the MAIN switch is off, the door
can slam shut and possibly injure
someone.
Make sure the power sliding doors
are latched in the f ully-open
position, then hold the door open
while allowing your passengers to
enter or exit the vehicle. Do not
pull the inside or outside door
handle, or the latch will release
and the door will close.
Bef ore ref ueling, make sure the
driver’s side sliding door is f ully
closed. When you release the f uel f ill
door, the driver’s side sliding door
automatically locks so it cannot open
and interfere with the fuel door. If a
passenger attempts to unlock the
door by cycling the lock knob several
times, the door may unlock and can
be opened.
If a passenger needs to get out of the
vehicle while you are ref ueling,
instruct that person to exit on the
passenger’s side, not the driver’s
side.
Af ter you close the f uel f ill door, the
sliding door does not automatically
unlock. You must unlock it manually.
CONT INUED
Parking Facing Downhill
A Not e A bout Ref ueling
Power Sliding Doors (EX, EX-L Models)
Inst rument s and Cont rols107
Page 111 of 415
If the Power Sliding Door indicator
comes on and stays on, it indicates a
problem in the system. Turn the
MAIN switch of f to turn of f the
indicator. Have the system inspected
by your Honda dealer as soon as
possible.
If your vehicle’s battery is
disconnected or goes dead while a
sliding door is open, the power
sliding door system needs to be reset.
Af ter reconnecting the battery:
If the power sliding doors are closed,
the system will reset itself
automatically once the battery has
been reconnected.
If the power sliding doors do not
operate properly af ter resetting,
have your vehicle checked by a
Honda dealer.
Close each sliding door completely
by hand; or
Move the MAIN switch on the
dashboard to the ON position.
Push and hold the top of each door
switch until each sliding door
closes completely.
Power Sliding Door Indicat or
How t o Reset t he Power Sliding
Doors
Power Sliding Doors (EX, EX-L Models)
Inst rument s and Cont rols108
POWER SLIDING DOOR INDICATOR
Page 131 of 415
Turn the ignition switch ON (II).
Move the selector switch to L
(driver’s side) or R (passenger’s
side).Push the appropriate edge of the
adjustment switch to move the
mirrorright,left,up,ordown.
When you f inish, move the
selector switch to the center (off)
position. This turns of f the
adjustment switch so you can’t
move a mirror out of position by
accidentally bumping the switch.
Keeptheinsideandoutsidemirrors
clean and adjusted f or best visibility.
Be sure to adjust the mirrors bef ore
you start driving.
The inside mirror has day and night
positions. The night position reduces
glare f rom headlights behind you.
Flip the tab on the bottom edge of
the mirror to select the day or night
position.
Adjust the outside mirrors with the
adjustment switch on the lef t side of
the dashboard:
1.
2.
3.
4.
Adjusting the Power Mirrors
Mirrors
Inst rument s and Cont rols128
TAB
SELECTOR SWITCH
ADJUSTMENT SWITCH
Page 148 of 415
Use the MODE buttons to select the
vents the air flows from. Some air
will f low f rom the dashboard corner
vents in all modes.Air f lows f rom the f loor
vents. Air f low is divided between
the vents in the dashboard and the
f loor vents. Air flows from the center
and corner vents in the dashboard.
Air f low is divided between
the f loor vents and the def roster
vents at the base of the windshield.
Air f lows f rom the def roster
vents at the base of the windshield. When you select , the system
automatically switches to Fresh Air
mode.
When you select or ,
the system automatically switches to
Fresh Air mode and turns on the
A/C.
In these two modes, the A/C stays
on.
Heating and Cooling
Comf ort and Convenience Feat ures
Mode Buttons
145
Page 149 of 415
The vents in the corners of the
dashboard can be opened and closed
with the dials next to them.
You can adjust the direction of the
air coming f rom the dashboard vents
by moving the tab in the center of
each vent up-and-down and side-to-
side. There are f our vents in the ceiling
(see page ).
168
Heating and Cooling
Comf ort and Convenience Feat ures
Vent Controls
146
CENTER VENTS CORNER VENT
REAR CEILING VENT
Page 155 of 415

For the climate control system to
provide heating and cooling, the
engine must be running.
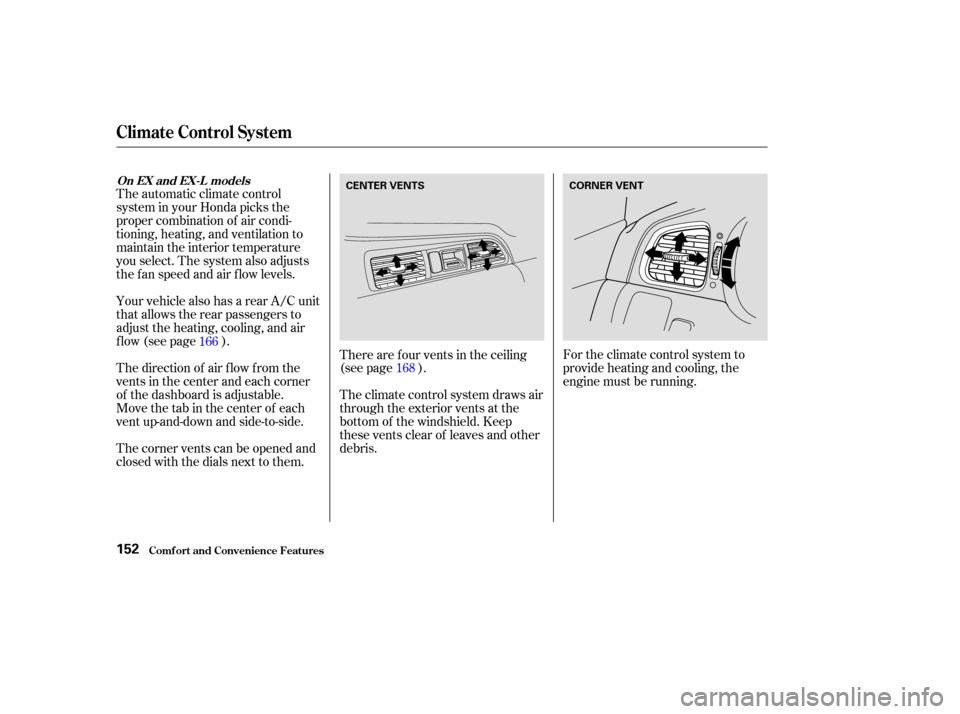
The automatic climate control
system in your Honda picks the
proper combination of air condi-
tioning, heating, and ventilation to
maintain the interior temperature
you select. The system also adjusts
the fan speed and air flow levels.
The direction of air f low f rom the
vents in the center and each corner
of the dashboard is adjustable.
Move the tab in the center of each
vent up-and-down and side-to-side. Your vehicle also has a rear A/C unit
that allows the rear passengers to
adjust the heating, cooling, and air
f low (see page ).
The corner vents can be opened and
closed with the dials next to them.
The climate control system draws air
through the exterior vents at the
bottom of the windshield. Keep
these vents clear of leaves and other
debris. There are f our vents in the ceiling
(see page ).
166
168
Climat e Cont rol Syst em
Comf ort and Convenience Feat ures
On EX and EX-L models
152
CENTER VENTS CORNER VENT
Page 160 of 415
You can manually select the f an
speedbyturningthefancontroldial.
When you turn the dial clockwise,
the fan is taken out of automatic
mode and starts to run at its lowest
speed. Turning the dial f ully
clockwise increases the f an’s speed,
which increases air flow.
With this dial, you can adjust the
rear A/C unit heating, cooling, and
air flow (see page ).
Use the MODE button to select the
vents the air flows from. Some air
will f low f rom the dashboard corner
vents in all modes. Each time you
press the MODE button, the display
shows the mode selected. Press the
button four times to see all the
modes.166
CONT INUED
Fan Cont rol Dial
Rear A /C Cont rol DialMode Button
Climat e Cont rol Syst em
Comf ort and Convenience Feat ures157
MODE BUTTON FAN CONTROL DIAL
REAR A/C CONTROL DIAL