Page 43 of 415
Af ter conf irming that the belt is
locked, grab the shoulder part of
the belt near the buckle and pull
up to remove any slack from the
lap part of the belt. Remember, if
the lap part of the belt is not tight,
the child seat will not be secure. It
mayhelptoputweightonthe
child seat, or push on the back of
the seat, while pulling up on the
belt.
To activate the lockable retractor,
slowly pull the shoulder part of the
belt all the way out until it stops,
then let the belt f eed back into the
retractor (you might hear a
clicking noise as the belt retracts). Af ter the belt has retracted, tug on
it. If the belt is locked, you will not
be able to pull it out. If you can pull
the belt out, it is not locked and
you will need to repeat these steps.
4.
2. 3.
Protecting Children
Driver and Passenger Saf ety40
Page 44 of 415
To deactivate the locking
mechanism in order to remove a
child restraint system, unlatch the
buckle, unroute the seat belt, and let
the belt fully retract.
Push and pull the child seat
f orward and f rom side to side to
verif y that it is secure enough to
stay upright during normal driving
maneuvers. If the child seat is not
secure, unlatch the belt, allow it to
retract f ully, then repeat these
steps. To install a forward-facing child seat
in the center position of the third
seat, use the lap part of the lap/
shoulder belt. Follow instruction
number 1 on page f or routing and
latching the seat belt.
5.
39
CONT INUED
Inst alling a Child Seat in t he Cent erPosition of the T hird Seat
Protecting Children
Driver and Passenger Saf ety41
Page 54 of 415

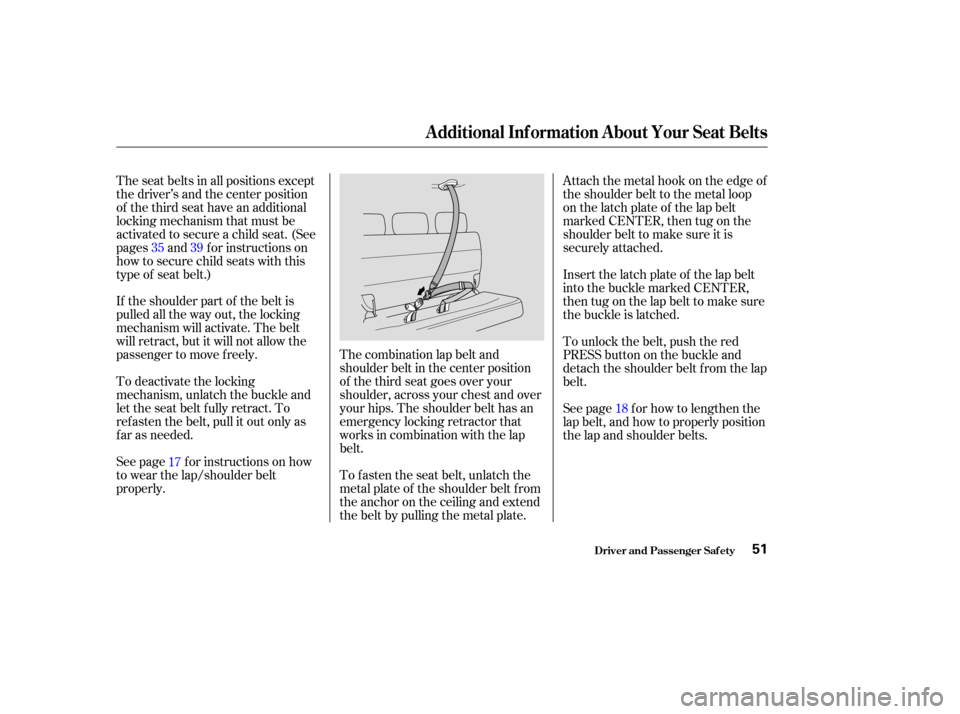
The combination lap belt and
shoulder belt in the center position
of the third seat goes over your
shoulder, across your chest and over
your hips. The shoulder belt has an
emergency locking retractor that
works in combination with the lap
belt.
The seat belts in all positions except
the driver’s and the center position
of the third seat have an additional
locking mechanism that must be
activated to secure a child seat. (See
pages and f or instructions on
how to secure child seats with this
type of seat belt.)
If the shoulder part of the belt is
pulled all the way out, the locking
mechanism will activate. The belt
will retract, but it will not allow the
passenger to move f reely.
To deactivate the locking
mechanism, unlatch the buckle and
let the seat belt f ully retract. To
ref asten the belt, pull it out only as
f ar as needed.
See page f or instructions on how
to wear the lap/shoulder belt
properly.
To f asten the seat belt, unlatch the
metal plate of the shoulder belt from
the anchor on the ceiling and extend
the belt by pulling the metal plate.Attach the metal hook on the edge of
the shoulder belt to the metal loop
on the latch plate of the lap belt
marked CENTER, then tug on the
shoulder belt to make sure it is
securely attached.
Insert the latch plate of the lap belt
into the buckle marked CENTER,
then tug on the lap belt to make sure
the buckle is latched.
To unlock the belt, push the red
PRESS button on the buckle and
detach the shoulder belt f rom the lap
belt.
See page f or how to lengthen the
lap belt, and how to properly position
the lap and shoulder belts.
39
17 18
35
Additional Inf ormation About Your Seat Belts
Driver and Passenger Saf ety51
Page 72 of 415

This section gives inf ormation about
the controls and displays that
contribute to the daily operation of
your Honda. All the essential
controls are within easy reach............................
Control Locations .70
...............................
Indicator Lights .71
.............................................
Gauges .78
Controls Near the Steering .......................................
Wheel .81
...................................
Headlights .82
Automatic Lighting Off .....................................
Feature .83
............
Daytime Running Lights . 83
....
Instrument Panel Brightness . 83
................................
Turn Signals .84 .....................
Windshield Wipers .84
..................
Windshield Washers . 86
Rear Window Wiper and .....................................
Washer .86
..........................
Hazard Warning .87
.............
Rear Window Def ogger . 87
......
Steering Wheel Adjustment . 88
...............................
Keys and Locks .89
..............................................
Keys .89
....................
Immobilizer System . 90
............................
Ignition Switch .91
......................
Power Door Locks .92
...................
Remote Transmitter . 94
..............
Childproof Door Locks . 98
........................................
Tailgate .98
..................................
Glove Box .100
...................
Manual Sliding Doors . 101
.....................
Power Sliding Doors .103
...............................................
Seats .109
....................
Passenger Seating .109
......................
Seat Adjustments .110
Driver’s Seat Manual Height ............................
Adjustment .112
Driver’s Seat Power ..........................
Adjustments .113
.........
Driver’s Lumbar Support . 114....................................
Armrests .115
........................
Head Restraints .115
.....................
Third Seat Access .116
Moving the Second Row ...........................
Bucket Seat .117
Removing the Bucket Seats ................
in the Second Row . 119
Folding the Third Row .........................
‘‘Magic Seat’’ .120
..................................
Seat Heaters .123
............................
Power Windows .124
...........................................
Mirrors .128
...............................
Parking Brake .129
..................................
Digital Clock .130
..................................
Center Table .130
.........................
Beverage Holders .132
........................
Sunglasses Holder .134
........................................
Sun Visor .134
................................
Vanity Mirror .135
.......................
Rear Compartment .135
...............................
Center Pocket .136
...................................
Coin Holder .136
...................................
Storage Box .137
......................................
Coat Hook .137
............
Accessory Power Sockets . 138
...............................
Interior Lights .139
Instruments and Controls
Inst rument s and Cont rols69
Page 101 of 415
The childproof door locks are
designed to prevent children seated
in the rear f rom accidentally opening
the rear sliding doors. Each door has
a lock lever near the edge. With the
lever in the LOCK position, the door
cannot be opened f rom the inside
regardless of the position of the lock
knob. To open the door, slide the
lock knob f orward and use the
outside door handle.With the childproof door locks on,
automatic operation with the inside
door handle is disabled.
Use your key to lock and unlock the
tailgate.
On the EX and EX-L models, you can
also lock and unlock the tailgate with
theremotetransmitter(seepage).
94
On EX and EX-L models
Keys and Locks
Inst rument s and Cont rols
Childproof Door L ocks T ailgate
98
Unlock
LOCK
LEVER Lock
Page 104 of 415
Your Honda is equipped with dual
sliding doors. Be sure all passengers
are clear of the sliding doors bef ore
closing them.Each sliding door has a lock knob
under the inside door handle. Slide
the lock knob f orward to unlock, and
backward to lock.
Whenyoudrivewithchildreninyour
vehicle, use the childproof door
locks (see page ). This will
prevent children f rom opening the
doors accidentally.
To open a manual sliding door, pull
the inside or outside door handle and
slide the door back. It will latch in
the f ully-open position.
To close the door, pull either handle
and slide the door closed. Make sure
the door is closed and latched
securely bef ore driving.
98
CONT INUED
Manual Sliding Doors (L X Model)
Inst rument s and Cont rols
L ocking t he Doors
Opening and Closing t he Doors
101
OUTSIDE
INSIDE LOCK KNOB
Lock
Unlock
Page 106 of 415

Your Honda is equipped with dual
power sliding doors. The doors on
the EX and EX-L models are
electrically powered and can be
operated with the remote transmitter,
the door handles, or the switches on
the dashboard.
Be sure all passengers are clear of
the sliding doors bef ore closing them.The power sliding doors operate
with the ignition switch in any
position. In addition:
If you shif t out of Park while a door
is opening, you will hear a
continuous tone and the door will
stop moving. If you keep driving with
the door open, the tone continues
until you stop and close the door.
If you shif t out of Park while a door
is closing, you will hear a beep until
the power sliding door closes
completely. Make sure both sliding doors are
closed bef ore you start driving. To open the door with the inside
handle, the childproof door lock
on the door you want to operate
must be unlocked (see page ). The sliding door you want to
operate must be unlocked. The MAIN switch on the
dashboard must be in the ON
position. TheshiftlevermustbeinPark.
98
CONT INUED
Power Sliding Doors (EX, EX-L Models)
Inst rument s and Cont rols103
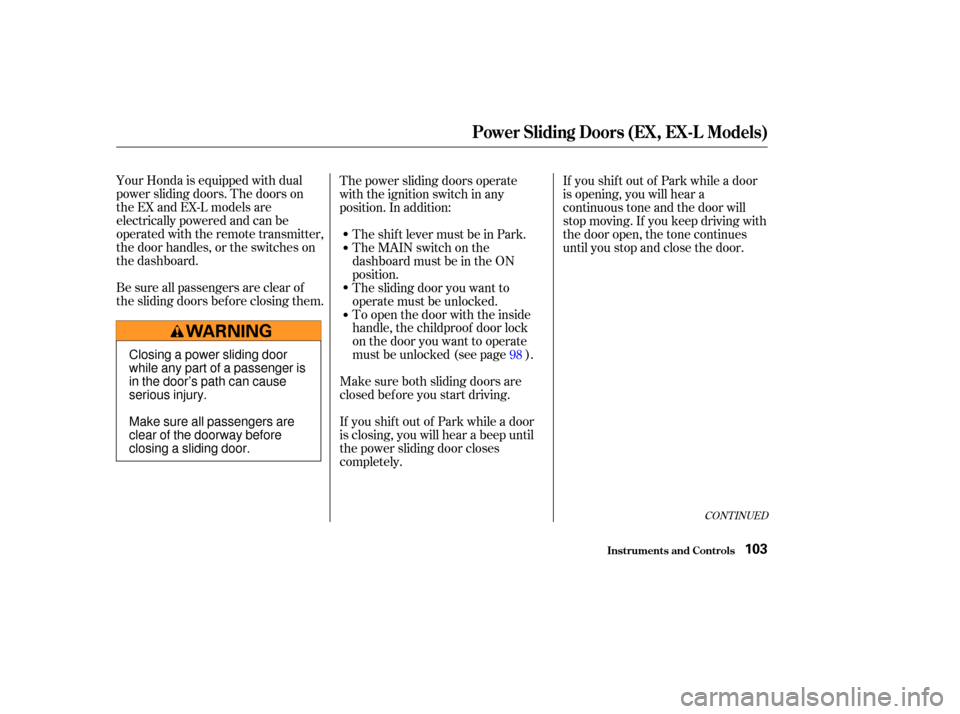
Closing a power sliding door
while any part of a passenger is
in the door’s path can cause
serious injury.
Make sure all passengers are
clear of the doorway before
closing a sliding door.
Page 109 of 415

Each power sliding door has an auto-
reverse f eature. If a door meets
resistance while closing, it will beep
three times and automatically
reverse direction. However, the door
may not immediately reverse
direction (like some elevator doors),
and the f orce of a closing door may
cause bruising or discomf ort. Always
make sure passengers and any
objects are well away f rom the power
sliding doors bef ore closing them.
Also check that passengers,
especially children, do not have their
hands on the edge of the sliding door
or on the door pillar. The auto-
reverse f eature stops working when
the door is about to latch so the
motor can pull the door shut.
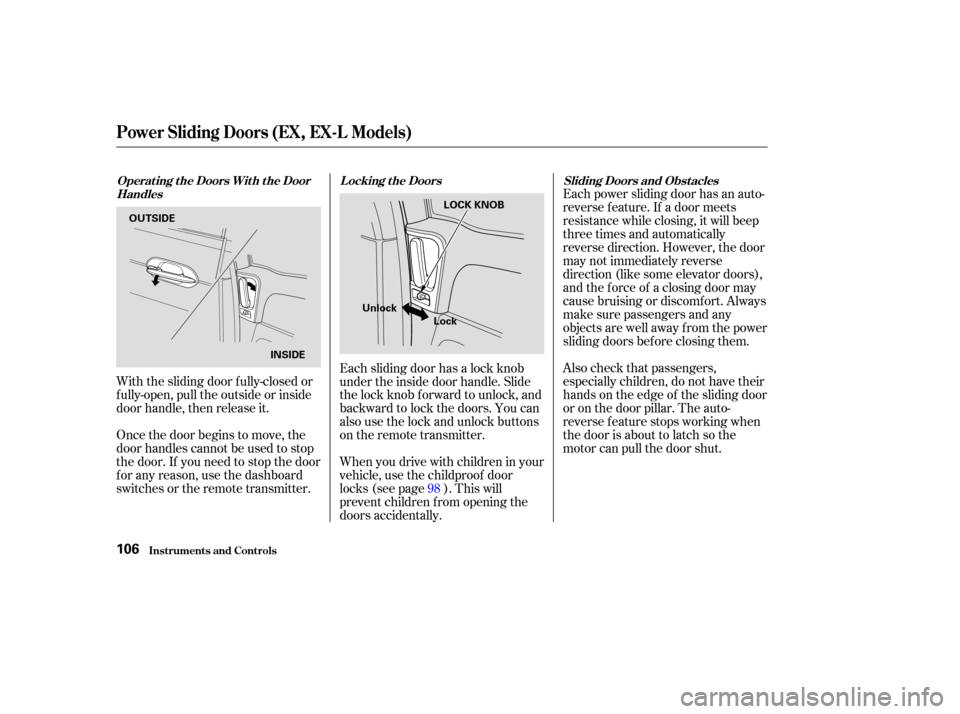
With the sliding door f ully-closed or
f ully-open, pull the outside or inside
door handle, then release it.
Once the door begins to move, the
door handles cannot be used to stop
the door. If you need to stop the door
f or any reason, use the dashboard
switches or the remote transmitter. Each sliding door has a lock knob
under the inside door handle. Slide
the lock knob f orward to unlock, and
backward to lock the doors. You can
also use the lock and unlock buttons
on the remote transmitter.
Whenyoudrivewithchildreninyour
vehicle, use the childproof door
locks (see page ). This will
prevent children f rom opening the
doors accidentally.
98
Operat ing t he Doors Wit h t he Door
Handles L ocking t he Doors
Sliding Doors and Obst acles
Power Sliding Doors (EX, EX-L Models)
Inst rument s and Cont rols106
OUTSIDE
INSIDE LOCK KNOB
Unlock Lock