2003 GMC SIERRA DENALI headlamp
[x] Cancel search: headlampPage 138 of 428

Daytime Running Lamps
Daytime Running Lamps (DRL) can make it easier for
others to see the front of your vehicle during the
day. DRL can be helpful
in many different driving
conditions, but they can be especially helpful in the short
periods after dawn and before sunset. Fully functional
daytime running lamps are required on all vehicles
first sold in Canada.
The DRL system will come on when the following
conditions are met:
The ignition is on,
0 the exterior lamp control is in AUTO
0 the automatic transmission is not in PARK (P), and
0 the light sensor determines it is daytime.
When the
DRL are on, only your DRL lamps will be on.
The taillamps, sidemarker and other lamps won’t be
on. The instrument panel won’t be lit up either. When
it begins to
get dark, the automatic headlamp
system will switch from DRL to the headlamps or the last
chosen headlamp setting that was used.
W-hen you turn the exterior iamp controi
to off, the
headlamps will go off, and your DRL lamps will
illuminate, provided it is not dark outside.
Shifting the transmission into PARK
(P) will allow you to
idle the vehicle with the DRL off. The DRL will stay
off until you release the parking brake or shift the
transmission out of PARK (P).
Puddle Lamps
Your vehicle is equipped with puddle lamps to help you
see the area near the base
of the front doors when it
is dark out. The puddle lamps will illuminate when a door
is opened or when you press the UNLOCK button on
the keyless entry transmitter.
3-1 3
Page 139 of 428
Fog Lamps
You can use your vehicle’s fog lamps for better vision in
foggy or misty conditions.
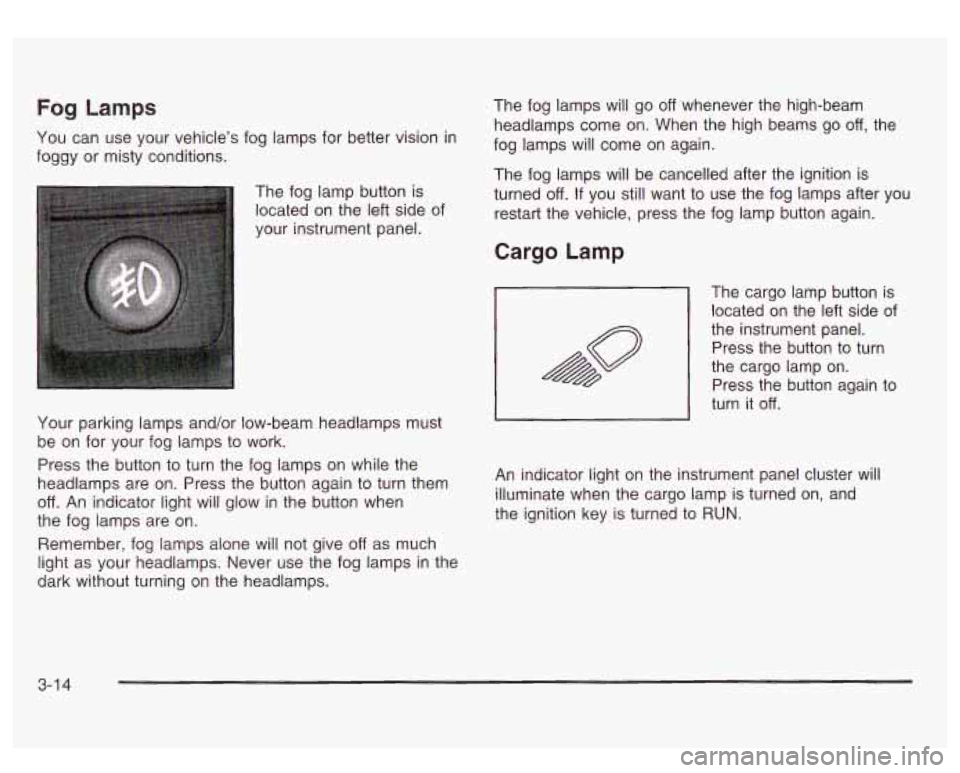
The fog lamp button is
located on the left side of
your instrument panel.
Your parking lamps and/or low-beam headlamps must
be on for your fog lamps to work.
Press the button to turn the fog lamps on while the
headlamps are on. Press the button again to turn them
off. An indicator light will glow in the button when
the fog lamps are on.
Remember, fog lamps alone will not give
off as much
light as your headlamps. Never use the fog lamps in the
dark without turning on the headlamps. The
fog lamps will go
off whenever the high-beam
headlamps come on. When the high beams go
off, the
fog lamps will come on again.
The fog lamps will be cancelled after the ignition is
turned
off. If you still want to use the fog lamps after you
restart the vehicle, press the fog lamp button again.
Cargo Lamp
The cargo lamp button is
located on the left side of
the instrument panel.
~ Press the button to turn
the cargo lamp on.
Press the button again to
turn it
off.
An indicator light on the instrument panel cluster will
illuminate when the cargo lamp is turned on, and
the ignition key is turned to RUN.
3-1 4
Page 140 of 428
Front Reading Lamps Interior Lamps
Instrument Panel Brightness Control
-g-: This feature controls the brightness of the
instrument panel lights.
The thumbwheel for this feature is located next
to the
exterior lamp control.
Turn the thumbwheel up to adjust the instrument panel
lights and return the radio display to full brightness
when the headlamps or parking lamps are on. To turn
on the dome lamps, with the vehicle doors closed,
turn the thumbwheel all the way up.
Exit Lighting
With exit lighting, the interior lamps will come on when
you remove the key from the ignition. The lamps
will not come on
if the dome override button is pressed
in.
Entry Lighting
Your vehicle is equipped with an illuminated entry
feature.
When a door is opened, the dome lamps and puddle
lamps will come on
if the dome override button is in the
out position. If the dome override button is pressed
in, the lamps will not come on. Your
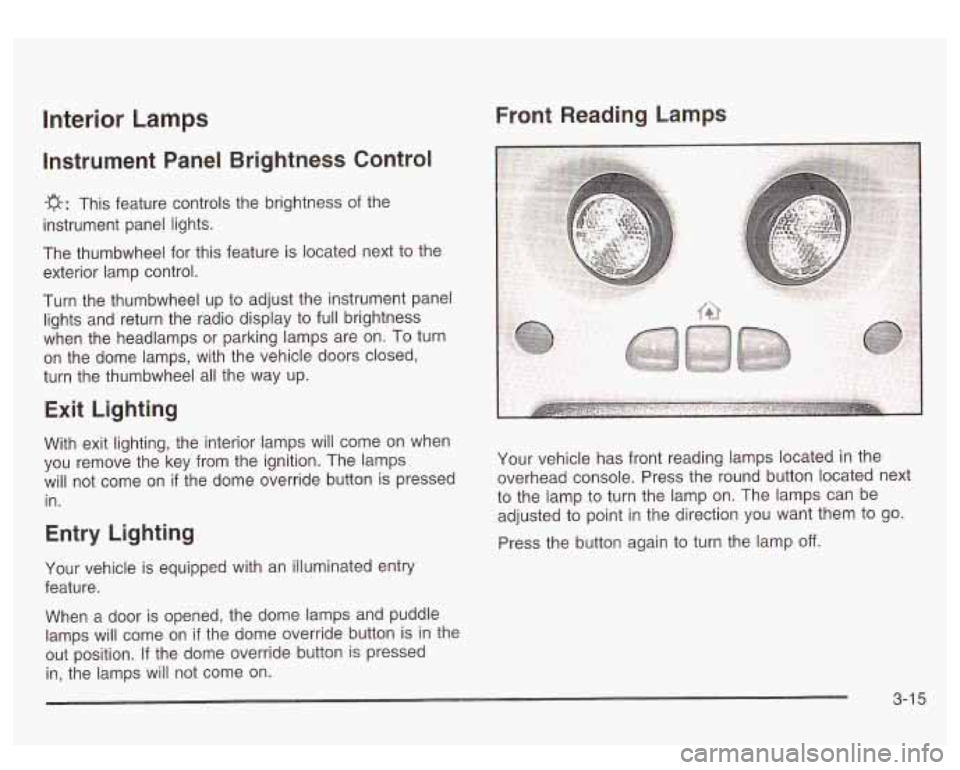
vehicle has front reading lamps located in the
overhead console. Press the round button located next
to the lamp to turn the lamp on. The lamps can be
adjusted to point in the direction you want them to go.
Press the button again to turn the lamp
off.
3-1 5
Page 145 of 428

2. Set the driver’s and passenger’s temperature.
To find your comfort setting, start with a
74°F
(23°C) temperature setting and allow about
20 minutes for the system to regulate. Turn the
driver’s or passenger’s side temperature knob
to adjust the temperature setting as necessary. If
you choose the temperature setting of
60°F
(15°C) the system will remain at the maximum
cooling setting. If you choose the temperature
setting of
90°F (32°C) the system will remain at the
maximum heat setting. Choosing either maximum
setting will not cause the vehicle to heat or cool any
faster.
Be careful not
to cover the sensor located on the
top of the instrument panel near the windshield.
This sensor regulates air temperature based on sun
load, and also turns on your headlamps.
To avoid blowing cold air in cold weather, the
system will delay turning on the fan until warm air
is available. The length of delay depends on
the engine coolant temperature. Pressing the fan switch will override this delay and change the fan
to
a selected speed.
Manual Operation
To change the current setting, select one of the
following:
A 8f? v (Fan): This button allows you to manually
adjust the fan speed. Press the up arrow
to increase fan
speed and the down arrow
to decrease fan speed.
4d (Mode): Press this button to manually change the
direction of the airflow in your vehicle; keep pressing the
button until the desired mode appears on the display.
If you press the mode button
to select an air delivery
mode, the display will change
to show you the selected
air mode delivery. The display will then show the
current status of the system. When the system is turned
off, the display will go blank after displaying the
current status
of the system.
f;’ (Vent): This mode directs air to the instrument
panel vents.
+2 (Bi-Level): This mode directs half of the air to the
instrument panel vents, then directs the remaining air
to
the floor vents. A little air is directed toward the
windshield and the side window vents. Cooler air is
directed
to the upper vents and warmer air to the floor
vents.
3-20
Page 172 of 428

Personalization Button
You can program certain features to a preferred setting
for up to two people. Press the personalization button
to scroll through the following personalization features.
All of the personalization options may not be available
on your vehicle. only the options available will be
displayed on your DIC.
If your vehicle is not equipped with the DIC steering
wheel buttons you will not have any of these
personalization options except for DISPLAY LANGUAGE. See DISPLAY LANGUAGE later in this
section for more information.
ALARM WARNING TYPE
AUTOMATIC LOCKING
0 AUTOMATIC UNLOCKING
SEAT POSITION RECALL
PERIMETER LIGHTING
REMOTE LOCK FEEDBACK
REMOTE UNLOCK FEEDBACK
HEADLAMPS ON AT EXIT
CURB VIEW ASSIST
EASY EXIT SEAT
DISPLAY UNITS (E/M)
DISPLAY LANGUAGE The driver’s
preferences are recalled by pressing the
unlock button on the remote keyless entry transmitter or
by pressing the appropriate memory button
1 or 2
located on the driver’s door.
Alarm Warning Type
Press the personalization button until ALARM
WARNING TYPE appears in the display. To select your
personalization for alarm warning type, press the
select button while ALARM WARNING TYPE is
displayed on the DIC. Pressing the select button will
scroll through the following choices:
ALARM WARNING: BOTH
(default): The headlamps
will flash and the horn will chirp when the alarm is
active.
ALARM WARNING:
OFF: There will be no alarm
warning on activation.
ALARM WARNING: HORN: The horn will chirp when
the alarm is active.
ALARM WARNING: LAMPS: The headlamps will flash
when the alarm is active.
Choose one of the four options and press the
personalization button while it is displayed on the DIC to
select it and move on to the next feature. For more
information on alarm warning type, see
Content
Theft-Deterrent
on page 2- 13.
3-47
Page 174 of 428
Seat Position Recall Perimeter Lighting
Press the personalization button until SEAT POSITION
RECALL appears on the display. To select your
personalization for seat position recall, press the select
button while SEAT POSITION RECALL is displayed
on the DIC. Pressing the select button will scroll through
the following choices:
SEAT POSITION RECALL
OFF (default): The memory
seat position you saved will only be recalled when the
memory button
1 or 2 is pressed on the driver’s
door panel.
SEAT POSITION RECALL AT KEY IN: The memory
seat position you saved will be recalled when you
put the key in the ignition.
SEAT POSITION RECALL ON REMOTE: The memory
seat position you saved will be recalled when you
unlock the vehicle with the remote keyless entry
transmitter.
Choose one of the three options and press the
personalization button while it is displayed on the DIC to
select it and move on to the next feature. For more
information on seat position recall see
Memory Seat on
page 2-42.
Press the personalization button until PERIMETER
LIGHTING appears in the display. To select your
personalization for perimeter lighting, press the select
button while PERIMETER LIGHTING is displayed on the
DIC. Pressing the select button will scroll through the
following choices:
PERIMETER LIGHTING ON
(default): The headlamps
and back-up lamps will come on for
40 seconds, if it
is dark enough outside, when you unlock the vehicle
with the remote keyless entry transmitter.
PERIMETER LIGHTING
OFF: The perimeter lights will
not come on when you unlock the vehicle with the
remote keyless entry transmitter.
Choose on
of the two options and press the
personalization button while it is displayed on the DIC to
select it and move on to the next feature.
3-49
Page 176 of 428
Headlamps on at Exit Curb View Assist
Press the personalization button until HEADLAMPS ON
AT EXIT appears in the display. To select your
personalization for how long the headlamps will stay on
when you turn
off the vehicle, press the select button
while HEADLAMPS
ON AT EXIT is displayed on
the DIC. Pressing the select button will scroll through
the following choices:
HEADLAMPS DELAY: 10 SEC (default)
HEADLAMPS DELAY: 20 SEC
0 HEADLAMPS DELAY: 40 SEC
HEADLAMPS DELAY: 60 SEC
HEADLAMPS DELAY: 120 SEC
HEADLAMPS BELAY: 180 SEC
HEADLAMPS DELAY OFF
The amount of time you choose will be the amount of
time that the headlamps stay on after you turn
off
the vehicle. If you choose off, the headlamps will turn
off as soon as you turn off the vehicle.
Choose one of the seven options and press the
personalization button while it
is displayed on the DIC to
select it and move on to the next feature. Press the personalization button until CURB
VIEW
ASSIST appears
in the display. To select your
personalization for curb view assist, press the select
button while CURB VIEW ASSIST is displayed on
the DIC. Pressing the select button will scroll through
the following choices:
CURB VIEW:
OFF (default): Neither outside mirror will
be tilted down when the vehicle is shifted into
REVERSE (R).
CURB VIEW: PASSENGER: The passenger’s outside
mirror will be tilted down when the vehicle is shifted
into REVERSE (R).
CURB VIEW: DRIVER: The driver’s outside mirror will
be tilted down when the vehicle is shifted into
REVERSE (R).
CURB VIEW: BOTH: The driver’s and passenger’s
outside mirror will be tilted down when the vehicle
is shifted into REVERSE
(R).
Choose one of the four options and press the
personalization button while it is displayed on the DIC to
select it and move on to the next feature. For more
information on curb view assist, see Curb View Assist
Mirrors in the index.
3-5 1
Page 231 of 428
Driving Uphill
Once you decide you can safely drive up the hill, you
need to take some special steps.
Use a low gear and get a firm grip on the steering
wheel.
0 Get a smooth start up the hill and try to maintain
your speed. Don’t use more power than yo need,
because you don’t want your wheels to start
spinning or sliding.
Try to drive straight up the hill if at all possible. If
the path twists and turns, you might want to find
another route.
0
0
Ease up on your speed as you approach the tip of
the hill.
Attach a flag to the vehicle to make you more
visible to approaching traffic on trails or hills.
Sound the horn as you approach the top of the hill
to let opposing traffic know you’re there.
Use your headlamps even during the day. They
make you more visible
~ oncoming traffic.
Turning or driving across steep hills can be
dangerous. You could lose traction, slide
sideways, and possibly roll over. You could be
seriously injured or killed. When driving up
hills, always try to go straight up.
A CAUTION: 0
Driving to the top (crest) of a hill at full speed
can cause an accident. There could be
a
drop-off, embankment, cliff, or even another
vehicle. You could be seriously injured or
killed.
As you near the top of a hill, slow down
and stay alert.
4-22