Page 153 of 256
Canadian customers who require roadside assistance, call
1–800–665–2006.
If you need to arrange roadside assistance for yourself, Ford Motor
Companywill reimburse a reasonable amount. To obtain reimbursement
information, U.S. Ford or Mercuryvehicles customers call
1-800-241-3673; Lincoln vehicle customers call 1–800–521–4140.
Canadian customers who need to obtain reimbursement information, call
1–800–665–2006.
ROADSIDE COVERAGE BEYOND BASIC WARRANTY
In the United States, you may purchase additional roadside assistance
coverage beyond this period through the Ford Auto Club by contacting
your Ford or Lincoln Mercury dealer.
Similarlyin Canada, for uninterrupted Roadside Assistance coverage, you
maypurchase extended coverage prior to your Basic Warranty’s Roadside
Assistance expiring. For more information and enrollment, contact
1–877–294–2582 or visit our website at www.ford.ca.
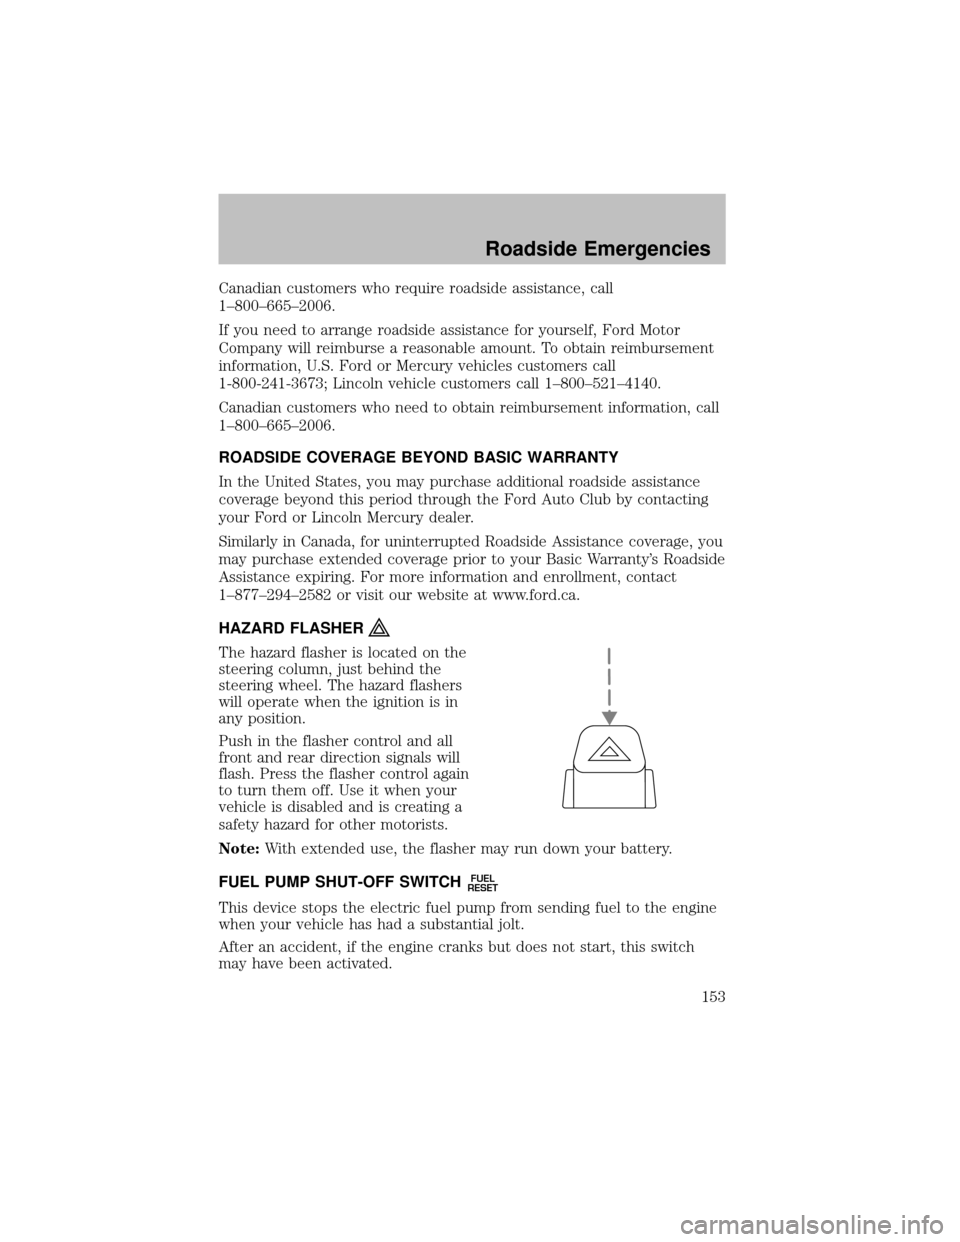
HAZARD FLASHER
The hazard flasher is located on the
steering column, just behind the
steering wheel. The hazard flashers
will operate when the ignition is in
anyposition.
Push in the flasher control and all
front and rear direction signals will
flash. Press the flasher control again
to turn them off. Use it when your
vehicle is disabled and is creating a
safetyhazard for other motorists.
Note:With extended use, the flasher mayrun down your battery.
FUEL PUMP SHUT-OFF SWITCH
FUEL
RESET
This device stops the electric fuel pump from sending fuel to the engine
when your vehicle has had a substantial jolt.
After an accident, if the engine cranks but does not start, this switch
mayhave been activated.
Roadside Emergencies
153
Page 155 of 256
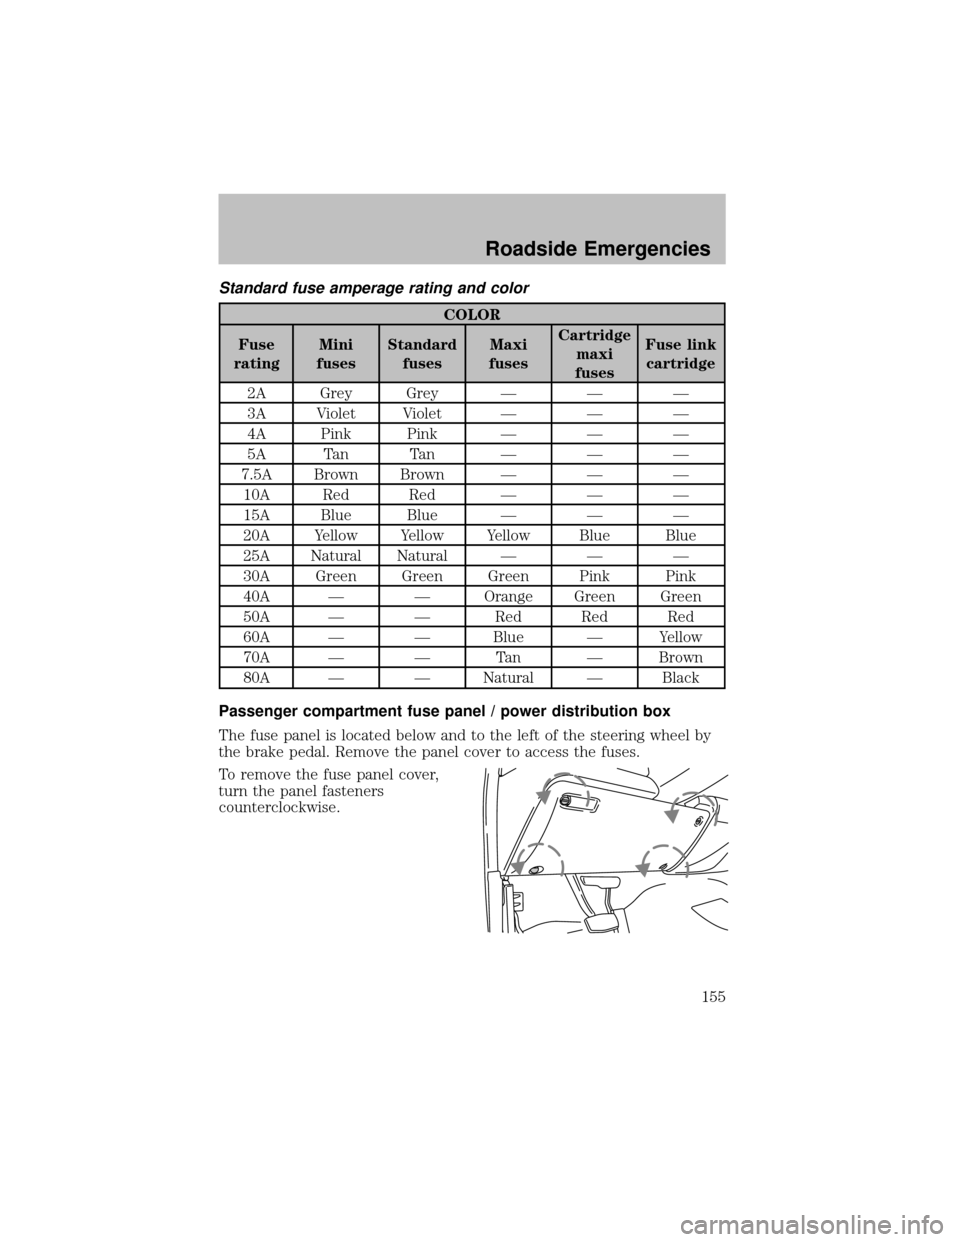
Standard fuse amperage rating and color
COLOR
Fuse
ratingMini
fusesStandard
fusesMaxi
fusesCartridge
maxi
fusesFuse link
cartridge
2A GreyGrey — — —
3A Violet Violet — — —
4A Pink Pink — — —
5A Tan Tan — — —
7.5A Brown Brown — — —
10A Red Red — — —
15A Blue Blue — — —
20A Yellow Yellow Yellow Blue Blue
25A Natural Natural — — —
30A Green Green Green Pink Pink
40A — — Orange Green Green
50A — — Red Red Red
60A — — Blue — Yellow
70A — — Tan — Brown
80A — — Natural — Black
Passenger compartment fuse panel / power distribution box
The fuse panel is located below and to the left of the steering wheel by
the brake pedal. Remove the panel cover to access the fuses.
To remove the fuse panel cover,
turn the panel fasteners
counterclockwise.
Roadside Emergencies
155
Page 159 of 256
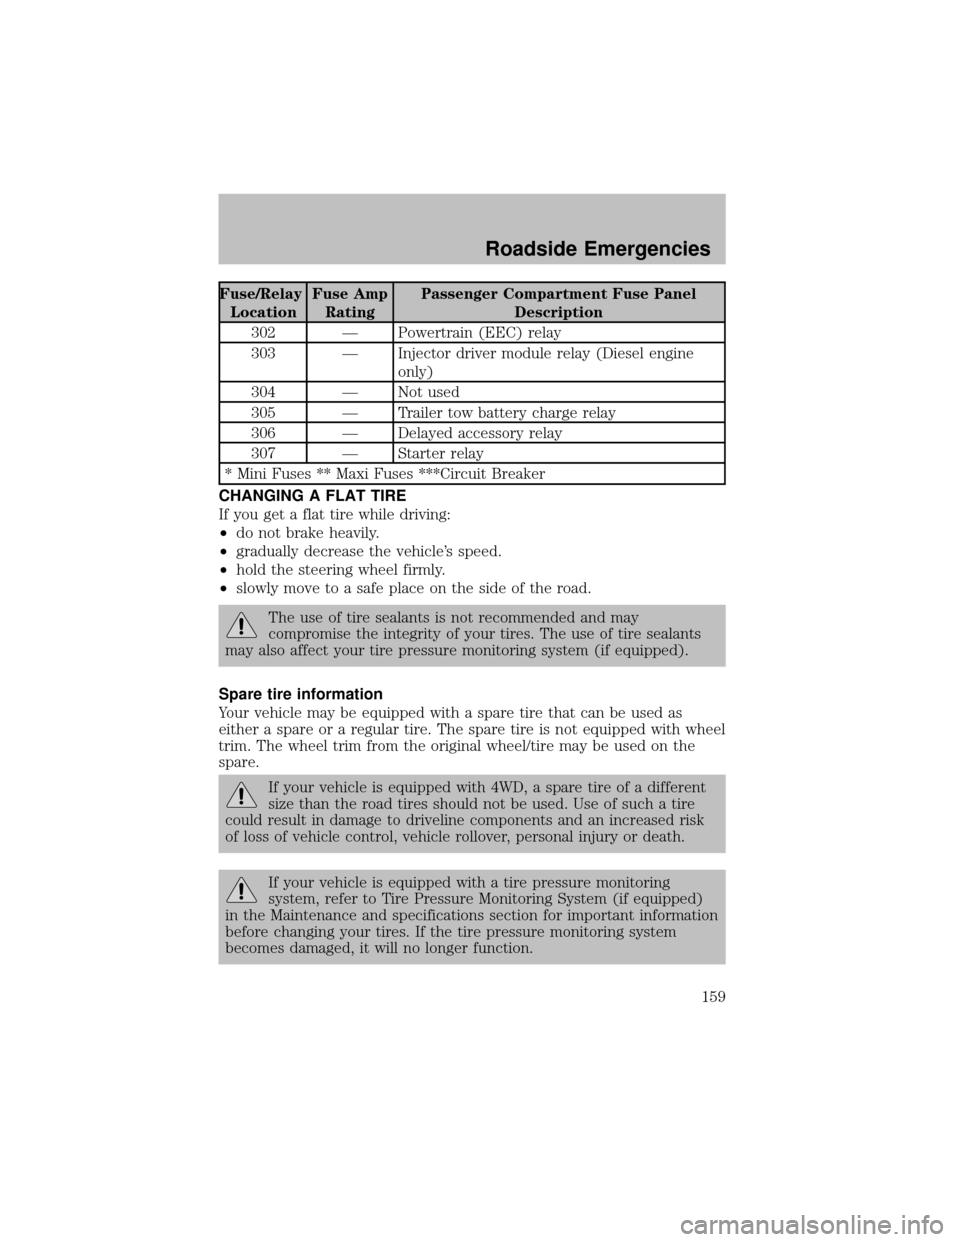
Fuse/Relay
LocationFuse Amp
RatingPassenger Compartment Fuse Panel
Description
302 — Powertrain (EEC) relay
303 — Injector driver module relay(Diesel engine
only)
304 — Not used
305 — Trailer tow batterycharge relay
306 — Delayed accessory relay
307 — Starter relay
* Mini Fuses ** Maxi Fuses ***Circuit Breaker
CHANGING A FLAT TIRE
If you get a flat tire while driving:
•do not brake heavily.
•graduallydecrease the vehicle’s speed.
•hold the steering wheel firmly.
•slowlymove to a safe place on the side of the road.
The use of tire sealants is not recommended and may
compromise the integrityof your tires. The use of tire sealants
may also affect your tire pressure monitoring system (if equipped).
Spare tire information
Your vehicle maybe equipped with a spare tire that can be used as
either a spare or a regular tire. The spare tire is not equipped with wheel
trim. The wheel trim from the original wheel/tire maybe used on the
spare.
If your vehicle is equipped with 4WD, a spare tire of a different
size than the road tires should not be used. Use of such a tire
could result in damage to driveline components and an increased risk
of loss of vehicle control, vehicle rollover, personal injuryor death.
If your vehicle is equipped with a tire pressure monitoring
system, refer to Tire Pressure Monitoring System (if equipped)
in the Maintenance and specifications section for important information
before changing your tires. If the tire pressure monitoring system
becomes damaged, it will no longer function.
Roadside Emergencies
159
Page 187 of 256
INSTRUMENT PANEL AND CLUSTER LENS
Clean the instrument panel with a damp cloth, then drywith a drycloth.
•Avoid cleaners or polish that increase the gloss of the upper portion of
the instrument panel. The dull finish in this area helps protect the
driver from undesirable windshield reflection.
Do not use chemical solvents or strong detergents when cleaning
the steering wheel or instrument panel to avoid contamination of
the air bag system.
•Be certain to wash or wipe your hands clean if you have been in
contact with certain products such as insect repellent and suntan
lotion in order to avoid possible damage to the painted surfaces.
INTERIOR TRIM
•Clean the interior trim areas with a damp cloth, then drybywiping
with a dry, soft, clean cloth.
•Do not use household or glass cleaners as these maydamage the
finish.
INTERIOR
For fabric, carpets, cloth seats and safetybelts:
•Remove dust and loose dirt with a vacuum cleaner.
•Remove light stains and soil with Ford Extra Strength Upholstery
Cleaner (E8AZ-19523–AA).
•If grease or tar is present on the material, spot-clean the area first
with Motorcraft Spot and Stain Remover (ZC-14).
•Never saturate the seat covers with cleaning solution.
•Do not use household cleaning products or glass cleaners, which can
stain and discolor the fabric and affect the flame retardant abilities of
the seat materials.
Do not use cleaning solvents, bleach or dye on the vehicle’s
seatbelts, as these actions mayweaken the belt webbing.
Cleaning
187
Page 193 of 256
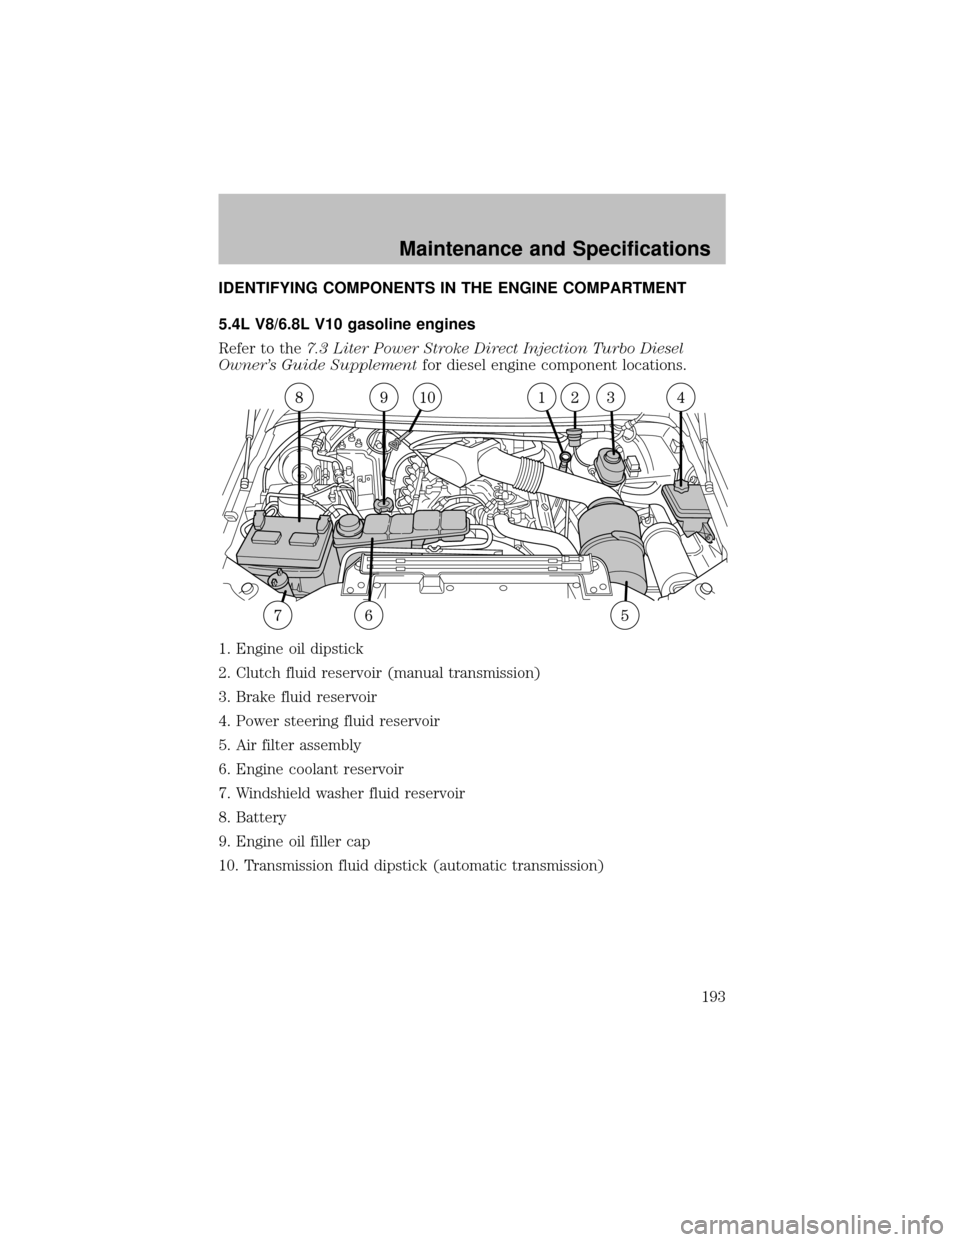
IDENTIFYING COMPONENTS IN THE ENGINE COMPARTMENT
5.4L V8/6.8L V10 gasoline engines
Refer to the7.3 Liter Power Stroke Direct Injection Turbo Diesel
Owner’s Guide Supplementfor diesel engine component locations.
1. Engine oil dipstick
2. Clutch fluid reservoir (manual transmission)
3. Brake fluid reservoir
4. Power steering fluid reservoir
5. Air filter assembly
6. Engine coolant reservoir
7. Windshield washer fluid reservoir
8. Battery
9. Engine oil filler cap
10. Transmission fluid dipstick (automatic transmission)
Maintenance and Specifications
193
Page 204 of 256
•Decreased engine coolant concentrations below 40% will
decrease the corrosion protection characteristics of the engine
coolant and may cause engine damage.
•Decreased engine coolant concentrations below 40% will
decrease the freeze protection characteristics of the engine
coolant and may cause engine damage.
•Refer to the chart on the coolant container to ensure the
coolant concentration in your vehicle will provide adequate
protection at the temperatures in which you drive.
Vehicles driven year-round in non-extreme climates should use a 50/50
mixture of engine coolant and distilled water for optimum cooling system
and engine protection.
What you should know about fail-safe cooling (if equipped)
If the engine coolant supplyis depleted, this feature allows the vehicle to
be driven temporarilybefore incremental component damage is incurred.
The “fail-safe” distance depends on ambient temperatures, vehicle load
and terrain.
How fail-safe cooling works
If the engine begins to overheat:
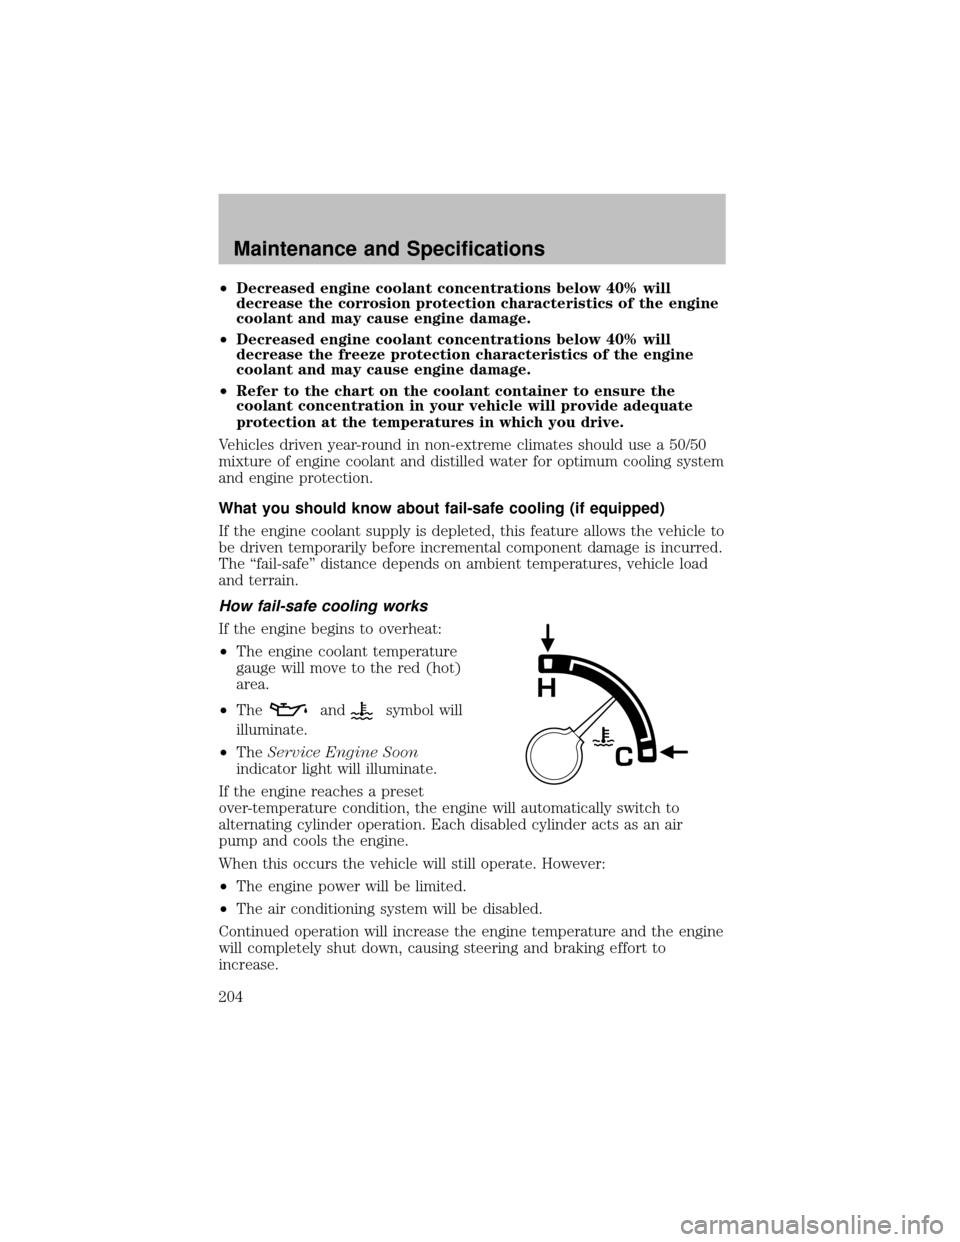
•The engine coolant temperature
gauge will move to the red (hot)
area.
•The
andsymbol will
illuminate.
•TheService Engine Soon
indicator light will illuminate.
If the engine reaches a preset
over-temperature condition, the engine will automaticallyswitch to
alternating cylinder operation. Each disabled cylinder acts as an air
pump and cools the engine.
When this occurs the vehicle will still operate. However:
•The engine power will be limited.
•The air conditioning system will be disabled.
Continued operation will increase the engine temperature and the engine
will completelyshut down, causing steering and braking effort to
increase.
Maintenance and Specifications
204
Page 215 of 256
CHECKING AND ADDING POWER STEERING FLUID
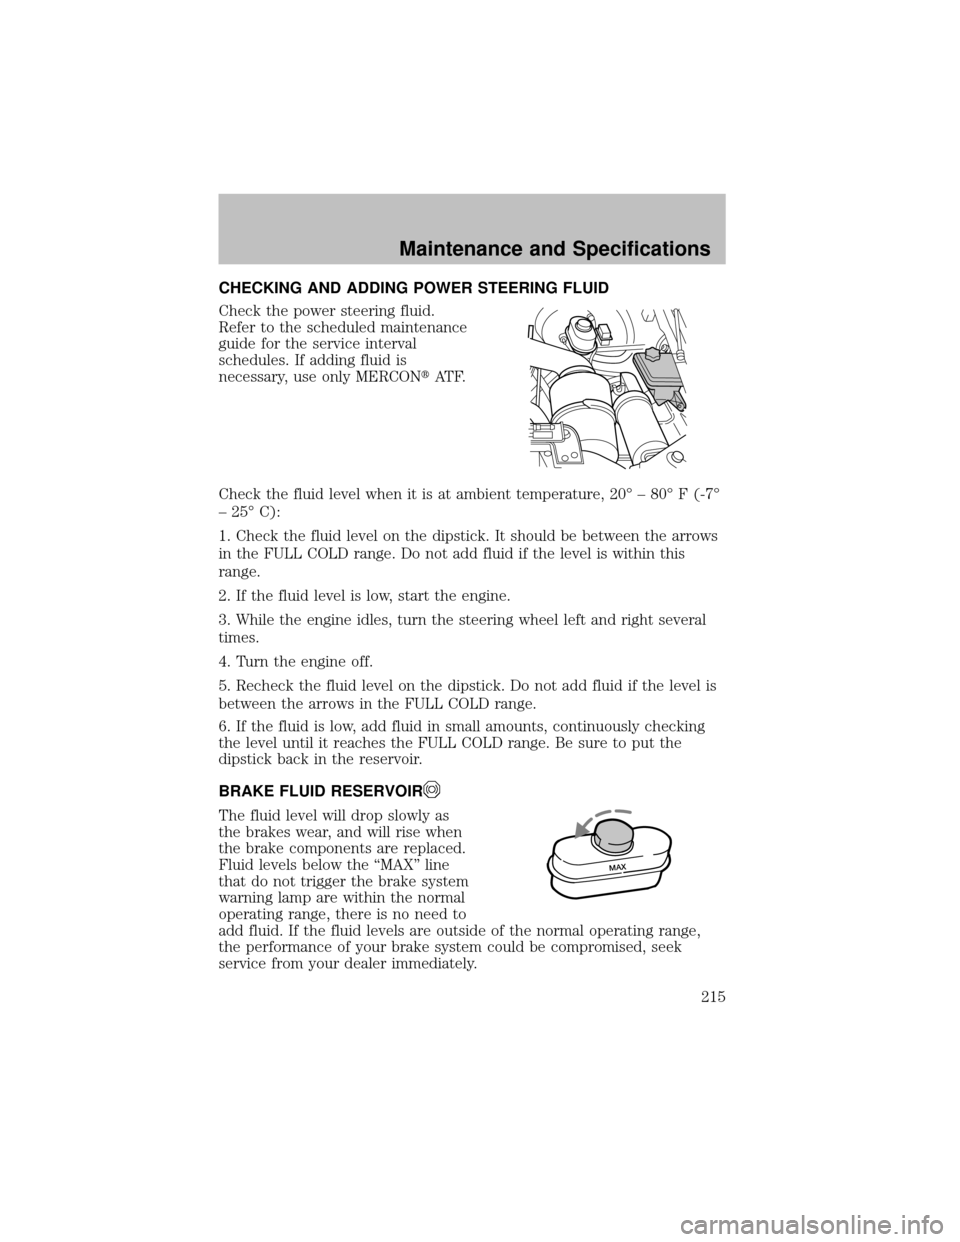
Check the power steering fluid.
Refer to the scheduled maintenance
guide for the service interval
schedules. If adding fluid is
necessary, use only MERCON�AT F.
Check the fluid level when it is at ambient temperature, 20° – 80° F (-7°
– 25° C):
1. Check the fluid level on the dipstick. It should be between the arrows
in the FULL COLD range. Do not add fluid if the level is within this
range.
2. If the fluid level is low, start the engine.
3. While the engine idles, turn the steering wheel left and right several
times.
4. Turn the engine off.
5. Recheck the fluid level on the dipstick. Do not add fluid if the level is
between the arrows in the FULL COLD range.
6. If the fluid is low, add fluid in small amounts, continuouslychecking
the level until it reaches the FULL COLD range. Be sure to put the
dipstick back in the reservoir.
BRAKE FLUID RESERVOIR
The fluid level will drop slowlyas
the brakes wear, and will rise when
the brake components are replaced.
Fluid levels below the “MAX” line
that do not trigger the brake system
warning lamp are within the normal
operating range, there is no need to
add fluid. If the fluid levels are outside of the normal operating range,
the performance of your brake system could be compromised, seek
service from your dealer immediately.
M
A
X
Maintenance and Specifications
215
Page 230 of 256
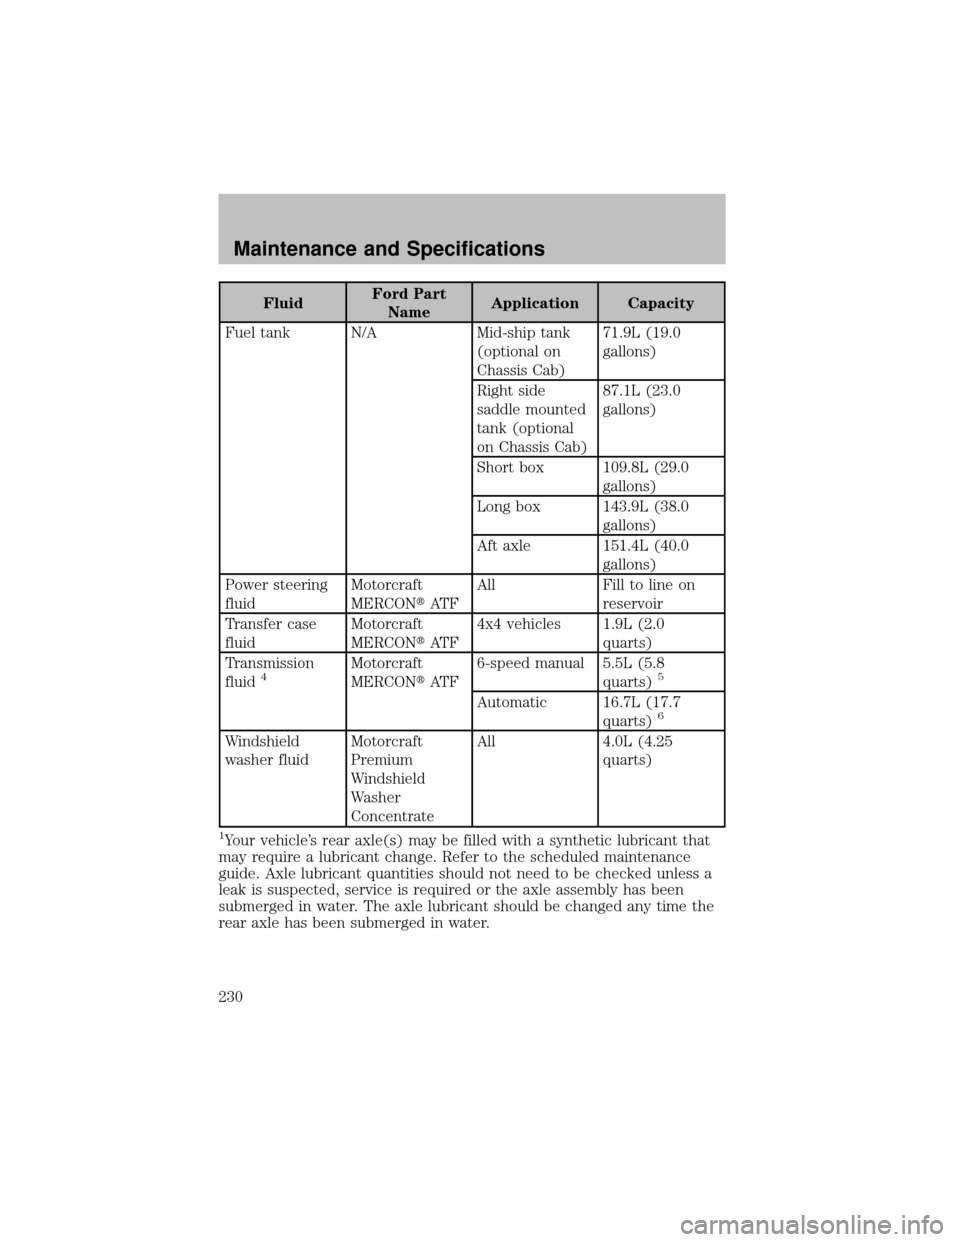
FluidFord Part
NameApplication Capacity
Fuel tank N/A Mid-ship tank
(optional on
Chassis Cab)71.9L (19.0
gallons)
Right side
saddle mounted
tank (optional
on Chassis Cab)87.1L (23.0
gallons)
Short box 109.8L (29.0
gallons)
Long box 143.9L (38.0
gallons)
Aft axle 151.4L (40.0
gallons)
Power steering
fluidMotorcraft
MERCON�AT FAll Fill to line on
reservoir
Transfer case
fluidMotorcraft
MERCON�AT F4x4 vehicles 1.9L (2.0
quarts)
Transmission
fluid
4Motorcraft
MERCON�AT F6-speed manual 5.5L (5.8
quarts)5
Automatic 16.7L (17.7
quarts)6
Windshield
washer fluidMotorcraft
Premium
Windshield
Washer
ConcentrateAll 4.0L (4.25
quarts)
1Your vehicle’s rear axle(s) maybe filled with a synthetic lubricant that
mayrequire a lubricant change. Refer to the scheduled maintenance
guide. Axle lubricant quantities should not need to be checked unless a
leak is suspected, service is required or the axle assemblyhas been
submerged in water. The axle lubricant should be changed anytime the
rear axle has been submerged in water.
Maintenance and Specifications
230