Page 3744 of 4378

Component Tests
Grid Wire Test
1. Using a bright lamp inside the vehicle, inspect the wire grid from the exterior. A broken grid wire will appear as a brown spot.
2. Run the engine at idle. Set the rear window defrost switch to ON. The indicator light should come on.
3. Working from the interior of the vehicle with a voltmeter, contact the broad red- brown stripes of
the rear glass window positive lead to battery side and negative lead to ground side. The meter
should read 10- 13 volts. A lower voltage reading indicates a loose ground connection.
4. Contact a good ground point with the negative lead of the meter. The voltage reading should not differ.
5. With the negative lead of the meter grounded, touch each grid line of the heated rear window glass at its midpoint with the positive lead. A reading of approximately 6 volts indicates that the
line is good. A reading of zero volts indicates that the line is broken between the midpoint and
the B+ side of the grid line. A reading of 12 volts indicates that the circuit is broken between the
midpoint of the grid line and ground. �z
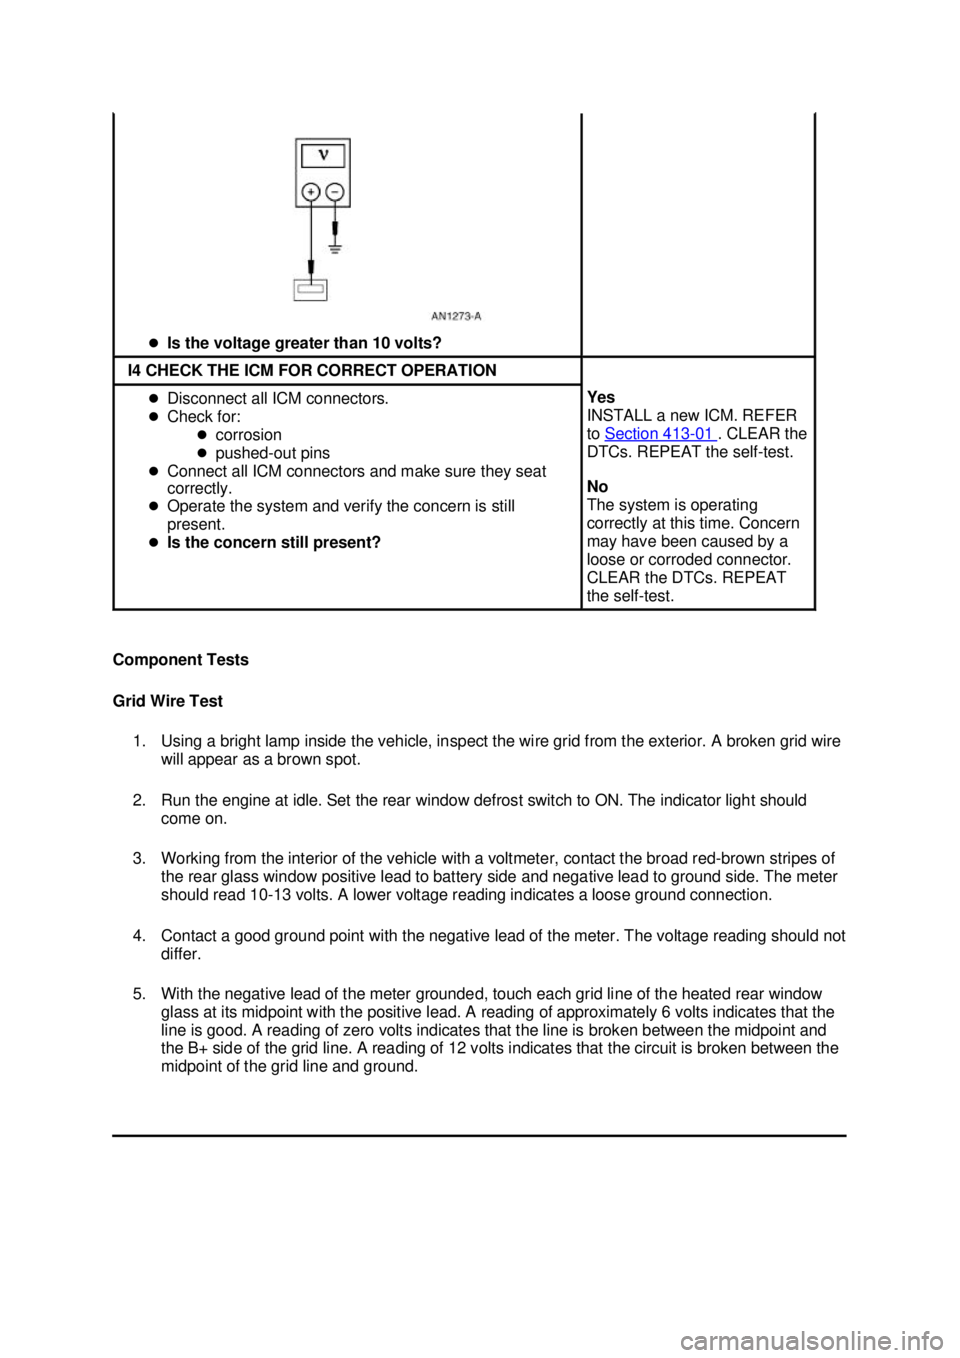
Is the voltage greater than 10 volts? I4 CHECK THE ICM FOR CORRECT OPERATION
�z
Disconnect all ICM connectors.
�z Check for:
�zcorrosion
�z pushed- out pins
�z Connect all ICM connectors and make sure they seat
correctly.
�z Operate the system and verify the concern is still
present.
�z Is the concern still present? Yes
INSTALL a new ICM. REFER
to Section 413
- 01 . CLEAR the
DTCs. REPEAT the self-test.
No
The system is operating
correctly at this time. Concern
may have been caused by a
loose or corroded connector.
CLEAR the DTCs. REPEAT
the self- test. �K�l�j . 31 �b�a
322003 Mustang Workshop Manual
18. 11. 2011file:///C:/Ford/2000 - 2004/tsocache/SHEF_5108/S3B~us~en~ ...
Page 3746 of 4378

GENERAL PROCEDURES
Heated Window Grid Wire Repair
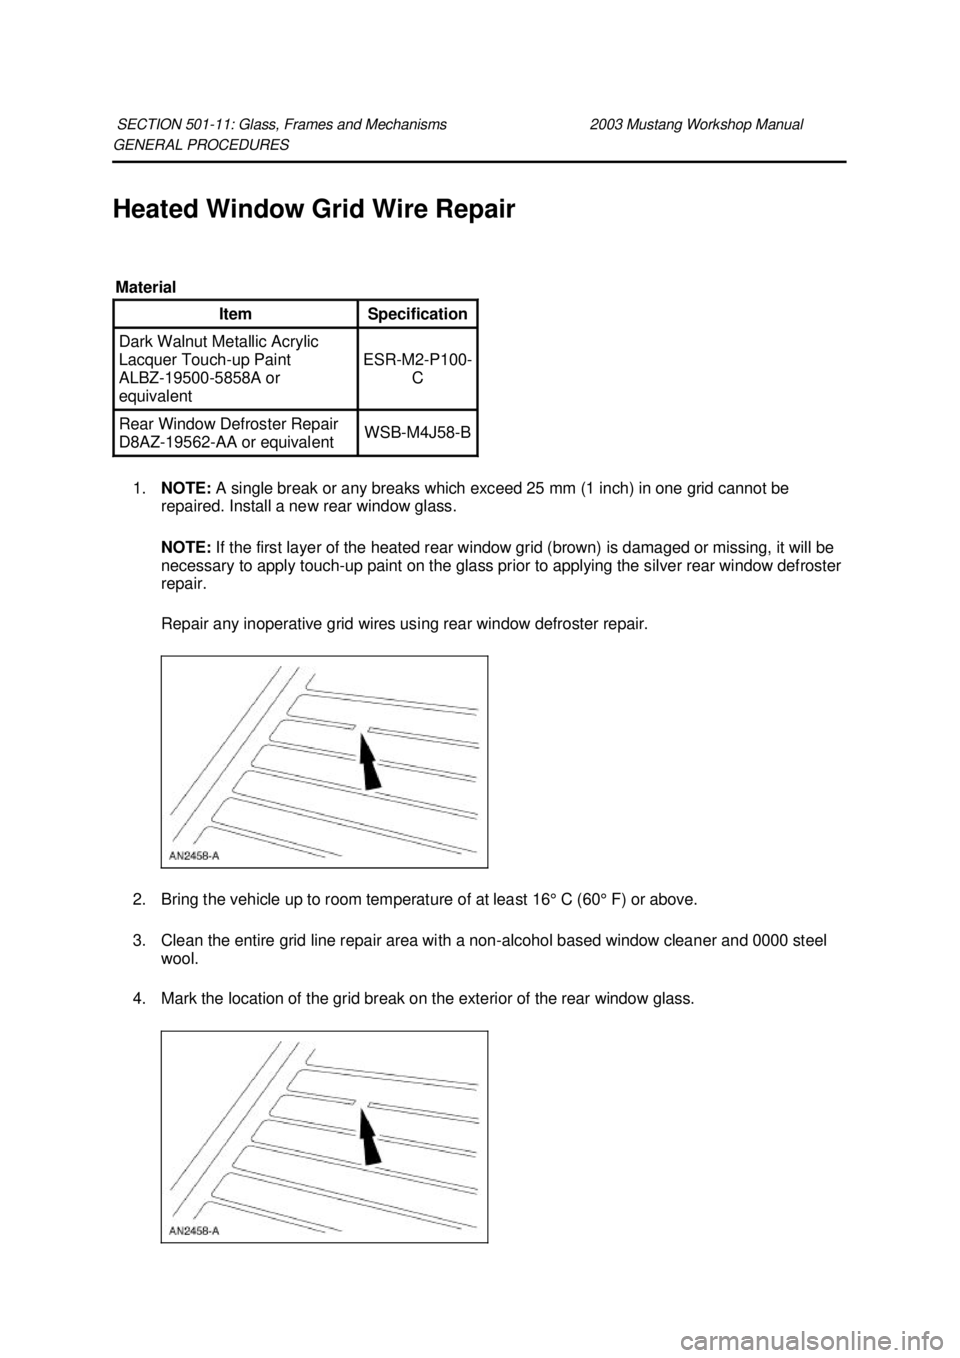
1. NOTE: A single break or any breaks which exceed 25 mm (1 inch) in one grid cannot be
repaired. Install a new rear window glass.
NOTE: If the first layer of the heated rear window grid (brown) is damaged or missing, it will be
necessary to apply touch- up paint on the glass prior to applying the silver rear window defroster
repair.
Repair any inoperative grid wires using rear window defroster repair.
2. Bring the vehicle up to room temperature of at least 16° C (60° F) or above.
3. Clean the entire grid line repair area with a non- alcohol based window cleaner and 0000 steel
wool.
4. Mark the location of the grid break on the exterior of the rear window glass.
SECTION 501-
11: Glass, Frames and Mechanisms 2003 Mustang Workshop Manual Material
Item Specification
Dark Walnut Metallic Acrylic
Lacquer Touch-
up Paint
ALBZ- 19500-5858A or
equivalent ESR-
M2-P100-
C Rear Window Defroster Repair
D8AZ-
19562- AA or equivalent WSB-
M4J58- B �K�l�j . 1 �b�a
32003 Mustang Workshop Manual
18. 11. 2011file:///C:/Ford/2000 - 2004/tsocache/SHEF_5108/S3B~us~en~ ...
Page 3747 of 4378

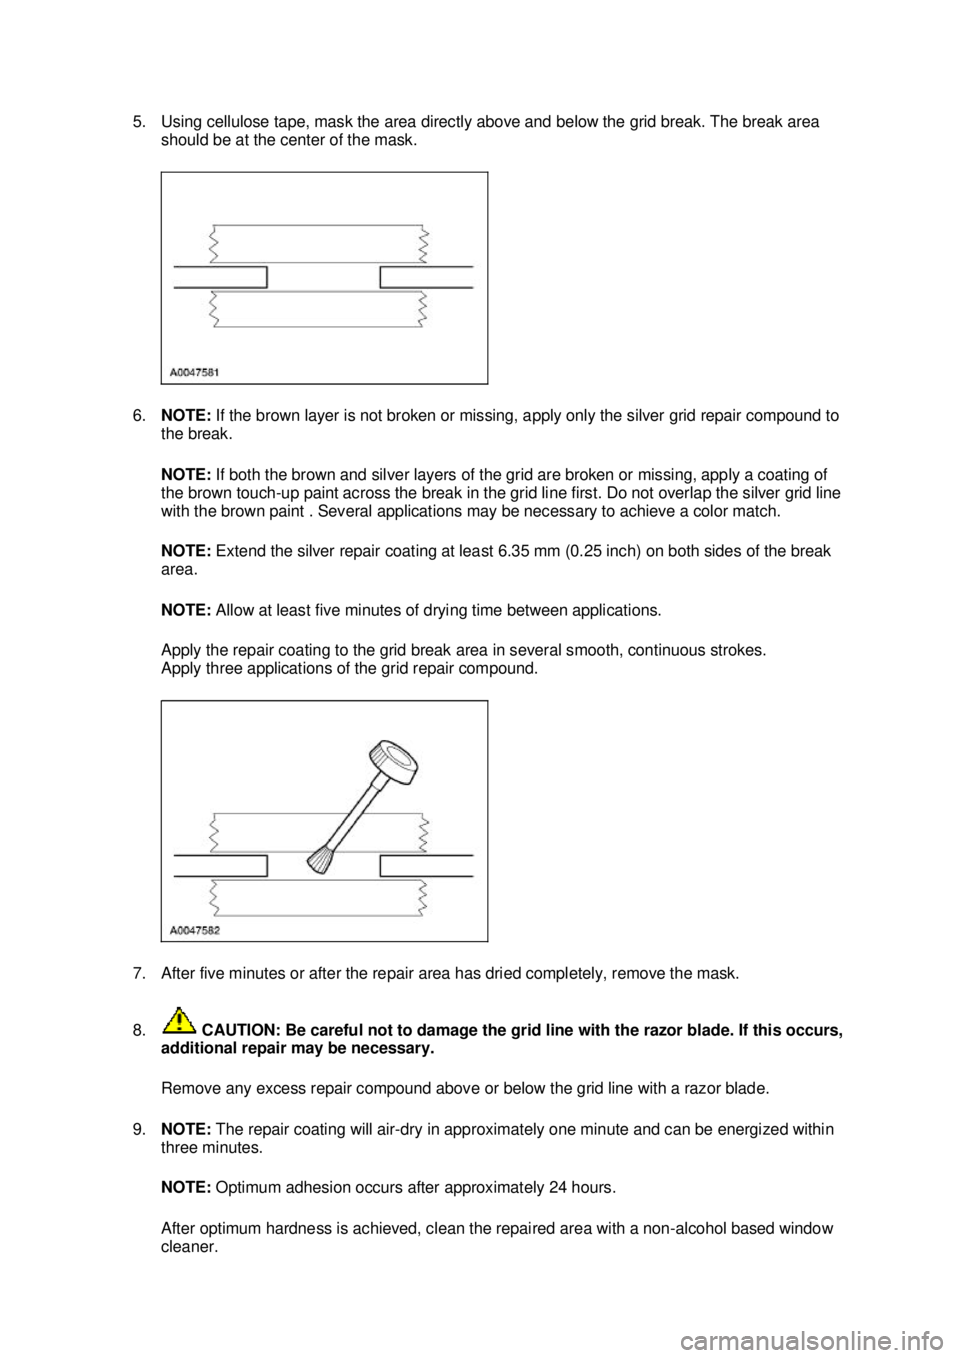
5. Using cellulose tape, mask the area directly above and below the grid break. The break area
should be at the center of the mask.
6. NOTE: If the brown layer is not broken or missing, apply only the silver grid repair compound to
the break.
NOTE: If both the brown and silver layers of the grid are broken or missing, apply a coating of
the brown touch- up paint across the break in the grid line first. Do not overlap the silver grid line
with the brown paint . Several applications may be necessary to achieve a color match.
NOTE: Extend the silver repair coating at least 6.35 mm (0.25 inch) on both sides of the break
area.
NOTE: Allow at least five minutes of drying time between applications.
Apply the repair coating to the grid break area in several smooth, continuous strokes.
Apply three applications of the grid repair compound.
7. After five minutes or after the repair area has dried completely, remove the mask.
8. CAUTION: Be careful not to damage the grid line with the razor blade. If this occurs,
additional repair may be necessary.
Remove any excess repair compound above or below the grid line with a razor blade.
9. NOTE: The repair coating will air- dry in approximately one minute and can be energized within
three minutes.
NOTE: Optimum adhesion occurs after approximately 24 hours.
After optimum hardness is achieved, clean the repaired area with a non- alcohol based window
cleaner. �K�l�j . 2 �b�a
32003 Mustang Workshop Manual
18. 11. 2011file:///C:/Ford/2000 - 2004/tsocache/SHEF_5108/S3B~us~en~ ...
Page 3749 of 4378
GENERAL PROCEDURES
Lead Terminal Repair
1. NOTE: The rear window glass must be at room temperature at the time of the repair.
Clean the bus bar in the area to be repaired with steel wool (3/0 to 4/0 grade).
2. NOTE: Allow 10 minutes of drying time between the coats.
Apply three coats of rear window defroster repair to the surface.
3. CAUTION: Do not overheat the rear window glass or damage to the rear window
glass may occur.
SECTION 501-
11: Glass, Frames and Mechanisms 2003 Mustang Workshop Manual Special Tool(s)
Heat Gun
107-
R0300 or equivalent
Material Item Specification
Rear Window Defroster Repair
D8AZ-
19562- AA WSB-
M4J58- B �K�l�j . 1 �b�a
32003 Mustang Workshop Manual
18. 11. 2011file:///C:/Ford/2000 - 2004/tsocache/SHEF_5108/S3B~us~en~ ...
Page 3750 of 4378
Tin the bus bar repair area with solder.
4. CAUTION: To prevent overheating the rear window glass, remove the soldering gun
as soon as the solder flows.
Preheat the rear window glass in the area to be repaired using the special tool and solder the
terminal to the bus bar.
5. NOTE: Turn the heated rear window switch ON for five minutes prior to the final inspection of
the repair.
Apply rear window defroster repair to the area as needed. �K�l�j . 2 �b�a
32003 Mustang Workshop Manual
18. 11. 2011file:///C:/Ford/2000 - 2004/tsocache/SHEF_5108/S3B~us~en~ ...
Page 3752 of 4378
GENERAL PROCEDURES
Door Window Glass Adjustment —
Height Stop Adjustment
1. Close the front door.
2. Loosen the screws.
3. Raise the door window glass to the desired height.
4. Tighten the screws.
SECTION 501-
11: Glass, Frames and Mechanisms 2003 Mustang Workshop Manual �K�l�j . 1 �b�a
22003 Mustang Workshop Manual
18. 11. 2011file:///C:/Ford/2000 - 2004/tsocache/SHEF_5108/S3B~us~en~ ...
Page 3754 of 4378
GENERAL PROCEDURES
Door Window Glass Adjustment —
Stabilizer
1. Raise the door window glass to the full up position.
2. Loosen the bolts.
3. Push the door window glass inner stabilizers firmly against the door window glass.
4. Tighten the bolts.
SECTION 501-
11: Glass, Frames and Mechanisms 2003 Mustang Workshop Manual �K�l�j . 1 �b�a
22003 Mustang Workshop Manual
18. 11. 2011file:///C:/Ford/2000 - 2004/tsocache/SHEF_5108/S3B~us~en~ ...
Page 3756 of 4378
GENERAL PROCEDURES
Rear Quarter Window Glass Adjustment —
Convertible
1. Adjust the quarter window glass for correct fit. 1. horizontal adjustment
2. regulator plate tilt
3. glass to regulator tilt
4. front high/low up stop
5. rear high/low/tilt channel stop
6. inboard/outboard tilt
SECTION 501-
11: Glass, Frames and Mechanisms 2003 Mustang Workshop Manual �K�l�j . 1 �b�a
12003 Mustang Workshop Manual
18. 11. 2011file:///C:/Ford/2000 - 2004/tsocache/SHEF_5108/S3B~us~en~ ...