Page 3808 of 4378
REMOVAL AND INSTALLATION
Instrument Panel —
Center Finish Panel
Removal and Installation
All vehicles 1. Disconnect the battery ground cable. For additional information, refer to Section 414 - 01 .
Vehicles with automatic transmission 2. Place the selector lever in the 1 position.
Vehicles with manual transmission
3. Remove the gearshift lever handle.
All vehicles
4. Remove the floor console finish panel. �zDisconnect the electrical connector.
5. Remove the instrument panel center finish panel. �zDisconnect the electrical connector.
6. To install, reverse the removal procedure.
SECTION 501-
12: Instrument Panel and Console 2003 Mustang Workshop Manual �K�l�j . 1 �b�a
22003 Mustang Workshop Manual
18. 11. 2011file:///C:/Ford/2000 - 2004/tsocache/SHEF_5108/S3B~us~en~ ...
Page 3810 of 4378
REMOVAL AND INSTALLATION
Floor Console
Removal and Installation
All vehicles
1. Disconnect the battery ground cable. For additional information, refer to Section 414 - 01 .
2. Apply the parking brake.
Vehicles with automatic transmission 3. Place the selector lever in the 1 position.
Vehicles with manual transmission 4. Remove the gearshift lever handle.
All vehicles 5. Remove the floor console finish panel. �zDisconnect the electrical connector.
6. Open the floor console glove compartment door.
7. Remove the floor console screws.
8. Disconnect the floor console electrical connector.
SECTION 501-
12: Instrument Panel and Console 2003 Mustang Workshop Manual �K�l�j . 1 �b�a
22003 Mustang Workshop Manual
18. 11. 2011file:///C:/Ford/2000 - 2004/tsocache/SHEF_5108/S3B~us~en~ ...
Page 3842 of 4378
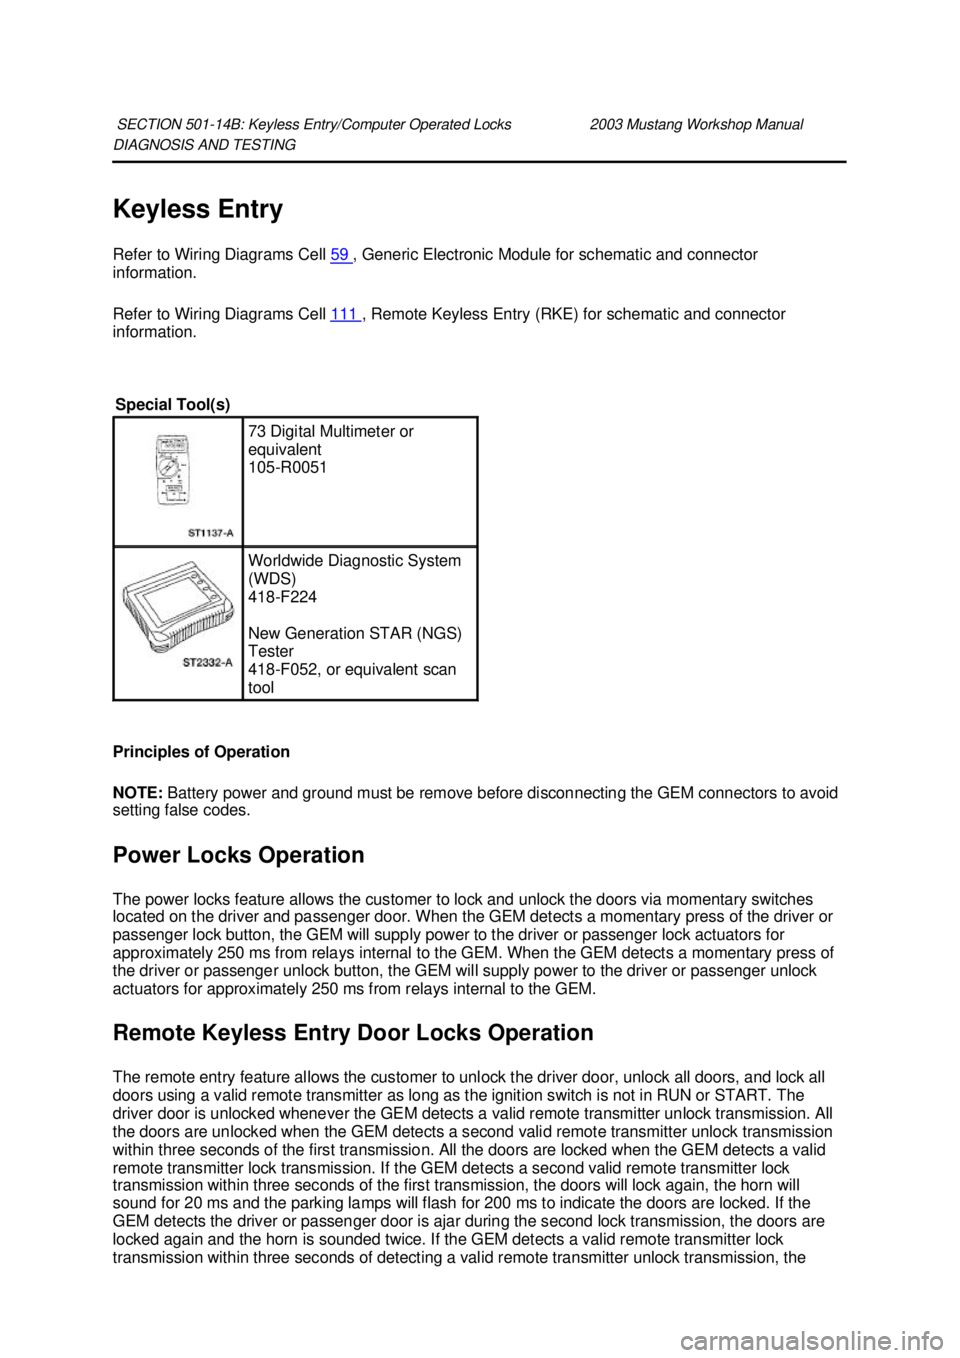
DIAGNOSIS AND TESTING
Keyless Entry
Refer to Wiring Diagrams Cell
59 , Generic Electronic Module for schematic and connector
information.
Refer to Wiring Diagrams Cell 111 , Remote Keyless Entry (RKE) for schematic and connector
information.
Principles of Operation
NOTE: Battery power and ground must be remove before disconnecting the GEM connectors to avoid
setting false codes.
Power Locks Operation
The power locks feature allows the customer to lock and unlock the doors via momentary switches
located on the driver and passenger door. When the GEM detects a momentary press of the driver or
passenger lock button, the GEM will supply power to the driver or passenger lock actuators for
approximately 250 ms from relays internal to the GEM. When the GEM detects a momentary press of
the driver or passenger unlock button, the GEM will supply power to the driver or passenger unlock
actuators for approximately 250 ms from relays internal to the GEM.
Remote Keyless Entry Door Locks Operation
The remote entry feature allows the customer to unlock the driver door, unlock all doors, and lock all
doors using a valid remote transmitter as long as the ignition switch is not in RUN or START. The
driver door is unlocked whenever the GEM detects a valid remote transmitter unlock transmission. All
the doors are unlocked when the GEM detects a second valid remote transmitter unlock transmission
within three seconds of the first transmission. All the doors are locked when the GEM detects a valid
remote transmitter lock transmission. If the GEM detects a second valid remote transmitter lock
transmission within three seconds of the first transmission, the doors will lock again, the horn will
sound for 20 ms and the parking lamps will flash for 200 ms to indicate the doors are locked. If the
GEM detects the driver or passenger door is ajar during the second lock transmission, the doors are
locked again and the horn is sounded twice. If the GEM detects a valid remote transmitter lock
transmission within three seconds of detecting a valid remote transmitter unlock transmission, the SECTION 501-
14B: Keyless Entry/Computer Operated Locks 2003 Mustang Workshop Manual Special Tool(s)
73 Digital Multimeter or
equivalent
105-
R0051 Worldwide Diagnostic System
(WDS)
418-
F224
New Generation STAR (NGS)
Tester
418- F052, or equivalent scan
tool �K�l�j . 1 �b�a
212003 Mustang Workshop Manual
18. 11. 2011file:///C:/Ford/2000 - 2004/tsocache/SHEF_5108/S3B~us~en~ ...
Page 3843 of 4378
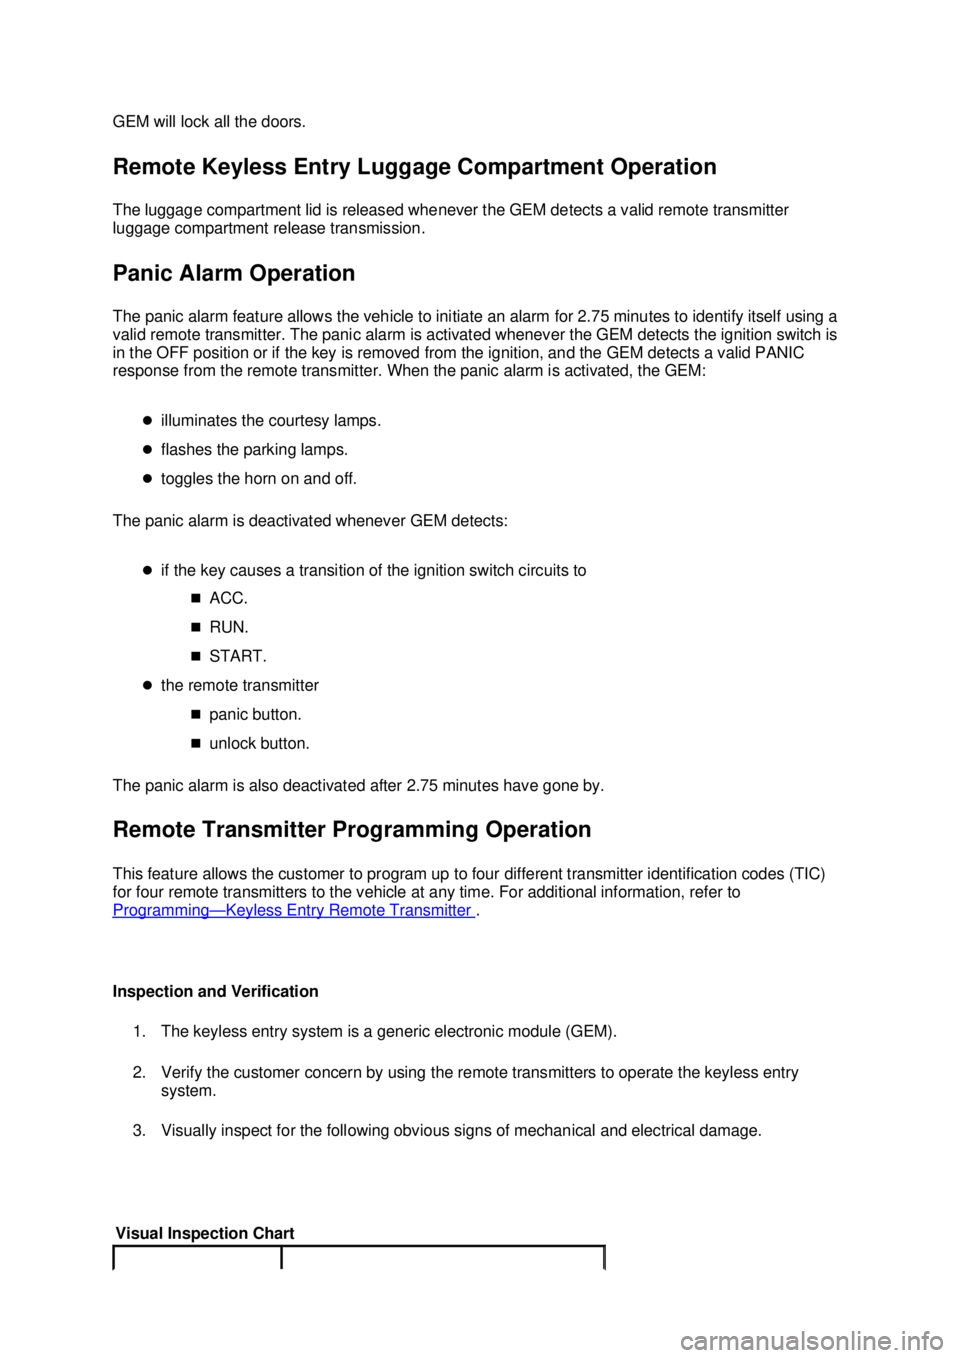
GEM will lock all the doors.
Remote Keyless Entry Luggage Compartment Operation
The luggage compartment lid is released whenever the GEM detects a valid remote transmitter
luggage compartment release transmission.
Panic Alarm Operation
The panic alarm feature allows the vehicle to initiate an alarm for 2.75 minutes to identify itself using a
valid remote transmitter. The panic alarm is activated whenever the GEM detects the ignition switch is
in the OFF position or if the key is removed from the ignition, and the GEM detects a valid PANIC
response from the remote transmitter. When the panic alarm is activated, the GEM:
�zilluminates the courtesy lamps.
�z flashes the parking lamps.
�z toggles the horn on and off.
The panic alarm is deactivated whenever GEM detects:
�zif the key causes a transition of the ignition switch circuits to
�„ACC.
�„ RUN.
�„ START.
�z the remote transmitter
�„panic button.
�„ unlock button.
The panic alarm is also deactivated after 2.75 minutes have gone by.
Remote Transmitter Programming Operation
This feature allows the customer to program up to four different transmitter identification codes (TIC)
for four remote transmitters to the vehicle at any time. For additional information, refer to
Programming — Keyless Entry Remote Transmitter .
Inspection and Verification 1. The keyless entry system is a generic electronic module (GEM).
2. Verify the customer concern by using the remote transmitters to operate the keyless entry system.
3. Visually inspect for the following obvious signs of mechanical and electrical damage.
Visual Inspection Chart �K�l�j . 2 �b�a
212003 Mustang Workshop Manual
18. 11. 2011file:///C:/Ford/2000 - 2004/tsocache/SHEF_5108/S3B~us~en~ ...
Page 3874 of 4378
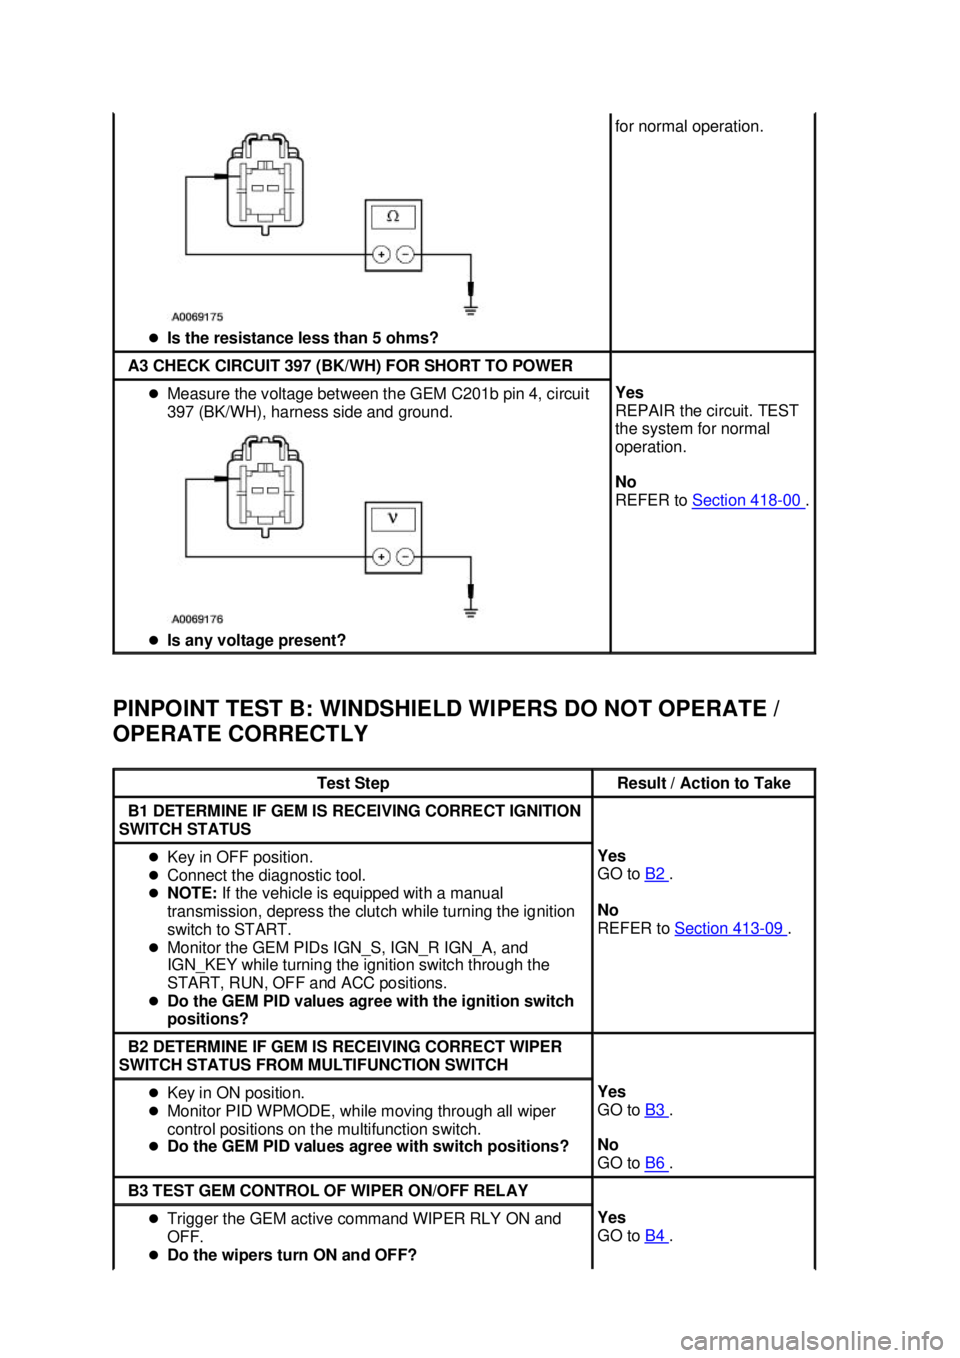
PINPOINT TEST B: WINDSHIELD WIPERS DO NOT OPERATE /
OPERATE CORRECTLY �z
Is the resistance less than 5 ohms? for normal operation.
A3 CHECK CIRCUIT 397 (BK/WH) FOR SHORT TO POWER
�z
Measure the voltage between the GEM C201b pin 4, circuit
397 (BK/WH), harness side and ground.
�z Is any voltage present? Yes
REPAIR the circuit. TEST
the system for normal
operation.
No
REFER to
Section 418 - 00 .
Test Step Result / Action to Take
B1 DETERMINE IF GEM IS RECEIVING CORRECT IGNITION
SWITCH STATUS �z
Key in OFF position.
�z Connect the diagnostic tool.
�z NOTE: If the vehicle is equipped with a manual
transmission, depress the clutch while turning the ignition
switch to START.
�z Monitor the GEM PIDs IGN_S, IGN_R IGN_A, and
IGN_KEY while turning the ignition switch through the
START, RUN, OFF and ACC positions.
�z Do the GEM PID values agree with the ignition switch
positions? Yes
GO to
B2 .
No
REFER to Section 413 - 09 .
B2 DETERMINE IF GEM IS RECEIVING CORRECT WIPER
SWITCH STATUS FROM MULTIFUNCTION SWITCH �z
Key in ON position.
�z Monitor PID WPMODE, while moving through all wiper
control positions on the multifunction switch.
�z Do the GEM PID values agree with switch positions? Yes
GO to
B3 .
No
GO to B6 .
B3 TEST GEM CONTROL OF WIPER ON/OFF RELAY
�z
Trigger the GEM active command WIPER RLY ON and
OFF.
�z Do the wipers turn ON and OFF? Yes
GO to
B4 . �K�l�j . 7 �b�a
202003 Mustang Workshop Manual
18. 11. 2011file:///C:/Ford/2000 - 2004/tsocache/SHEF_5108/S3B~us~en~ ...
Page 3882 of 4378
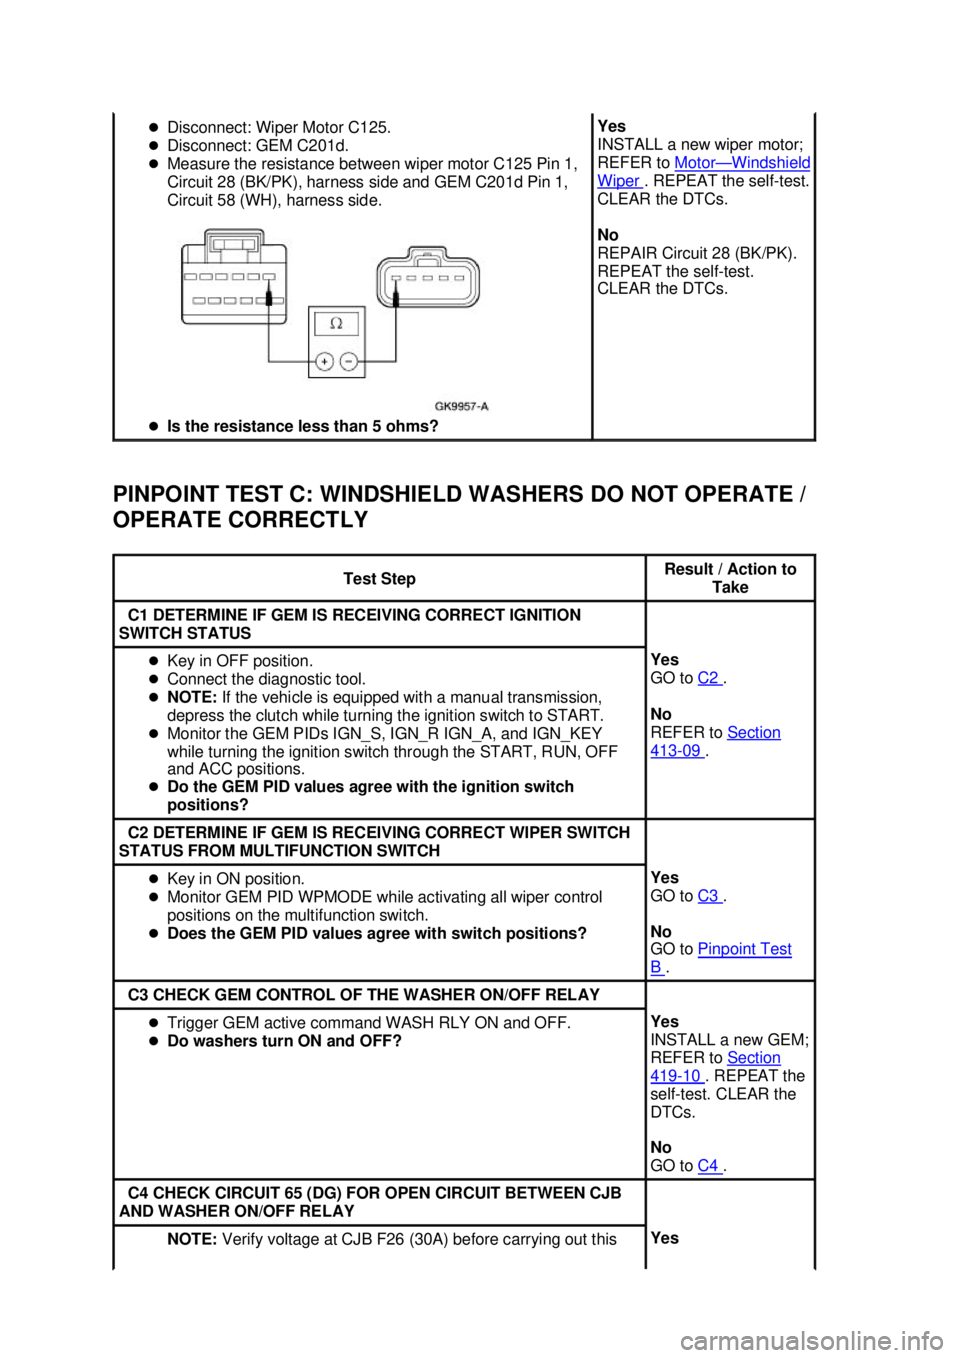
PINPOINT TEST C: WINDSHIELD WASHERS DO NOT OPERATE /
OPERATE CORRECTLY �z
Disconnect: Wiper Motor C125.
�z Disconnect: GEM C201d.
�z Measure the resistance between wiper motor C125 Pin 1,
Circuit 28 (BK/PK), harness side and GEM C201d Pin 1,
Circuit 58 (WH), harness side.
�z Is the resistance less than 5 ohms? Yes
INSTALL a new wiper motor;
REFER to
Motor — Windshield
Wiper . REPEAT the self-
test.
CLEAR the DTCs.
No
REPAIR Circuit 28 (BK/PK).
REPEAT the self- test.
CLEAR the DTCs. Test Step Result / Action to
Take C1 DETERMINE IF GEM IS RECEIVING CORRECT IGNITION
SWITCH STATUS �z
Key in OFF position.
�z Connect the diagnostic tool.
�z NOTE: If the vehicle is equipped with a manual transmission,
depress the clutch while turning the ignition switch to START.
�z Monitor the GEM PIDs IGN_S, IGN_R IGN_A, and IGN_KEY
while turning the ignition switch through the START, RUN, OFF
and ACC positions.
�z Do the GEM PID values agree with the ignition switch
positions? Yes
GO to
C2 .
No
REFER to Section 413 - 09 .
C2 DETERMINE IF GEM IS RECEIVING CORRECT WIPER SWITCH
STATUS FROM MULTIFUNCTION SWITCH �z
Key in ON position.
�z Monitor GEM PID WPMODE while activating all wiper control
positions on the multifunction switch.
�z Does the GEM PID values agree with switch positions? Yes
GO to
C3 .
No
GO to Pinpoint Test B .
C3 CHECK GEM CONTROL OF THE WASHER ON/OFF RELAY
�z
Trigger GEM active command WASH RLY ON and OFF.
�z Do washers turn ON and OFF? Yes
INSTALL a new GEM;
REFER to
Section 419 - 10 . REPEAT the
self- test. CLEAR the
DTCs.
No
GO to C4 .
C4 CHECK CIRCUIT 65 (DG) FOR OPEN CIRCUIT BETWEEN CJB
AND WASHER ON/OFF RELAY NOTE:
Verify voltage at CJB F26 (30A) before carrying out this Yes �K�l�j . 15 �b�a
202003 Mustang Workshop Manual
18. 11. 2011file:///C:/Ford/2000 - 2004/tsocache/SHEF_5108/S3B~us~en~ ...
Page 3903 of 4378
SPECIFICATIONS
SECTION 501-
18: Convertible Top 2003 Mustang Workshop Manual General Specifications
Item Specification
Mercon® multi-
purpose automatic transmission fluid XT -2-QDX —
Torque Specifications Description Nm lb-
ft lb-
in Cylinder mounting nut 23 17 —
Rail seal screws 3 — 27
Side rail bolts 63 46 —
Cylinder upper mounting bolt 17 13 —
Cylinder retaining bolts 22 16 —
Front safety belt retractor bolts and nut 30 20 —
Front seal screws 5 — 44
Cylinder rod mounting bolts 12 9 —
Side rail to header bolts 23 17 —
Tacking strip nuts 7 — 62
Hydraulic line to lift cylinder nuts 9 — 80
Hydraulic line to motor nuts 12 9 —
B-
Hinge lock nut 4 — 35
Balance linkage bolts 22 16 —
Adjusting cam set screw 6 — 53 �K�l�j . 1 �b�a
22003 Mustang Workshop Manual
18. 11. 2011file:///C:/Ford/2000 - 2004/tsocache/SHEF_5108/S3B~us~en~ ...
Page 3917 of 4378
GENERAL PROCEDURES
System Bleeding
1. If required, remove the hydraulic system from the vehicle. Refer to Hydraulic System, Lift Cylinder and Motor in this section.
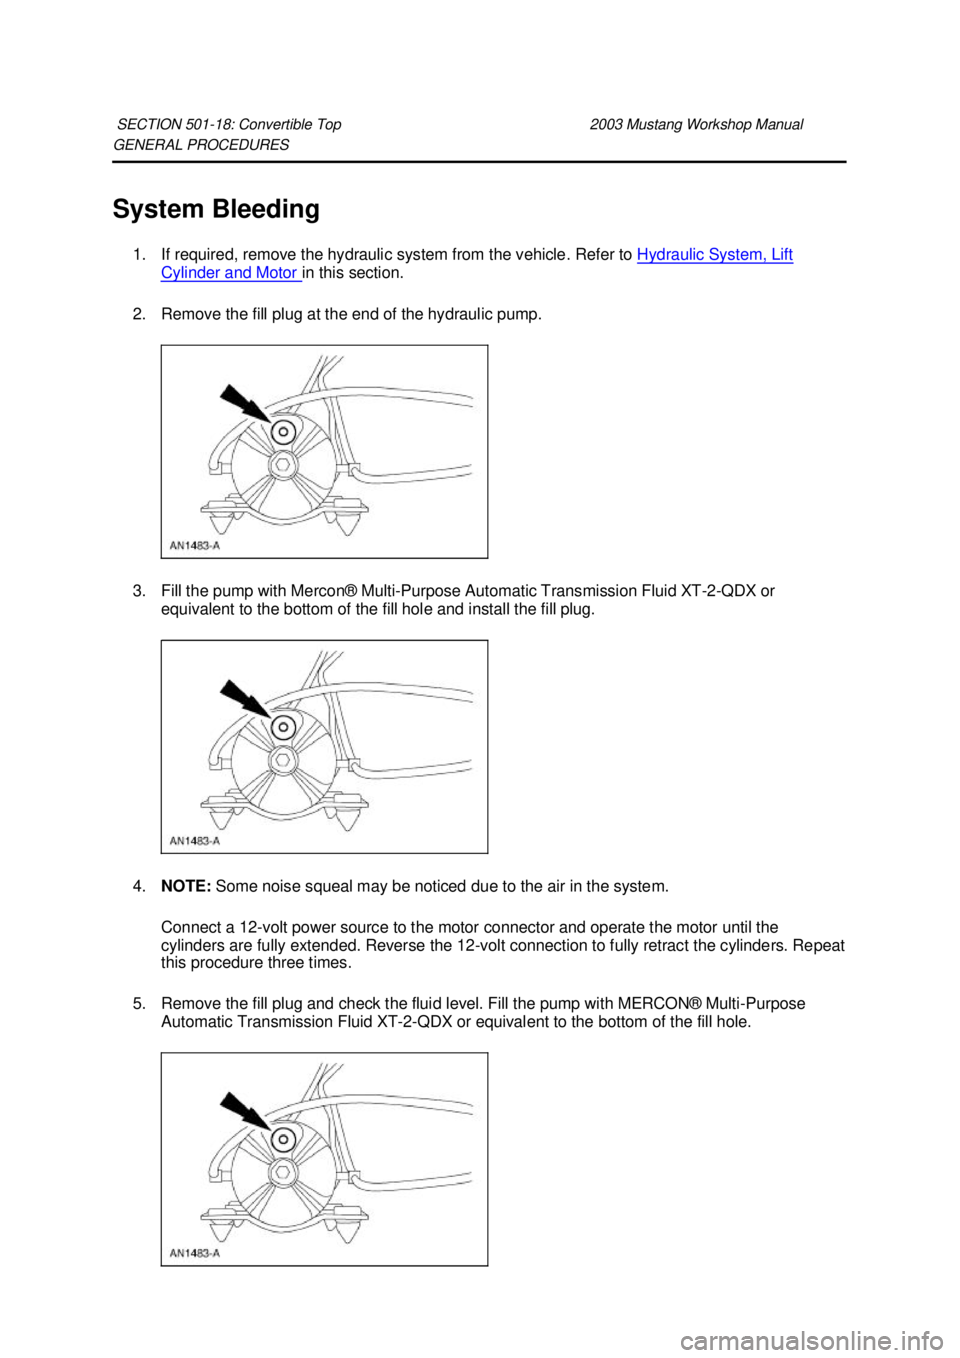
2. Remove the fill plug at the end of the hydraulic pump.
3. Fill the pump with Mercon® Multi- Purpose Automatic Transmission Fluid XT -2-QDX or
equivalent to the bottom of the fill hole and install the fill plug.
4. NOTE: Some noise squeal may be noticed due to the air in the system.
Connect a 12- volt power source to the motor connector and operate the motor until the
cylinders are fully extended. Reverse the 12- volt connection to fully retract the cylinders. Repeat
this procedure three times.
5. Remove the fill plug and check the fluid level. Fill the pump with MERCON® Multi- Purpose
Automatic Transmission Fluid XT -2-QDX or equivalent to the bottom of the fill hole.
SECTION 501-
18: Convertible Top 2003 Mustang Workshop Manual �K�l�j . 1 �b�a
22003 Mustang Workshop Manual
18. 11. 2011file:///C:/Ford/2000 - 2004/tsocache/SHEF_5108/S3B~us~en~ ...