Page 1169 of 4378
IN-
VEHICLE REPAIR
Valve Cover LH
Removal and Installation 1. Position the oil level tube (6754) out of the way.
2. Disconnect the breather tube.
3. Separate the engine wiring harness in the locations shown.
SECTION 303-
01B: Engine — 4.6L (2V) 2003 Mustang Workshop Manual Material
Item Specification
Silicone Gasket and Sealant
F7AZ-
19554- EA or equivalent WSE-
M4G323- A4 �K�l�j . 1 �b�a
32003 Mustang Workshop Manual
17. 11. 2011file:///C:/Ford/2000 - 2004/tsocache/SHEF_4464/S3B~us~en~ ...
Page 1175 of 4378
IN-
VEHICLE REPAIR
Crankshaft Front Oil Seal
Removal 1. Remove the crankshaft pulley. For additional information, refer to Crankshaft Pulley in this
section. 2. Using the special tool, remove the crankshaft front oil seal. SECTION 303-
01B: Engine — 4.6L (2V) 2003 Mustang Workshop Manual Special Tool(s)
Crankshaft Seal
Installer/Aligner
303-
335 (T88T-6701- A) Front Cover Seal Remover
303-
107 (T74P-6700- A) Crankshaft Seal Installer
303-
635 Crankshaft Damper Replacer
303-
102 (T74P-6316- B)
Material Item Specification
Super Premium SAE 5W-20
Engine Oil
XO- 5W20- QSP or equivalent WSS-
M2C153-
H �K�l�j . 1 �b�a
32003 Mustang Workshop Manual
17. 11. 2011file:///C:/Ford/2000 - 2004/tsocache/SHEF_4464/S3B~us~en~ ...
Page 1176 of 4378
Installation
1. Lubricate the engine front cover and the crankshaft front oil seal inner lip with clean engine oil.
2. Using the special tools, install the crankshaft front oil seal into the engine front cover.
3. Install the crankshaft pulley. For additional information, refer to Crankshaft Pulley . �K�l�j . 2 �b�a
32003 Mustang Workshop Manual
17. 11. 2011file:///C:/Ford/2000 - 2004/tsocache/SHEF_4464/S3B~us~en~ ...
Page 1178 of 4378
IN-
VEHICLE REPAIR
Engine Front Cover
Removal 1. Remove the nuts and position the radio ignition interference capacitors aside.
2. Remove the valve covers. For additional information, refer to Valve Cover RH and
Valve Cover LH in this section.
3. Remove the cooling fan. For additional information, refer to Section 303 - 03A or
Section 303 -
03B .
4. Remove the accessory drive belt. For additional information, refer to Section 303 - 05 .
5. Remove bolts (1) and the water pump pulley (2).
6. Remove the nut and position the A/C muffler aside.
SECTION 303-
01B: Engine — 4.6L (2V) 2003 Mustang Workshop Manual Material
Item Specification
Silicone Gasket and Sealant
F7AZ-
19554- EA or equivalent WSE-
M4G323-
A4 Super Premium SAE 5W-20
Motor Oil
XO- 5W20- QSP or equivalent WSS-
M2C153- H �K�l�j . 1 �b�a
92003 Mustang Workshop Manual
17. 11. 2011file:///C:/Ford/2000 - 2004/tsocache/SHEF_4464/S3B~us~en~ ...
Page 1179 of 4378
7. Raise and support the vehicle. For additional information, refer to
Section 100 - 02 .
8. Remove the bolts and position the power steering pump aside.
9. Disconnect the crankshaft position (CKP) sensor electrical connector.
10. Drain the engine oil.
11. Remove the two support nuts and position the battery cable aside. �K�l�j . 2 �b�a
92003 Mustang Workshop Manual
17. 11. 2011file:///C:/Ford/2000 - 2004/tsocache/SHEF_4464/S3B~us~en~ ...
Page 1186 of 4378
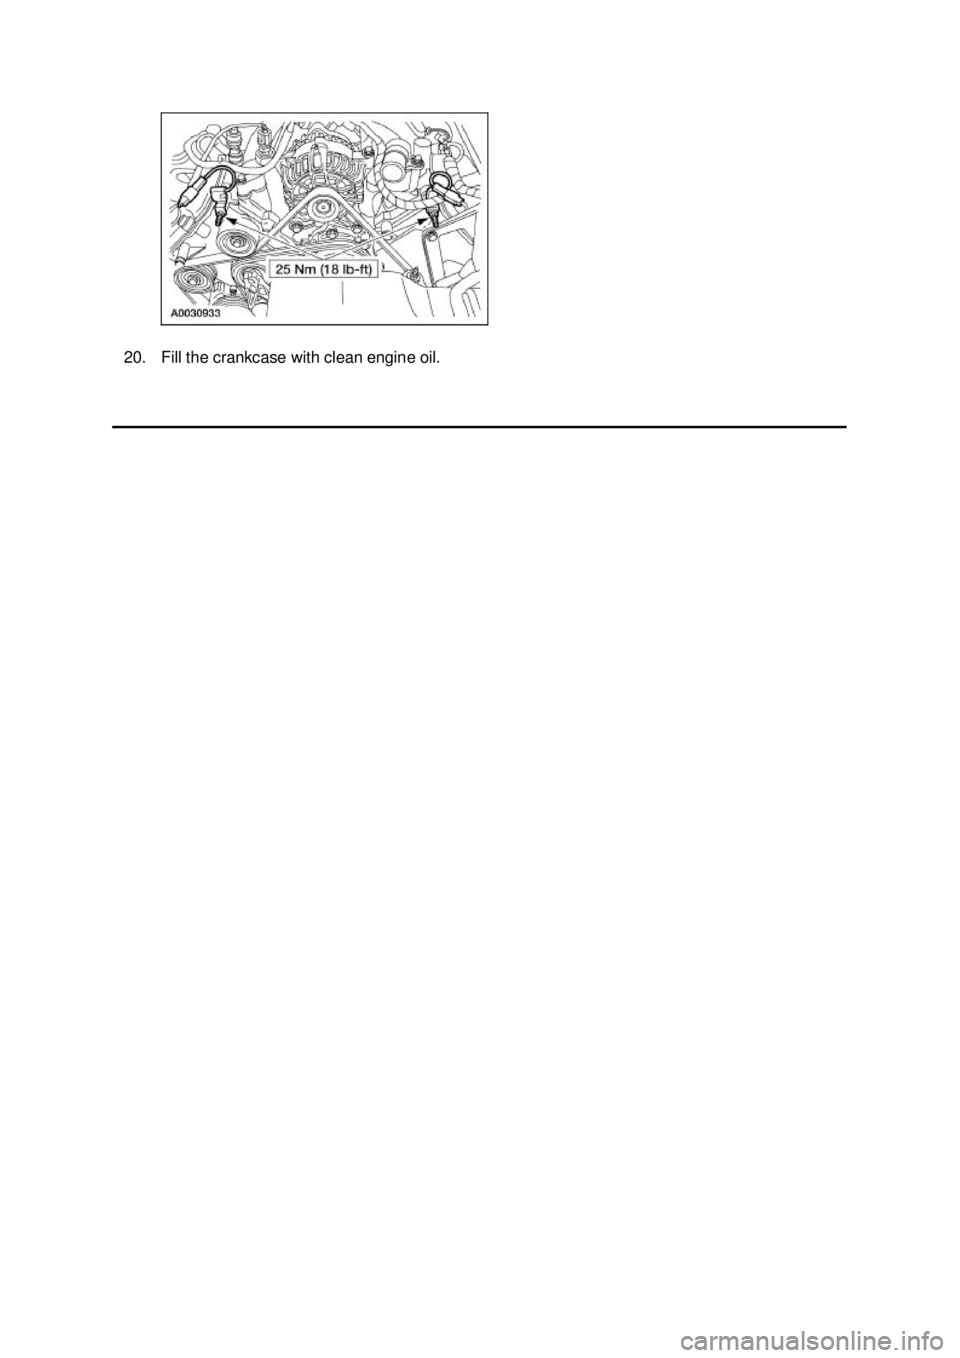
20. Fill the crankcase with clean engine oil. �K�l�j . 9 �b�a
92003 Mustang Workshop Manual
17. 11. 2011file:///C:/Ford/2000 - 2004/tsocache/SHEF_4464/S3B~us~en~ ...
Page 1187 of 4378
IN-
VEHICLE REPAIR
Timing Drive Components
Removal CAUTION: Since the engine is not free- wheeling, timing procedures must be followed
exactly or piston and valve damage can occur.
1. Remove the engine front cover. For additional information, refer to Engine Front Cover in this
section.
2. Remove the crankshaft sensor ring from the crankshaft. 3. Disconnect the eight ignition coil electrical connectors. SECTION 303-
01B: Engine — 4.6L (2V) 2003 Mustang Workshop Manual Special Tool(s)
Compressor, Valve Spring
303-
567 (T97P-6565- AH) Holding Tool, Crankshaft
303-
448 (T93P-6303- A) Aligner, Camshaft Position
303-
557 (T96T-6256- B) �K�l�j . 1 �b�a
132003 Mustang Workshop Manual
17. 11. 2011file:///C:/Ford/2000 - 2004/tsocache/SHEF_4464/S3B~us~en~ ...
Page 1198 of 4378
19. Install the eight ignition coils and bolts.
20. Connect the eight ignition coil electrical connectors.
21. Install the crankshaft sensor ring on the crankshaft.
22. Install the engine front cover. For additional information, refer to
Engine Front Cover in this
section. �K�l�j . 12 �b�a
132003 Mustang Workshop Manual
17. 11. 2011file:///C:/Ford/2000 - 2004/tsocache/SHEF_4464/S3B~us~en~ ...
 out of the way.
2. Disconnect the breather tube.
3. Separate the engine wiring harness in the loca")