Page 2 of 256
Brakes 138
Traction control/AdvanceTrac 142
Transmission operation 144
Vehicle loading 154
Trailer towing 156
Roadside Emergencies 157
Getting roadside assistance 157
Hazard flasher switch 158
Fuel pump shut-off switch 159
Fuses and relays 160
Changing tires 165
Jump starting 170
Wrecker towing 175
Customer Assistance 176
Reporting safety defects (U.S. only) 186
Cleaning 187
Maintenance and Specifications 194
Engine compartment 197
Engine oil 199
Battery 203
Fuel information 214
Part numbers 237
Refill capacities 238
Lubricant specifications 240
Accessories 245
Index 248
All rights reserved. Reproduction by any means, electronic or
mechanical including photocopying, recording or by any
information storage and retrieval system or translation in
whole or part is not permitted without written authorization
from Ford Motor Company. Ford may change the contents
without notice and without incurring obligation.
Copyright © 2002 Ford Motor Company
Table of Contents
2
Page 13 of 256

Low fuel
Illuminates when the
fuel level in the fuel
tank is at, or near,
empty (refer toFuel
gaugein this chapter for more information).
O/D off (if equipped)
Illuminates when the
overdrive function has
been turned OFF using
the transmission control switch (TCS) on the
gearshift. If the light does not come on or the light
flashes steadily, have your vehicle serviced as soon
as possible, damage to the transmission could occur.
Traction Control�active
Illuminates when the
Traction Control�
system is active. It will
be lit for a minimum of
four seconds or for the duration of the Traction
Control�event.
For more information, refer to theDrivingchapter.
Anti-lock brake system (ABS)
To confirm the
anti-lock brake system
(ABS) warning light is
functional it will
momentarily illuminate when the ignition is turned
to the ON position (alternatively for some vehicles
when the ignition is moved from the ON position to
the START position, the light will momentarily
illuminate just prior to reaching the START
position). If the light remains on, continues to flash
or fails to illuminate, have the ABS serviced
immediately. If the ABS light remains on, it means
the anti-lock brake system has malfunctioned and is
disabled, however, the normal brake system will still
function unless the brake warning light also remains
LOW
FUEL
O/D
OFF
ABS
Instrument Cluster
13
Page 84 of 256
OVERDRIVE CONTROL (IF EQUIPPED)
Activating overdrive
(Overdrive) is the normal drive position for the
best fuel economy.
The overdrive function allows automatic upshifts and
downshifts through all available gears.
Deactivating overdrive
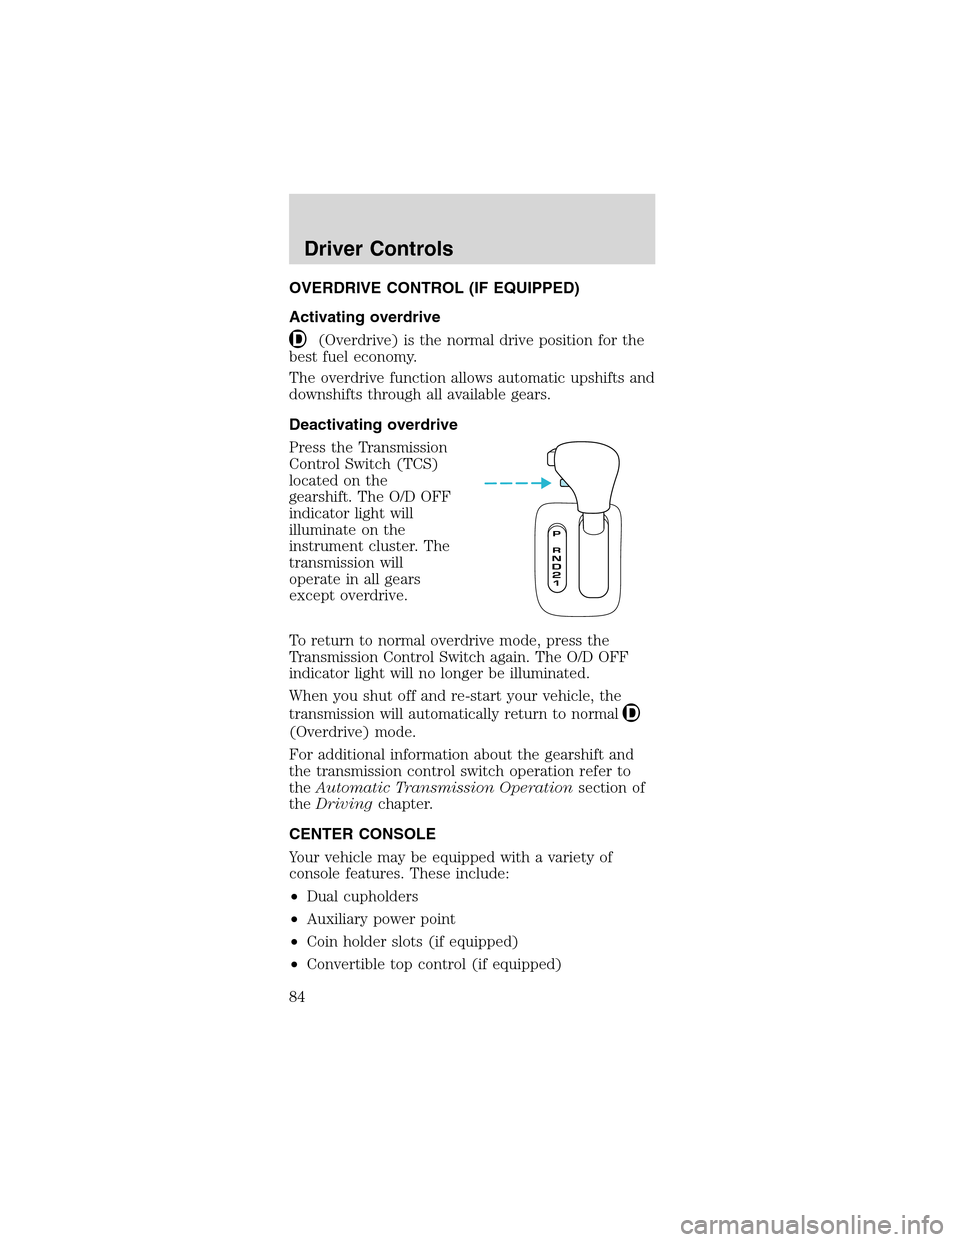
Press the Transmission
Control Switch (TCS)
located on the
gearshift. The O/D OFF
indicator light will
illuminate on the
instrument cluster. The
transmission will
operate in all gears
except overdrive.
To return to normal overdrive mode, press the
Transmission Control Switch again. The O/D OFF
indicator light will no longer be illuminated.
When you shut off and re-start your vehicle, the
transmission will automatically return to normal
(Overdrive) mode.
For additional information about the gearshift and
the transmission control switch operation refer to
theAutomatic Transmission Operationsection of
theDrivingchapter.
CENTER CONSOLE
Your vehicle may be equipped with a variety of
console features. These include:
•Dual cupholders
•Auxiliary power point
•Coin holder slots (if equipped)
•Convertible top control (if equipped)
Driver Controls
84
Page 93 of 256
Opening the trunk
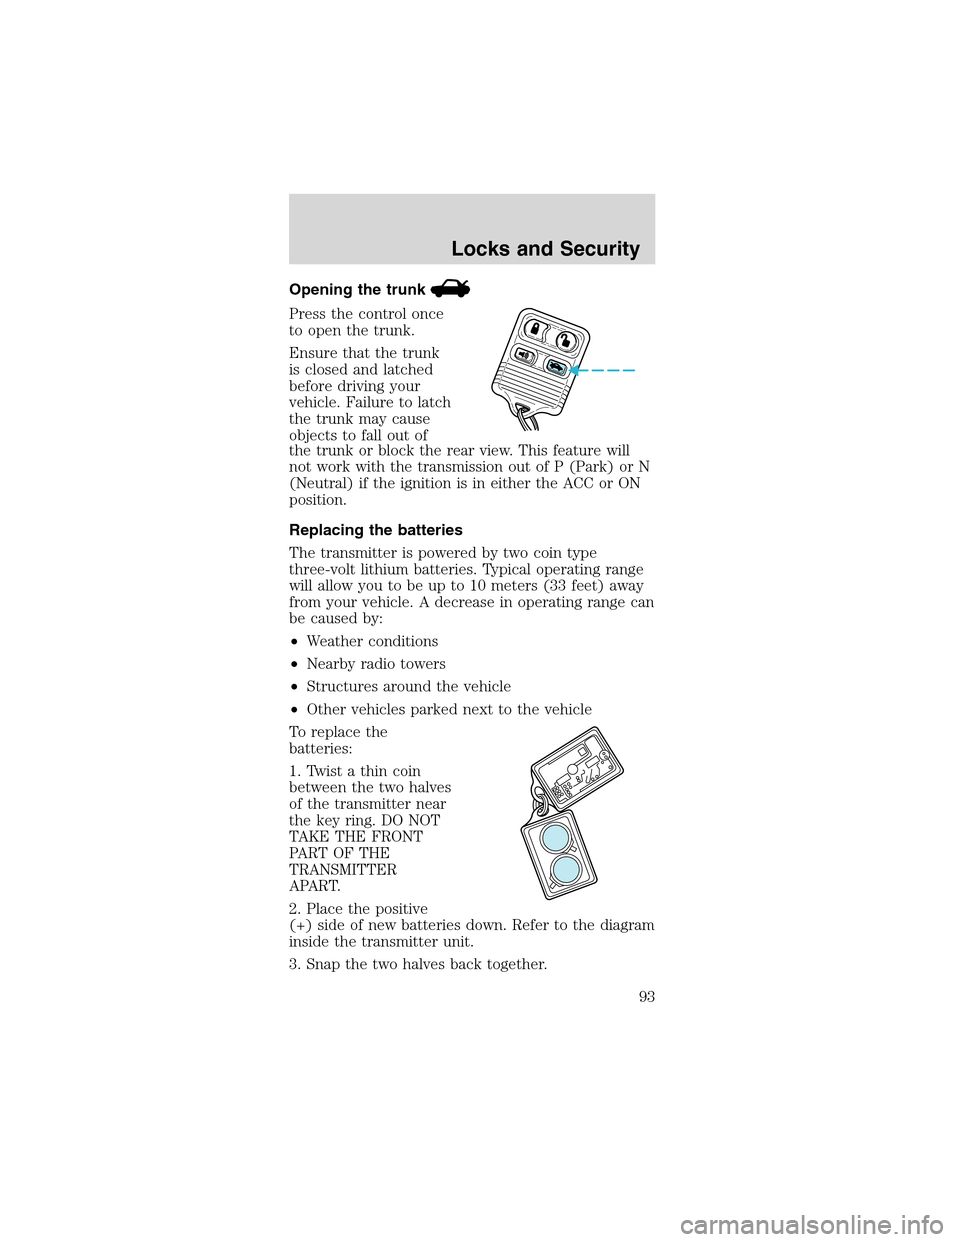
Press the control once
to open the trunk.
Ensure that the trunk
is closed and latched
before driving your
vehicle. Failure to latch
the trunk may cause
objects to fall out of
the trunk or block the rear view. This feature will
not work with the transmission out of P (Park) or N
(Neutral) if the ignition is in either the ACC or ON
position.
Replacing the batteries
The transmitter is powered by two coin type
three-volt lithium batteries. Typical operating range
will allow you to be up to 10 meters (33 feet) away
from your vehicle. A decrease in operating range can
be caused by:
•Weather conditions
•Nearby radio towers
•Structures around the vehicle
•Other vehicles parked next to the vehicle
To replace the
batteries:
1. Twist a thin coin
between the two halves
of the transmitter near
the key ring. DO NOT
TAKE THE FRONT
PART OF THE
TRANSMITTER
APART.
2. Place the positive
(+) side of new batteries down. Refer to the diagram
inside the transmitter unit.
3. Snap the two halves back together.
Locks and Security
93
Page 111 of 256
Reasons given... Consider...
“The people I’m
with don’t wear
belts”Set the example, teen deaths occur 4
times more often in vehicles with TWO
or MORE people. Children and younger
brothers/sisters imitate behavior they
see.
“I have an air
bag”Air bags offer greater protection when
used with safety belts. Frontal airbags
are not designed to inflate in rear and
side crashes or rollovers.
“I’d rather be
thrown clear”Not a good idea.Peoplewho are
ejected are 40 times more likely to
DIE.Safety belts help prevent ejection,
WE CAN’T“PICK OUR CRASH”.
Do not sit on top of a buckled safety belt to
avoid the Belt Minder chime. Sitting on the
safety belt will increase the risk of injury in an
accident. To disable (one-time) or deactivate the
Belt Minder feature please follow the directions
stated below.
One time disable
Any time the safety belt is buckled and then
unbuckled during an ignition ON cycle, BeltMinder
will be disabled for that ignition cycle only.
Deactivating/activating the BeltMinder feature
Read steps1-9thoroughly before proceeding
with the deactivation/activation programming
procedure.
The BeltMinder feature can be deactivated/activated
by performing the following procedure:
Before following the procedure, make sure that:
•The parking brake is set.
•The gearshift is in P (Park) (automatic
transmission) or the neutral position (manual
transmission).
•The ignition switch is in the OFF position.
•All vehicle doors are closed.
Seating and Safety Restraints
111
Page 133 of 256
STARTING
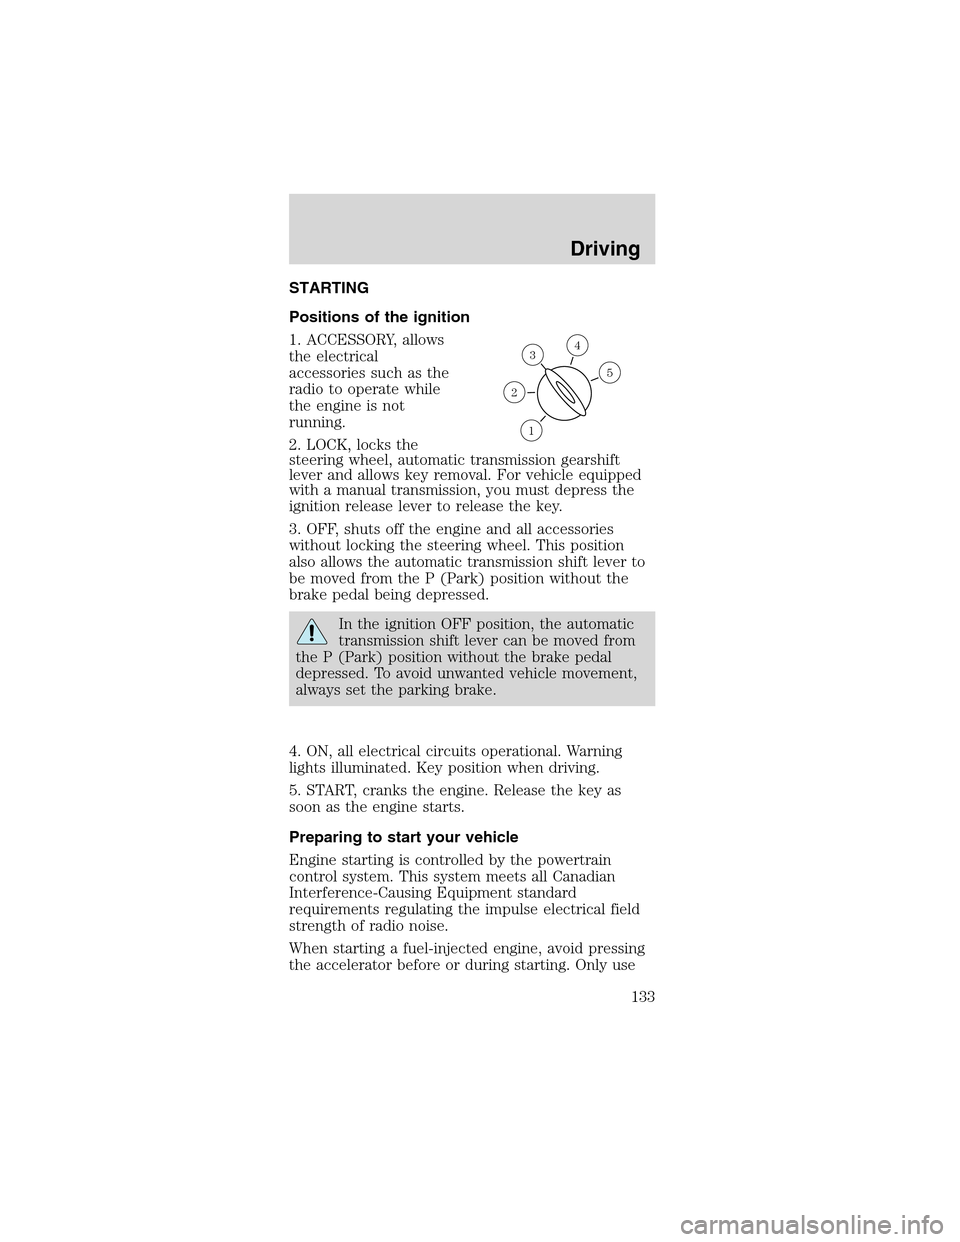
Positions of the ignition
1. ACCESSORY, allows
the electrical
accessories such as the
radio to operate while
the engine is not
running.
2. LOCK, locks the
steering wheel, automatic transmission gearshift
lever and allows key removal. For vehicle equipped
with a manual transmission, you must depress the
ignition release lever to release the key.
3. OFF, shuts off the engine and all accessories
without locking the steering wheel. This position
also allows the automatic transmission shift lever to
be moved from the P (Park) position without the
brake pedal being depressed.
In the ignition OFF position, the automatic
transmission shift lever can be moved from
the P (Park) position without the brake pedal
depressed. To avoid unwanted vehicle movement,
always set the parking brake.
4. ON, all electrical circuits operational. Warning
lights illuminated. Key position when driving.
5. START, cranks the engine. Release the key as
soon as the engine starts.
Preparing to start your vehicle
Engine starting is controlled by the powertrain
control system. This system meets all Canadian
Interference-Causing Equipment standard
requirements regulating the impulse electrical field
strength of radio noise.
When starting a fuel-injected engine, avoid pressing
the accelerator before or during starting. Only use
3
1
2
5
4
Driving
133
Page 135 of 256
2.Makesure the headlamps and vehicle accessories
are off.
If starting a vehicle with an automatic transmission:
•Make sure the
parking brake is set.
•Make sure the gearshift is in P (Park).
If starting a vehicle with a manual transmission:
•Make sure the parking brake is set.
•Push the clutch
pedal to the floor.
3. Turn the key to 4
(ON) without turning
the key to 5 (START).
1
2
34
5
Driving
135
Page 139 of 256
cold, heat, moisture, road dust, salt or mud. If a
“metal-to-metal,”“continuous grinding”or
“continuous squeal”sound is present while braking,
the brake linings may be worn-out and should be
inspected by a qualified service technician.
If you are driving down a long or steep hill,
shift to a lower gear. Do not apply your
brakes continuously, as they may overheat and
become less effective.
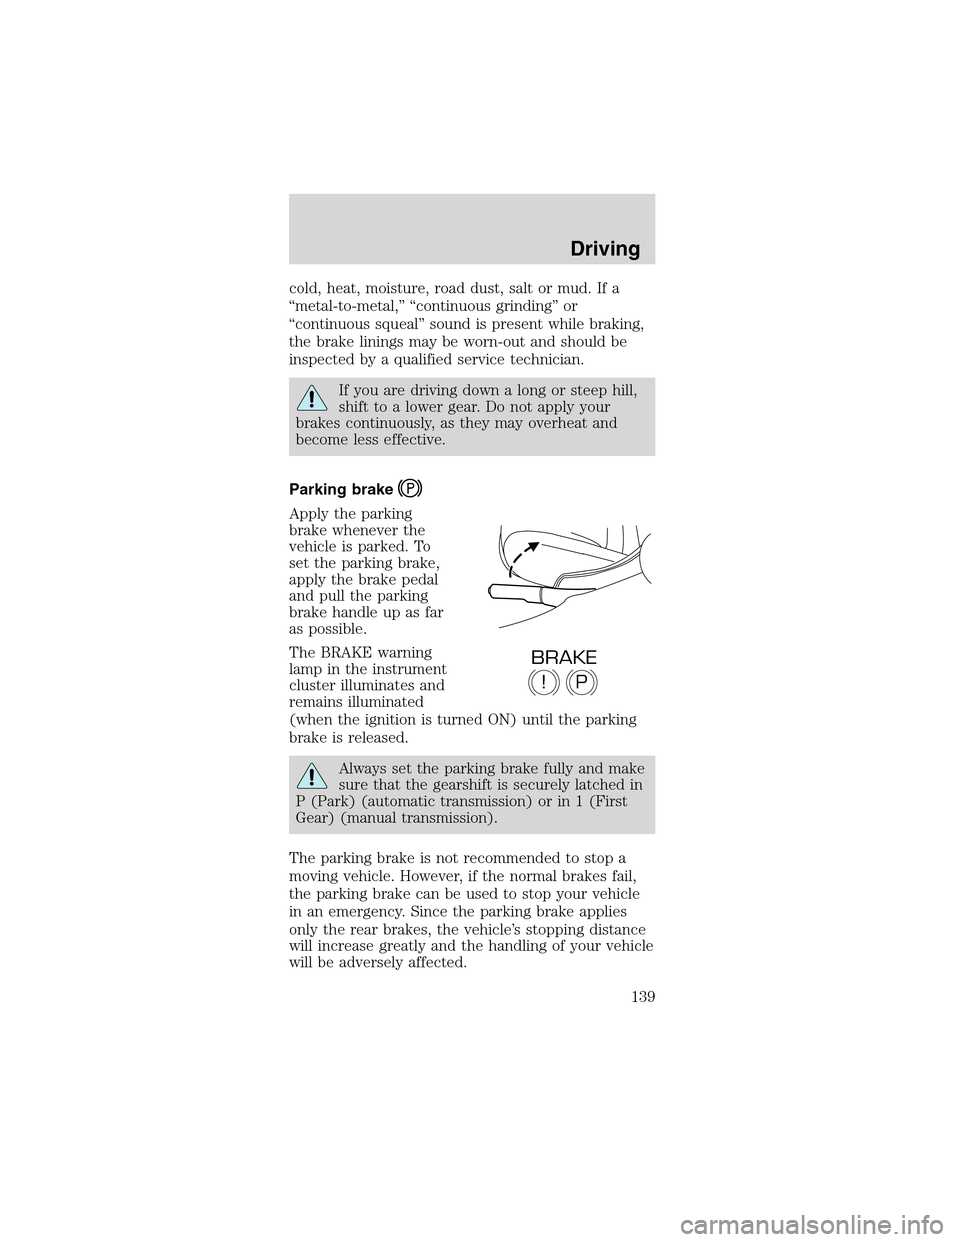
Parking brake
Apply the parking
brake whenever the
vehicle is parked. To
set the parking brake,
apply the brake pedal
and pull the parking
brake handle up as far
as possible.
The BRAKE warning
lamp in the instrument
cluster illuminates and
remains illuminated
(when the ignition is turned ON) until the parking
brake is released.
Always set the parking brake fully and make
sure that the gearshift is securely latched in
P (Park) (automatic transmission) or in 1 (First
Gear) (manual transmission).
The parking brake is not recommended to stop a
moving vehicle. However, if the normal brakes fail,
the parking brake can be used to stop your vehicle
in an emergency. Since the parking brake applies
only the rear brakes, the vehicle’s stopping distance
will increase greatly and the handling of your vehicle
will be adversely affected.
P!
BRAKE
Driving
139