Page 17 of 256
When refueling the vehicle from empty indication,
the amount of fuel that can be added will be less
than the advertised capacity due to the reserve fuel.
The FUEL DOOR icon and arrow indicates which
side of the vehicle the fuel filler door is located.
Speedometer
Indicates the current vehicle speed.
•Base instrument
cluster gauge
•Optional instrument
cluster gauge
Odometer
Registers the total
kilometers (miles) of
the vehicle.
Tachometer
Indicates the engine speed in revolutions per
minute.
Driving with your tachometer pointer at the top of
the scale or in the red zone may damage the engine.
Instrument Cluster
17
Page 18 of 256
•Base instrument
cluster gauge
•Optional instrument
cluster gauge
Trip odometer
Registers the
kilometers (miles) of
individual journeys.
Press and release the
reset button until a’T’
appears in the display
(this represents the
trip mode). Press and hold the button for three
seconds to reset.
0
00000 00
4
5
6
7
8 3
2
1RPMX1000
SELECT/RESET
.
Instrument Cluster
18
Page 84 of 256
OVERDRIVE CONTROL (IF EQUIPPED)
Activating overdrive
(Overdrive) is the normal drive position for the
best fuel economy.
The overdrive function allows automatic upshifts and
downshifts through all available gears.
Deactivating overdrive
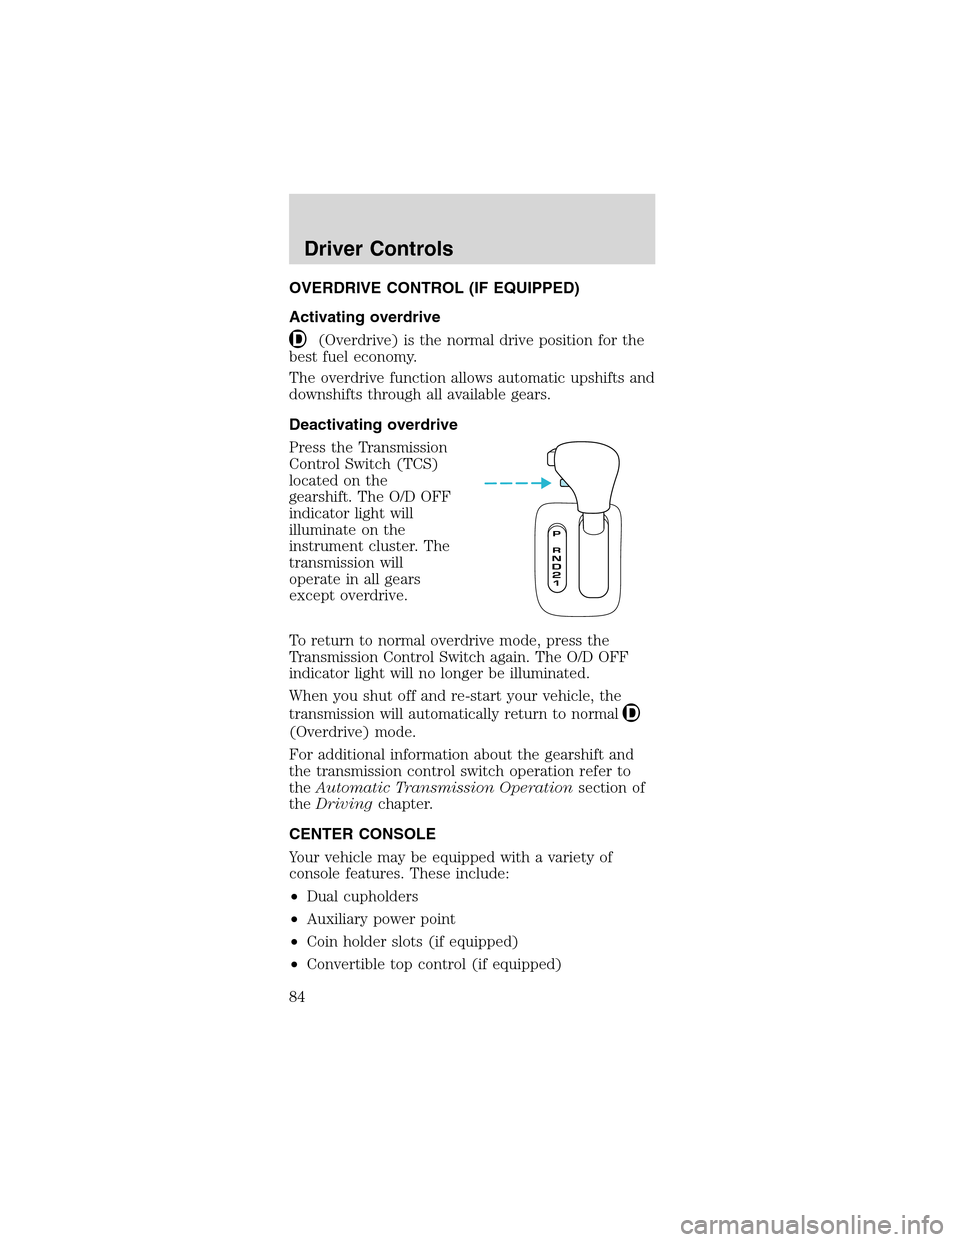
Press the Transmission
Control Switch (TCS)
located on the
gearshift. The O/D OFF
indicator light will
illuminate on the
instrument cluster. The
transmission will
operate in all gears
except overdrive.
To return to normal overdrive mode, press the
Transmission Control Switch again. The O/D OFF
indicator light will no longer be illuminated.
When you shut off and re-start your vehicle, the
transmission will automatically return to normal
(Overdrive) mode.
For additional information about the gearshift and
the transmission control switch operation refer to
theAutomatic Transmission Operationsection of
theDrivingchapter.
CENTER CONSOLE
Your vehicle may be equipped with a variety of
console features. These include:
•Dual cupholders
•Auxiliary power point
•Coin holder slots (if equipped)
•Convertible top control (if equipped)
Driver Controls
84
Page 96 of 256
Automatic arming
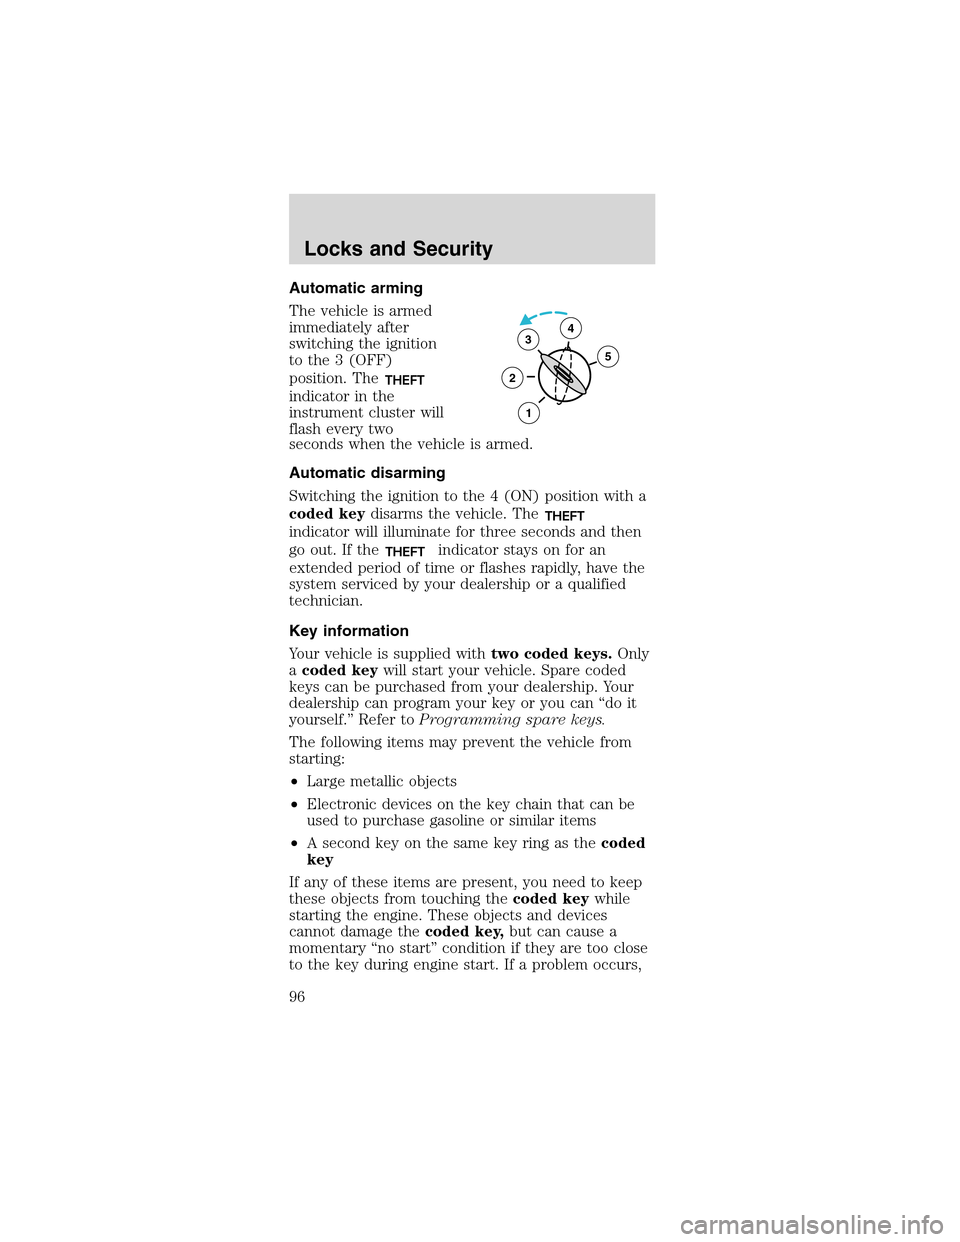
The vehicle is armed
immediately after
switching the ignition
to the 3 (OFF)
position. The
THEFT
indicator in the
instrument cluster will
flash every two
seconds when the vehicle is armed.
Automatic disarming
Switching the ignition to the 4 (ON) position with a
coded keydisarms the vehicle. The
THEFT
indicator will illuminate for three seconds and then
go out. If the
THEFTindicator stays on for an
extended period of time or flashes rapidly, have the
system serviced by your dealership or a qualified
technician.
Key information
Your vehicle is supplied withtwo coded keys.Only
acoded keywill start your vehicle. Spare coded
keys can be purchased from your dealership. Your
dealership can program your key or you can“do it
yourself.”Refer toProgramming spare keys.
The following items may prevent the vehicle from
starting:
•Large metallic objects
•Electronic devices on the key chain that can be
used to purchase gasoline or similar items
•A second key on the same key ring as thecoded
key
If any of these items are present, you need to keep
these objects from touching thecoded keywhile
starting the engine. These objects and devices
cannot damage thecoded key,but can cause a
momentary“no start”condition if they are too close
to the key during engine start. If a problem occurs,
3
2
1
5
4
Locks and Security
96
Page 108 of 256
Disconnect the combination lap/shoulder belt and
allow it to retract completely to disengage the
automatic locking mode and activate the vehicle
sensitive (emergency) locking mode.
After any vehicle collision, the front
passenger and rear outboard seat belt
systems must be checked by a qualified technician
to verify that the“automatic locking retractor”
feature for child seats is still functioning properly.
In addition, all seat belts should be checked for
proper function.
BELT AND RETRACTOR ASSEMBLY MUST
BE REPLACED if the seat belt assembly
“automatic locking retractor”feature or any other
seat belt function is not operating properly when
checked according to the procedures in Workshop
Manual.
Failure to replace the Belt and Retractor
assembly could increase the risk of injury in
collisions.
Safety belt warning light and indicator
chime
The seat belt warning light illuminates in the
instrument cluster and a chime sounds to remind
the occupants to fasten their safety belts.
Seating and Safety Restraints
108
Page 109 of 256
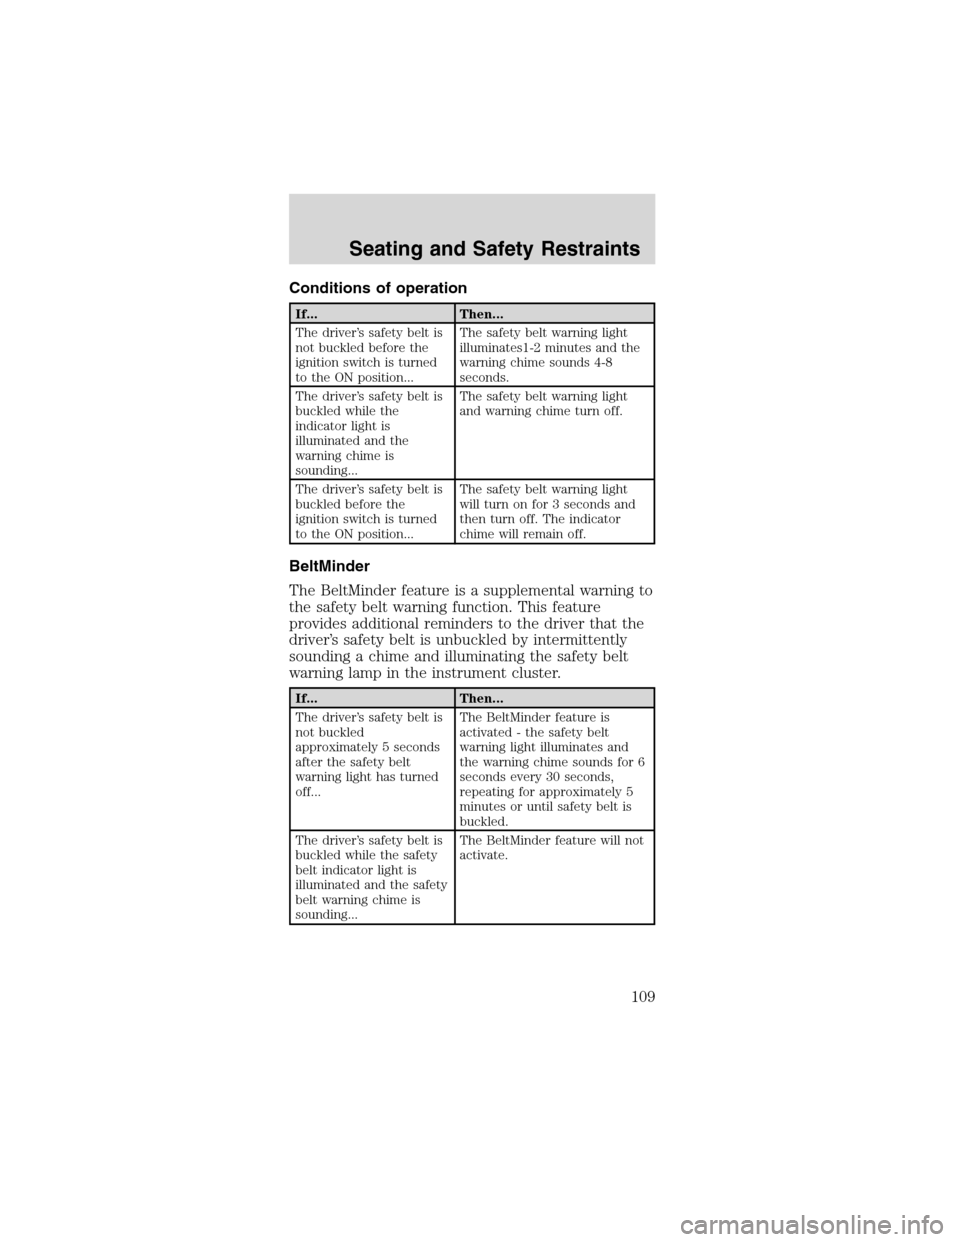
Conditions of operation
If... Then...
The driver’s safety belt is
not buckled before the
ignition switch is turned
to the ON position...The safety belt warning light
illuminates1-2 minutes and the
warning chime sounds 4-8
seconds.
The driver’s safety belt is
buckled while the
indicator light is
illuminated and the
warning chime is
sounding...The safety belt warning light
and warning chime turn off.
The driver’s safety belt is
buckled before the
ignition switch is turned
to the ON position...The safety belt warning light
will turn on for 3 seconds and
then turn off. The indicator
chime will remain off.
BeltMinder
The BeltMinder feature is a supplemental warning to
the safety belt warning function. This feature
provides additional reminders to the driver that the
driver’s safety belt is unbuckled by intermittently
sounding a chime and illuminating the safety belt
warning lamp in the instrument cluster.
If... Then...
The driver’s safety belt is
not buckled
approximately 5 seconds
after the safety belt
warning light has turned
off...The BeltMinder feature is
activated - the safety belt
warning light illuminates and
the warning chime sounds for 6
seconds every 30 seconds,
repeating for approximately 5
minutes or until safety belt is
buckled.
The driver’s safety belt is
buckled while the safety
belt indicator light is
illuminated and the safety
belt warning chime is
sounding...The BeltMinder feature will not
activate.
Seating and Safety Restraints
109
Page 119 of 256
Determining if the system is operational
The SRS uses a readiness light in the instrument
cluster or a tone to indicate the condition of the
system. Refer toAir bag readinesssection in the
Instrument clusterchapter. Routine maintenance of
the air bag is not required.
A difficulty with the system is indicated by one or
more of the following:
•The readiness light
will either flash or
stay lit.
•The readiness light will not illuminate immediately
after ignition is turned on.
•A series of five beeps will be heard. The tone
pattern will repeat periodically until the problem
and/or light are repaired.
If any of these things happen, even intermittently,
have the SRS serviced at your dealership or by a
qualified technician immediately. Unless serviced,
the system may not function properly in the event of
a collision.
Disposal of air bags and air bag equipped
vehicles (including pretensioners)
For disposal of air bags or air bag equipped vehicles,
see your local dealership or qualified technician. Air
bags MUST BE disposed of by qualified personnel.
SAFETY RESTRAINTS FOR CHILDREN
See the following sections for directions on how to
properly use safety restraints for children. Also see
Air bag supplemental restraint system (SRS)in
this chapter for special instructions about using air
bags.
Important child restraint precautions
You are required by law to use safety restraints for
children in the U.S. and Canada. If small children
ride in your vehicle (generally children who are four
AIR
BAG
Seating and Safety Restraints
119
Page 139 of 256
cold, heat, moisture, road dust, salt or mud. If a
“metal-to-metal,”“continuous grinding”or
“continuous squeal”sound is present while braking,
the brake linings may be worn-out and should be
inspected by a qualified service technician.
If you are driving down a long or steep hill,
shift to a lower gear. Do not apply your
brakes continuously, as they may overheat and
become less effective.
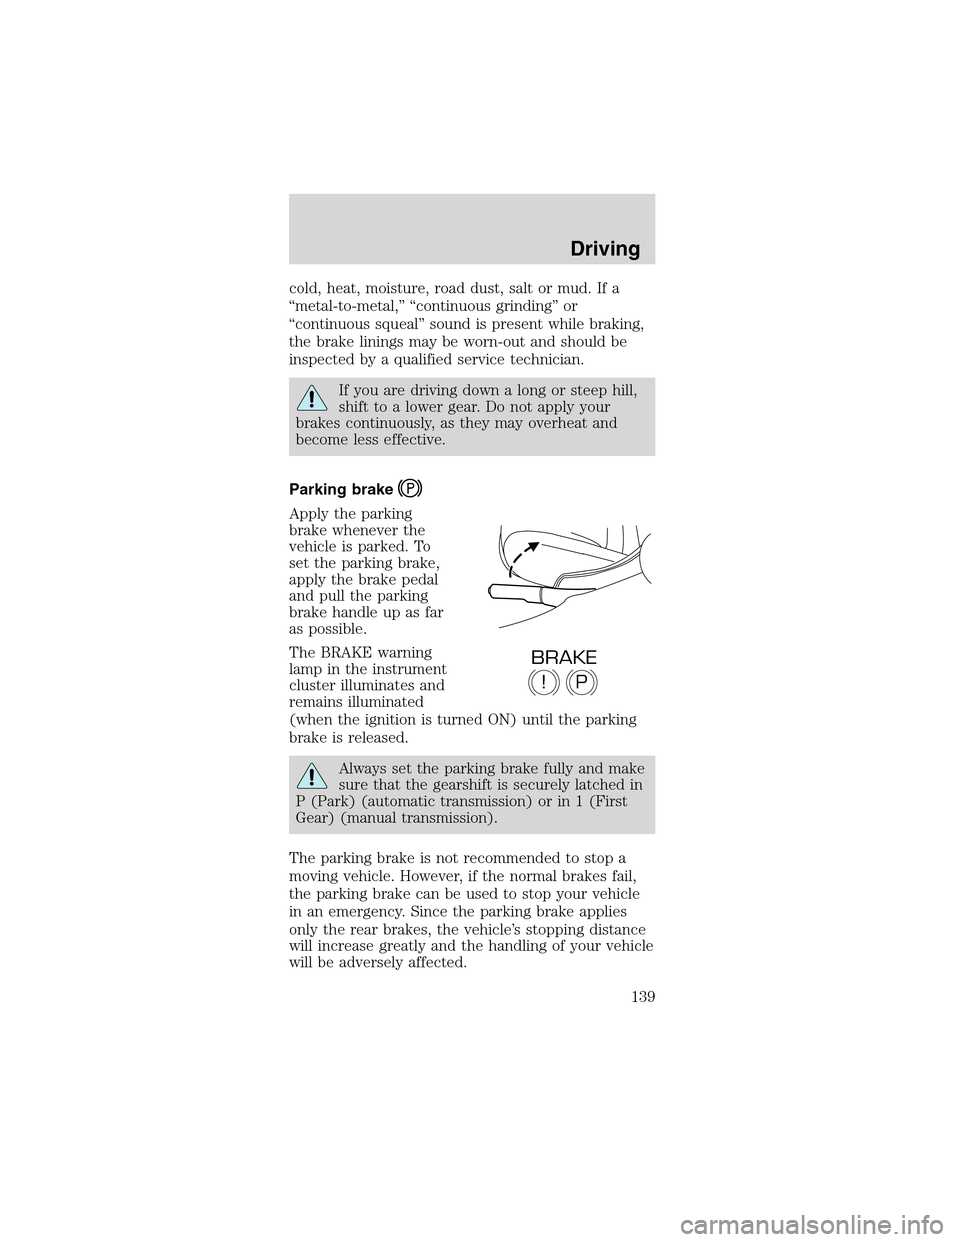
Parking brake
Apply the parking
brake whenever the
vehicle is parked. To
set the parking brake,
apply the brake pedal
and pull the parking
brake handle up as far
as possible.
The BRAKE warning
lamp in the instrument
cluster illuminates and
remains illuminated
(when the ignition is turned ON) until the parking
brake is released.
Always set the parking brake fully and make
sure that the gearshift is securely latched in
P (Park) (automatic transmission) or in 1 (First
Gear) (manual transmission).
The parking brake is not recommended to stop a
moving vehicle. However, if the normal brakes fail,
the parking brake can be used to stop your vehicle
in an emergency. Since the parking brake applies
only the rear brakes, the vehicle’s stopping distance
will increase greatly and the handling of your vehicle
will be adversely affected.
P!
BRAKE
Driving
139