Page 129 of 216
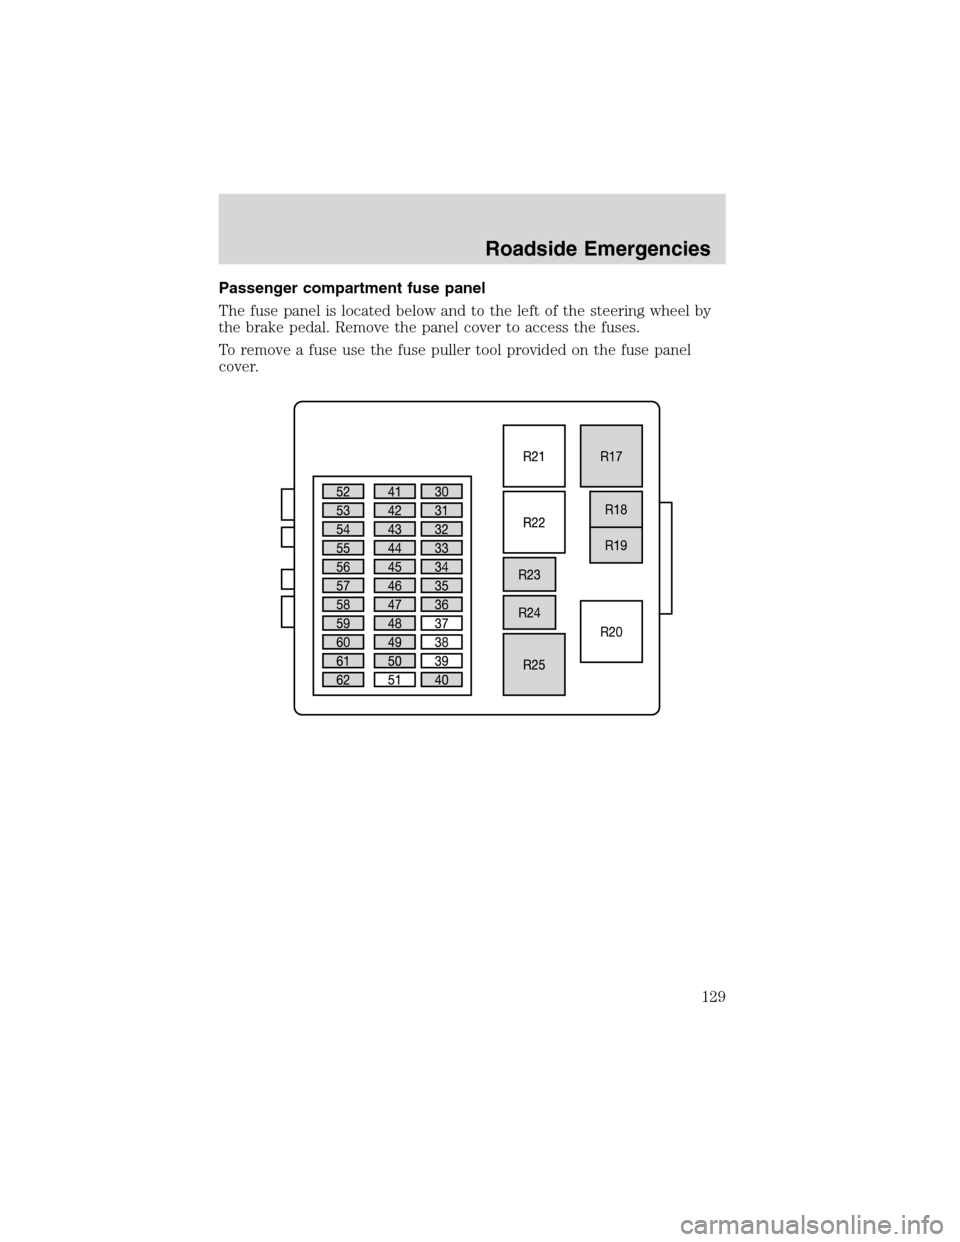
Passenger compartment fuse panel
The fuse panel is located below and to the left of the steering wheel by
the brake pedal. Remove the panel cover to access the fuses.
To remove a fuse use the fuse puller tool provided on the fuse panel
cover.
Roadside Emergencies
129
Page 130 of 216
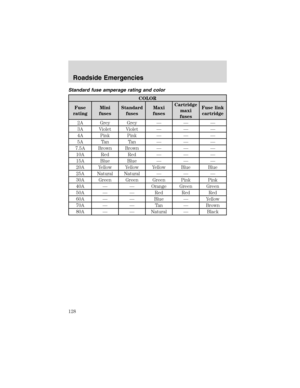
The fuses are coded as follows.
Fuse/Relay
LocationFuse Amp
RatingPassenger Compartment Fuse
Panel Description
R17—Starter relay
R18–Rear intermittent relay
R19—Front wiper intermittent relay
R20—Not used
R21—Not used
R22—Not used
R23—Horn relay
R24—Battery saver relay
R25—Rear defrost relay
30 10A Light switch
31 15A Radio
32 15A Turn signal
33 20A Horn, Power seats (SVT only)
34 20A Power sunroof
35 7.5A Interior lamps, Power mirrors
36 7.5A A/C switch, Hazard flasher,
Instrument cluster
37—Not used
38—Not used
39—Not used
40 10A Backup lamps (automatic
transaxle)
41 7.5A Radio and cluster (accessory)
42 15A Stop lamps
43 15A Rear wiper
44 20A Fog lamps
45 7.5A Recirculated air, Air conditioning
46 7.5A Anti-lock Brake System (ABS)
47 20A Cigar lighter, Rear power point
(SVT only)
Roadside Emergencies
130
Page 131 of 216

Fuse/Relay
LocationFuse Amp
RatingPassenger Compartment Fuse
Panel Description
48 10A Data link connector
49 25A Rear defroster
50 7.5A Heated mirror, Heated backlite
indicator
51—Not used
52 15A Heated seats
53 10A Backup lamps (manual transaxle)
54 25A Rear power windows
55 25A Front power windows
56 20A Front wipers
57 7.5A Position and side lights (right)
58 7.5A Position and side lights (left)
59 7.5A Light switch (headlamps)
60 7.5A Air bag module
61 7.5A PATS modules, Instrument cluster
62 7.5A License plate lamp
63 20A Power locks (GEM)
Fuse 63 is located on the back of the fuse panel. See your dealer or a
certified technician for service of this fuse.
Power distribution box
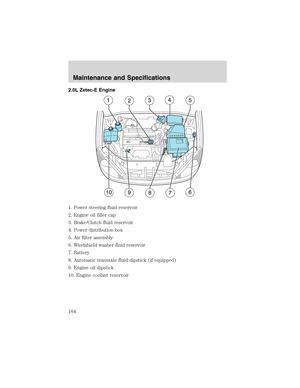
The power distribution box is located in the engine compartment. The
power distribution box contains high-current fuses that protect your
vehicle’s main electrical systems from overloads.
Always disconnect the battery before servicing high current
fuses.
Always replace the cover to the power distribution box before
reconnecting the battery or refilling fluid reservoirs
If the battery has been disconnected and reconnected, refer to the
Batterysection of theMaintenance and specificationschapter.
Roadside Emergencies
131
Page 132 of 216
To remove a fuse, use the fuse puller tool provided on the power
distribution box cover.
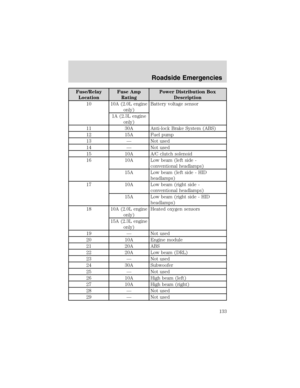
The high-current fuses are coded as follows:
Fuse/Relay
LocationFuse Amp
RatingPower Distribution Box
Description
1 40A Main power supply to electrical
system
2 30A Engine cooling fan (A/C) 2nd fuse
3 30A Cooling fan (2.0L engine only)
4 30A Air pump motor
5 30A Cooling fan 2 (2.0L engine only)
6 50A Engine cooling fan (A/C) 1st fuse
7 40A Main power supply to electrical
system
8 30A Ignition switch, Starter
9 20A Engine management
Roadside Emergencies
132
Page 133 of 216
Fuse/Relay
LocationFuse Amp
RatingPower Distribution Box
Description
10 10A (2.0L engine
only)Battery voltage sensor
1A (2.3L engine
only)
11 30A Anti-lock Brake System (ABS)
12 15A Fuel pump
13—Not used
14—Not used
15 10A A/C clutch solenoid
16 10A Low beam (left side -
conventional headlamps)
15A Low beam (left side - HID
headlamps)
17 10A Low beam (right side -
conventional headlamps)
15A Low beam (right side - HID
headlamps)
18 10A (2.0L engine
only)Heated oxygen sensors
15A (2.3L engine
only)
19—Not used
20 10A Engine module
21 20A ABS
22 20A Low beam (DRL)
23—Not used
24 30A Subwoofer
25—Not used
26 10A High beam (left)
27 10A High beam (right)
28—Not used
29—Not used
Roadside Emergencies
133
Page 134 of 216
Fuse/Relay
LocationFuse Amp
RatingPower Distribution Box
Description
64 40A Heater blower motor
R1—Ignition relay
R2—Air pump motor relay
R3—Cooling fan (Run-on fan) relay
(2.3L engine only)
R4—Not used
R5—High beams relay
R6—Low beams relay
R7—Fuel pump relay
R8—Engine management relay
R9—Cooling fan relay (2.0L engine
only)
R10—Cooling fan 2 relay (2.0L engine
only)
R11—Air conditioning relay
R12—Daytime Running Lamps (DRL)
relay
R13—Fog lamps relay
R14—HID lamps (SVT only)
R15—Cooling fan high speed (A/C only)
relay (2.0L engine only)
R16—Cooling fan low speed relay
D1—PCM diode
D2—Cooling fan diode
D3—A/C clutch diode
CHANGING A FLAT TIRE
If you get a flat tire while driving:
•do not brake heavily.
•gradually decrease the vehicle’s speed.
•hold the steering wheel firmly.
•slowly move to a safe place on the side of the road.
Roadside Emergencies
134
Page 135 of 216

The use of tire sealants is not recommended and may
compromise the integrity of your tires.
Temporary spare tire information
The temporary spare tire for your vehicle is labeled as such. It is smaller
than a regular tire and is designed for emergency use only. Replace the
temporary spare tire with a full-size tire as soon as possible.
If you use the temporary spare tire continuously or do not follow
these precautions, the tire could fail, causing you to lose control
of the vehicle, possibly injuring yourself or others.
When driving with the temporary spare tiredo not:
•use more than one temporary spare tire at a time
•exceed 80 km/h (50 mph)
•load the vehicle beyond maximum vehicle load rating listed on the
Safety Compliance Label
•tow a trailer
•use tire chains
•drive through an automatic car wash, because of the vehicle’s reduced
ground clearance
•try to repair the temporary spare tire or remove it from its wheel
•use the wheel for any other type of vehicle
Use of a temporary spare tire at any one wheel location can lead to
impairment of the following:
•handling, stability and braking performance
•comfort and noise
•ground clearance and parking at curbs
•Winter driving capability
Roadside Emergencies
135
Page 136 of 216

Tire change procedure
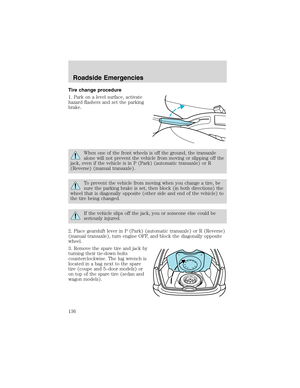
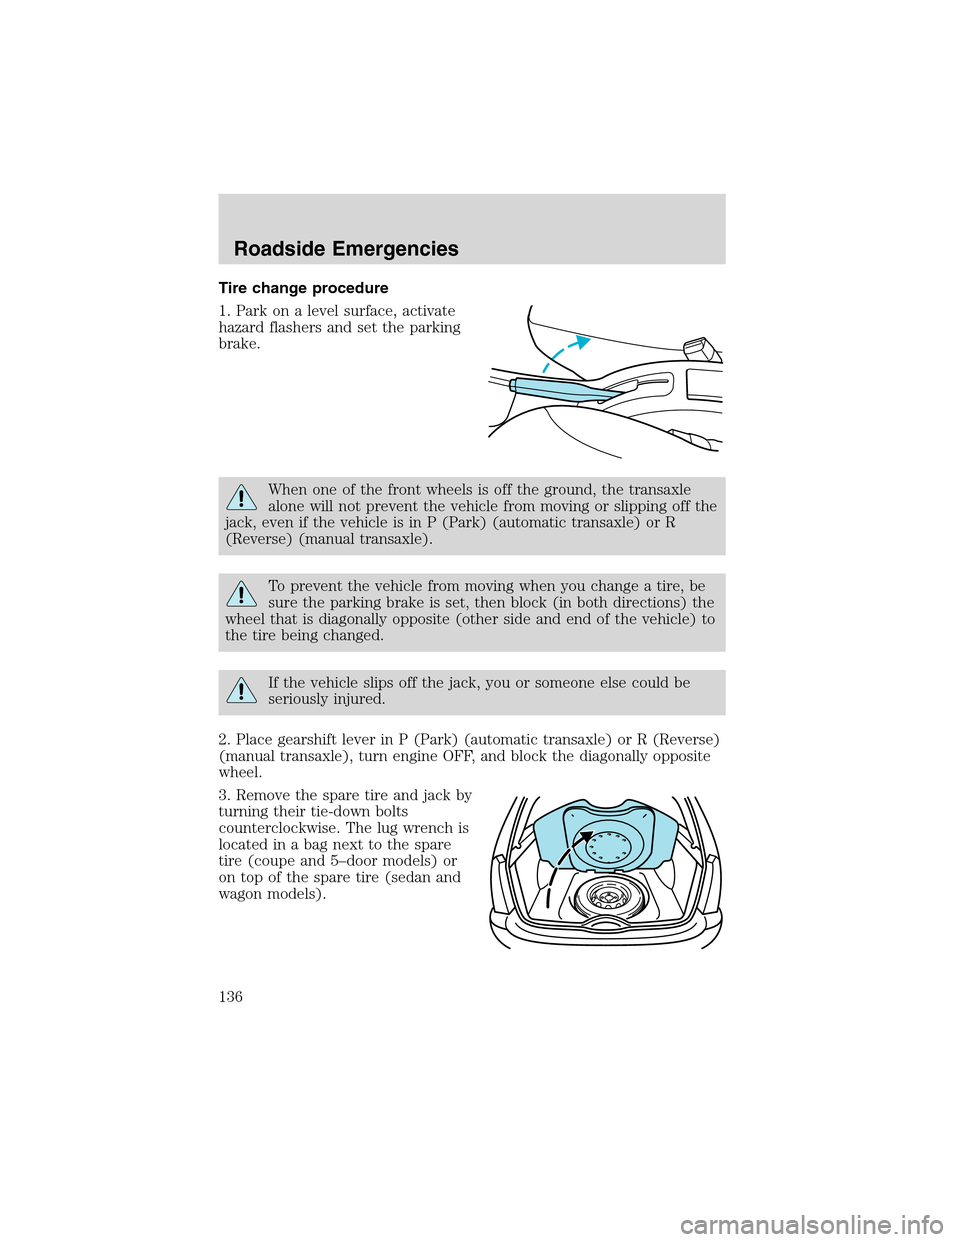
1. Park on a level surface, activate
hazard flashers and set the parking
brake.
When one of the front wheels is off the ground, the transaxle
alone will not prevent the vehicle from moving or slipping off the
jack, even if the vehicle is in P (Park) (automatic transaxle) or R
(Reverse) (manual transaxle).
To prevent the vehicle from moving when you change a tire, be
sure the parking brake is set, then block (in both directions) the
wheel that is diagonally opposite (other side and end of the vehicle) to
the tire being changed.
If the vehicle slips off the jack, you or someone else could be
seriously injured.
2. Place gearshift lever in P (Park) (automatic transaxle) or R (Reverse)
(manual transaxle), turn engine OFF, and block the diagonally opposite
wheel.
3. Remove the spare tire and jack by
turning their tie-down bolts
counterclockwise. The lug wrench is
located in a bag next to the spare
tire (coupe and 5–door models) or
on top of the spare tire (sedan and
wagon models).
Roadside Emergencies
136