Page 144 of 240
Driving while you tow
When towing a trailer:
•Turn off the speed control. The speed control may shut off
automatically when you are towing on long, steep grades.
•Consult your local motor vehicle speed regulations for towing a trailer.
•To eliminate excessive shifting, use a lower gear. This will also assist
in transmission cooling. (For additional information, refer to the
Driving with a 4–speed automatic transmissionsection in this
chapter.
•Anticipate stops and brake gradually.
•Do not exceed the GCWR rating or transmission damage may occur.
Servicing after towing
If you tow a trailer for long distances, your vehicle will require more
frequent service intervals. Refer to your scheduled maintenance guide for
more information.
Trailer towing tips
•Practice turning, stopping and backing up before starting on a trip to
get the feel of the vehicle trailer combination. When turning, make
wider turns so the trailer wheels will clear curbs and other obstacles.
•Allow more distance for stopping with a trailer attached.
•The trailer tongue weight should be 10–15% of the loaded trailer
weight.
•After you have traveled 80 km (50 miles), thoroughly check your
hitch, electrical connections and trailer wheel lug nuts.
•To aid in engine/transmission cooling and A/C efficiency during hot
weather while stopped in traffic, place the gearshift lever in P (Park)
(automatic transmission) or N (Neutral) (manual transmissions).
•Vehicles with trailers should not be parked on a grade. If you must
park on a grade, place wheel chocks under the trailer’s wheels.
Launching or retrieving a boat
Disconnect the wiring to the trailer before backing the trailer
into the water. Reconnect the wiring to the trailer after the
trailer is removed from the water.
When backing down a ramp during boat launching or retrieval:
•do not allow the static water level to rise above the bottom edge of
the rear bumper.
Driving
144
Page 145 of 240
•do not allow waves to break higher than 15 cm (6 inches) above the
bottom edge of the rear bumper.
Exceeding these limits may allow water to enter vehicle components:
•causing internal damage to the components.
•affecting driveability, emissions and reliability.
Replace the rear axle lubricant any time the axle has been submerged in
water. Rear axle lubricant quantities are not to be checked or changed
unless a leak is suspected or repair required.
RECREATIONAL TOWING
An example of“recreational towing”is towing your vehicle behind a
motorhome.
If your vehicle is automatic transmission equipped, with a 4x2
(front-wheel drive only) configured powertrain,“recreational towing”is
permitted by trailering the vehicle with its front wheels on a dolly. This
protects the transmission’s internal mechanical components from
potential lack of lubrication damage.
If your vehicle is automatic transmission equipped, with a 4x4 (all-wheel
drive) configured powertrain,“recreational towing”is permitted only if
the vehicle is trailered with all four (4) wheels off the ground. Otherwise,
no“recreational towing”is permitted.
If your vehicle is manual transmission equipped, shifting the transmission
into neutral permits“flat-towing”(all wheels on the ground) for pulling
behind a motorhome. Your vehicle may be towed up to a speed of 120 km/h
(75 mph) but you should always obey local speed limits.
For other towing requirements, refer toWrecker Towingin the
Roadside emergencieschapter.
Driving
145
Page 150 of 240
Fuse/Relay
LocationFuse Amp
RatingPassenger Compartment Fuse
Panel Description
7 10A Passive Anti-theft Transceiver
(PATS), RCM, EEC fuse
8 10A Cluster, Shift lock relay (coil), O/D
signal to PCM, GEM, E/C autolamp
mirror
9 3A PCM relay (coil), Fan relay 1, 2, 3
(coil), A/C relay (coil)
10 20A Front wiper motor, Front washer
motor
11 10A ACC relay (coil), Key interlock
solenoid, GEM
12 5A Radio
13—Not used
14 20A Cigar lighter
15 15A Park lamp relay, Front position
lamps, License lamps, Tail lamps,
Park lamp relay (coil), Trailer fuse,
Illumination fuse
16 10A Cluster, Power mirror, GEM,
Heated seats
17 15A Sun roof motor
18 5A Illumination for: Cluster, Heater
unit, Radio, Hazard switch, Rear
defrost switch, 4WD switch, Front
fog switch
19 10A Subwoofer amp
20 15A Turn Indicators, Front Side Turn
Lamps, Front turn lamps, Rear turn
lamps, Trailer turn, Flasher unit
21 10A Trailer position lamps
22 15A Not used
23 20A Horn relay
Roadside Emergencies
150
Page 151 of 240
Fuse/Relay
LocationFuse Amp
RatingPassenger Compartment Fuse
Panel Description
24 15A Stoplamps, High mounted
stoplamp, Trailer stoplamp, ABS
unit, ASC unit (Brake Pedal
Position Switch), PCM, Shift
solenoid
25 30A Power window motors
26 30A Power door lock motors, GEM
(door lock relay coil), Power seat,
4WD relay
27 10A GEM, Audio, Cluster, Interior lamp,
Map lamp, Cargo lamp, Datalink
connector
ACC—Accessory relay
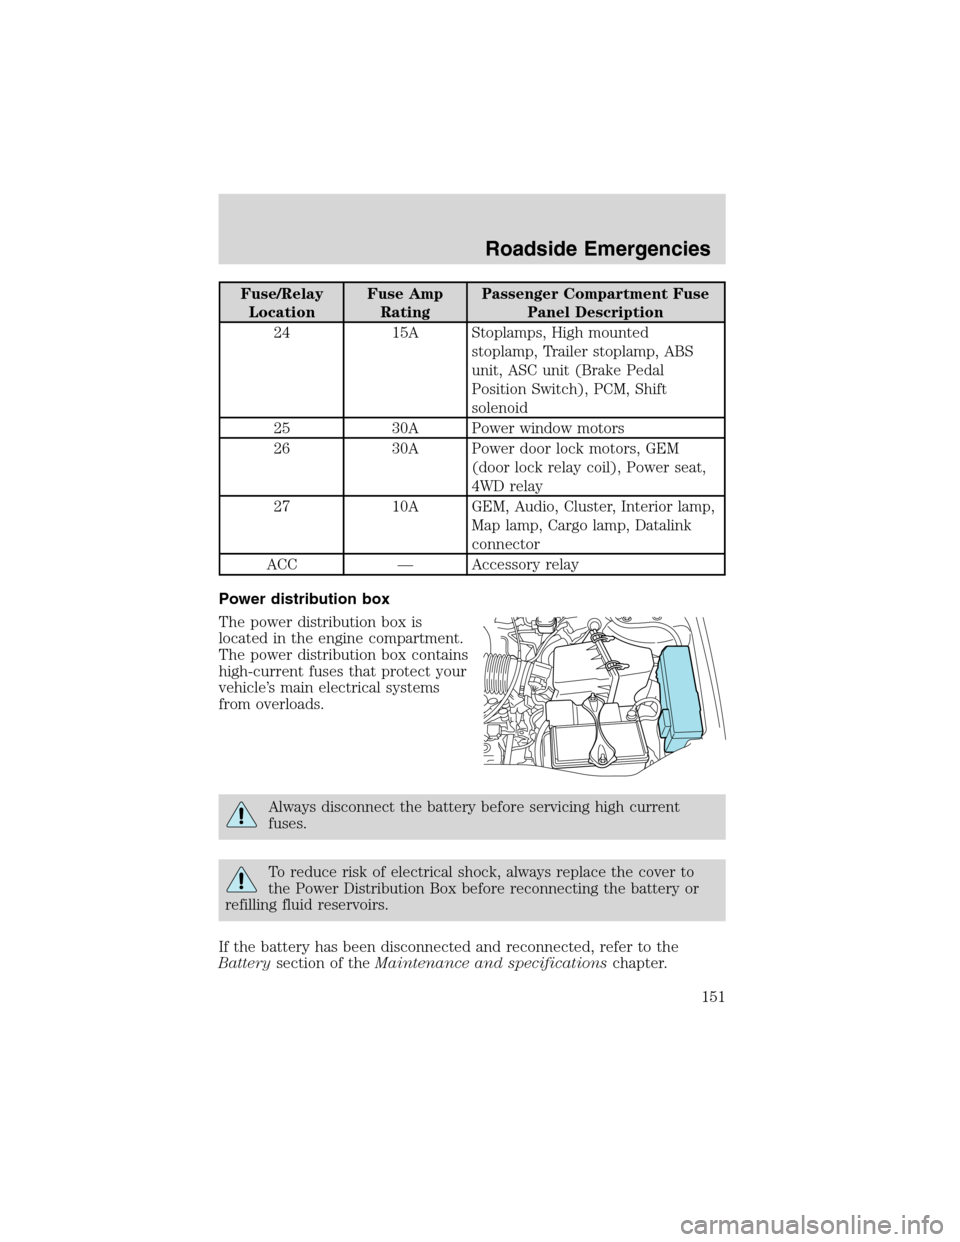
Power distribution box
The power distribution box is
located in the engine compartment.
The power distribution box contains
high-current fuses that protect your
vehicle’s main electrical systems
from overloads.
Always disconnect the battery before servicing high current
fuses.
To reduce risk of electrical shock, always replace the cover to
the Power Distribution Box before reconnecting the battery or
refilling fluid reservoirs.
If the battery has been disconnected and reconnected, refer to the
Batterysection of theMaintenance and specificationschapter.
Roadside Emergencies
151
Page 155 of 240
When driving with the temporary spare tiredo not:
•use more than one temporary spare tire at a time
•exceed 80 km/h (50 mph) or drive further than 3 200 km
(2 000 miles) total under any circumstances
•load the vehicle beyond maximum vehicle load rating listed on the
Safety Compliance Label
•tow a trailer
•use tire chains
•try to repair the temporary spare tire or remove it from its wheel
•use the wheel for any other type of vehicle
Use of a temporary spare tire at any one wheel location can lead to
impairment of the following:
•handling, stability and braking performance
•comfort and noise
•ground clearance and parking at curbs
•Winter driving capability
Tire change procedure
When one of the front wheels is off the ground, the transmission
alone will not prevent the vehicle from moving or slipping off the
jack, even if the vehicle is in P (Park) (automatic transaxle) or R
(Reverse) (manual transaxle).
To prevent the vehicle from moving when you change a tire, be
sure the parking brake is set, then block (in both directions) the
wheel that is diagonally opposite (other side and end of the vehicle) to
the tire being changed.
If the vehicle slips off the jack, you or someone else could be
seriously injured.
Roadside Emergencies
155
Page 166 of 240
In case of a roadside emergency with a disabled vehicle (without access
to wheel dollies, car hauling trailer, or flatbed transport vehicle) your
vehicle (regardless of transmission powertrain configuration) can be flat
towed (all wheels in the ground) under the following conditions:
•Place the transmission in N (Neutral).
•Maximum speed is not to exceed 56 km/h (35 mph).
•Maximum distance is 80 km (50 miles).
Ford Motor Company produces a towing manual for all authorized tow
truck operators. Have your tow truck operator refer to this manual for
proper hook-up and towing procedures for your vehicle.
Roadside Emergencies
166
Page 206 of 240
•Perform all regularly scheduled maintenance items. Follow the
recommended maintenance schedule and owner maintenance checks
found in your vehicle scheduled maintenance guide.
Conditions
•Heavily loading a vehicle or towing a trailer may reduce fuel economy
at any speed.
•Carrying unnecessary weight may reduce fuel economy (approximately
0.4 km/L [1 mpg] is lost for every 180 kg [400 lb] of weight carried).
•Adding certain accessories to your vehicle (for example bug
deflectors, rollbars/light bars, running boards, ski/luggage racks) may
reduce fuel economy.
•Using fuel blended with alcohol may lower fuel economy.
•Fuel economy may decrease with lower temperatures during the first
12–16 km (8–10 miles) of driving.
•Driving on flat terrain offers improved fuel economy as compared to
driving on hilly terrain.
•Transmissions give their best fuel economy when operated in the top
cruise gear and with steady pressure on the gas pedal.
•Close windows for high speed driving.
EPA window sticker
Every new vehicle should have the EPA window sticker. Contact your
dealer if the window sticker is not supplied with your vehicle. The EPA
window sticker should be your guide for the fuel economy comparisons
with other vehicles.
It is important to note the box in the lower left corner of the window
sticker. These numbers represent the Range of L/100 km (MPG)
expected on the vehicle under optimum conditions. Your fuel economy
may vary depending upon the method of operation and conditions.
EMISSION CONTROL SYSTEM
Your vehicle is equipped with various emission control components and a
catalytic converter which will enable your vehicle to comply with
applicable exhaust emission standards. To make sure that the catalytic
converter and other emission control components continue to work
properly:
•Use only the specified fuel listed.
•Avoid running out of fuel.
Maintenance and Specifications
206
Page 210 of 240
during hot weather or pulling a trailer, the vehicle should be
turned off for about 30 minutes to allow fluid to cool before
checking.
1. Drive the vehicle 30 km (20 miles) or until it reaches normal operating
temperature.
2. Park the vehicle on a level surface and engage the parking brake.
3. With the parking brake engaged and your foot on the brake pedal,
start the engine and move the gearshift lever through all of the gear
ranges. Allow sufficient time for each gear to engage.
4. Latch the gearshift lever in P (Park) and leave the engine running.
5. Remove the dipstick, wiping it clean with a clean, dry lint free rag. If
necessary, refer toIdentifying components in the engine compartment
in this chapter for the location of the dipstick.
6. Install the dipstick making sure it is fully seated in the filler tube.
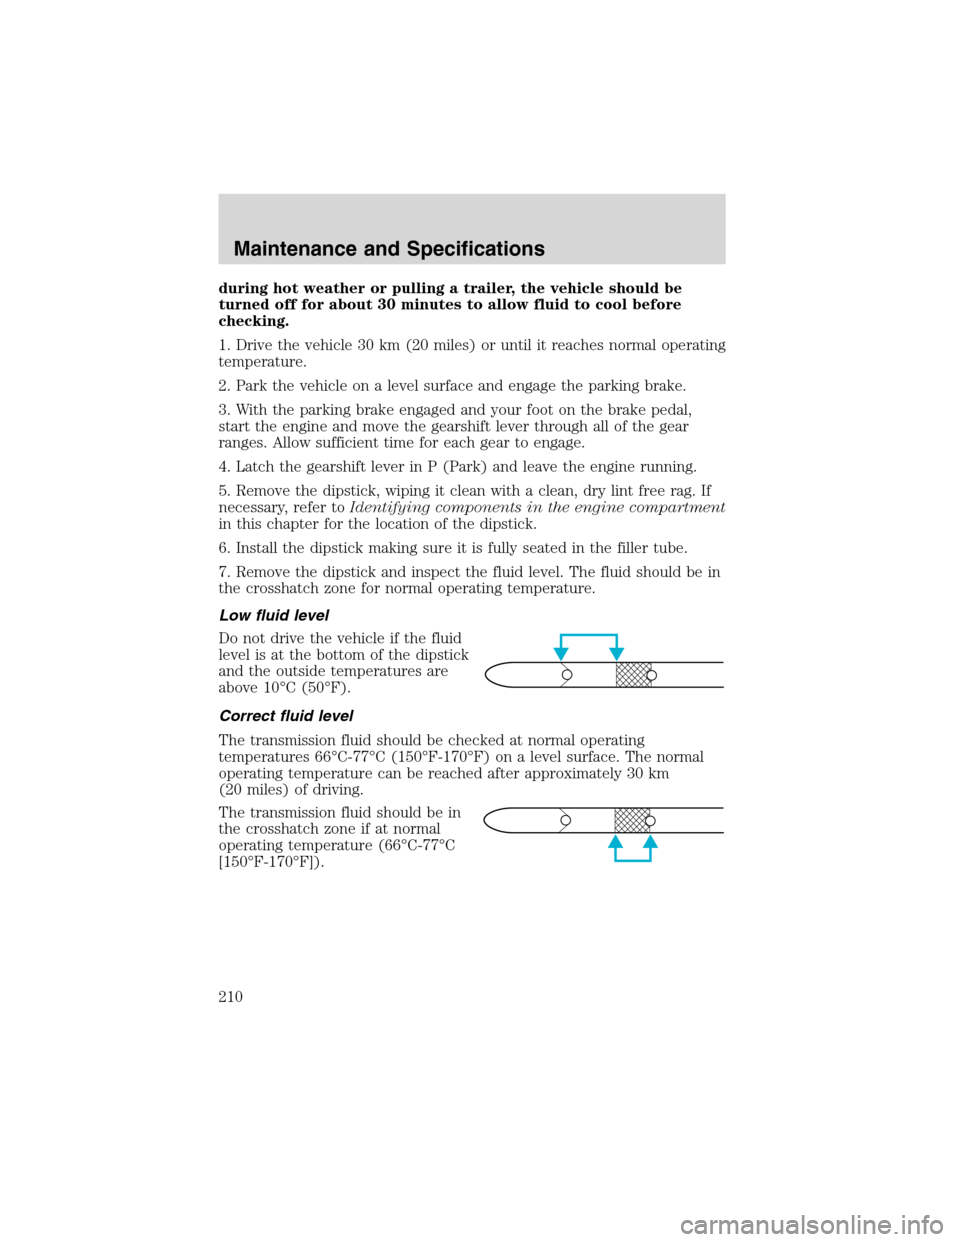
7. Remove the dipstick and inspect the fluid level. The fluid should be in
the crosshatch zone for normal operating temperature.
Low fluid level
Do not drive the vehicle if the fluid
level is at the bottom of the dipstick
and the outside temperatures are
above 10°C (50°F).
Correct fluid level
The transmission fluid should be checked at normal operating
temperatures 66°C-77°C (150°F-170°F) on a level surface. The normal
operating temperature can be reached after approximately 30 km
(20 miles) of driving.
The transmission fluid should be in
the crosshatch zone if at normal
operating temperature (66°C-77°C
[150°F-170°F]).
Maintenance and Specifications
210