Page 10 of 240

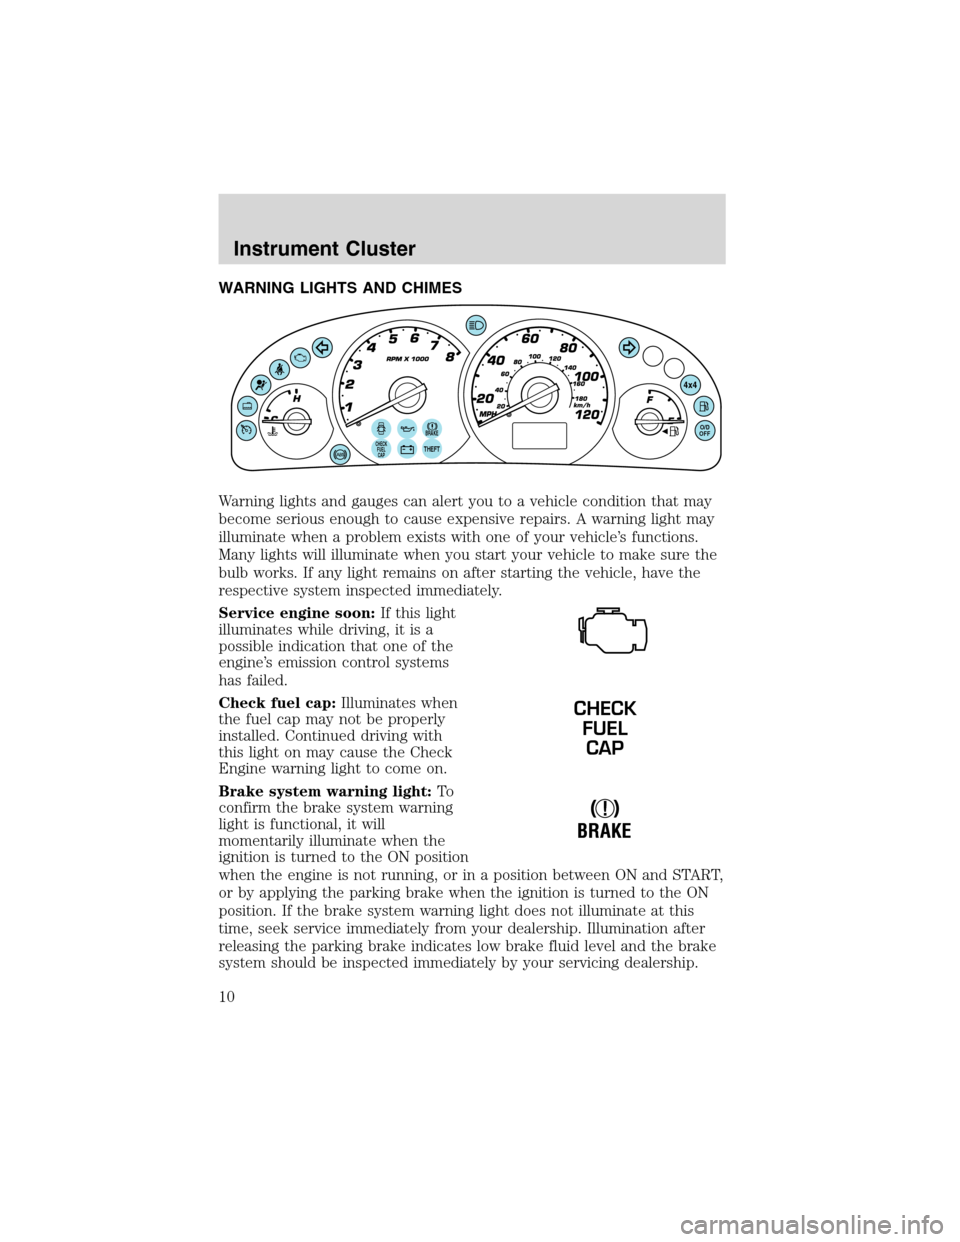
WARNING LIGHTS AND CHIMES
Warning lights and gauges can alert you to a vehicle condition that may
become serious enough to cause expensive repairs. A warning light may
illuminate when a problem exists with one of your vehicle’s functions.
Many lights will illuminate when you start your vehicle to make sure the
bulb works. If any light remains on after starting the vehicle, have the
respective system inspected immediately.
Service engine soon:If this light
illuminates while driving, it is a
possible indication that one of the
engine’s emission control systems
has failed.
Check fuel cap:Illuminates when
the fuel cap may not be properly
installed. Continued driving with
this light on may cause the Check
Engine warning light to come on.
Brake system warning light:To
confirm the brake system warning
light is functional, it will
momentarily illuminate when the
ignition is turned to the ON position
when the engine is not running, or in a position between ON and START,
or by applying the parking brake when the ignition is turned to the ON
position. If the brake system warning light does not illuminate at this
time, seek service immediately from your dealership. Illumination after
releasing the parking brake indicates low brake fluid level and the brake
system should be inspected immediately by your servicing dealership.
BRAKECHECK
FUEL
CAPTHEFT
4x4
O/D
OFF
CHECK
FUEL
CAP
!
BRAKE
Instrument Cluster
10
Page 11 of 240

Driving a vehicle with the brake system warning light on is
dangerous. A significant decrease in braking performance may
occur. It will take you longer to stop the vehicle. Have the vehicle
checked by your dealer immediately.
Anti-lock brake system:
Illuminates indicating an ABS fault.
If the lamp stays on for more than a
few seconds, then an ABS fault is
indicated, have the system serviced
immediately. Normal braking is still functional unless the brake warning
light also is illuminated.
Air bag readiness:If this light fails
to illuminate when ignition is turned
to ON, continues to flash or remains
on, have the system serviced
immediately. A chime will also
sound when a malfunction in the supplemental restraint system has been
detected.
Safety belt:Reminds you to fasten
your safety belt. A chime will also
sound to remind you to fasten your
safety belt.
Charging system:Illuminates when
the battery is not charging properly.
Engine oil pressure:Illuminates
when the oil pressure falls below the
normal range, refer toEngine oilin
theMaintenance and
specificationschapter.
Low coolant (if equipped):
Illuminates when the coolant level in
the coolant reservoir is low and
more needs to be added, refer to
Engine coolantin theMaintenance and specificationschapter.
ABS
Instrument Cluster
11
Page 12 of 240

Low fuel:Illuminates when the fuel
level in the fuel tank is at, or near
empty (refer toFuel gaugein this
chapter).
Overdrive off:Illuminates when
the overdrive function of the
transmission has been turned off,
refer to theDrivingchapter. If the
light flashes steadily, have the system serviced immediately.
Four wheel driver indicator (if
equipped):Illuminates when
four-wheel drive is engaged.
Anti-theft system:Flashes when
the Securilock�Passive Anti-theft
System has been activated.
Speed control:Illuminates when
the speed control is activated. Turns
off when the speed control system
is deactivated.
Door ajar:Illuminates when the
ignition is in the ON position and
any door is open.
Turn signal:Illuminates when the
left or right turn signal or the
hazard lights are turned on. If the
indicators stay on or flash faster, check for a burned out bulb.
High beams:Illuminates when the
high beam headlamps are turned on.
Key-in-ignition warning chime:Sounds when the key is left in the
ignition in the OFF/LOCK or ACC position and the driver’s door is
opened.
Headlamps on warning chime:Sounds when the headlamps or parking
lamps are on, the ignition is off (and the key is not in the ignition) and
the driver’s door is opened.
O/D
OFF
4x4
Instrument Cluster
12
Page 14 of 240
Odometer:Registers the total
kilometers (miles) of the vehicle.
Trip odometer:Registers the
kilometers (miles) of individual
journeys. To reset, tap on the trip
reset button to toggle the display
between the trip and the odometer.
Holding the reset button for one or two seconds will reset the trip
odometer to zero.
Tachometer:Indicates the engine
speed in revolutions per minute.
Driving with your tachometer
pointer continuously at the top of
the scale may damage the engine.
Fuel gauge:Indicates
approximately how much fuel is left
in the fuel tank (when the ignition
is in the ON position).
Instrument Cluster
14
Page 32 of 240

Operating tips
•To reduce fog build up on the windshield during humid weather, place
the air flow selector in the
position.
•To reduce humidity build up inside the vehicle: do not drive with the
air flow selector in the OFF or MAX A/C position.
•Under normal weather conditions, do not leave the air flow selector in
MAX A/C or OFF when the vehicle is parked. This allows the vehicle
to“breathe”using the outside air inlet vents.
•Do not put objects under the front seats that will interfere with the
airflow to the back seats.
•Remove any snow, ice or leaves from the air intake area at the base of
the windshield.
To aid in side window defogging/demisting in cold weather:
1. Select
2. Select A/C
3. Modulate the temperature control to maintain comfort.
4. Set the fan speed to HI
5. Direct the outer instrument panel vents towards the side windows
To increase airflow to the outer instrument panel vents, close the vents
located in the middle of the instrument panel.
Do not place objects on top of the instrument panel as these
objects may become projectiles in a collision or sudden stop.
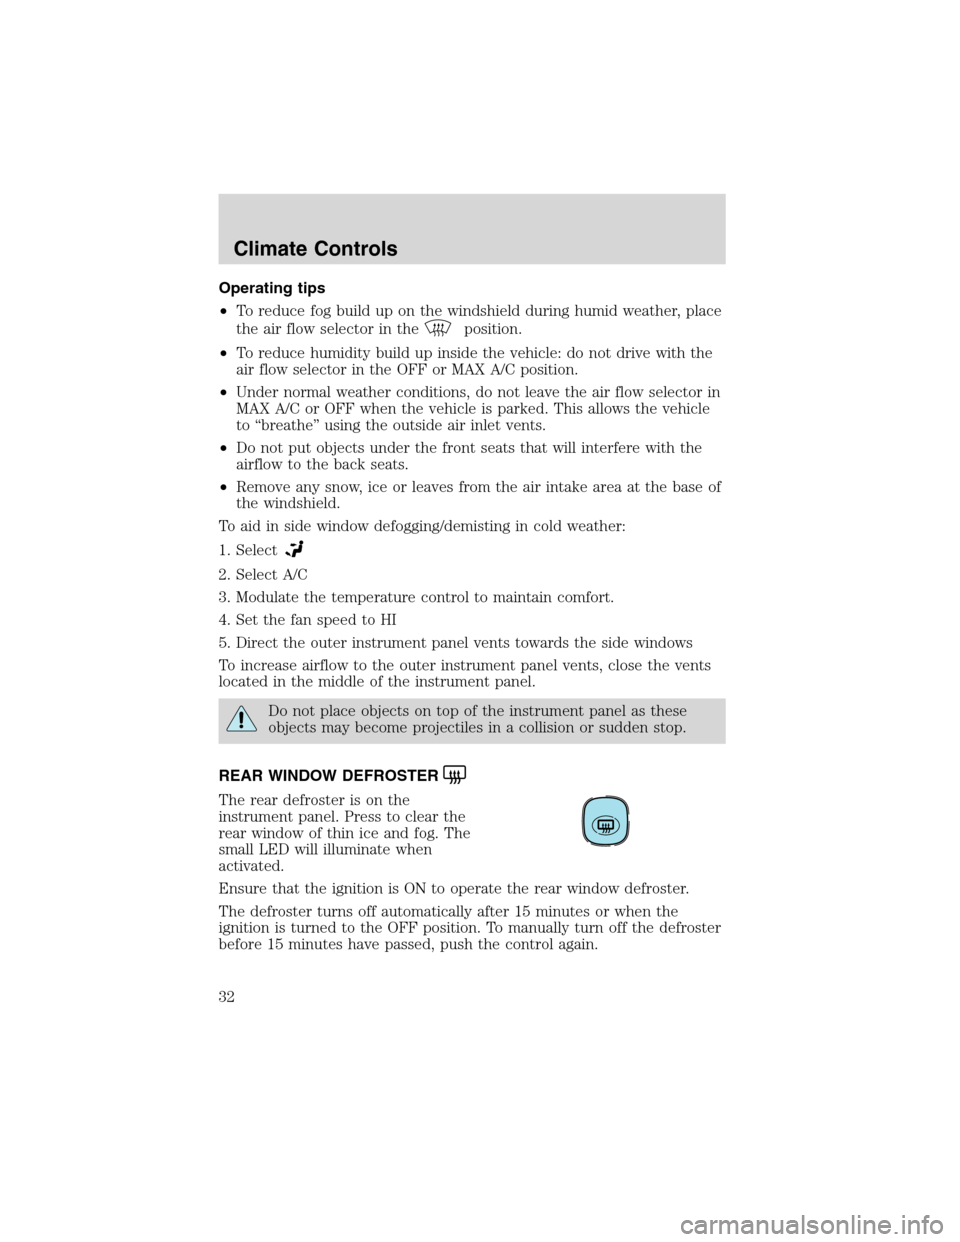
REAR WINDOW DEFROSTER
The rear defroster is on the
instrument panel. Press to clear the
rear window of thin ice and fog. The
small LED will illuminate when
activated.
Ensure that the ignition is ON to operate the rear window defroster.
The defroster turns off automatically after 15 minutes or when the
ignition is turned to the OFF position. To manually turn off the defroster
before 15 minutes have passed, push the control again.
Climate Controls
32
Page 33 of 240

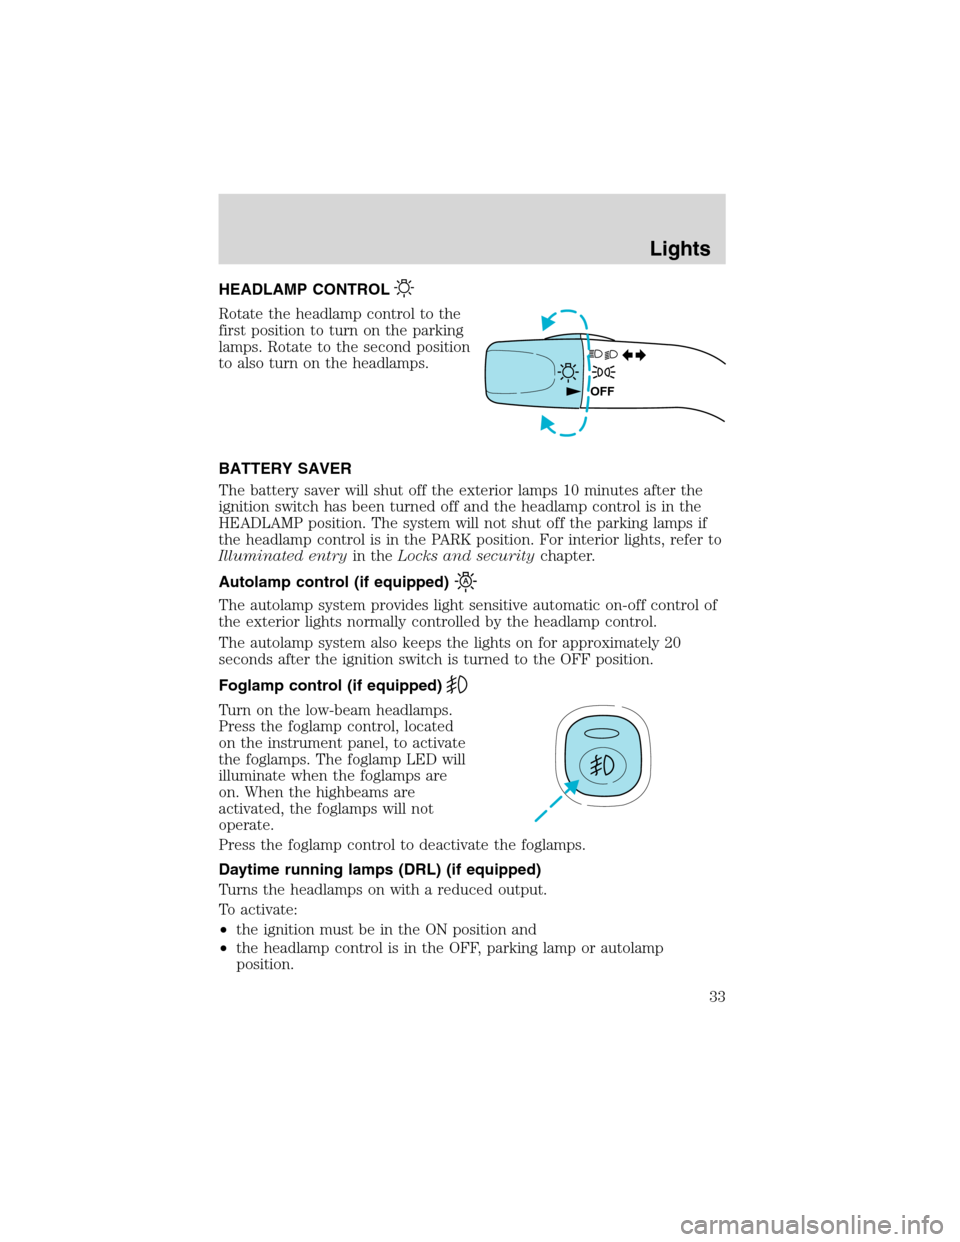
HEADLAMP CONTROL
Rotate the headlamp control to the
first position to turn on the parking
lamps. Rotate to the second position
to also turn on the headlamps.
BATTERY SAVER
The battery saver will shut off the exterior lamps 10 minutes after the
ignition switch has been turned off and the headlamp control is in the
HEADLAMP position. The system will not shut off the parking lamps if
the headlamp control is in the PARK position. For interior lights, refer to
Illuminated entryin theLocks and securitychapter.
Autolamp control (if equipped)
The autolamp system provides light sensitive automatic on-off control of
the exterior lights normally controlled by the headlamp control.
The autolamp system also keeps the lights on for approximately 20
seconds after the ignition switch is turned to the OFF position.
Foglamp control (if equipped)
Turn on the low-beam headlamps.
Press the foglamp control, located
on the instrument panel, to activate
the foglamps. The foglamp LED will
illuminate when the foglamps are
on. When the highbeams are
activated, the foglamps will not
operate.
Press the foglamp control to deactivate the foglamps.
Daytime running lamps (DRL) (if equipped)
Turns the headlamps on with a reduced output.
To activate:
•the ignition must be in the ON position and
•the headlamp control is in the OFF, parking lamp or autolamp
position.
OFF
Lights
33
Page 46 of 240

Installing a garage door opener (if equipped)
The storage compartment can be converted to accommodate a variety of
aftermarket garage door openers:
•Remove the Velcro pad from the
storage compartment door.
•Place Velcro on aftermarket
transmitter opposite of actuator
control.
•Install the transmitter on to
storage compartment door
aligning the actuator control with
the rubber plunger.
•Close the door and press the
storage compartment door to activate the transmitter.
Illuminated visor mirror (if equipped)
To turn on the visor mirror lamps,
lift the mirror cover.
SETTING AUTOLAMP (IF EQUIPPED)
1. Make sure the headlamp control
is in the OFF position. Leaving the
headlamp control in the ON position
will override the autolamp.
2. Turn the ignition to the ON
position or start the vehicle.
3. An illuminated green LED to the
left of the autolamp button indicates
the autolamp is ON. If the green
LED is not illuminated, then the
autolamp is OFF. Press the
autolamp button to activate the
autolamp.
Driver Controls
46
Page 49 of 240

POWER SIDE VIEW MIRRORS
The ignition must be in the ACC or ON position to adjust the power side
view mirrors.
To adjust your mirrors:
1. Rotate the control clockwise to
adjust the right mirror and rotate
the control counterclockwise to
adjust the left mirror.
2. Move the control in the direction
you wish to tilt the mirror.
3. Return to the center position to
lock mirrors in place.
Fold-away mirrors
Pull the side mirrors in carefully
when driving through a narrow
space, like an automatic car wash.
Heated outside mirrors
R(if equipped)
Both mirrors are heated
automatically to remove ice, mist
and fog when the rear window
defrost is activated.
Do not remove ice from the
mirrors with a scraper or
attempt to readjust the mirror
glass if it is frozen in place.
These actions could cause damage to the glass and mirrors.
SPEED CONTROL (IF EQUIPPED)
With speed control set, you can maintain a speed of 48 km/h (30 mph)
or more without keeping your foot on the pedal. Speed control does not
work at speeds below 48 km/h (30 mph).
Driver Controls
49