Page 67 of 248

3. From a blank display press and
release the MODE button once. The
directional heading will be
displayed.
Note:If the compass is
de-calibrated, CAL will be displayed
in the right corner of the display.
Refer to“Calibration mode”in this
section for more details.
4. The overhead console displays the compass heading in one of eight
directions: NORTH, NORTHEAST, EAST, SOUTHEAST, SOUTH,
SOUTHWEST, WEST, and NORTHWEST.
Zone variation mode
Most geographic areas (zones) have a magnetic north compass point that
varies slightly from the northerly direction on maps. A correct zone
setting will eliminate compass heading error.
For optimum calibration, turn off all electrical accessories (heater/air
conditioning, wipers, etc.) and make sure all vehicle doors are shut.
To set the compass zone:
1. Press and release the MODE
button until the compass directional
heading is displayed.
2. Hold down the MODE button for
5 seconds to enter zone mode. The
display will read PRESS RESET TO
SET ZONE XX where XX is the
current zone.
3. Release the MODE button.
2003 Crown Victoria(cro)
Owners Guide (post-2002-fmt)
USA English(fus)
Driver Controls
67
Page 68 of 248

4. Repeatedly press and release the
RESET button to scroll through the
zones 1–15 until the desired zone is
displayed.
5. Press the MODE button to save
the new zone setting and return to
the compass normal mode.
Note:The compass exits the zone
setting mode and returns to its
previous setting after one minute of
no activity.
Note:If power is interrupted during the zone setting process, the
compass resets to the same zone it was set to before the zone change
process was started.
Calibration mode
To calibrate the compass:
1. Press and release the MODE
button until the compass directional
heading is displayed.
2. Hold down the MODE button for
10 seconds to enter the calibration
mode. The display will read PRESS
RESET TO DECAL.
3. Release the MODE button.
4. Press the RESET button to
de-calibrate the compass. The
display will read CIRCLE SLOWLY
TO CALIBRATE for a few seconds
and then display a direction with
CAL displayed on the right side.
5. Slowly drive the vehicle in a
circle (less than 5 km/h [3 mph]).
This will take up to three circles to complete calibration.
1 2 3
4
5
6 7 8 9 101112 13 14 15
2003 Crown Victoria(cro)
Owners Guide (post-2002-fmt)
USA English(fus)
Driver Controls
68
Page 69 of 248

6. The correct compass heading will be displayed when the compass is
calibrated.
Note:If the RESET button is not pressed, the compass will exit
calibration mode after three minutes of no activity and the original
calibration data will be restored.
Note:If power is interrupted during the calibration process, the compass
resets to the original calibration data from before the calibration process
started.
HomeLink�mode
Train mode
Note:Do not train the HomeLink�with the vehicle parked in the garage.
To train a HomeLink�button to control a specific device:
1. Select the HomeLink�button to
train.
2. Press and continuously hold the
button for 20 seconds. CHANNEL X
TRANSMIT will be displayed (X will
be 1, 2, or 3) during this time.
Note:If more than one button is
pressed, priority will be given to the
lowest numbered channel.
3. After 20 seconds, the display will
read CHANNEL X TRANING to
indicate training has started.
Continue to hold the button.
Note:If the channel being trained
has not been previously trained, the
channel will immediately enter the
training mode (no 20 second delay).
4. Point the original garage door
opener/transmitter at the overhead
console. Hold down the original transmitter’s button so the overhead
console can learn the transmitter’s frequency and data stream.
2003 Crown Victoria(cro)
Owners Guide (post-2002-fmt)
USA English(fus)
Driver Controls
69
Page 70 of 248

5. Training will be complete in 100
seconds or less. CHANNEL X
TRAINED will be displayed when
training is complete.
6. DID NOT TRAIN will be displayed
if the channel did not properly train.
7. Release the channel X button.
Training is complete.
Note:Additional training may be
required for rolling code equipped
devices. Refer to theRolling code
programmingin this section.
Rolling code programming
To train a garage door opener (or other rolling code equipped devices)
with the rolling code feature, follow these instructionsaftercompleting
the“Train mode”in this section. (A second person may make the
following training procedures quicker & easier)
1. Locate the“learn” or “smart” buttonon the garage door motor
head unit. Exact location and color of the button may vary by product
brand. If there is difficulty locating the“learn”or“smart”button refer to
the device’s owner manual or contact HomeLink�at1–800–355–3515or
on the Internet atwww.homelink.com.
2. Press and release the“learn”or“smart”button on the garage door
motor head unit.
Note:Following step 2, there are 30 seconds in which to initiate step 3.
2003 Crown Victoria(cro)
Owners Guide (post-2002-fmt)
USA English(fus)
Driver Controls
70
Page 71 of 248
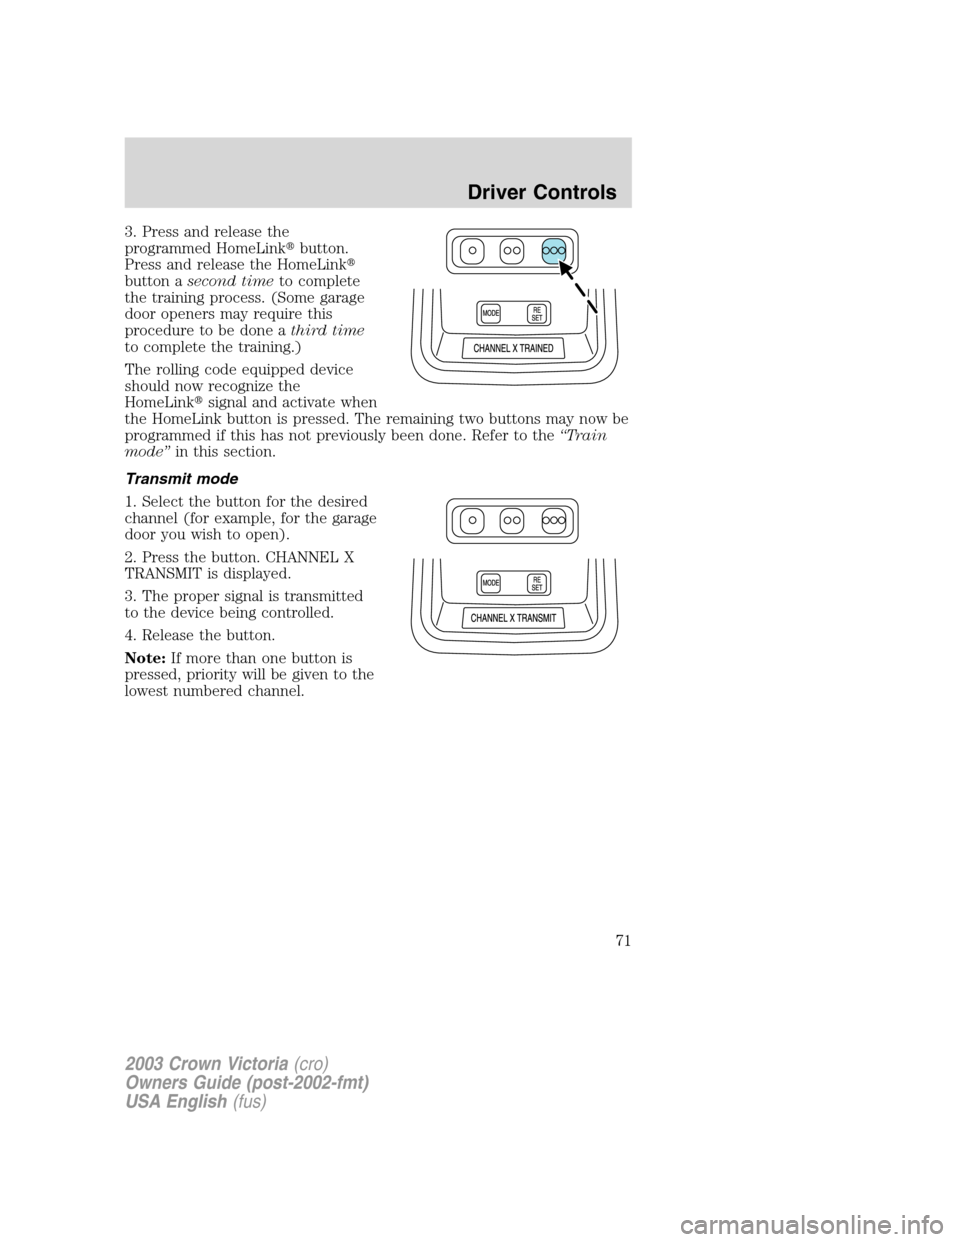
3. Press and release the
programmed HomeLink�button.
Press and release the HomeLink�
button asecond timeto complete
the training process. (Some garage
door openers may require this
procedure to be done athird time
to complete the training.)
The rolling code equipped device
should now recognize the
HomeLink�signal and activate when
the HomeLink button is pressed. The remaining two buttons may now be
programmed if this has not previously been done. Refer to the“Train
mode”in this section.
Transmit mode
1. Select the button for the desired
channel (for example, for the garage
door you wish to open).
2. Press the button. CHANNEL X
TRANSMIT is displayed.
3. The proper signal is transmitted
to the device being controlled.
4. Release the button.
Note:If more than one button is
pressed, priority will be given to the
lowest numbered channel.
2003 Crown Victoria(cro)
Owners Guide (post-2002-fmt)
USA English(fus)
Driver Controls
71
Page 72 of 248
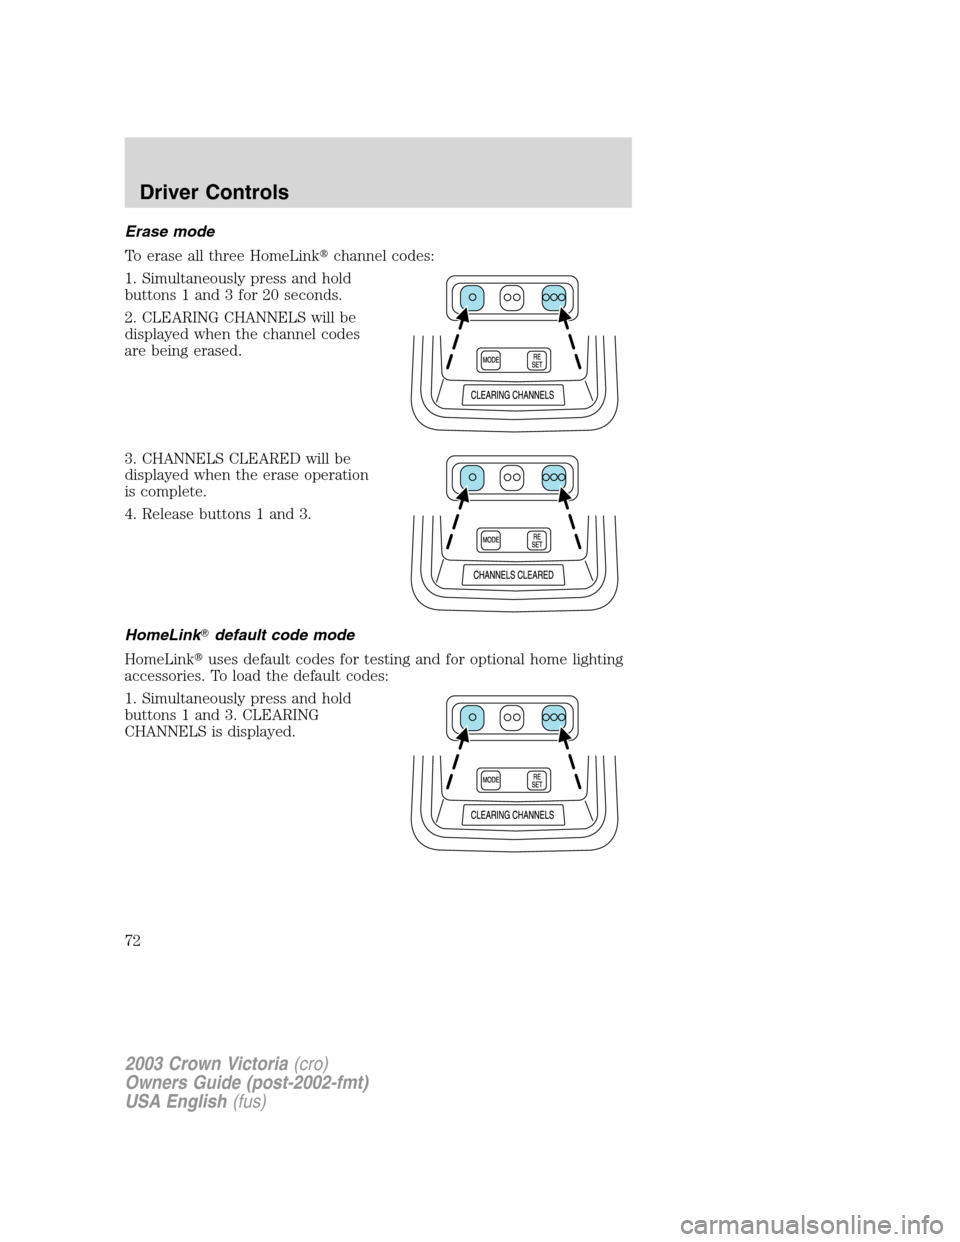
Erase mode
To erase all three HomeLink�channel codes:
1. Simultaneously press and hold
buttons 1 and 3 for 20 seconds.
2. CLEARING CHANNELS will be
displayed when the channel codes
are being erased.
3. CHANNELS CLEARED will be
displayed when the erase operation
is complete.
4. Release buttons 1 and 3.
HomeLink�default code mode
HomeLink�uses default codes for testing and for optional home lighting
accessories. To load the default codes:
1. Simultaneously press and hold
buttons 1 and 3. CLEARING
CHANNELS is displayed.
2003 Crown Victoria(cro)
Owners Guide (post-2002-fmt)
USA English(fus)
Driver Controls
72
Page 73 of 248

2. After 20 seconds CHANNELS
CLEARED is displayed. Continue to
hold the buttons.
3. After 10 more seconds,
CHANNELS DEFAULTED is
displayed when all the channel
default codes have been successfully
loaded.
Note:If you need to train the
garage door opener, refer to“Train
mode”in this section.
AUXILIARY POWER POINT
The auxiliary power point for five passenger vehicles is located in the
floor console storage bin. For six passenger vehicles, the auxiliary power
point is located under the cup holder and ashtray drawer in the center
stack.
Do not plug optional electrical accessories into the cigarette lighter. Use
the power point.
Do not use the power point for operating the cigarette lighter element.
The Maximum power each power point can supply depends on the fuse
rating. For example: a 20A fuse should supply a maximum of 240 Watts,
a 15A fuse should supply a maximum of 180 Watts and a 10A fuse should
supply a maximum of 120 Watts. Exceeding these limits will result in a
blown fuse.
Always keep the power point caps closed when not being used.
Power outlets are designed for accessory plugs only. Do not hang
any type of accessory or accessory bracket from the plug.
Improper use of the power outlet can cause damage not covered
by your warranty.
2003 Crown Victoria(cro)
Owners Guide (post-2002-fmt)
USA English(fus)
Driver Controls
73
Page 82 of 248

•To close from the vent position, press and hold the rear portion of the
control.
Do not let children play with the moon roof. They may seriously
hurt themselves.
HOMELINK�WIRELESS CONTROL SYSTEM (IF EQUIPPED)
The HomeLink�Wireless Control System, located on the overhead
console, provides a convenient way to replace up to three hand-held
transmitters with a single built-in device. This feature will learn the radio
frequency codes of most current transmitters to operate garage doors,
entry gate operators, security systems, entry door locks, and home or
office lighting.
When programming your HomeLink�Wireless Control System to
a garage door or gate, be sure that people and objects are out of
the way to prevent potential harm or damage.
Do not use the HomeLink�Wireless Control System with any garage
door opener that lacks safety stop and reverse features as required by
U.S. federal safety standards (this includes any garage door opener
model manufactured before April 1, 1982). A garage door which cannot
detect an object, signaling the door to stop and reverse, does not meet
current U.S. federal safety standards. For more information, contact
HomeLink�at:www.homelink.comor1–800–355–3515.
Retain the original transmitter for use in other vehicles as well as for
future programming procedures (i.e. new HomeLink�equipped vehicle
purchase). It is also suggested that upon the sale of the vehicle, the
programmed Homelink�buttons be erased for security purposes, refer to
Programmingin this section.
Programming
Do not program HomeLink�with the vehicle parked in the garage.
Note:Some vehicles may require the ignition switch to be turned to the
second (or“ACC”) position for programming and/or operation of the
HomeLink�. It is also recommended that a new battery be placed in the
hand-held transmitter of the device being programmed to HomeLink�for
quicker training and accurate transmission of the radio-frequency signal.
2003 Crown Victoria(cro)
Owners Guide (post-2002-fmt)
USA English(fus)
Driver Controls
82