2003 CHEVROLET VENTURE warning
[x] Cancel search: warningPage 1 of 486
Seats and Restraint Systems........................... 1-1
Front Seats
............................................... 1-3
Rear Seats
............................................... 1-7
Safety Belts
.............................................1-30
Child Restraints
.......................................1-55
Air Bag Systems
......................................1-93
Restraint System Check
..........................1-103
Features and Controls..................................... 2-1
Keys
........................................................ 2-3
Doors and Locks
....................................... 2-9
Windows
.................................................2-24
Theft-Deterrent Systems
............................2-27
Starting and Operating Your Vehicle
...........2-31
Mirrors
....................................................2-44
OnStar
žSystem
......................................2-45
HomeLinkžTransmitter
.............................2-47
Storage Areas
.........................................2-51
Vehicle Personalization
.............................2-61
Instrument Panel............................................. 3-1
Instrument Panel Overview
.......................... 3-4
Climate Controls
......................................3-25
Warning Lights, Gages and Indicators
.........3-35
Message Center
.......................................3-50
Driver Information Center (DIC)
..................3-58
Audio System(s)
.......................................3-61Driving Your Vehicle....................................... 4-1
Your Driving, the Road, and Your Vehicle
..... 4-2
Towing
...................................................4-32
Service and Appearance Care.......................... 5-1
Service
..................................................... 5-3
Fuel
......................................................... 5-4
Checking Things Under the Hood
...............5-10
All-Wheel Drive
........................................5-50
Bulb Replacement
....................................5-52
Windshield Wiper Blade Replacement
.........5-58
Tires
......................................................5-60
Appearance Care
.....................................5-87
Vehicle Identi®cation
.................................5-95
Electrical System
......................................5-96
Capacities and Speci®cations
...................5-103
Normal Maintenance Replacement Parts
....5-104
Maintenance Schedule..................................... 6-1
Maintenance Schedule
................................ 6-2
Customer Assistance Information.................... 7-1
Customer Assistance Information
.................. 7-2
Reporting Safety Defects
............................ 7-9
Index.................................................................1
2003 Chevrolet Venture Owner ManualM
Page 3 of 486
Safety Warnings and Symbols
You will ®nd a number of safety cautions in this book.
We use a box and the word CAUTION to tell you about
things that could hurt you if you were to ignore the
warning.
{CAUTION:
These mean there is something that could hurt
you or other people.
In the caution area, we tell you what the hazard is.
Then we tell you what to do to help avoid or reduce the
hazard. Please read these cautions. If you don't, you
or others could be hurt.You will also ®nd a circle
with a slash through it in
this book. This safety
symbol means ªDon't,º
ªDon't do thisº or ªDon't let
this happen.º
iii
Page 4 of 486
Vehicle Damage Warnings
Also, in this book you will ®nd these notices:
Notice:These mean there is something that could
damage your vehicle.
A notice will tell you about something that can damage
your vehicle. Many times, this damage would not be
covered by your warranty, and it could be costly. But the
notice will tell you what to do to help avoid the
damage.
When you read other manuals, you might see
CAUTION and NOTICE warnings in different colors or in
different words.
You'll also see warning labels on your vehicle. They use
the same words, CAUTION or NOTICE.
Vehicle Symbols
Your vehicle has components and labels that use
symbols instead of text. Symbols, used on your vehicle,
are shown along with the text describing the operation
or information relating to a speci®c component, control,
message, gage or indicator.
If you need help ®guring out a speci®c name of a
component, gage or indicator, reference the following
topics:
·Seats and Restraint Systems in Section 1
·Features and Controls in Section 2
·Instrument Panel Overview in Section 3
·Climate Controls in Section 3
·Warning Lights, Gages and Indicators in Section 3
·Audio System(s) in Section 3
·Engine Compartment Overview in Section 5
iv
Page 92 of 486
{CAUTION:
Using the vehicle's regular safety belts on a
child seated on the child restraint cushion can
cause serious injury to the child in a sudden
stop or crash. If a child is the proper size for
the built-in child restraint, secure the child
using the child restraint's harness. But
children who are too large for the built-in child
restraint should sit on the vehicle's regular
seat and use the vehicle's adult safety belts.
Warning:Failure to follow the manufacturer's
instructions on the use of this child restraint system can
result in your child striking the vehicle's interior during
a sudden stop or crash. Snugly adjust the belts provided
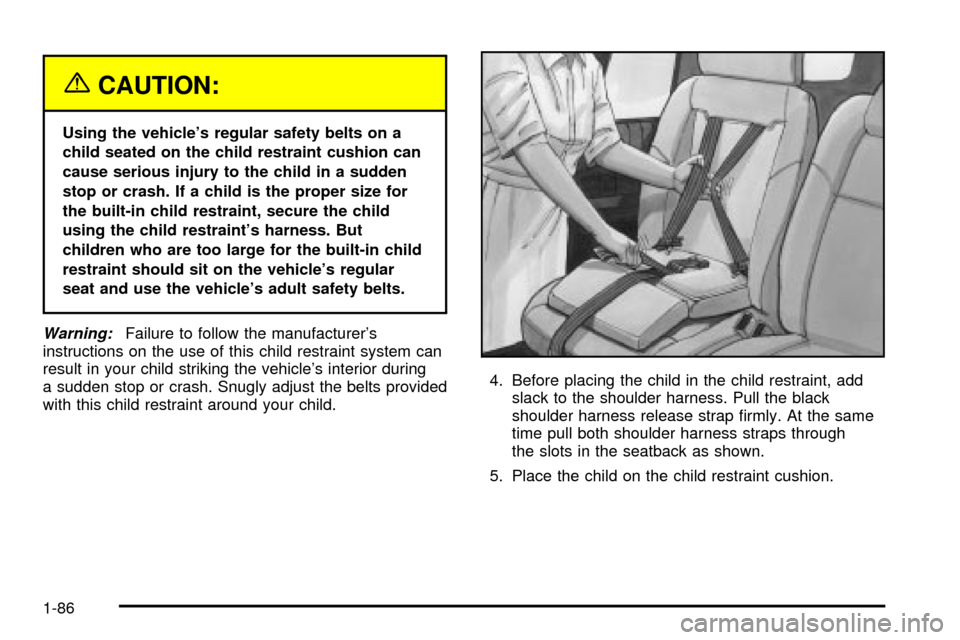
with this child restraint around your child.4. Before placing the child in the child restraint, add
slack to the shoulder harness. Pull the black
shoulder harness release strap ®rmly. At the same
time pull both shoulder harness straps through
the slots in the seatback as shown.
5. Place the child on the child restraint cushion.
1-86
Page 129 of 486
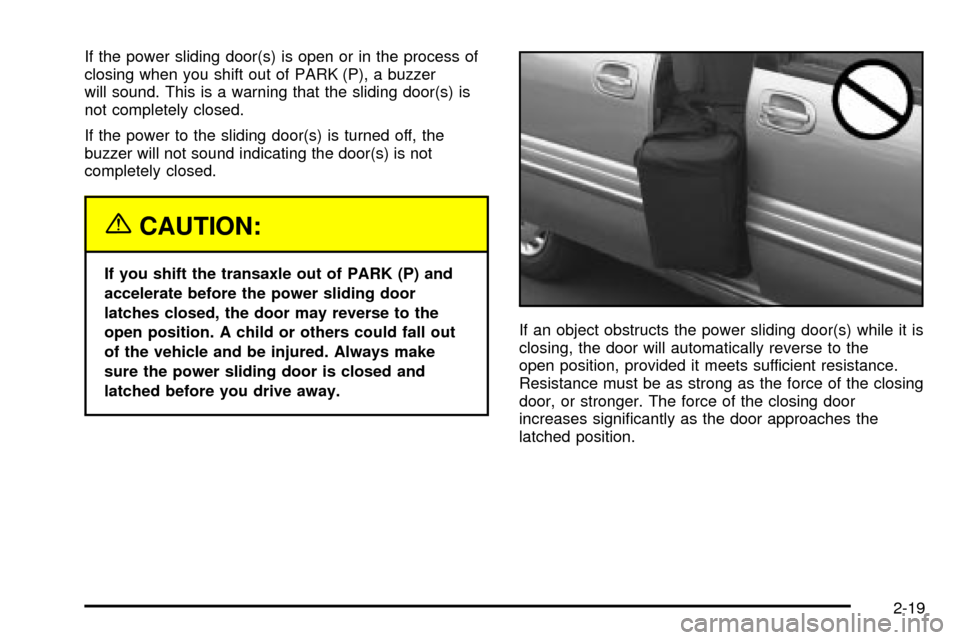
If the power sliding door(s) is open or in the process of
closing when you shift out of PARK (P), a buzzer
will sound. This is a warning that the sliding door(s) is
not completely closed.
If the power to the sliding door(s) is turned off, the
buzzer will not sound indicating the door(s) is not
completely closed.
{CAUTION:
If you shift the transaxle out of PARK (P) and
accelerate before the power sliding door
latches closed, the door may reverse to the
open position. A child or others could fall out
of the vehicle and be injured. Always make
sure the power sliding door is closed and
latched before you drive away.If an object obstructs the power sliding door(s) while it is
closing, the door will automatically reverse to the
open position, provided it meets sufficient resistance.
Resistance must be as strong as the force of the closing
door, or stronger. The force of the closing door
increases signi®cantly as the door approaches the
latched position.
2-19
Page 133 of 486
{CAUTION:
It can be dangerous to drive with the liftgate
open because carbon monoxide (CO) gas can
come into your vehicle. You can't see or smell
CO. It can cause unconsciousness and even
death. If you must drive with the liftgate open
or if electrical wiring or other cable
connections must pass through the seal
between the body and the liftgate:
·Make sure all other windows are shut.
·Turn the fan on your heating or cooling
system to its highest speed and select the
control setting that will force outside air
into your vehicle. See ªClimate Control
Systemº in the Index.
·If you have air outlets on or under the
instrument panel, open them all the way.
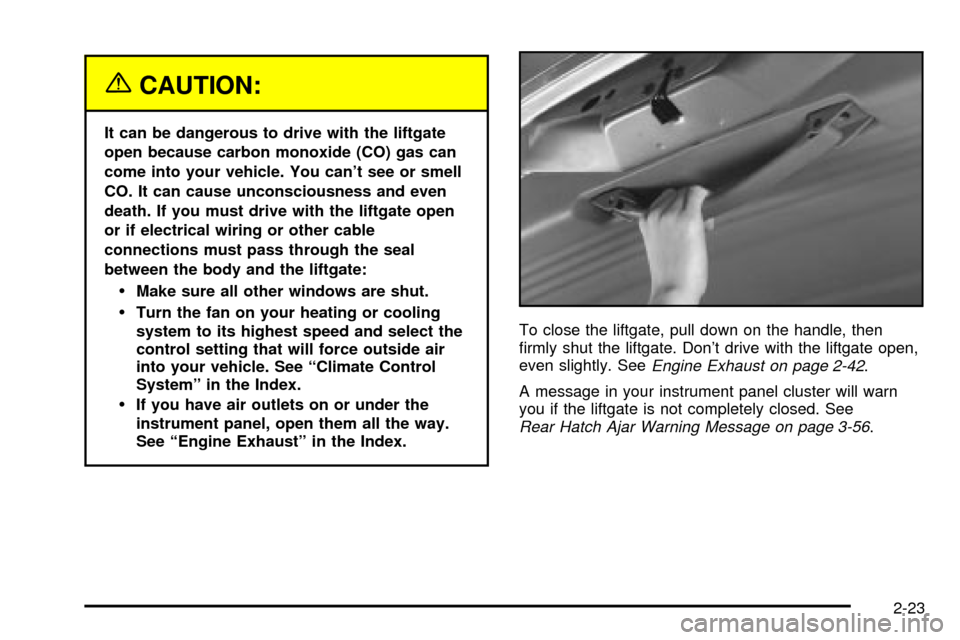
See ªEngine Exhaustº in the Index.To close the liftgate, pull down on the handle, then
®rmly shut the liftgate. Don't drive with the liftgate open,
even slightly. See
Engine Exhaust on page 2-42.
A message in your instrument panel cluster will warn
you if the liftgate is not completely closed. See
Rear Hatch Ajar Warning Message on page 3-56.
2-23
Page 142 of 486
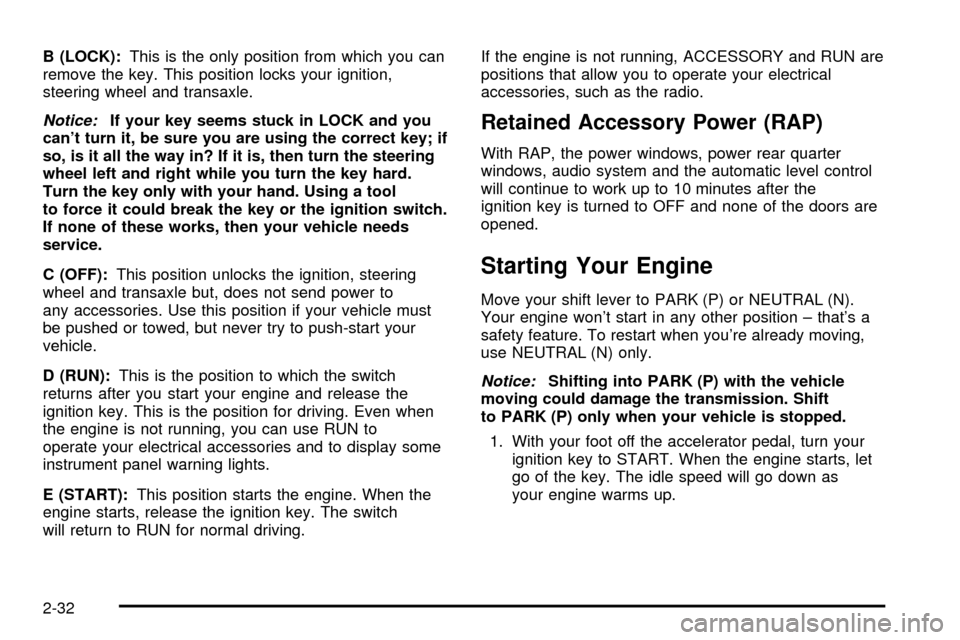
B (LOCK):This is the only position from which you can
remove the key. This position locks your ignition,
steering wheel and transaxle.
Notice:If your key seems stuck in LOCK and you
can't turn it, be sure you are using the correct key; if
so, is it all the way in? If it is, then turn the steering
wheel left and right while you turn the key hard.
Turn the key only with your hand. Using a tool
to force it could break the key or the ignition switch.
If none of these works, then your vehicle needs
service.
C (OFF):This position unlocks the ignition, steering
wheel and transaxle but, does not send power to
any accessories. Use this position if your vehicle must
be pushed or towed, but never try to push-start your
vehicle.
D (RUN):This is the position to which the switch
returns after you start your engine and release the
ignition key. This is the position for driving. Even when
the engine is not running, you can use RUN to
operate your electrical accessories and to display some
instrument panel warning lights.
E (START):This position starts the engine. When the
engine starts, release the ignition key. The switch
will return to RUN for normal driving.If the engine is not running, ACCESSORY and RUN are
positions that allow you to operate your electrical
accessories, such as the radio.Retained Accessory Power (RAP)
With RAP, the power windows, power rear quarter
windows, audio system and the automatic level control
will continue to work up to 10 minutes after the
ignition key is turned to OFF and none of the doors are
opened.
Starting Your Engine
Move your shift lever to PARK (P) or NEUTRAL (N).
Your engine won't start in any other position ± that's a
safety feature. To restart when you're already moving,
use NEUTRAL (N) only.
Notice:Shifting into PARK (P) with the vehicle
moving could damage the transmission. Shift
to PARK (P) only when your vehicle is stopped.
1. With your foot off the accelerator pedal, turn your
ignition key to START. When the engine starts, let
go of the key. The idle speed will go down as
your engine warms up.
2-32
Page 148 of 486
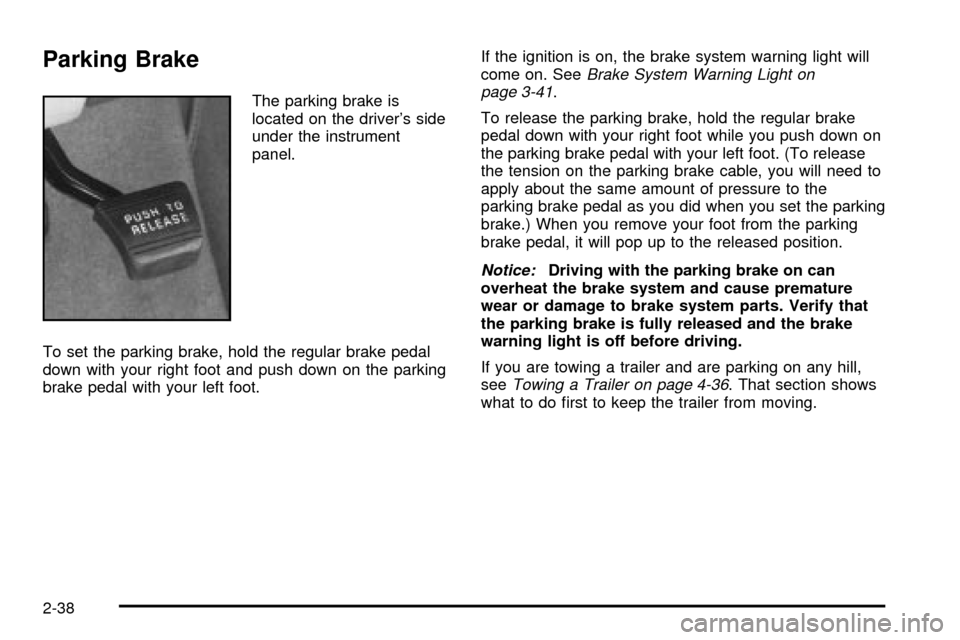
Parking Brake
The parking brake is
located on the driver's side
under the instrument
panel.
To set the parking brake, hold the regular brake pedal
down with your right foot and push down on the parking
brake pedal with your left foot.If the ignition is on, the brake system warning light will
come on. See
Brake System Warning Light on
page 3-41.
To release the parking brake, hold the regular brake
pedal down with your right foot while you push down on
the parking brake pedal with your left foot. (To release
the tension on the parking brake cable, you will need to
apply about the same amount of pressure to the
parking brake pedal as you did when you set the parking
brake.) When you remove your foot from the parking
brake pedal, it will pop up to the released position.
Notice:Driving with the parking brake on can
overheat the brake system and cause premature
wear or damage to brake system parts. Verify that
the parking brake is fully released and the brake
warning light is off before driving.
If you are towing a trailer and are parking on any hill,
see
Towing a Trailer on page 4-36. That section shows
what to do ®rst to keep the trailer from moving.
2-38