2003 CHEVROLET VENTURE door lock
[x] Cancel search: door lockPage 1 of 486

Seats and Restraint Systems........................... 1-1
Front Seats
............................................... 1-3
Rear Seats
............................................... 1-7
Safety Belts
.............................................1-30
Child Restraints
.......................................1-55
Air Bag Systems
......................................1-93
Restraint System Check
..........................1-103
Features and Controls..................................... 2-1
Keys
........................................................ 2-3
Doors and Locks
....................................... 2-9
Windows
.................................................2-24
Theft-Deterrent Systems
............................2-27
Starting and Operating Your Vehicle
...........2-31
Mirrors
....................................................2-44
OnStar
žSystem
......................................2-45
HomeLinkžTransmitter
.............................2-47
Storage Areas
.........................................2-51
Vehicle Personalization
.............................2-61
Instrument Panel............................................. 3-1
Instrument Panel Overview
.......................... 3-4
Climate Controls
......................................3-25
Warning Lights, Gages and Indicators
.........3-35
Message Center
.......................................3-50
Driver Information Center (DIC)
..................3-58
Audio System(s)
.......................................3-61Driving Your Vehicle....................................... 4-1
Your Driving, the Road, and Your Vehicle
..... 4-2
Towing
...................................................4-32
Service and Appearance Care.......................... 5-1
Service
..................................................... 5-3
Fuel
......................................................... 5-4
Checking Things Under the Hood
...............5-10
All-Wheel Drive
........................................5-50
Bulb Replacement
....................................5-52
Windshield Wiper Blade Replacement
.........5-58
Tires
......................................................5-60
Appearance Care
.....................................5-87
Vehicle Identi®cation
.................................5-95
Electrical System
......................................5-96
Capacities and Speci®cations
...................5-103
Normal Maintenance Replacement Parts
....5-104
Maintenance Schedule..................................... 6-1
Maintenance Schedule
................................ 6-2
Customer Assistance Information.................... 7-1
Customer Assistance Information
.................. 7-2
Reporting Safety Defects
............................ 7-9
Index.................................................................1
2003 Chevrolet Venture Owner ManualM
Page 33 of 486

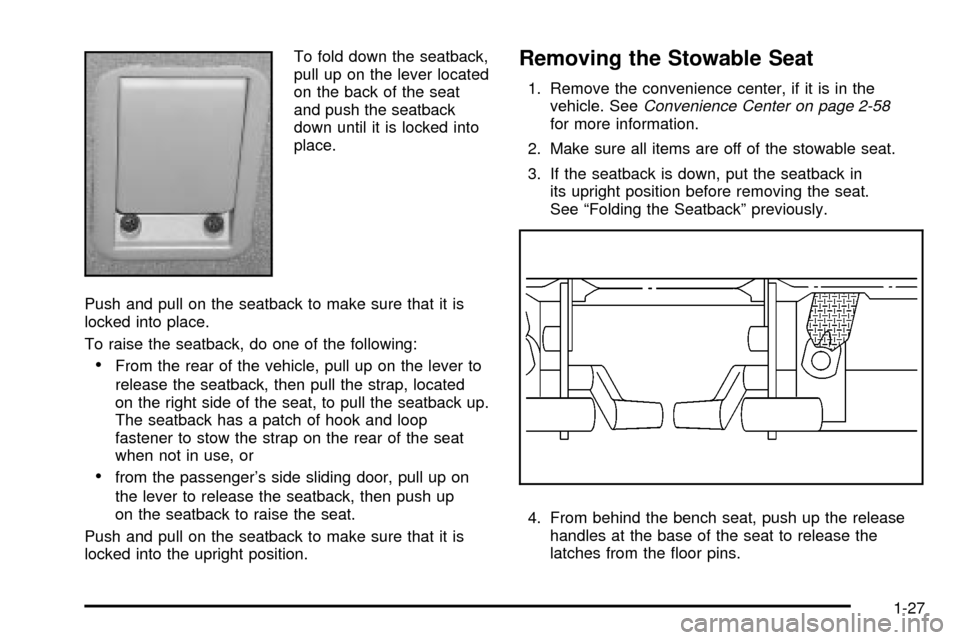
To fold down the seatback,
pull up on the lever located
on the back of the seat
and push the seatback
down until it is locked into
place.
Push and pull on the seatback to make sure that it is
locked into place.
To raise the seatback, do one of the following:
·From the rear of the vehicle, pull up on the lever to
release the seatback, then pull the strap, located
on the right side of the seat, to pull the seatback up.
The seatback has a patch of hook and loop
fastener to stow the strap on the rear of the seat
when not in use, or
·from the passenger's side sliding door, pull up on
the lever to release the seatback, then push up
on the seatback to raise the seat.
Push and pull on the seatback to make sure that it is
locked into the upright position.
Removing the Stowable Seat
1. Remove the convenience center, if it is in the
vehicle. SeeConvenience Center on page 2-58for more information.
2. Make sure all items are off of the stowable seat.
3. If the seatback is down, put the seatback in
its upright position before removing the seat.
See ªFolding the Seatbackº previously.
4. From behind the bench seat, push up the release
handles at the base of the seat to release the
latches from the ¯oor pins.
1-27
Page 42 of 486

Driver Position
This part describes the driver's restraint system.
Lap-Shoulder Belt
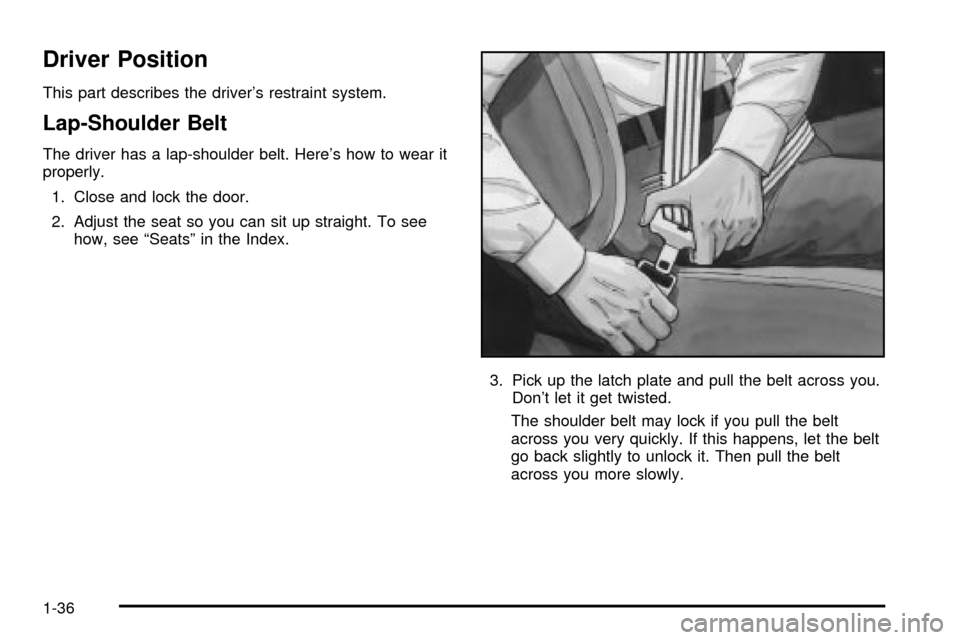
The driver has a lap-shoulder belt. Here's how to wear it
properly.
1. Close and lock the door.
2. Adjust the seat so you can sit up straight. To see
how, see ªSeatsº in the Index.
3. Pick up the latch plate and pull the belt across you.
Don't let it get twisted.
The shoulder belt may lock if you pull the belt
across you very quickly. If this happens, let the belt
go back slightly to unlock it. Then pull the belt
across you more slowly.
1-36
Page 103 of 486

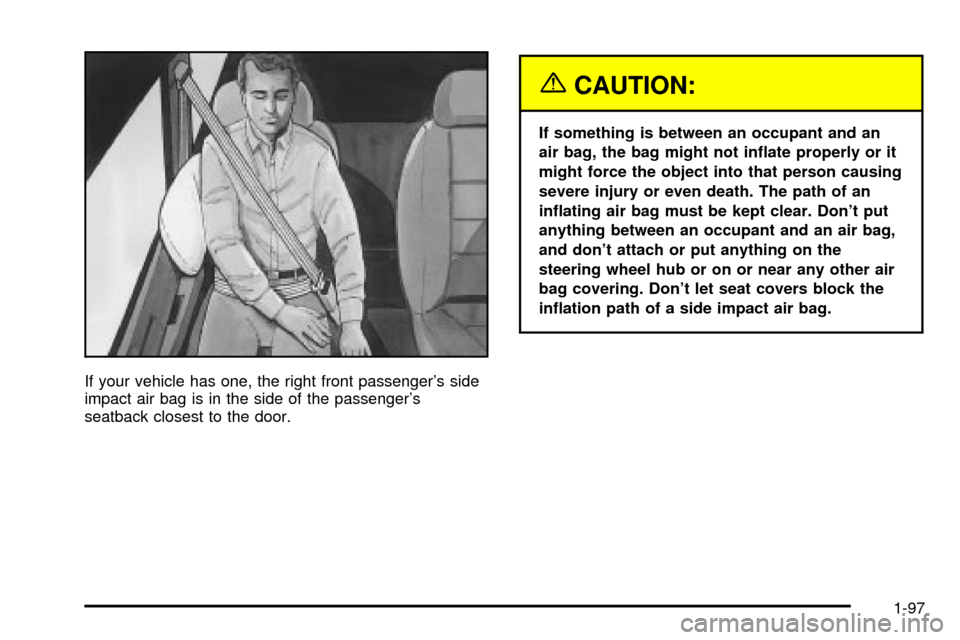
If your vehicle has one, the right front passenger's side
impact air bag is in the side of the passenger's
seatback closest to the door.
{CAUTION:
If something is between an occupant and an
air bag, the bag might not in¯ate properly or it
might force the object into that person causing
severe injury or even death. The path of an
in¯ating air bag must be kept clear. Don't put
anything between an occupant and an air bag,
and don't attach or put anything on the
steering wheel hub or on or near any other air
bag covering. Don't let seat covers block the
in¯ation path of a side impact air bag.
1-97
Page 111 of 486

Keys...............................................................2-3
Remote Keyless Entry System.........................2-5
Remote Keyless Entry System Operation...........2-6
Doors and Locks.............................................2-9
Door Locks....................................................2-9
Power Door Locks........................................2-11
Last Door Closed Locking..............................2-12
Programmable Automatic Door Locks..............2-12
Lockout Protection........................................2-13
Leaving Your Vehicle....................................2-13
Dual Sliding Doors........................................2-13
Power Sliding Door (PSD)..............................2-17
Liftgate........................................................2-22
Windows........................................................2-24
Manual Windows..........................................2-24
Power Windows............................................2-25
Side Window Latches....................................2-25
Power Rear Quarter Windows........................2-26
Sun Visors...................................................2-26
Theft-Deterrent Systems..................................2-27
Content Theft-Deterrent.................................2-27
PASS-Key
žIII ..............................................2-29
PASS-KeyžIII Operation...............................2-29
Starting and Operating Your Vehicle................2-31
New Vehicle Break-In....................................2-31Ignition Positions..........................................2-31
Starting Your Engine.....................................2-32
Engine Coolant Heater..................................2-33
Automatic Transaxle Operation.......................2-34
Parking Brake..............................................2-38
Shifting Into Park (P).....................................2-39
Shifting Out of Park (P).................................2-41
Parking Over Things That Burn.......................2-42
Engine Exhaust............................................2-42
Running Your Engine While You Are Parked. . . .2-43
Mirrors...........................................................2-44
Manual Rearview Mirror.................................2-44
Outside Power Mirrors...................................2-44
Outside Convex Mirror...................................2-45
Outside Heated Mirrors..................................2-45
OnStar
žSystem.............................................2-45
HomeLinkžTransmitter...................................2-47
Programming the HomeLinkžTransmitter.........2-48
Storage Areas................................................2-51
Glove Box...................................................2-51
Cupholder(s)................................................2-51
Compact Overhead Console...........................2-52
Overhead Console........................................2-52
Front Seat Storage Net.................................2-54
Luggage Carrier...........................................2-55
Section 2 Features and Controls
2-1
Page 112 of 486

Rear Storage Area........................................2-57
Convenience Net..........................................2-57
Convenience Center......................................2-58
Vehicle Personalization...................................2-61
Entering Programming Mode..........................2-62
Delayed Illumination and Exit Lighting..............2-62
Automatic Door Locks...................................2-63Last Door Locking and Lockout Deterrent.........2-64
Remote Driver Unlock Control........................2-65
Remote Lock and Unlock Con®rmation.............2-66
Content Theft-Deterrent System......................2-67
Arming and Disarming the Content
Theft-Deterrent System...............................2-68
Exiting Programming Mode.............................2-70
Section 2 Features and Controls
2-2
Page 114 of 486

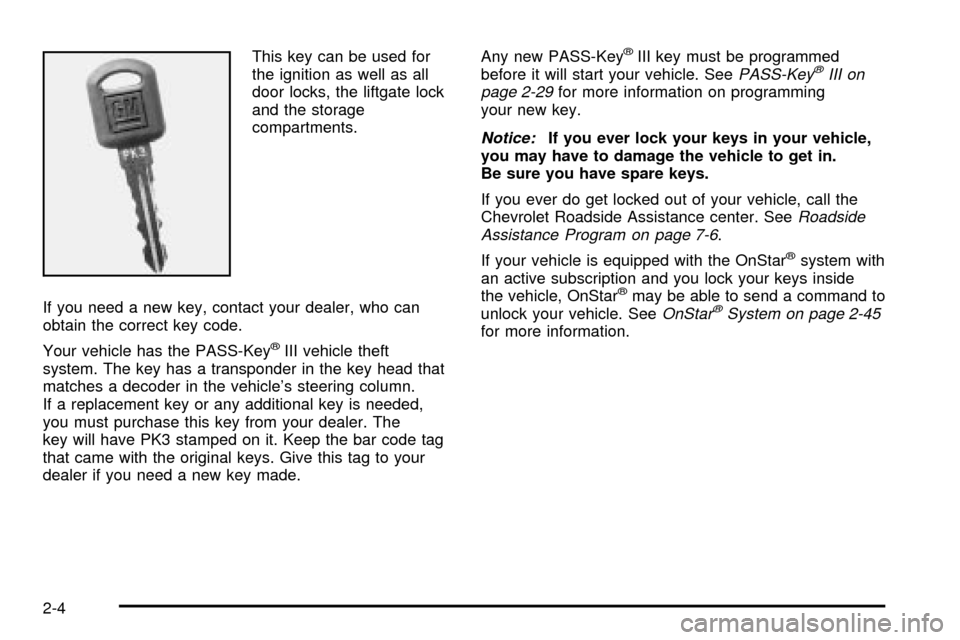
This key can be used for
the ignition as well as all
door locks, the liftgate lock
and the storage
compartments.
If you need a new key, contact your dealer, who can
obtain the correct key code.
Your vehicle has the PASS-Key
žIII vehicle theft
system. The key has a transponder in the key head that
matches a decoder in the vehicle's steering column.
If a replacement key or any additional key is needed,
you must purchase this key from your dealer. The
key will have PK3 stamped on it. Keep the bar code tag
that came with the original keys. Give this tag to your
dealer if you need a new key made.Any new PASS-Key
žIII key must be programmed
before it will start your vehicle. SeePASS-KeyžIII on
page 2-29for more information on programming
your new key.
Notice:If you ever lock your keys in your vehicle,
you may have to damage the vehicle to get in.
Be sure you have spare keys.
If you ever do get locked out of your vehicle, call the
Chevrolet Roadside Assistance center. See
Roadside
Assistance Program on page 7-6.
If your vehicle is equipped with the OnStar
žsystem with
an active subscription and you lock your keys inside
the vehicle, OnStar
žmay be able to send a command to
unlock your vehicle. SeeOnStaržSystem on page 2-45for more information.
2-4
Page 116 of 486

Remote Keyless Entry System
Operation
You can lock and unlock
your doors and the liftgate
from about 3 feet (1 m)
up to 30 feet (9 m)
away using the remote
keyless entry transmitter
supplied with your vehicle.
UNLOCK:When you press UNLOCK on the remote
keyless entry transmitter, only the driver's door will
unlock. If you press UNLOCK again within ®ve seconds,
all the doors and the liftgate will unlock. If you would
like all the doors to unlock the ®rst time you press
UNLOCK, see
Vehicle Personalization on page 2-61.With the content theft-deterrent system, the UNLOCK
button on the remote keyless entry transmitter will
disarm the system. See
Content Theft-Deterrent on
page 2-27for more details.
When you use your remote keyless entry transmitter to
unlock your vehicle or to operate the power sliding
door(s), the parking lamps will ¯ash to let you know the
command was received.
If you would like to change the way the parking lamps
operate with remote unlock con®rmation, see
Vehicle
Personalization on page 2-61.
LOCK:To lock all doors, press LOCK on the remote
keyless entry transmitter. See
Power Door Locks
on page 2-11for more details on the power door lock
features. With the content theft-deterrent system,
the LOCK button may arm the system. See
Content
Theft-Deterrent on page 2-27for more details.
When you use the remote keyless entry transmitter to
lock your vehicle, the parking lamps will ¯ash to let you
know the command has been received. If you press
the LOCK button again, within ®ve seconds, the horn will
sound and the parking lamps will ¯ash to let you
know the vehicle is already locked.
If you would like to change the way the parking lamps
and horn operate with remote lock con®rmation,
see
Vehicle Personalization on page 2-61.
2-6