2003 CHEVROLET VENTURE service
[x] Cancel search: servicePage 1 of 486

Seats and Restraint Systems........................... 1-1
Front Seats
............................................... 1-3
Rear Seats
............................................... 1-7
Safety Belts
.............................................1-30
Child Restraints
.......................................1-55
Air Bag Systems
......................................1-93
Restraint System Check
..........................1-103
Features and Controls..................................... 2-1
Keys
........................................................ 2-3
Doors and Locks
....................................... 2-9
Windows
.................................................2-24
Theft-Deterrent Systems
............................2-27
Starting and Operating Your Vehicle
...........2-31
Mirrors
....................................................2-44
OnStar
žSystem
......................................2-45
HomeLinkžTransmitter
.............................2-47
Storage Areas
.........................................2-51
Vehicle Personalization
.............................2-61
Instrument Panel............................................. 3-1
Instrument Panel Overview
.......................... 3-4
Climate Controls
......................................3-25
Warning Lights, Gages and Indicators
.........3-35
Message Center
.......................................3-50
Driver Information Center (DIC)
..................3-58
Audio System(s)
.......................................3-61Driving Your Vehicle....................................... 4-1
Your Driving, the Road, and Your Vehicle
..... 4-2
Towing
...................................................4-32
Service and Appearance Care.......................... 5-1
Service
..................................................... 5-3
Fuel
......................................................... 5-4
Checking Things Under the Hood
...............5-10
All-Wheel Drive
........................................5-50
Bulb Replacement
....................................5-52
Windshield Wiper Blade Replacement
.........5-58
Tires
......................................................5-60
Appearance Care
.....................................5-87
Vehicle Identi®cation
.................................5-95
Electrical System
......................................5-96
Capacities and Speci®cations
...................5-103
Normal Maintenance Replacement Parts
....5-104
Maintenance Schedule..................................... 6-1
Maintenance Schedule
................................ 6-2
Customer Assistance Information.................... 7-1
Customer Assistance Information
.................. 7-2
Reporting Safety Defects
............................ 7-9
Index.................................................................1
2003 Chevrolet Venture Owner ManualM
Page 93 of 486

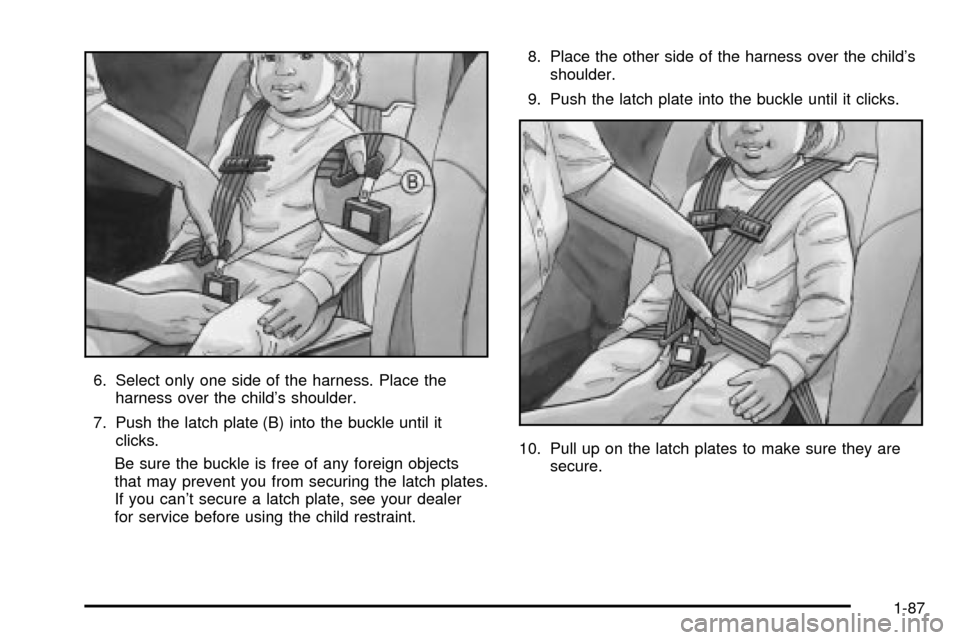
6. Select only one side of the harness. Place the
harness over the child's shoulder.
7. Push the latch plate (B) into the buckle until it
clicks.
Be sure the buckle is free of any foreign objects
that may prevent you from securing the latch plates.
If you can't secure a latch plate, see your dealer
for service before using the child restraint.8. Place the other side of the harness over the child's
shoulder.
9. Push the latch plate into the buckle until it clicks.
10. Pull up on the latch plates to make sure they are
secure.
1-87
Page 107 of 486

In many crashes severe enough to in¯ate an air bag,
windshields are broken by vehicle deformation.
Additional windshield breakage may also occur from the
right front passenger air bag.
·Air bags are designed to in¯ate only once. After an
air bag in¯ates, you'll need some new parts for
your air bag system. If you do not get them, the air
bag system will not be there to help protect you
in another crash. A new system will include air bag
modules and possibly other parts. The service
manual for your vehicle covers the need to replace
other parts.
·Your vehicle is equipped with two electronic frontal
sensors, which help the sensing system distinguish
between a moderate frontal impact and a more
severe frontal impact. Your vehicle is also equipped
with a crash sensing and diagnostic module,
which records information about the frontal air bag
system. The module records information about
the readiness of the system, when the system
commands air bag in¯ation and driver's safety belt
usage at deployment. The module also records
speed, engine rpm, brake and throttle data.
·Let only quali®ed technicians work on your air bag
systems. Improper service can mean that an air
bag system will not work properly. See your dealer
for service.
1-101
Page 108 of 486

Notice:If you damage the covering for the driver's
or the right front passenger's air bag, or the air
bag covering on the driver's and right front
passenger's seatback, the bag may not work
properly. You may have to replace the air bag
module in the steering wheel, both the air bag
module and the instrument panel for the right front
passenger's air bag, or both the air bag module
and seatback for the driver's and right front
passenger's side impact air bag. Do not open or
break the air bag coverings.Servicing Your Air Bag-Equipped
Vehicle
Air bags affect how your vehicle should be serviced.
There are parts of the air bag systems in several places
around your vehicle. Your dealer and the service
manual have information about servicing your vehicle
and the air bag systems. To purchase a service manual,
see
Service Publications Ordering Information on
page 7-10.
{CAUTION:
For up to 10 seconds after the ignition key is
turned off and the battery is disconnected, an
air bag can still in¯ate during improper
service. You can be injured if you are close to
an air bag when it in¯ates. Avoid yellow
connectors. They are probably part of the air
bag system. Be sure to follow proper service
procedures, and make sure the person
performing work for you is quali®ed to do so.
The air bag systems do not need regular maintenance.
1-102
Page 115 of 486

Remote Keyless Entry System
If equipped, the keyless entry system operates on a
radio frequency subject to Federal Communications
Commission (FCC) Rules and with Industry Canada.
This device complies with Part 15 of the FCC Rules.
Operation is subject to the following two conditions:
1. This device may not cause interference, and
2. This device must accept any interference received,
including interference that may cause undesired
operation of the device.
This device complies with RSS-210 of Industry Canada.
Operation is subject to the following two conditions:
1. This device may not cause interference, and
2. This device must accept any interference received,
including interference that may cause undesired
operation of the device.
Changes or modi®cations to this system by other than
an authorized service facility could void authorization to
use this equipment.At times you may notice a decrease in range. This is
normal for any remote keyless entry system. If the
transmitter does not work or if you have to stand closer
to your vehicle for the transmitter to work, try this:
·Check the distance. You may be too far from your
vehicle. You may need to stand closer during
rainy or snowy weather.
·Check the location. Other vehicles or objects may
be blocking the signal. Take a few steps to the
left or right, hold the transmitter higher, and
try again.
·Check to determine if battery replacement is
necessary. See ªBattery Replacementº under
Remote Keyless Entry System Operation on
page 2-6.
·If you are still having trouble, see your dealer or a
quali®ed technician for service.
2-5
Page 132 of 486

3. If the power sliding door override is on, press the
textured end of the power sliding door override
switch to turn it off.
4. Remove fuse 29 from the underhood fuse block.
Leave it out for 30 seconds.
5. Reinstall the fuse and wait 10 seconds.
6. Turn the power sliding door override on by pressing
the end of the switch with the override symbol on it.
7. Press the power sliding door switch(es) to open the
power sliding door.
8. Open the door all of the way.
9. Wait ®ve seconds and close the door by pressing
the power sliding door switch(es).
10. Wait ®ve seconds and repeat Steps 7 through 9.
If the door does not rest in the fully open position after
repeating Step 7, repeat Steps 7 through 9 again. If
the door still does not operate correctly, see your dealer
for service.Liftgate
To unlock the liftgate from the outside, turn the key in
the cylinder clockwise or use the remote keyless
entry transmitter. To lock the liftgate using the key, turn
the key counterclockwise.
Open the liftgate using the handle located above the
license plate. Once slightly opened, the liftgate will rise
by itself. Lamps in the rear of the vehicle will come
on, illuminating the rear cargo area. See
Interior Lamps
on page 3-17.
Notice:If you open the liftgate without checking for
overhead obstructions such as a garage door,
you could break the liftgate glass. Always check to
make sure the area above the liftgate is clear
before opening it.
2-22
Page 139 of 486

PASS-KeyžIII
Your PASS-KeyžIII system operates on a radio
frequency subject to Federal Communications
Commission (FCC) Rules and with Industry Canada.
This device complies with Part 15 of the FCC Rules.
Operation is subject to the following two conditions:
(1) this device may not cause harmful interference, and
(2) this device must accept any interference received,
including interference that may cause undesired
operation.
This device complies with RSS-210 of Industry Canada.
Operation is subject to the following two conditions:
(1) this device may not cause interference, and
(2) this device must accept any interference received,
including interference that may cause undesired
operation of the device.
Changes or modi®cations to this system by other than
an authorized service facility could void authorization to
use this equipment.
PASS-Key
žIII uses a radio frequency transponder in
the key that matches a decoder in your vehicle.
PASS-KeyžIII Operation
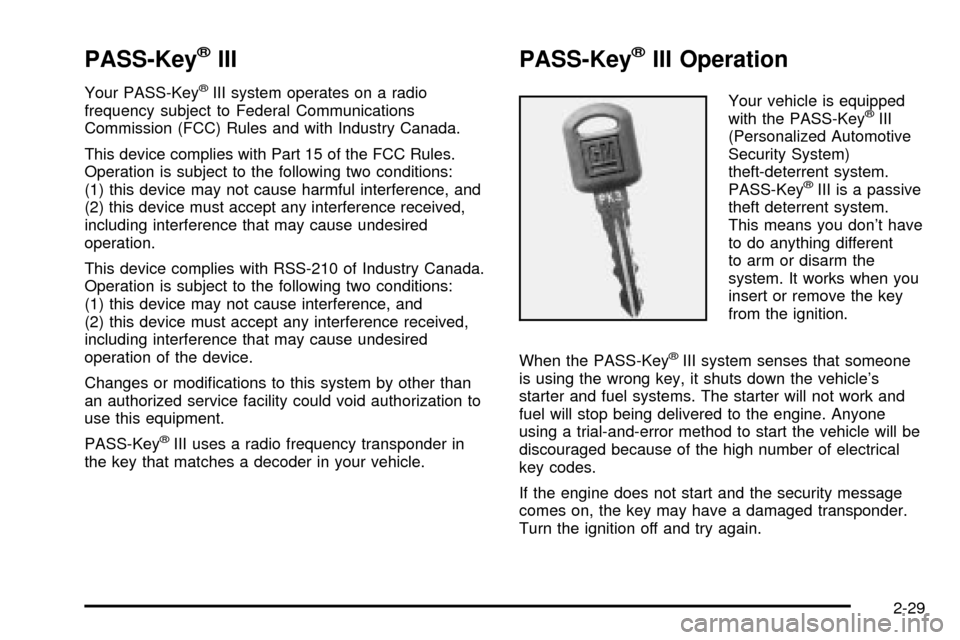
Your vehicle is equipped
with the PASS-KeyžIII
(Personalized Automotive
Security System)
theft-deterrent system.
PASS-Key
žIII is a passive
theft deterrent system.
This means you don't have
to do anything different
to arm or disarm the
system. It works when you
insert or remove the key
from the ignition.
When the PASS-Key
žIII system senses that someone
is using the wrong key, it shuts down the vehicle's
starter and fuel systems. The starter will not work and
fuel will stop being delivered to the engine. Anyone
using a trial-and-error method to start the vehicle will be
discouraged because of the high number of electrical
key codes.
If the engine does not start and the security message
comes on, the key may have a damaged transponder.
Turn the ignition off and try again.
2-29
Page 140 of 486

If the engine still does not start, and the key appears to
be undamaged, try another ignition key. At this time,
you may also want to check the instrument panel PASS
KEY fuse. If the engine still does not start with the
other key, your vehicle needs service. If your vehicle
does start, the ®rst key may be faulty. See your dealer or
a locksmith who can service the PASS-Key
žIII to
have a new key made. SeeFuses and Circuit Breakers
on page 5-96.
It is possible for the PASS-Key
žIII decoder to learn the
transponder value of a new or replacement key. Up
to 10 additional keys may be programmed for the
vehicle. This procedure is for learning additional keys
only. If all the currently programmed keys are lost or do
not operate, you must see your dealer or a locksmith
who can service PASS-Key
žIII to have keys made and
programmed to the system.
See your dealer or a locksmith who can service
PASS-Key
žIII to get a new key blank that is cut exactly
as the ignition key that operates the system.
Canadian Owners:If you lose or damage your keys,
only a GM dealer can service PASS-Key
žIII to
have new keys made. To program additional keys you
will need two current driver's keys (black in color).
You must add a step to the following procedure. After
Step 3 repeat Steps 1 through 3 with the second current
driver's key. Then continue with Step 4.To program the new key, do the following:
1. Verify the new key has PK3 stamped on it.
2. Insert the ignition key in the ignition and start the
engine. If the engine will not start see your dealer
for service.
3. After the engine has started, turn the key to OFF
and remove the key.
4. Insert the key to be programmed and turn it to RUN
within 10 seconds of removing the previous key.
5. The security message will turn off once the key has
been programmed. It may not be apparent that the
security message went on due to how quickly
the key is programmed.
6. Repeat Steps 1 through 4 if additional keys are to
be programmed.
If you are ever driving and the security message comes
on and stays on, you will be able to restart your
engine if you turn it off. Your PASS-Key
žIII system,
however, is not working properly and must be serviced
by your dealer. Your vehicle is not protected by the
PASS-Key
žIII system at this time.
If you lose or damage a PASS-Key
žIII key, see your
dealer or a locksmith who can service PASS-KeyžIII to
have a new key made.
2-30