2003 CHEVROLET VENTURE service
[x] Cancel search: servicePage 142 of 486

B (LOCK):This is the only position from which you can
remove the key. This position locks your ignition,
steering wheel and transaxle.
Notice:If your key seems stuck in LOCK and you
can't turn it, be sure you are using the correct key; if
so, is it all the way in? If it is, then turn the steering
wheel left and right while you turn the key hard.
Turn the key only with your hand. Using a tool
to force it could break the key or the ignition switch.
If none of these works, then your vehicle needs
service.
C (OFF):This position unlocks the ignition, steering
wheel and transaxle but, does not send power to
any accessories. Use this position if your vehicle must
be pushed or towed, but never try to push-start your
vehicle.
D (RUN):This is the position to which the switch
returns after you start your engine and release the
ignition key. This is the position for driving. Even when
the engine is not running, you can use RUN to
operate your electrical accessories and to display some
instrument panel warning lights.
E (START):This position starts the engine. When the
engine starts, release the ignition key. The switch
will return to RUN for normal driving.If the engine is not running, ACCESSORY and RUN are
positions that allow you to operate your electrical
accessories, such as the radio.Retained Accessory Power (RAP)
With RAP, the power windows, power rear quarter
windows, audio system and the automatic level control
will continue to work up to 10 minutes after the
ignition key is turned to OFF and none of the doors are
opened.
Starting Your Engine
Move your shift lever to PARK (P) or NEUTRAL (N).
Your engine won't start in any other position ± that's a
safety feature. To restart when you're already moving,
use NEUTRAL (N) only.
Notice:Shifting into PARK (P) with the vehicle
moving could damage the transmission. Shift
to PARK (P) only when your vehicle is stopped.
1. With your foot off the accelerator pedal, turn your
ignition key to START. When the engine starts, let
go of the key. The idle speed will go down as
your engine warms up.
2-32
Page 146 of 486
REVERSE (R):Use this gear to back up.
Notice:Shifting to REVERSE (R) while your vehicle
is moving forward could damage the transaxle.
The repairs would not be covered by your warranty.
Shift to REVERSE (R) only after your vehicle is
stopped.
To rock your vehicle back and forth to get out of snow,
ice or sand without damaging your transaxle, see If
You Are Stuck: In Sand, Mud, Ice or Snow on
page 4-30.
NEUTRAL (N):In this position, your engine doesn't
connect with the wheels. To restart when you're already
moving, use NEUTRAL (N) only. Also, use
NEUTRAL (N) when your vehicle is being towed.
{CAUTION:
Shifting into a drive gear while your engine is
running at high speed is dangerous. Unless
your foot is ®rmly on the brake pedal, your
vehicle could move very rapidly. You could
lose control and hit people or objects. Do not
shift into a drive gear while your engine is
running at high speed.
Notice:Shifting our of PARK (P) or NEUTRAL (N)
with the engine racing may damage the transaxle.
The repairs would not be covered by your warranty.
Be sure the engine is not racing when shifting
your vehicle.
AUTOMATIC OVERDRIVE (D):This position is for
normal driving. If you need more power for passing, and
you're:
·Going less than 35 mph (55 km/h), push your
accelerator pedal about halfway down.
·Going about 35 mph (55 km/h) or more, push the
accelerator all the way down.
You'll shift down to the next gear and have more power.
Notice:Driving your vehicle if you notice that it
is moving slowly or not shifting gears as you
increase speed may damage the transaxle. Have
your vehicle serviced right away. You can drive in
SECOND (2) when you are driving less than
35 mph (55 km/h) and AUTOMATIC OVERDRIVE (D)
for higher speeds until then.
2-36
Page 147 of 486

Warm-Up Shift
Your vehicle has a computer controlled transaxle
designed to warm up the engine faster when the outside
temperature is 35ÉF (2ÉC) or colder. You may notice
that the transaxle will shift at a higher vehicle speed until
the engine is warmed up. This is a normal condition
designed to provide heat to the passenger compartment
and defrost the windows more quickly. See
Climate
Control System on page 3-25for more information.
THIRD (3):This position is also used for normal driving,
but it offers more power and lower fuel economy than
AUTOMATIC OVERDRIVE (D).
Here are some times you might choose THIRD (3)
instead of AUTOMATIC OVERDRIVE (D):
·When driving on hilly, winding roads.
·When towing a trailer (so there is less shifting
between gears).
·When going down a steep hill.
SECOND (2):This position gives you more power but
lower fuel economy than THIRD (3). You can use
SECOND (2) on hills. It can help control your speed as
you go down steep mountain roads, but then you
would also want to use your brakes off and on.
Notice:Driving in SECOND (2) for more than
25 miles (40 km) or at speeds over 55 mph (90 km/h)
may damage the transaxle. Also, shifting into
SECOND (2) at speeds above 65 mph (105 km/h) can
cause damage. Drive in THIRD (3) or AUTOMATIC
OVERDRIVE (D) instead of SECOND (2).
Notice:If your vehicle seems to start up rather
slowly, or if it seems not to shift gears as you go
faster, something may be wrong with a transaxle
system sensor. If you drive very far that way, your
vehicle can be damaged. So, if this happens,
have your vehicle serviced right away. Until then,
you can use SECOND (2) when you are driving less
than 35 mph (55 km/h) and THIRD (3) for higher
speeds.
FIRST (1):This position gives you even more power
but lower fuel economy than SECOND (2). You can use
it on very steep hills, or in deep snow or mud. If the
shift lever is put in FIRST (1), the transaxle won't
downshift into ®rst gear until the vehicle is going slow
enough.
Notice:Spinning the tires or holding the vehicle in
one place on a hill using only the accelerator
pedal may damage the transaxle. If you are stuck,
do not spin the tires. When stopping on a hill,
use the brakes to hold the vehicle in place.
2-37
Page 155 of 486
Outside Convex Mirror
Your passenger's side mirror is convex. A convex
mirror's surface is curved so you can see more from the
driver's seat.
{CAUTION:
A convex mirror can make things (like other
vehicles) look farther away than they really are.
If you cut too sharply into the right lane, you
could hit a vehicle on your right. Check your
inside mirror or glance over your shoulder
before changing lanes.
Outside Heated Mirrors
If your vehicle has the outside rearview mirrors, they are
heated when you activate the rear window defogger.
See ªRear Window Defoggerº in
Climate Control System
on page 3-25.
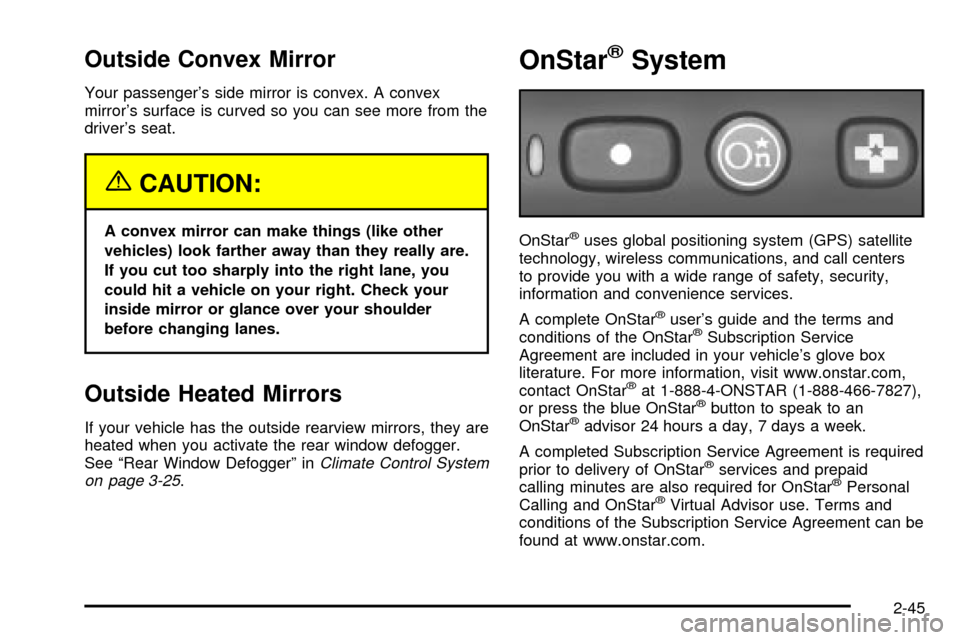
OnStaržSystem
OnStaržuses global positioning system (GPS) satellite
technology, wireless communications, and call centers
to provide you with a wide range of safety, security,
information and convenience services.
A complete OnStar
žuser's guide and the terms and
conditions of the OnStaržSubscription Service
Agreement are included in your vehicle's glove box
literature. For more information, visit www.onstar.com,
contact OnStar
žat 1-888-4-ONSTAR (1-888-466-7827),
or press the blue OnStaržbutton to speak to an
OnStaržadvisor 24 hours a day, 7 days a week.
A completed Subscription Service Agreement is required
prior to delivery of OnStar
žservices and prepaid
calling minutes are also required for OnStaržPersonal
Calling and OnStaržVirtual Advisor use. Terms and
conditions of the Subscription Service Agreement can be
found at www.onstar.com.
2-45
Page 156 of 486

OnStaržServices
One of the following plans is normally included for a
speci®c duration with each vehicle equipped with
OnStar
ž. You can upgrade or extend your OnStarž
service plan to meet your needs.
Safe and Sound Plan
·
Automatic Noti®cation of Air Bag Deployment
·Emergency Services
·Roadside Assistance
·Stolen Vehicle Assistance
·AccidentAssist
·Remote Door Unlock
·Remote Diagnostics
·Online Concierge
Directions and Connections Plan
·
All Safe and Sound Plan services
·Route Support
·RideAssist
·Information and Convenience Services
Luxury and Leisure Plan
·
All Directions and Connections Plan services
·Personal Concierge
OnStaržPersonal Calling
With OnStaržPersonal Calling, you have a safer way to
stay connected while driving. It's a hands-free wireless
phone that's integrated into your vehicle. You can place
calls nationwide using voice-activated dialing with no
contracts and no additional roaming charges. To ®nd out
more about OnStar
žPersonal Calling, refer to the
OnStaržuser's guide in your vehicle's glove box, or call
OnStaržat 1-888-4-ONSTAR (1-888-466-7827).
OnStaržVirtual Advisor
With OnStaržVirtual Advisor you can listen to the news,
entertainment and informative topics, such as traffic
and weather reports. You are able to listen and reply to
your e-mail through your vehicle's speakers.
2-46
Page 157 of 486
HomeLinkžTransmitter
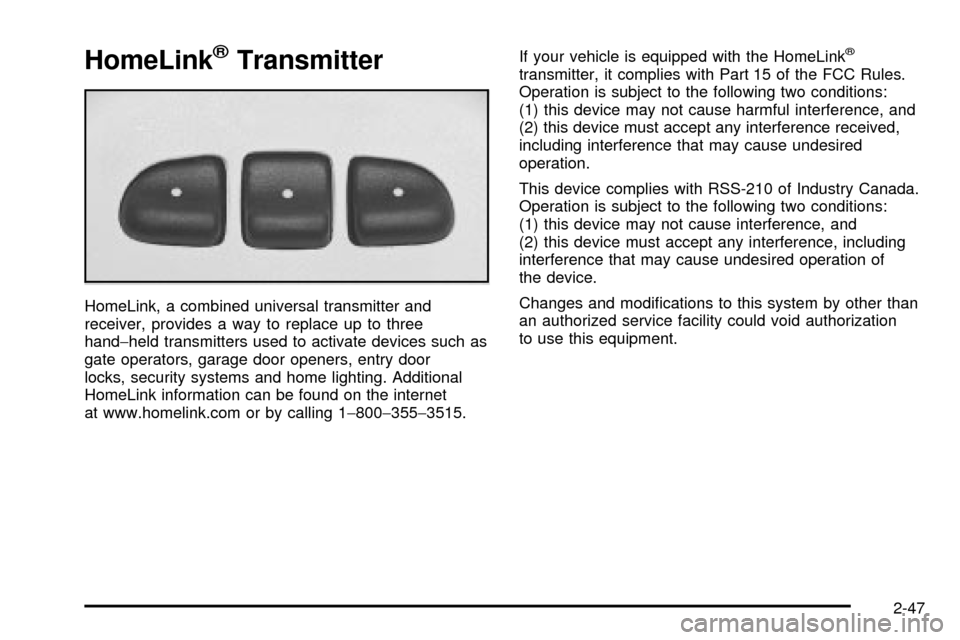
HomeLink, a combined universal transmitter and
receiver, provides a way to replace up to three
hand-held transmitters used to activate devices such as
gate operators, garage door openers, entry door
locks, security systems and home lighting. Additional
HomeLink information can be found on the internet
at www.homelink.com or by calling 1-800-355-3515.If your vehicle is equipped with the HomeLink
ž
transmitter, it complies with Part 15 of the FCC Rules.
Operation is subject to the following two conditions:
(1) this device may not cause harmful interference, and
(2) this device must accept any interference received,
including interference that may cause undesired
operation.
This device complies with RSS-210 of Industry Canada.
Operation is subject to the following two conditions:
(1) this device may not cause interference, and
(2) this device must accept any interference, including
interference that may cause undesired operation of
the device.
Changes and modi®cations to this system by other than
an authorized service facility could void authorization
to use this equipment.
2-47
Page 181 of 486
Instrument Panel Overview...............................3-4
Hazard Warning Flashers................................3-6
Other Warning Devices...................................3-6
Horn.............................................................3-7
Tilt Wheel.....................................................3-7
Turn Signal/Multifunction Lever.........................3-7
Exterior Lamps.............................................3-15
Interior Lamps..............................................3-17
Switchbanks.................................................3-20
Instrument Panel Switchbank..........................3-21
Overhead Console Switchbank.......................3-21
Ultrasonic Rear Parking
Assist (URPA)...........................................3-22
Accessory Power Outlets...............................3-24
Climate Controls............................................3-25
Climate Control System.................................3-25
Outlet Adjustment.........................................3-28
Rear Climate Control System (Without
Entertainment System)...............................3-29
Rear Climate Control System
(With Entertainment System).......................3-31
Passenger Compartment Air Filter...................3-33
Warning Lights, Gages and Indicators.............3-35
Instrument Panel Cluster................................3-36
Speedometer and Odometer...........................3-38Tachometer.................................................3-39
Safety Belt Reminder Light.............................3-40
Air Bag Readiness Light................................3-40
Brake System Warning Light..........................3-41
Anti-Lock Brake System Warning Light.............3-42
Traction Control System (TCS)
Warning Light...........................................3-43
Engine Coolant Temperature Gage..................3-44
Malfunction Indicator Lamp.............................3-45
Fuel Gage...................................................3-48
Message Center.............................................3-50
Service Traction System Warning Message......3-50
Traction Active Message................................3-51
Engine Coolant Temperature Warning
Message..................................................3-51
Charging System Indicator Message................3-52
Low Oil Pressure Message............................3-52
Low Engine Oil Level Message.......................3-53
Change Engine Oil Message..........................3-54
Power Sliding Door Warning Message.............3-54
Door Ajar Warning Message...........................3-55
Rear Hatch Ajar Warning Message..................3-56
PASS-Key
žIII Security Message....................3-56
All-Wheel Drive Disable Warning Message.......3-57
Low Fuel Warning Message...........................3-57
Section 3 Instrument Panel
3-1
Page 213 of 486
Rear Air Outlets
To increase air¯ow through the rear ¯oor outlets, place
the left bucket seat in the second row in the forward
position. For more information, see
Rear Seat Operation
on page 1-7.
The outlet behind the left rear seat is the cold air return
outlet. Be sure to keep it free from obstructions.
Also, keep the area around the base of the center
instrument panel console, between and under the front
seats, free of objects that could also obstruct air¯ow
to the rear-seating area.
For more information on how to use the main climate
control system, see ªClimate Control Systemº listed
previously in this section. For information on ventilation,
see ªOutlet Adjustmentº under ªClimate Control
Systemº listed previously in this section.
Passenger Compartment Air Filter
Passenger compartment air, both outside and
recirculated air, is routed through a passenger
compartment ®lter. The ®lter removes certain
contaminants from the air, including pollen and dust
particles. Reductions in air¯ow, which may occur more
quickly in dusty areas, indicate that the ®lter needs
to be replaced early. For how often to change the air
®lter, see
Part A: Scheduled Maintenance Services
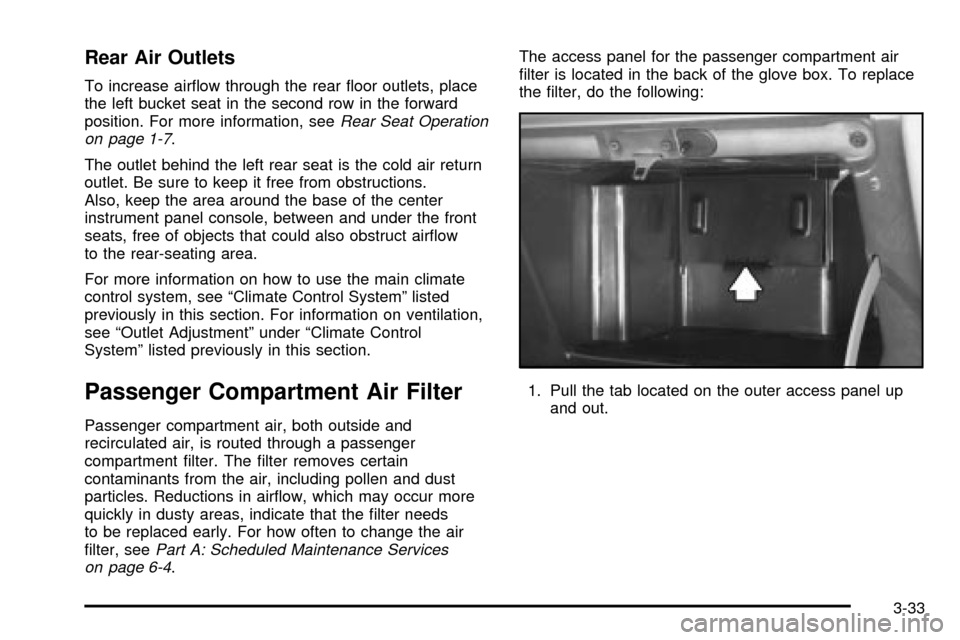
on page 6-4.The access panel for the passenger compartment air
®lter is located in the back of the glove box. To replace
the ®lter, do the following:
1. Pull the tab located on the outer access panel up
and out.
3-33