Page 331 of 486

Service............................................................5-3
Doing Your Own Service Work.........................5-3
Adding Equipment to the Outside of
Your Vehicle..............................................5-4
Fuel................................................................5-4
Gasoline Octane............................................5-4
Gasoline Speci®cations....................................5-5
California Fuel...............................................5-5
Additives.......................................................5-6
Fuels in Foreign Countries...............................5-6
Filling Your Tank............................................5-7
Filling a Portable Fuel Container.......................5-9
Checking Things Under the Hood....................5-10
Hood Release..............................................5-10
Engine Compartment Overview.......................5-12
Engine Oil...................................................5-13
Engine Air Cleaner/Filter................................5-18
Automatic Transaxle Fluid..............................5-20
Engine Coolant.............................................5-23
Radiator Pressure Cap..................................5-26
Engine Overheating.......................................5-26
Cooling System............................................5-29
Power Steering Fluid.....................................5-37
Windshield Washer Fluid................................5-38
Brakes........................................................5-40Battery........................................................5-43
Jump Starting...............................................5-44
All-Wheel Drive..............................................5-50
Bulb Replacement..........................................5-52
Halogen Bulbs..............................................5-52
Headlamps..................................................5-52
Front Turn Signal, Sidemarker and
Parking Lamps..........................................5-54
Taillamps, Turn Signal, Stoplamps and
Back-up Lamps.........................................5-56
Replacement Bulbs.......................................5-57
Windshield Wiper Blade Replacement..............5-58
Tires..............................................................5-60
In¯ation - Tire Pressure.................................5-61
Tire Inspection and Rotation...........................5-62
When It Is Time for New Tires.......................5-63
Buying New Tires.........................................5-64
Uniform Tire Quality Grading..........................5-65
Wheel Alignment and Tire Balance..................5-66
Wheel Replacement......................................5-66
Tire Chains..................................................5-67
Accessory In¯ator.........................................5-68
If a Tire Goes Flat........................................5-70
Changing a Flat Tire.....................................5-71
Compact Spare Tire......................................5-86
Section 5 Service and Appearance Care
5-1
Page 332 of 486

Appearance Care............................................5-87
Cleaning the Inside of Your Vehicle.................5-87
Care of Safety Belts and Built-in Child
Restraint Harness......................................5-90
Weatherstrips...............................................5-90
Cleaning the Outside of Your Vehicle..............5-90
Sheet Metal Damage.....................................5-93
Finish Damage.............................................5-93
Underbody Maintenance................................5-93
Chemical Paint Spotting.................................5-93
Vehicle Care/Appearance Materials..................5-94Vehicle Identi®cation......................................5-95
Vehicle Identi®cation Number (VIN).................5-95
Service Parts Identi®cation Label.....................5-95
Electrical System............................................5-96
Add-On Electrical Equipment..........................5-96
Headlamp Wiring..........................................5-96
Windshield Wiper Fuses................................5-96
Power Windows and Other Power Options.......5-96
Fuses and Circuit Breakers............................5-96
Capacities and Speci®cations........................5-103
Normal Maintenance Replacement Parts.........5-104
Section 5 Service and Appearance Care
5-2
Page 382 of 486
Bulb Replacement
For the type of bulbs, seeReplacement Bulbs on
page 5-57.
For any bulb changing procedure not listed in this
section, contact your dealer.
Halogen Bulbs
{CAUTION:
Halogen bulbs have pressurized gas inside
and can burst if you drop or scratch the bulb.
You or others could be injured. Be sure to read
and follow the instructions on the bulb
package.
Headlamps
1. Open the hood.
2. Remove the front turn signal/parking lamp
assembly. See
Front Turn Signal, Sidemarker and
Parking Lamps on page 5-54.
3. Pull the assembly away from the vehicle.
4. Unscrew the black retainer ring that holds the bulb
assembly in place.
5. Pull the bulb assembly straight up from the lamp
housing.
5-52
Page 383 of 486
6. Unhook the electrical connector by lifting up the
blue tabs and pulling the bulb out.
7. Install the new bulb through the black retainer ring
and into the electrical connector. Tighten the black
retainer ring in place. Push the bulb ®rmly
enough so that the blue tabs hook over the tab on
the bulb.8. Carefully put the bulb assembly back into the lamp
housing. Be careful not to damage the bulb on the
headlamp aiming bar.
5-53
Page 384 of 486
9. Align the pins on the bottom of the headlamp
assembly with the holes in the lamp support
bracket.
10. To reinstall the front turn signal/parking lamp
assembly. See
Front Turn Signal, Sidemarker
and Parking Lamps on page 5-54next.
Front Turn Signal, Sidemarker and
Parking Lamps
1. Open the hood.
2. Remove the thumbscrew attaching the front turn
signal/parking lamp assembly to the headlamp
assembly.
3. Pull the front turn signal/parking lamp assembly
away from the vehicle.
5-54
Page 386 of 486

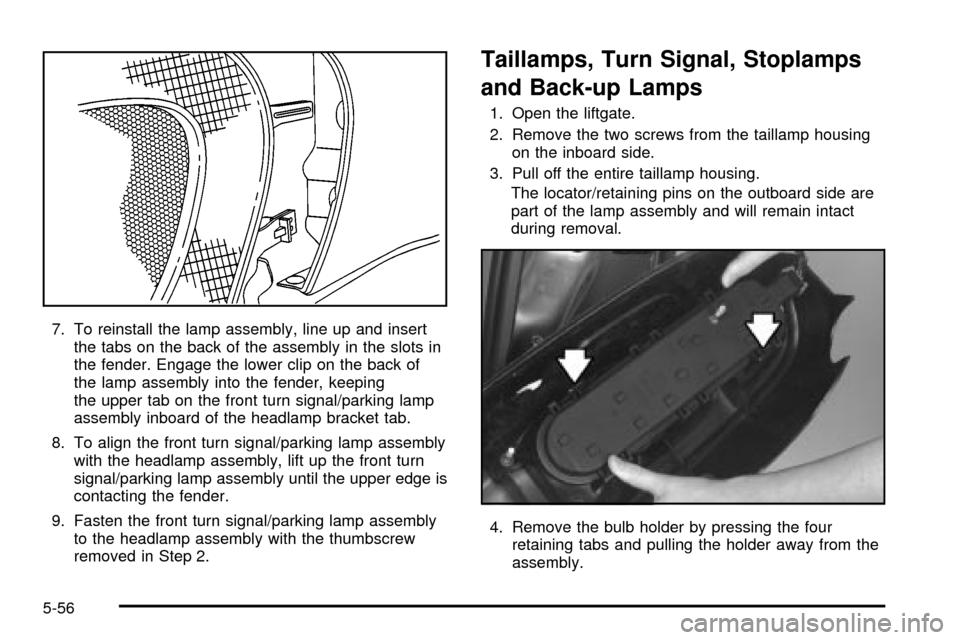
7. To reinstall the lamp assembly, line up and insert
the tabs on the back of the assembly in the slots in
the fender. Engage the lower clip on the back of
the lamp assembly into the fender, keeping
the upper tab on the front turn signal/parking lamp
assembly inboard of the headlamp bracket tab.
8. To align the front turn signal/parking lamp assembly
with the headlamp assembly, lift up the front turn
signal/parking lamp assembly until the upper edge is
contacting the fender.
9. Fasten the front turn signal/parking lamp assembly
to the headlamp assembly with the thumbscrew
removed in Step 2.
Taillamps, Turn Signal, Stoplamps
and Back-up Lamps
1. Open the liftgate.
2. Remove the two screws from the taillamp housing
on the inboard side.
3. Pull off the entire taillamp housing.
The locator/retaining pins on the outboard side are
part of the lamp assembly and will remain intact
during removal.
4. Remove the bulb holder by pressing the four
retaining tabs and pulling the holder away from the
assembly.
5-56
Page 387 of 486
A. Taillamp Bulb
B. Back-Up Lamp Bulb
C. Turn Signal Lamp Bulb
D. Stop/Taillamp Bulb5. Replace the bulb by pulling the old bulb out and
gently pushing the new bulb into the bulb holder
socket.
6. Snap the bulb holder back into place, making
sure all retaining tabs are properly over the
bulb holder tabs.
7. Reinstall the taillamp assembly by inserting the
outboard locating/retaining pins until the lamp is
seated. Secure with the inboard screws.
Replacement Bulbs
For any bulb not listed here contact your dealer.
Lamp Bulb Number
Back-up Lamps (3rd from Top) 3156
Front Sidemarker Lamps 194
Front Turn Signal/Parking Lamps 4157 NAK
Headlamps 9004-HBI
Stop/Taillamps (Top) 3057
Taillamps (Bottom) 3057
Turn Signal Lamps (2nd from Top) 3156
5-57
Page 397 of 486

{CAUTION:
Using the wrong replacement wheels, wheel
bolts or wheel nuts on your vehicle can be
dangerous. It could affect the braking and
handling of your vehicle, make your tires lose
air and make you lose control. You could have
a collision in which you or others could be
injured. Always use the correct wheel, wheel
bolts and wheel nuts for replacement.
Notice:The wrong wheel can also cause problems
with bearing life, brake cooling, speedometer or
odometer calibration, headlamp aim, bumper height,
vehicle ground clearance and tire or tire chain
clearance to the body and chassis.
See
Changing a Flat Tire on page 5-71for more
information.
Used Replacement Wheels
{CAUTION:
Putting a used wheel on your vehicle is
dangerous. You can't know how it's been used
or how far it's been driven. It could fail
suddenly and cause a crash. If you have to
replace a wheel, use a new GM original
equipment wheel.
Tire Chains
Notice:Use tire chains only where legal and only
when you must. Use only SAE Class ªSº type chains
that are the proper size for your tires. Install them
on the front tires and tighten them as tightly as
possible with the ends securely fastened. Drive
slowly and follow the chain manufacturer's
instructions. If you can hear the chains contacting
your vehicle, stop and retighten them. If the contact
continues, slow down until it stops. Driving too
fast or spinning the wheels with chains on will
damage your vehicle.
5-67