2003 CHEVROLET VENTURE odometer
[x] Cancel search: odometerPage 181 of 486

Instrument Panel Overview...............................3-4
Hazard Warning Flashers................................3-6
Other Warning Devices...................................3-6
Horn.............................................................3-7
Tilt Wheel.....................................................3-7
Turn Signal/Multifunction Lever.........................3-7
Exterior Lamps.............................................3-15
Interior Lamps..............................................3-17
Switchbanks.................................................3-20
Instrument Panel Switchbank..........................3-21
Overhead Console Switchbank.......................3-21
Ultrasonic Rear Parking
Assist (URPA)...........................................3-22
Accessory Power Outlets...............................3-24
Climate Controls............................................3-25
Climate Control System.................................3-25
Outlet Adjustment.........................................3-28
Rear Climate Control System (Without
Entertainment System)...............................3-29
Rear Climate Control System
(With Entertainment System).......................3-31
Passenger Compartment Air Filter...................3-33
Warning Lights, Gages and Indicators.............3-35
Instrument Panel Cluster................................3-36
Speedometer and Odometer...........................3-38Tachometer.................................................3-39
Safety Belt Reminder Light.............................3-40
Air Bag Readiness Light................................3-40
Brake System Warning Light..........................3-41
Anti-Lock Brake System Warning Light.............3-42
Traction Control System (TCS)
Warning Light...........................................3-43
Engine Coolant Temperature Gage..................3-44
Malfunction Indicator Lamp.............................3-45
Fuel Gage...................................................3-48
Message Center.............................................3-50
Service Traction System Warning Message......3-50
Traction Active Message................................3-51
Engine Coolant Temperature Warning
Message..................................................3-51
Charging System Indicator Message................3-52
Low Oil Pressure Message............................3-52
Low Engine Oil Level Message.......................3-53
Change Engine Oil Message..........................3-54
Power Sliding Door Warning Message.............3-54
Door Ajar Warning Message...........................3-55
Rear Hatch Ajar Warning Message..................3-56
PASS-Key
žIII Security Message....................3-56
All-Wheel Drive Disable Warning Message.......3-57
Low Fuel Warning Message...........................3-57
Section 3 Instrument Panel
3-1
Page 200 of 486

Rear Reading Lamps
There may be two reading lamps in the third row
headliner.
To turn on or off either reading lamp, press the lens of
the lamp.
There is also a reading lamp in the second row,
integrated with the dome lamp. To turn on or off
either reading lamp, press the button next to the
lamp lens.
These lamps will not turn on if the interior lamps
override switch is on. See ªInterior Lamps Overrideº
earlier in this section.
Cargo Lamp
The cargo lamp is located in the rear of your vehicle,
above the liftgate opening, and does not have a switch.
The cargo lamp will come on each time you open a
door, unless you turn on the interior lamps override. See
ªInterior Lamps Overrideº earlier in this section.
Battery Run-Down Protection
Your vehicle has a feature to help prevent you from
draining the battery, in case you accidentally leave the
interior lamps on. If you leave any interior lamps on
while the ignition is in LOCK or OFF, they will
automatically turn off after 10 minutes. The lamps won't
come back on again until you do one of the following:
·Turn the ignition to RUN or ACCESSORY,
·turn the interior lamps thumbwheel all the way to
the right, then slightly back to the left, or
·open (or close and reopen) a door that is closed.
If your vehicle has less than 15 miles (25 km) on
the odometer, the battery saver will turn off the lamps
after only three minutes.
Switchbanks
There are two sets of switchbanks located in the front of
the vehicle. The switches will vary with the options
that are on your vehicle.
3-20
Page 218 of 486

Speedometer and Odometer
Your speedometer lets you see your speed in both
miles per hour (mph) and kilometers per hour (km/h).
Your odometer shows how far your vehicle has
been driven, in either miles (used in the United States)
or kilometers (used in Canada).
Your vehicle has a tamper-resistant odometer.
You may wonder what happens if your vehicle needs a
new odometer installed. If the new one can be set to
the mileage total of the old odometer, then that will
be done. If it can't, then it's set at zero and a label must
be put on the driver's door to show the old mileage
reading when the new odometer was installed.
Dual Trip Odometers
In addition to the standard odometer, the cluster can
also display two separate trip odometers (designated by
the letter A or B in the display window) as well as
your vehicle's Engine Oil Life (designated by the word
OIL in the display window). The display can be
toggled between the odometer, the trip odometers and
engine oil life by quickly pressing and releasing the
trip/reset button located to the right of the temperature
gage. The display toggles once each time the trip/reset
button is pressed for less than 1.5 seconds. The
display toggles in the following sequence: Odometer -
Trip Odometer A - Trip Odometer B - Engine Oil Life. If
the engine oil life is left on the display, it will
automatically toggle back to the odometer after about
15 seconds. Each of the two trip odometers can be used
to keep track of different trip distances (for example,
the mileage of a long trip and the mileage driven on the
current tank of fuel). The trip odometers will continue
to keep track of miles (kilometers) driven even if they are
not currently displayed. To reset the odometer to
zero (0), press and hold the trip/reset button for at least
1.5 seconds, but less than three seconds. Only the
trip odometer that is showing in the display will be reset.
3-38
Page 219 of 486

Retro-Active Reset
Each of the two trip odometers has a feature called
retro-active reset. This feature can be used to set either
(or both) trip odometer(s) to the number of miles
(kilometers) driven since the ignition was last turned on.
This can be used if you forget to reset your trip
odometer at the beginning of a trip. To use the
retro-active reset feature, press and hold the trip/reset
button for at least three seconds. The trip odometer
will then display the number of miles (kilometers) driven
since the ignition was last turned on and you began
driving. (If you use the retro-active reset feature
after you have started the vehicle, but before you begin
moving, the display will show the number of miles
(kilometers) you drove during the last ignition cycle.)
Once you begin driving, the trip odometer will
accumulate mileage. For example, if you have driven
5.0 miles (8.0 km) since you started your vehicle,
and then activate the retro-active reset feature, the
display will show 5.0 miles (8.0 km). As you drive, the
display will then increase to 5.1 miles (8.2 km), 5.2 miles
(8.4 km), etc. Only the trip odometer that is displayed
will be affected by the retro-active reset so that both trip
odometers can be used separately.
Tachometer
Your vehicle may have a tachometer that displays the
engine speed in revolutions per minute (rpm).
Notice:If you operate the engine with the
tachometer in the shaded warning area, your vehicle
could be damaged, and the damages would not
be covered by your warranty. Do not operate
the engine with the tachometer in the shaded
warning area.
3-39
Page 397 of 486

{CAUTION:
Using the wrong replacement wheels, wheel
bolts or wheel nuts on your vehicle can be
dangerous. It could affect the braking and
handling of your vehicle, make your tires lose
air and make you lose control. You could have
a collision in which you or others could be
injured. Always use the correct wheel, wheel
bolts and wheel nuts for replacement.
Notice:The wrong wheel can also cause problems
with bearing life, brake cooling, speedometer or
odometer calibration, headlamp aim, bumper height,
vehicle ground clearance and tire or tire chain
clearance to the body and chassis.
See
Changing a Flat Tire on page 5-71for more
information.
Used Replacement Wheels
{CAUTION:
Putting a used wheel on your vehicle is
dangerous. You can't know how it's been used
or how far it's been driven. It could fail
suddenly and cause a crash. If you have to
replace a wheel, use a new GM original
equipment wheel.
Tire Chains
Notice:Use tire chains only where legal and only
when you must. Use only SAE Class ªSº type chains
that are the proper size for your tires. Install them
on the front tires and tighten them as tightly as
possible with the ends securely fastened. Drive
slowly and follow the chain manufacturer's
instructions. If you can hear the chains contacting
your vehicle, stop and retighten them. If the contact
continues, slow down until it stops. Driving too
fast or spinning the wheels with chains on will
damage your vehicle.
5-67
Page 440 of 486

Engine Oil and Chassis Lubrication
Scheduled Maintenance
Change engine oil and ®lter as indicated by the GM
Oil Life System (or every 12 months, whichever
occurs ®rst). Reset the system.
Your vehicle has a computer system that lets you know
when to change the engine oil and ®lter. This is
based on engine revolutions and engine temperature,
and not on mileage. Based on driving conditions,
the mileage at which an oil change will be indicated can
vary considerably. For the oil life system to work
properly, you must reset the system every time the oil is
changed.
When the system has calculated that oil life has been
diminished, it will indicate that an oil change is
necessary. A change engine oil message will come on.
Change your oil as soon as possible within the next
two times you stop for fuel. It is possible that, if you are
driving under the best conditions, the oil life system
may not indicate that an oil change is necessary for over
a year. However, your engine oil and ®lter must be
changed at least once a year and at this time the system
must be reset. Your dealer has GM-trained service
people who will perform this work using genuine GM
parts and reset the system.It is also important to check your oil regularly and keep
it at the proper level.
If the system is ever reset accidentally, you must
change your oil at 3,000 miles (5 000 km) since your
last oil change. Remember to reset the oil life system
whenever the oil is changed. See
Engine Oil on
page 5-13for information on resetting the system.
An Emission Control Service.
Lubricate chassis components with each engine oil
and ®lter change.
Lubricate the suspension, steering linkage, transaxle
shift linkage and the underbody contact points and
linkage.
See the mileage intervals following for additional
services that may be performed with an engine oil
change and chassis lubrication. After the services are
performed, record the date, odometer reading and
who performed the service on the maintenance record
pages in Part E of this schedule.
6-6
Page 453 of 486

Part E: Maintenance Record
After the scheduled services are performed, record the date, odometer reading and who performed the service and
any additional information from ªOwner Checks and Servicesº or ªPeriodic Maintenanceº on the following record
pages. Also, you should retain all maintenance receipts.
Maintenance Record
DateOdometer
ReadingServiced By Maintenance Record
6-19
Page 454 of 486

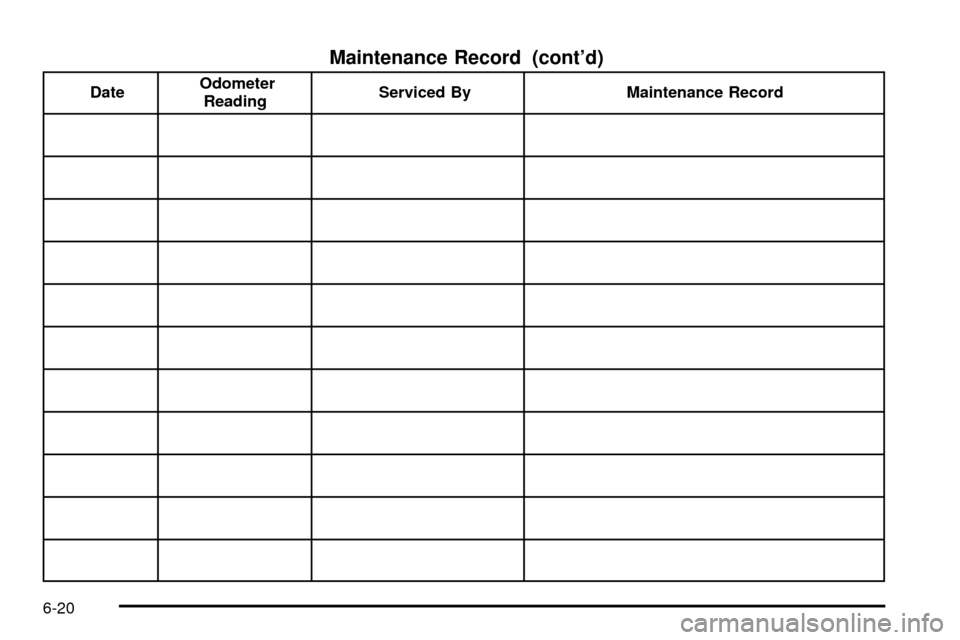
Maintenance Record (cont'd)
DateOdometer
ReadingServiced By Maintenance Record
6-20