2003 CHEVROLET VENTURE clock
[x] Cancel search: clockPage 132 of 486
3. If the power sliding door override is on, press the
textured end of the power sliding door override
switch to turn it off.
4. Remove fuse 29 from the underhood fuse block.
Leave it out for 30 seconds.
5. Reinstall the fuse and wait 10 seconds.
6. Turn the power sliding door override on by pressing
the end of the switch with the override symbol on it.
7. Press the power sliding door switch(es) to open the
power sliding door.
8. Open the door all of the way.
9. Wait ®ve seconds and close the door by pressing
the power sliding door switch(es).
10. Wait ®ve seconds and repeat Steps 7 through 9.
If the door does not rest in the fully open position after
repeating Step 7, repeat Steps 7 through 9 again. If
the door still does not operate correctly, see your dealer
for service.Liftgate
To unlock the liftgate from the outside, turn the key in
the cylinder clockwise or use the remote keyless
entry transmitter. To lock the liftgate using the key, turn
the key counterclockwise.
Open the liftgate using the handle located above the
license plate. Once slightly opened, the liftgate will rise
by itself. Lamps in the rear of the vehicle will come
on, illuminating the rear cargo area. See
Interior Lamps
on page 3-17.
Notice:If you open the liftgate without checking for
overhead obstructions such as a garage door,
you could break the liftgate glass. Always check to
make sure the area above the liftgate is clear
before opening it.
2-22
Page 154 of 486
Mirrors
Manual Rearview Mirror
To reduce glare from lights behind you, pull the lever
toward you (to the night position). To return the mirror to
the day position, push the lever away from you.
Outside Power Mirrors
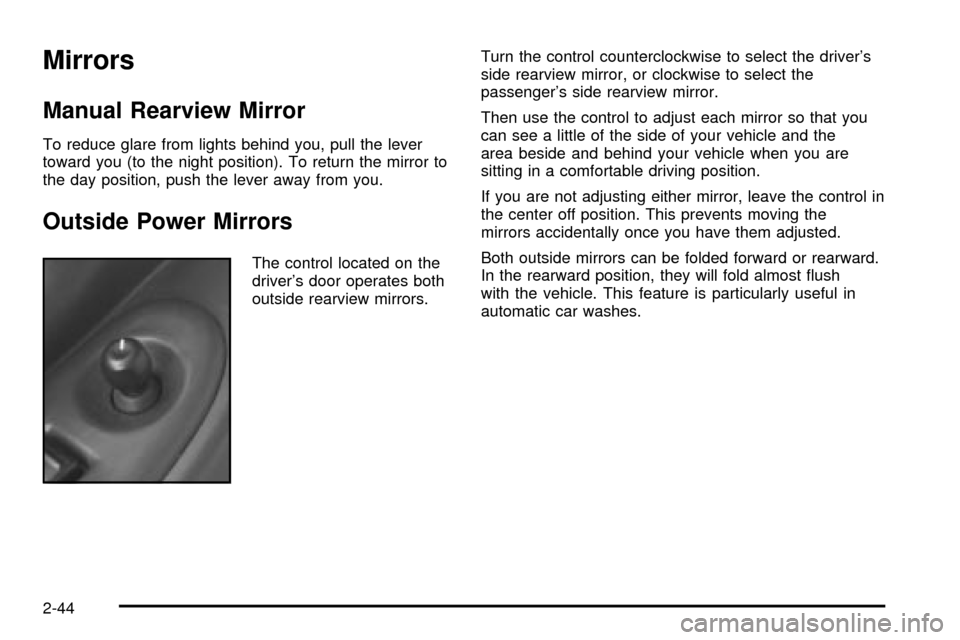
The control located on the
driver's door operates both
outside rearview mirrors.Turn the control counterclockwise to select the driver's
side rearview mirror, or clockwise to select the
passenger's side rearview mirror.
Then use the control to adjust each mirror so that you
can see a little of the side of your vehicle and the
area beside and behind your vehicle when you are
sitting in a comfortable driving position.
If you are not adjusting either mirror, leave the control in
the center off position. This prevents moving the
mirrors accidentally once you have them adjusted.
Both outside mirrors can be folded forward or rearward.
In the rearward position, they will fold almost ¯ush
with the vehicle. This feature is particularly useful in
automatic car washes.
2-44
Page 166 of 486
Notice:Loading cargo on the luggage carrier that
weighs more than 150 lbs. (68 kg) or hangs over the
rear or sides of the vehicle may damage your
vehicle. Load cargo so that it rests on the slats as
far forward as possible and against the side
rails, making sure to fasten it securely.
When you carry cargo on the luggage carrier of a
proper size and weight, put it on the slats, as far forward
as you can. Then slide the crossrail up against the
rear of the load, to help keep it from moving. You can
then tie it down.Don't exceed the maximum vehicle capacity when
loading your vehicle. For more information on vehicle
capacity and loading, see
Loading Your Vehicle on
page 4-34.
To prevent damage or loss of cargo as you're driving,
check now and then to make sure the luggage
carrier and cargo are still securely fastened.
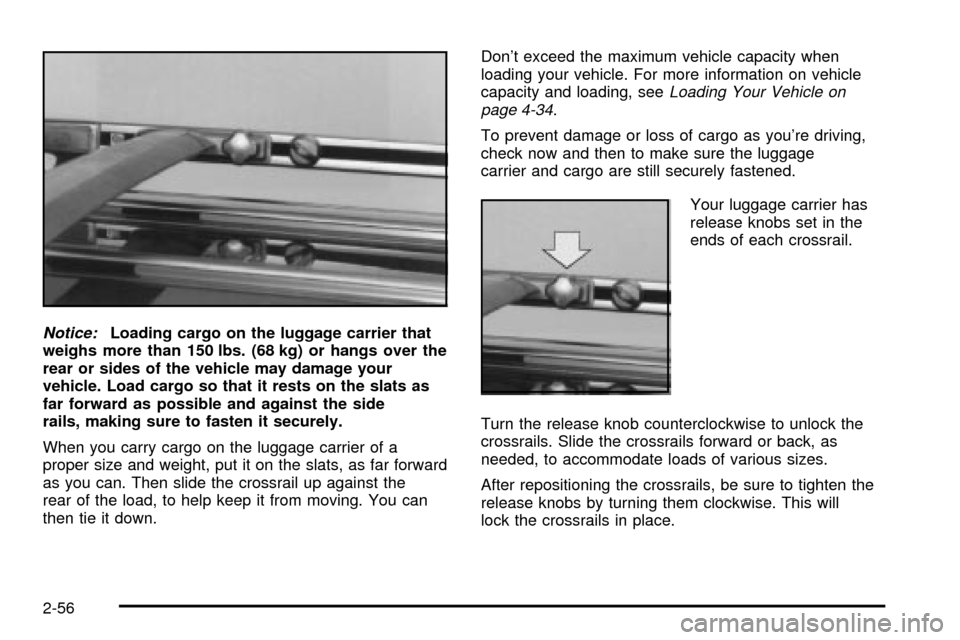
Your luggage carrier has
release knobs set in the
ends of each crossrail.
Turn the release knob counterclockwise to unlock the
crossrails. Slide the crossrails forward or back, as
needed, to accommodate loads of various sizes.
After repositioning the crossrails, be sure to tighten the
release knobs by turning them clockwise. This will
lock the crossrails in place.
2-56
Page 169 of 486
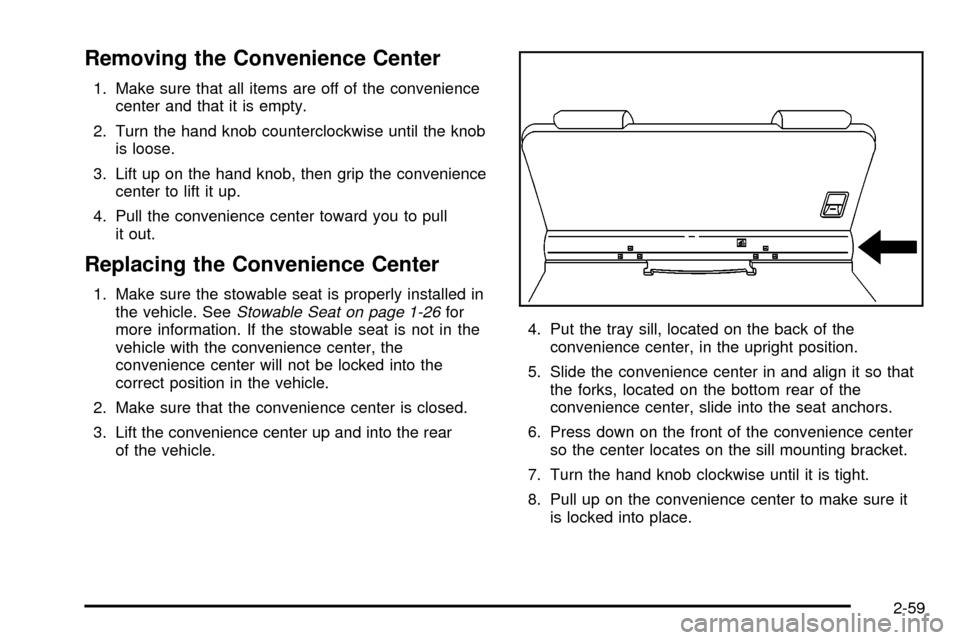
Removing the Convenience Center
1. Make sure that all items are off of the convenience
center and that it is empty.
2. Turn the hand knob counterclockwise until the knob
is loose.
3. Lift up on the hand knob, then grip the convenience
center to lift it up.
4. Pull the convenience center toward you to pull
it out.
Replacing the Convenience Center
1. Make sure the stowable seat is properly installed in
the vehicle. SeeStowable Seat on page 1-26for
more information. If the stowable seat is not in the
vehicle with the convenience center, the
convenience center will not be locked into the
correct position in the vehicle.
2. Make sure that the convenience center is closed.
3. Lift the convenience center up and into the rear
of the vehicle.4. Put the tray sill, located on the back of the
convenience center, in the upright position.
5. Slide the convenience center in and align it so that
the forks, located on the bottom rear of the
convenience center, slide into the seat anchors.
6. Press down on the front of the convenience center
so the center locates on the sill mounting bracket.
7. Turn the hand knob clockwise until it is tight.
8. Pull up on the convenience center to make sure it
is locked into place.
2-59
Page 205 of 486
Certain electrical accessories may not be compatible
with the accessory power outlet and could result
in blown vehicle or adapter fuses. If you experience a
problem see your dealer for additional information
on accessory power outlets.
Notice:Adding any electrical equipment to your
vehicle may damage it or keep other components
from working as they should. The repairs would not
be covered by your warranty. Check with your
dealer before adding electrical equipment.
When adding electrical equipment, be sure to follow the
proper installation instructions included with the
equipment.
Notice:Improper use of the power outlet can cause
damage not covered by your warranty. Do not
hang any type of accessory or accessory bracket
from the plug because the power outlets are
designed for accessory power plugs only.
Climate Controls
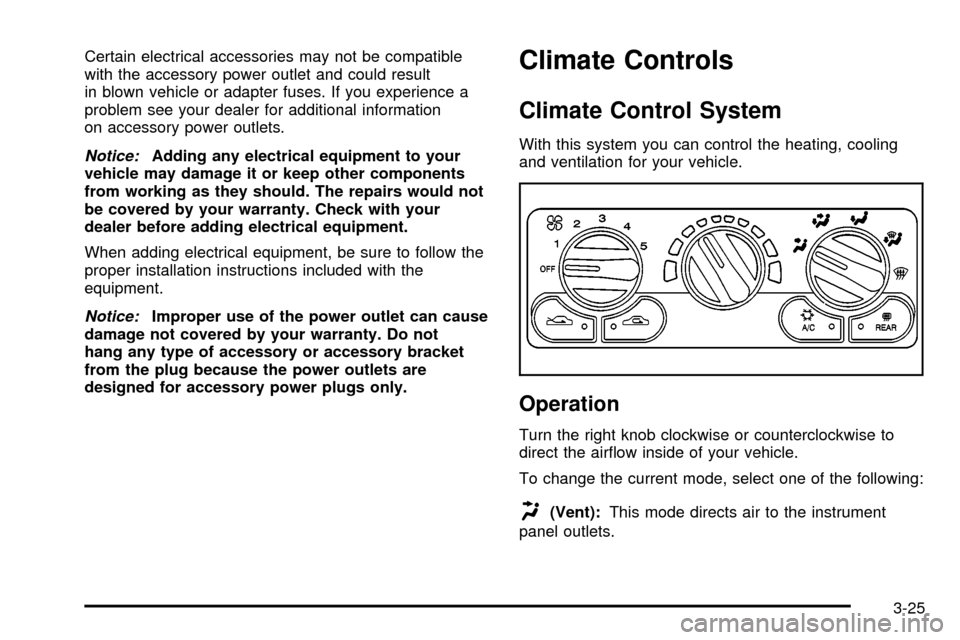
Climate Control System
With this system you can control the heating, cooling
and ventilation for your vehicle.
Operation
Turn the right knob clockwise or counterclockwise to
direct the air¯ow inside of your vehicle.
To change the current mode, select one of the following:
H(Vent):This mode directs air to the instrument
panel outlets.
3-25
Page 206 of 486
)(Bi-Level):This mode directs half of the air to the
instrument panel outlets, then directs the remaining
air to the ¯oor outlets. Cooler air is directed to the upper
outlets and warmer air to the ¯oor outlets.
6(Floor):This mode directs most of the air to the
¯oor outlets. Use this mode to send air to the rear of the
vehicle. Keep the area under the front seats free of
objects that could obstruct air¯ow to the rear of
the vehicle.
The right knob can also be used to select defog or
defrost mode. For more information, see ªDefogging and
Defrostingº later in this section.
9(Fan):Turn the left knob clockwise or
counterclockwise to increase or decrease the fan speed.
Turn the knob to OFF to turn off the fan. The fan
must be turned on for the air conditioning compressor to
operate.
:(Outside Air):Press this button to turn the
outside air mode on or off. When this mode is on,
outside air will circulate throughout your vehicle. When
this mode is on, an indicator light in the button will
come on to let you know that it is activated. The outside
air mode can be used with all modes, but it cannot
be used with the recirculation mode.
?(Recirculation):This mode keeps outside air
from coming in the vehicle. It can be used to prevent
outside air and odors from entering your vehicle or help
heat or cool the air inside your vehicle more quickly.
Press this button to turn the recirculation mode on or off.
When the button is pressed, an indicator light will
come on. The air-conditioning compressor also comes
on. The recirculation mode can be used with vent
and bi-level modes, but it cannot be used with ¯oor,
defog, defrost or outside air modes.
Temperature Control:Turn the center knob clockwise
or counterclockwise to increase or decrease the air
temperature inside your vehicle.
#A/C (Air Conditioning):Press this button to turn
the air-conditioning system on or off. When A/C is
pressed, an indicator light in the button will come on to
let you know that air conditioning is activated.
You may notice a slight change in engine performance
when the air-conditioning compressor shuts off and
turns on again. This is normal. The system is designed
to make adjustments to help with fuel economy while
still maintaining the selected temperature.
On hot days, open the windows to let hot inside air
escape; then close them. This helps to reduce the time
it takes for your vehicle to cool down. It also helps
the system to operate more efficiently.
3-26
Page 210 of 486
Directing the Air¯ow
To direct the air¯ow to the rear-seating area, use the
right knob located on the main climate-control panel.
·Select vent or bi-level mode to direct air to the
rear of the vehicle through the overhead outlets.
·Select ¯oor, defog or defrost mode to direct air to
the rear of the vehicle through the ¯oor outlets.
Generally the upper outlets are used for air conditioning
and the ¯oor outlets are used for heating.
Selecting the Fan Speed
9
(Fan):Turn the fan knob on either rear fan control
to numeral 1, 2, or 3 to increase or decrease air¯ow
to the rear-seating area. Turn the fan knob on either rear
fan control to 0 or OFF to turn off the fan.
Setting the Temperature
If the driver is adjusting the temperature, do the
following:
To increase or decrease the temperature for the entire
vehicle, use the temperature controls located on the
main climate-control panel.If using the main climate-control panel, then the
air-conditioning system must be on to direct cooled air
to the rear of the vehicle. If it is not on, then the
temperature in the rear of the vehicle will remain at
cabin temperature.
If a rear-seat passenger is adjusting the temperature, do
the following:
Turn the right knob, located on the overhead rear-control
panel, behind the driver's seat, clockwise or
counterclockwise to raise or lower the temperature in
the rear-seating area only.
Rear Air Outlets
To increase air¯ow through the rear ¯oor outlets, place
the left bucket seat in the second row in the forward
position. For more information, see
Rear Seat Operation
on page 1-7.
The outlet behind the left rear seat is the cold air return
outlet. Be sure to keep it free from obstructions.
Also, keep the area around the base of the center
instrument panel console, between and under the front
seats, free of objects that could also obstruct air¯ow
to the rear-seating area.
For more information on how to use the main climate
control system, see ªClimate Control Systemº listed
previously in this section. For information on ventilation,
see ªOutlet Adjustmentº under ªClimate Control
Systemº listed previously in this section.
3-30
Page 259 of 486
Cassette Tape Messages
CHK TAPE (Check Tape):If this message appears on
the radio display, the tape won't play because of one
of the following errors.
·The tape is tight and the player can't turn the tape
hubs. Remove the tape. Hold the tape with the
open end down and try to turn the right hub
counterclockwise with a pencil. Turn the tape over
and repeat. If the hubs do not turn easily, your
tape may be damaged and should not be used in
the player. Try a new tape to make sure your player
is working properly.
·The tape is broken. Try a new tape.
·The tape is wrapped around the tape head. Attempt
to get the cassette out. Try a new tape.
CLEAN:If this message appears on the display, the
cassette tape player needs to be cleaned. It will still play
tapes, but you should clean it as soon as possible to
prevent damage to the tapes and player. See
Care
of Your Cassette Tape Player on page 3-104.
If any error occurs repeatedly or if an error can't be
corrected, contact your dealer.
CD Adapter Kits
It is possible to use a portable CD player adapter kit
with your cassette tape player after disabling the
tight/loose tape sensing feature on your tape player.
To disable the feature, use the following steps:
1. Turn the ignition on.
2. Turn the radio off.
3. Press and hold the TAPE CD button. The radio will
display READY and ¯ash the cassette symbol.
4. Insert the adapter into the cassette slot. It will
power up the radio and begin playing.
The override feature will remain active until EJT is
pressed.
Playing a Compact Disc
Insert a disc partway into the slot, label side up. The
player will pull it in and the disc should begin playing.
The display will show the CD symbol. If you want
to insert a compact disc with the ignition off, ®rst press
DISPL or EJT.
If an error appears on the display, see ªCompact Disc
Messagesº later in this section.
3-79