2003 CHEVROLET MALIBU height
[x] Cancel search: heightPage 20 of 326
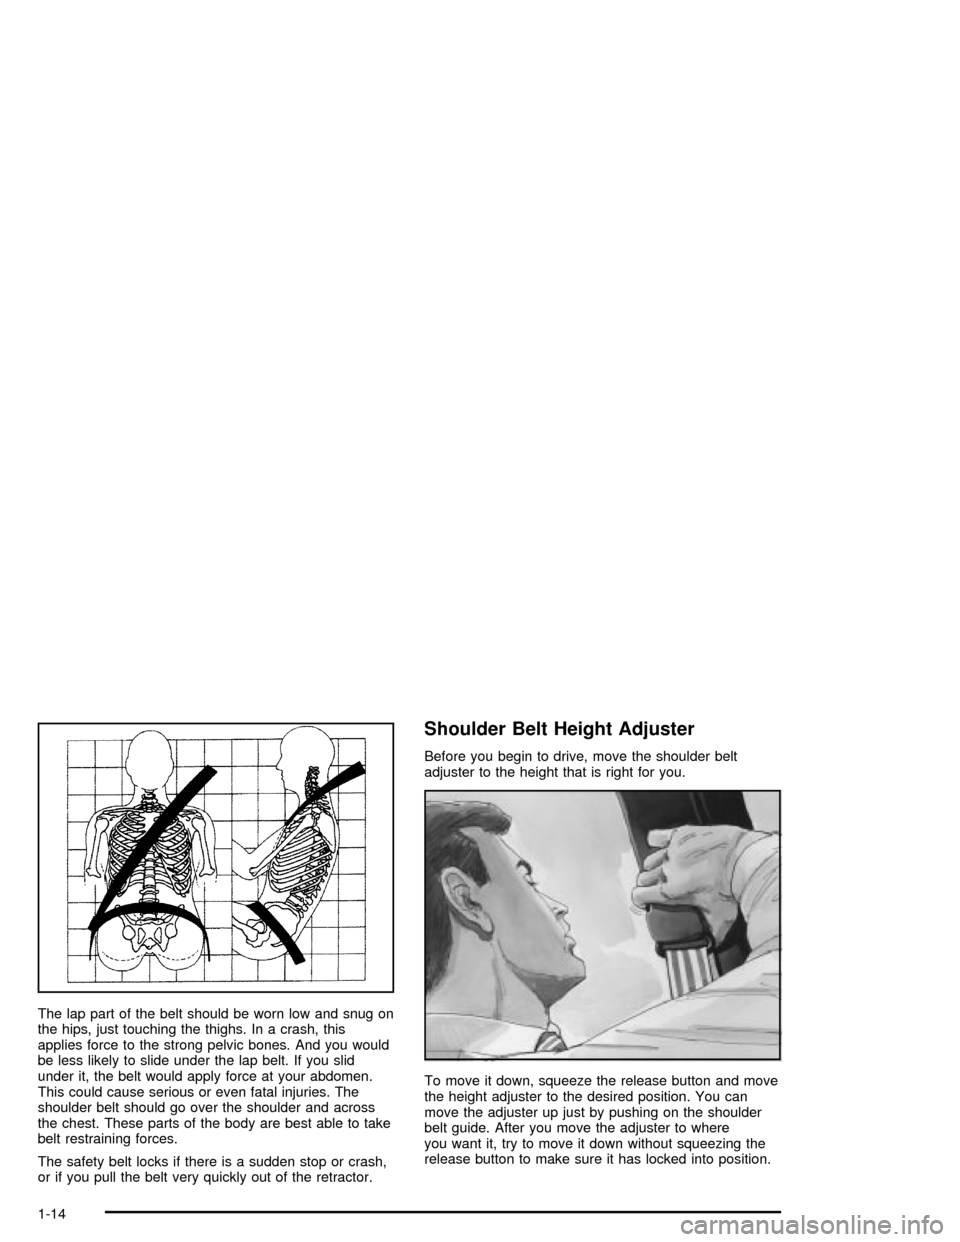
The lap part of the belt should be worn low and snug on
the hips, just touching the thighs. In a crash, this
applies force to the strong pelvic bones. And you would
be less likely to slide under the lap belt. If you slid
under it, the belt would apply force at your abdomen.
This could cause serious or even fatal injuries. The
shoulder belt should go over the shoulder and across
the chest. These parts of the body are best able to take
belt restraining forces.
The safety belt locks if there is a sudden stop or crash,
or if you pull the belt very quickly out of the retractor.
Shoulder Belt Height Adjuster
Before you begin to drive, move the shoulder belt
adjuster to the height that is right for you.
To move it down, squeeze the release button and move
the height adjuster to the desired position. You can
move the adjuster up just by pushing on the shoulder
belt guide. After you move the adjuster to where
you want it, try to move it down without squeezing the
release button to make sure it has locked into position.
1-14
Page 21 of 326
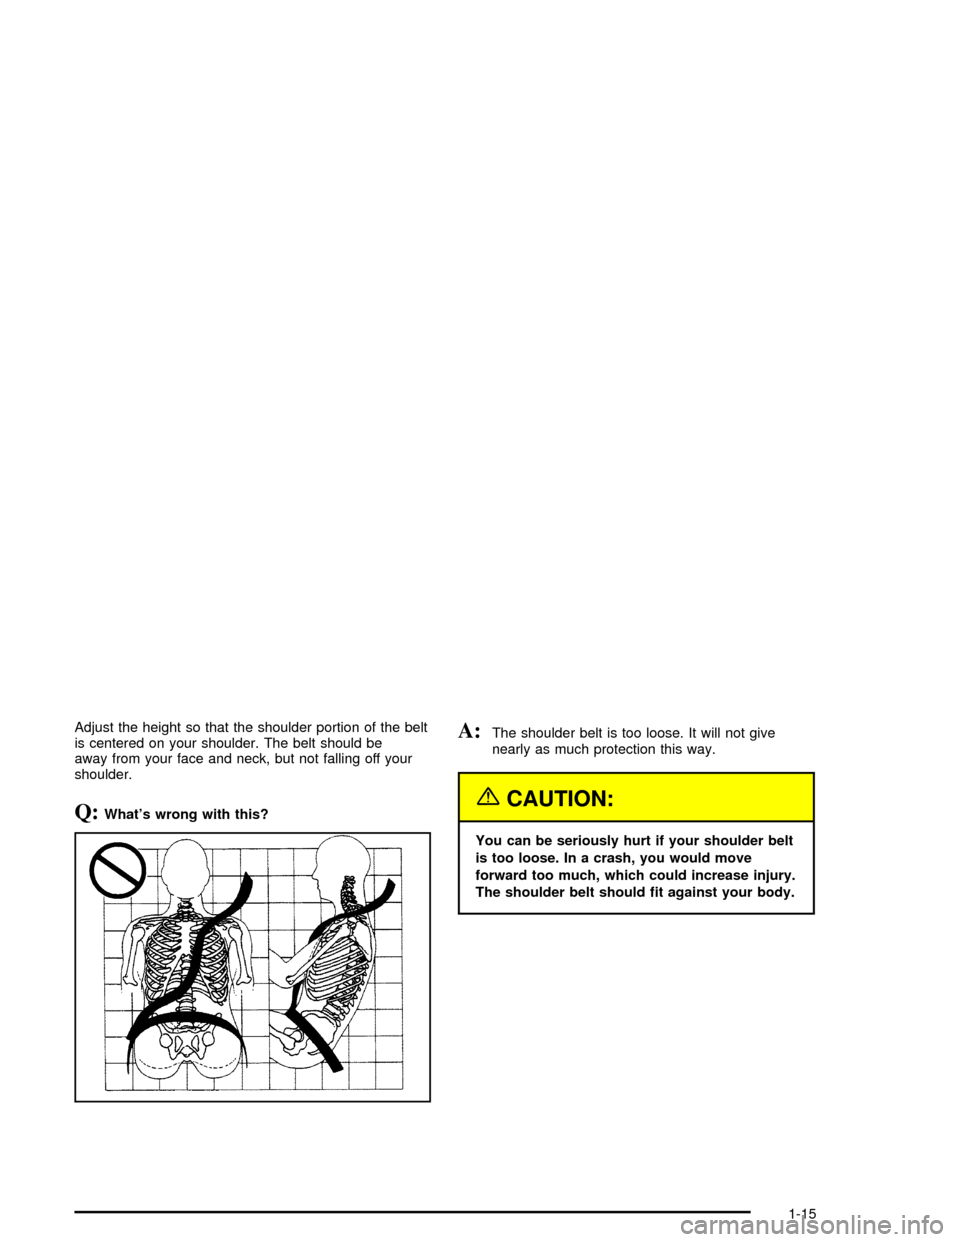
Adjust the height so that the shoulder portion of the belt
is centered on your shoulder. The belt should be
away from your face and neck, but not falling off your
shoulder.
Q:What's wrong with this?
A:The shoulder belt is too loose. It will not give
nearly as much protection this way.
{CAUTION:
You can be seriously hurt if your shoulder belt
is too loose. In a crash, you would move
forward too much, which could increase injury.
The shoulder belt should ®t against your body.
1-15
Page 39 of 326
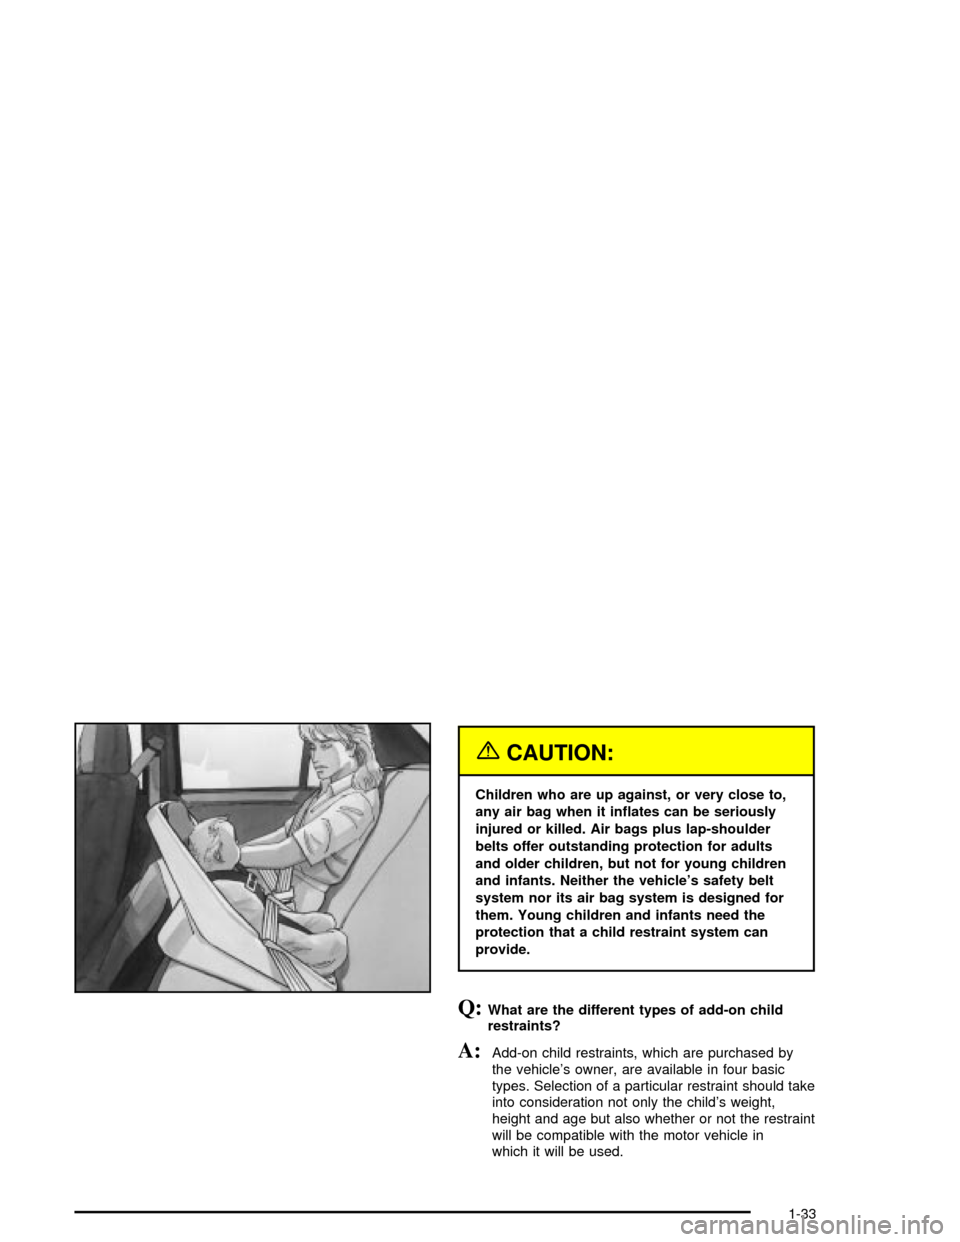
{CAUTION:
Children who are up against, or very close to,
any air bag when it in¯ates can be seriously
injured or killed. Air bags plus lap-shoulder
belts offer outstanding protection for adults
and older children, but not for young children
and infants. Neither the vehicle's safety belt
system nor its air bag system is designed for
them. Young children and infants need the
protection that a child restraint system can
provide.
Q:What are the different types of add-on child
restraints?
A:Add-on child restraints, which are purchased by
the vehicle's owner, are available in four basic
types. Selection of a particular restraint should take
into consideration not only the child's weight,
height and age but also whether or not the restraint
will be compatible with the motor vehicle in
which it will be used.
1-33
Page 40 of 326
For most basic types of child restraints, there are
many different models available. When purchasing a
child restraint, be sure it is designed to be used
in a motor vehicle. If it is, the restraint will have a
label saying that it meets federal motor vehicle
safety standards.
The restraint manufacturer's instructions that come
with the restraint, state the weight and height
limitations for a particular child restraint. In addition,
there are many kinds of restraints available for
children with special needs.
{CAUTION:
Newborn infants need complete support,
including support for the head and neck. This is
necessary because a newborn infant's neck is
weak and its head weighs so much compared
with the rest of its body. In a crash, an infant in a
rear-facing seat settles into the restraint, so the
crash forces can be distributed across the
strongest part of an infant's body, the back and
shoulders. Infants always should be secured in
appropriate infant restraints.
{CAUTION:
The body structure of a young child is quite
unlike that of an adult or older child, for whom
the safety belts are designed. A young child's
hip bones are still so small that the vehicle's
regular safety belt may not remain low on the
hip bones, as it should. Instead, it may settle
up around the child's abdomen. In a crash, the
belt would apply force on a body area that's
unprotected by any bony structure. This alone
could cause serious or fatal injuries. Young
children always should be secured in
appropriate child restraints.
1-34
Page 90 of 326

Mirrors
Manual Rearview Mirror
This mirror can be adjusted two ways. First, to adjust
the angle of the mirror, move the mirror to a position that
allows you see to out of the back window. To adjust
the height of the mirror, adjust the arm that connects the
mirror to the windshield.
To reduce glare from lights behind you, move the lever
toward you to the night position.
Outside Remote Control Mirrors
The outside remote control mirrors should be adjusted
so you can see a little of the side of your vehicle
when you are sitting in a comfortable driving position.To adjust the driver's
outside rearview mirror use
the lever located on the
driver's door.
To adjust the passenger's outside mirror, sit in the
driver's seat and have the passenger use the lever on
the passenger's door to adjust that mirror for you.
2-28
Page 229 of 326

Properly torqued wheel nuts are necessary to help
prevent brake pulsation. When tires are rotated, inspect
brake pads for wear and evenly tighten wheel nuts in
the proper sequence to GM torque speci®cations.
Your rear drum brakes don't have wear indicators, but if
you ever hear a rear brake rubbing noise, have the
rear brake linings inspected immediately. Also, the rear
brake drums should be removed and inspected each
time the tires are removed for rotation or changing.
When you have the front brake pads replaced, have the
rear brakes inspected, too.
Brake linings should always be replaced as complete
axle sets.
See
Brake System Inspection on page 6-20.
Brake Pedal Travel
See your dealer if the brake pedal does not return to
normal height, or if there is a rapid increase in
pedal travel. This could be a sign of brake trouble.
Brake Adjustment
Every time you make a moderate brake stop, your disc
brakes adjust for wear. If you rarely make a moderate or
heavier stop, then your brakes might not adjust correctly.
If you drive in that way, then Ð very carefully Ð make a
few moderate brake stops about every 1,000 miles
(1 600 km), so your brakes will adjust properly.If your brake pedal goes down farther than normal, your
rear drum brakes may need adjustment. Adjust them
by pumping the brake pedal repeatedly while the engine
is running with the shift lever in PARK (P).
Replacing Brake System Parts
The braking system on a vehicle is complex. Its many
parts have to be of top quality and work well together if
the vehicle is to have really good braking. Your
vehicle was designed and tested with top-quality GM
brake parts. When you replace parts of your braking
system Ð for example, when your brake linings
wear down and you need new ones put in Ð be sure
you get new approved replacement parts. If you
don't, your brakes may no longer work properly. For
example, if someone puts in brake linings that are wrong
for your vehicle, the balance between your front and
rear brakes can change Ð for the worse. The braking
performance you've come to expect can change in
many other ways if someone puts in the wrong
replacement brake parts.
5-35
Page 249 of 326
{CAUTION:
Using the wrong replacement wheels, wheel
bolts or wheel nuts on your vehicle can be
dangerous. It could affect the braking and
handling of your vehicle, make your tires lose
air and make you lose control. You could have
a collision in which you or others could be
injured. Always use the correct wheel, wheel
bolts and wheel nuts for replacement.
Notice:The wrong wheel can also cause problems
with bearing life, brake cooling, speedometer or
odometer calibration, headlamp aim, bumper height,
vehicle ground clearance and tire or tire chain
clearance to the body and chassis.
See
Changing a Flat Tire on page 5-57for more
information.
Used Replacement Wheels
{CAUTION:
Putting a used wheel on your vehicle is
dangerous. You can't know how it's been used
or how far it's been driven. It could fail suddenly
and cause a crash. If you have to replace a
wheel, use a new GM original equipment wheel.
Tire Chains
Notice:Use tire chains only where legal and only
when you must. Use only SAE Class ªSº type chains
that are the proper size for your tires. Install them
on the front tires and tighten them as tightly as
possible with the ends securely fastened. Drive
slowly and follow the chain manufacturer's
instructions. If you can hear the chains contacting
your vehicle, stop and retighten them. If the contact
continues, slow down until it stops. Driving too
fast or spinning the wheels with chains on will
damage your vehicle.
5-55
Page 324 of 326

Service........................................................... 5-3
Adding Equipment to the Outside of
Your Vehicle.............................................. 5-4
Doing Your Own Work................................... 5-3
Engine Soon Light.......................................3-30
Publications Ordering Information..................... 7-9
Vehicle Soon Light.......................................3-35
Setting Preset Stations....................3-38, 3-42, 3-49
Setting the Time.............................................3-37
Radios with Radio Data
Systems (RDS)........................................3-37
Radios without Radio Data
Systems (RDS)........................................3-36
Setting the Tone (Bass/Treble)..........3-38, 3-43, 3-49
Sheet Metal Damage.......................................5-72
Shifting Into Park (P).......................................2-23
Shifting Out of Park (P)...................................2-25
Short Trip/City De®nition.................................... 6-4
Short Trip/City Intervals..................................... 6-5
Short Trip/City Scheduled Maintenance................ 6-6
Shoulder Belt Height Adjuster...........................1-14
Skidding........................................................4-13
Some Other Rainy Weather Tips.......................4-17
Special Fabric Cleaning Problems.....................5-69
Speci®cations, Capacities.................................5-82
Speedometer..................................................3-24
Starter Switch Check.......................................6-17
Starting Your Engine.......................................2-18
Steering.......................................................... 4-8
Steering in Emergencies..................................4-10Steering, Suspension and Front Drive Axle
Boot and Seal Inspection..............................6-19
Steering Tips................................................... 4-9
Storage Areas................................................2-30
Center Console Storage Area........................2-30
Cupholder(s)...............................................2-30
Glove Box..................................................2-30
Storage.........................................................2-30
Garment Hooks...........................................2-30
Storing the Flat Tire and Tools..........................5-65
Storing the Spare Tire and Tools.......................5-66
Stuck in Sand, Mud, Ice or Snow......................4-27
Sun Visors.....................................................2-15
Sunroof.........................................................2-31
Supplemental Restraint System (SRS)...............1-48
How Does an Air Bag Restrain?....................1-52
Servicing Your Air Bag-Equipped Vehicle.........1-54
What Makes an Air Bag In¯ate?....................1-52
What Will You See After an
Air Bag In¯ates?.......................................1-52
When Should an Air Bag In¯ate?...................1-51
Where Are the Air Bags?..............................1-50
T
Tachometer....................................................3-25
Taillamps.......................................................5-45
Turn Signal, Stoplamps and Back-up Lamps....5-45
Theft-Deterrent, Radio.....................................3-57
12