2003 CHEVROLET EXPRESS CARGO VAN light
[x] Cancel search: lightPage 221 of 386

{CAUTION:
Snow can trap exhaust gases under your
vehicle. This can cause deadly CO (carbon
monoxide) gas to get inside. CO could
overcome you and kill you. You can't see it or
smell it, so you might not know it is in your
vehicle. Clear away snow from around the
base of your vehicle, especially any that is
blocking your exhaust pipe. And check around
again from time to time to be sure snow
doesn't collect there.
Open a window just a little on the side of the
vehicle that's away from the wind. This will
help keep CO out.Run your engine only as long as you must. This saves
fuel. When you run the engine, make it go a little
faster than just idle. That is, push the accelerator
slightly. This uses less fuel for the heat that you get and
it keeps the battery (or batteries) charged. You will
need a well-charged battery (or batteries) to restart the
vehicle, and possibly for signaling later on with your
headlamps. Let the heater run for a while.
Then, shut the engine off and close the window almost
all the way to preserve the heat. Start the engine
again and repeat this only when you feel really
uncomfortable from the cold. But do it as little as
possible. Preserve the fuel as long as you can. To help
keep warm, you can get out of the vehicle and do
some fairly vigorous exercises every half hour or so until
help comes.
4-27
Page 222 of 386

If You Are Stuck: In Sand, Mud, Ice
or Snow
In order to free your vehicle when it is stuck, you will
need to spin the wheels, but you don't want to spin your
wheels too fast. The method known as ªrockingº can
help you get out when you're stuck, but you must
use caution.
{CAUTION:
If you let your tires spin at high speed, they
can explode, and you or others could be
injured. And, the transmission or other parts of
the vehicle can overheat. That could cause an
engine compartment ®re or other damage.
When you're stuck, spin the wheels as little as
possible. Don't spin the wheels above 35 mph
(55 km/h) as shown on the speedometer.
Notice:Spinning your wheels can destroy parts of
your vehicle as well as the tires. If you spin the
wheels too fast while shifting your transmission
back and forth, you can destroy your transmission.
For information about using tire chains on your
vehicle, see
Tire Chains on page 5-63.
Rocking Your Vehicle To Get It Out
First, turn your steering wheel left and right. That will
clear the area around your front wheels. Then shift back
and forth between REVERSE (R) and a forward gear,
spinning the wheels as little as possible. Release
the accelerator pedal while you shift, and press lightly
on the accelerator pedal when the transmission is
in gear. By slowly spinning your wheels in the forward
and reverse directions, you will cause a rocking
motion that may free your vehicle. If that doesn't get
you out after a few tries, you may need to be towed out.
If you do need to be towed out, see ªTowing Your
Vehicleº following.
4-28
Page 227 of 386

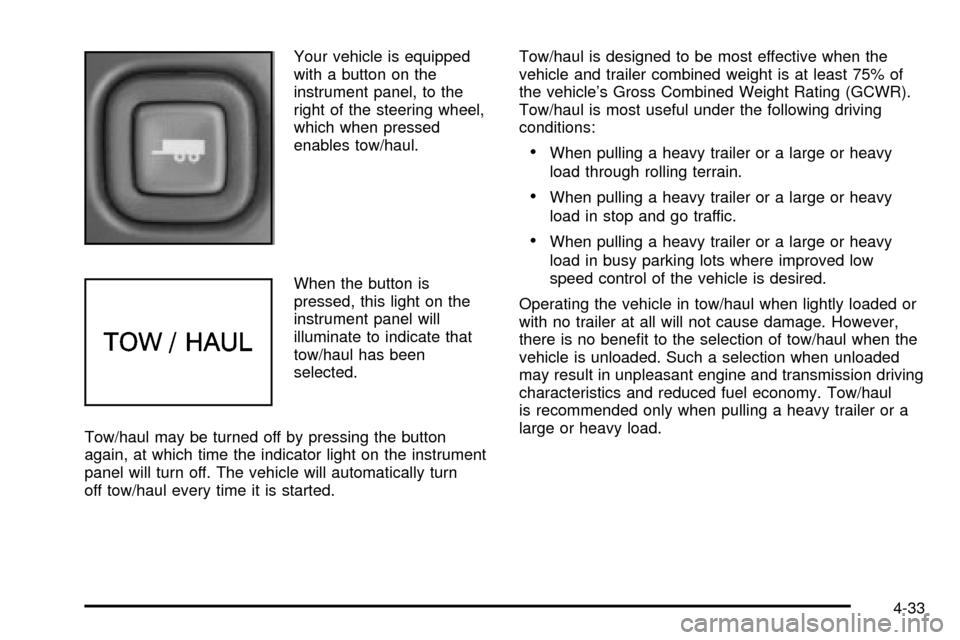
Your vehicle is equipped
with a button on the
instrument panel, to the
right of the steering wheel,
which when pressed
enables tow/haul.
When the button is
pressed, this light on the
instrument panel will
illuminate to indicate that
tow/haul has been
selected.
Tow/haul may be turned off by pressing the button
again, at which time the indicator light on the instrument
panel will turn off. The vehicle will automatically turn
off tow/haul every time it is started.Tow/haul is designed to be most effective when the
vehicle and trailer combined weight is at least 75% of
the vehicle's Gross Combined Weight Rating (GCWR).
Tow/haul is most useful under the following driving
conditions:
·When pulling a heavy trailer or a large or heavy
load through rolling terrain.
·When pulling a heavy trailer or a large or heavy
load in stop and go traffic.
·When pulling a heavy trailer or a large or heavy
load in busy parking lots where improved low
speed control of the vehicle is desired.
Operating the vehicle in tow/haul when lightly loaded or
with no trailer at all will not cause damage. However,
there is no bene®t to the selection of tow/haul when the
vehicle is unloaded. Such a selection when unloaded
may result in unpleasant engine and transmission driving
characteristics and reduced fuel economy. Tow/haul
is recommended only when pulling a heavy trailer or a
large or heavy load.
4-33
Page 238 of 386

Trailer Wiring Harness
The optional heavy-duty trailer wiring package includes
a seven-wire harness assembly at the rear of the
vehicle and a four-wire harness assembly under the left
hand side of the instrument panel. The seven-wire
harness assembly is taped together and located in a
frame pocket at the driver side rear left corner of
the frame. The seven-wire harness includes a
30-amp feed wire. Both harnesses come without
connectors and should be wired by a quali®ed electrical
technician. The technician can use the following
color code chart when connecting the wiring harness to
your trailer and trailer brake controller.Seven-Wire Harness·Light Green: Back-up lamps
·Brown: Parking lamps
·Yellow: Left stoplamp and turn signal
·Dark Green: Right stoplamp and turn signal
·Dark Blue: Use for electric trailer brakes
·Orange: Trailer accessory
·White (heavy gage): Ground wire
Four-Wire Harness (Trailer Brake Controller)
·Black: Ground
·Red/White Stripe: Fused Battery
·Dark Blue: Trailer Brake Feed
·Light Blue: Fused Stop/CHMSL
4-44
Page 250 of 386

Cassette Tape Player Service
Clean cassette tape player. Cleaning should be done
every 50 hours of tape play. SeeAudio System(s)
on page 3-40for further details.
At Least Twice a Year
Restraint System Check
Make sure the safety belt reminder light and all your
belts, buckles, latch plates, retractors and anchorages
are working properly. Look for any other loose or
damaged safety belt system parts. If you see anything
that might keep a safety belt system from doing its
job, have it repaired. Have any torn or frayed safety belts
replaced.
Also look for any opened or broken air bag coverings,
and have them repaired or replaced. (The air bag
system does not need regular maintenance.)
Wiper Blade Check
Inspect wiper blades for wear or cracking. Replace
blade inserts that appear worn or damaged or that
streak or miss areas of the windshield. Also see
Cleaning the Outside of Your Vehicle on page 5-84.
Spare Tire Check
At least twice a year, after the monthly in¯ation check of
the spare tire determines that the spare is in¯ated to
the correct tire in¯ation pressure, make sure that
the spare tire is stored securely. Push, pull, and then try
to rotate or turn the tire. If it moves, use the
ratchet/wheel wrench to tighten the cable. See
Changing
a Flat Tire on page 5-65.
Weatherstrip Lubrication
Silicone grease on weatherstrips will make them last
longer, seal better, and not stick or squeak. Apply
silicone grease with a clean cloth. During very cold,
damp weather more frequent application may be
required. See
Part D: Recommended Fluids and
Lubricants on page 6-18.
Automatic Transmission Check
Check the transmission ¯uid level; add if needed. SeeAutomatic Transmission Fluid on page 5-19. A ¯uid loss
may indicate a problem. Check the system and repair
if needed.
6-12
Page 266 of 386

RoadsideCourtesy Careprovides:
·RoadsideBasic Careservices
(as outlined previously)
Plus:
·FREE Non-Warranty Towing (to the closest dealer
from a legal roadway)
·FREE Locksmith/Key Service (when keys are lost
on the road or locked inside)
·FREE Flat Tire Service (spare installed on the road)
·FREE Jump Start (at home or on the road)
·FREE Fuel Delivery ($5 of fuel delivered
on the road)
Chevrolet offers Courtesy Transportation for customers
needing warranty service. Courtesy Transportation
will be offered in conjunction with the coverage provided
by the Bumper-to-Bumper New Vehicle Limited
Warranty to eligible purchasers of 2003 Chevrolet
passenger cars and light duty trucks. (See your selling
dealer for details.)
Courtesy Careis available to retail and retail lease
customers operating 2003 and newer Chevrolet vehicles
for a period of 3 years/36,000 miles (60 000 km),
whichever occurs ®rst. All
Courtesy Careservices must
be pre-arranged by Chevrolet Roadside or dealer
service management.
Basic CareandCourtesy Careare not part of or
included in the coverage provided by the New Vehicle
Limited Warranty. Chevrolet reserves the right to
modify or discontinue
Basic CareandCourtesy Careat
any time.
The Roadside Assistance Center uses companies that
will provide you with quality and priority service.
When roadside services are required, our advisors will
explain any payment obligations that may be incurred
for utilizing outside services.
For prompt assistance when calling, please have the
following available to give to the advisor;
·Vehicle Identi®cation Number (VIN)
·License plate number
·Vehicle color
·Vehicle location
·Telephone number where you can be reached
·Vehicle mileage
·Description of problem
Canadian Roadside Assistance
Vehicles purchased in Canada have an extensive
Roadside Assistance program accessible from anywhere
in Canada or the United States. Please refer to the
Warranty and Owner Assistance Information book.
7-6
Page 278 of 386

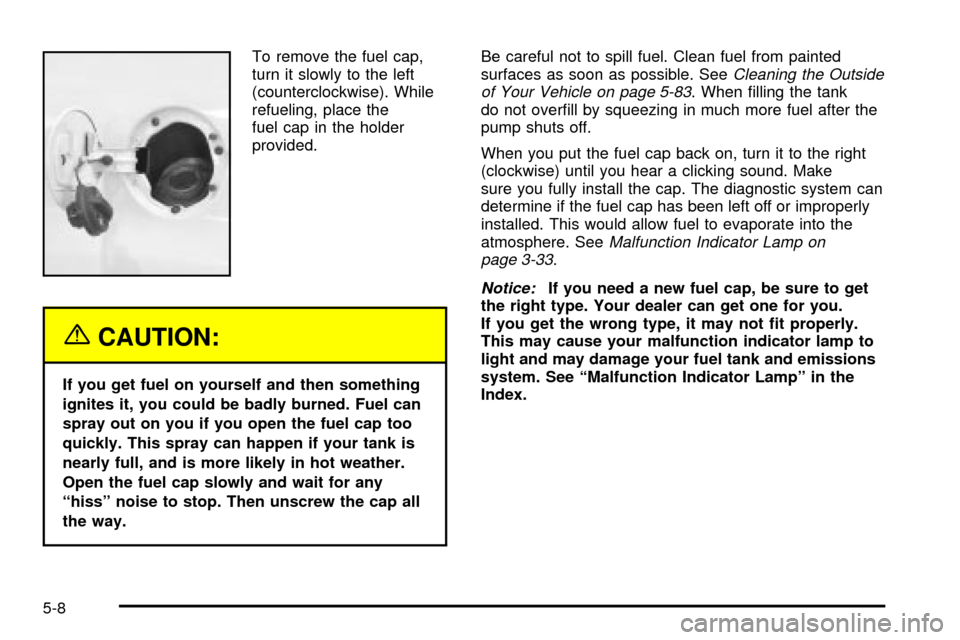
To remove the fuel cap,
turn it slowly to the left
(counterclockwise). While
refueling, place the
fuel cap in the holder
provided.
{CAUTION:
If you get fuel on yourself and then something
ignites it, you could be badly burned. Fuel can
spray out on you if you open the fuel cap too
quickly. This spray can happen if your tank is
nearly full, and is more likely in hot weather.
Open the fuel cap slowly and wait for any
ªhissº noise to stop. Then unscrew the cap all
the way.Be careful not to spill fuel. Clean fuel from painted
surfaces as soon as possible. See
Cleaning the Outside
of Your Vehicle on page 5-83. When ®lling the tank
do not over®ll by squeezing in much more fuel after the
pump shuts off.
When you put the fuel cap back on, turn it to the right
(clockwise) until you hear a clicking sound. Make
sure you fully install the cap. The diagnostic system can
determine if the fuel cap has been left off or improperly
installed. This would allow fuel to evaporate into the
atmosphere. See
Malfunction Indicator Lamp on
page 3-33.
Notice:If you need a new fuel cap, be sure to get
the right type. Your dealer can get one for you.
If you get the wrong type, it may not ®t properly.
This may cause your malfunction indicator lamp to
light and may damage your fuel tank and emissions
system. See ªMalfunction Indicator Lampº in the
Index.
5-8
Page 286 of 386

When to Change Engine Oil
If any one of these are true for you, use the short
trip/city maintenance schedule:
·Most trips are less than 5 miles (8 km). This is
particularly important when outside temperatures
are below freezing.
·Most trips include extensive idling (such as frequent
driving in stop-and-go traffic).
·You frequently tow a trailer or use a carrier on top
of your vehicle.
·The vehicle is used for delivery service, police, taxi
or other commercial application.
Driving under these conditions causes engine oil to
break down sooner. If any one of these is true for your
vehicle, then you need to change your oil and ®lter
every 3,000 miles (5 000 km) or 3 months Ð whichever
occurs ®rst.
If none of them is true, use the long trip/highway
maintenance schedule. Change the oil and ®lter every
7,500 miles (12 500 km) or 12 months Ð whichever
occurs ®rst. Driving a vehicle with a fully warmed engine
under highway conditions will cause engine oil to
break down slower.
How to Reset the CHANGE ENGINE
OIL Light
The GM Oil Life System calculates when to change
your engine oil and ®lter based on vehicle use. Anytime
your oil is changed, reset the system so it can
calculate when the next oil change is required. If a
situation occurs where you change your oil prior to a
CHANGE ENGINE OIL light being turned on, reset the
system.
To reset the CHANGE ENGINE OIL light, do the
following:
1. Turn the ignition key to RUN with the engine off.
2. Fully press and release the accelerator pedal
three times within ®ve seconds.
3. If the CHANGE ENGINE OIL light ¯ashes for ®ve
seconds, the system is reset.
If the system does not reset, try the procedure once
again. If it still does not reset, see your dealer for
service.
See
Change Engine Oil Light on page 3-37.
5-16