2003 CHEVROLET CORVETTE steering
[x] Cancel search: steeringPage 112 of 368

Your memory settings are now programmed. Any
changes that are made to the audio system and climate
controls while driving will be automatically stored
when the ignition key is turned off.
When ®rst entering your vehicle, after pressing the
unlock button on your remote keyless entry transmitter
or a MEMORY button, a recall of your settings will
occur when the door is closed and the ignition key is in
the ignition switch. As the memory settings are
recalled, the light above the button will ¯ash until the
correct settings are achieved, then glow for ®ve seconds
when complete.A memory recall can be stopped by pressing any
memory seat, mirror or steering column position button.
Drivers 1, 2 and 3 correspond to the order in which
your remote keyless entry transmitters were
programmed. See
Remote Keyless Entry System on
page 2-4for more information.
Memory recall will not work if the vehicle is moving.
Memory recall will be temporarily interrupted during
engine crank.
If easy entry is on, you must press the MEMORY button
to reset the seat.
2-56
Page 117 of 368

Horn
To sound the horn, press either horn symbol on the
steering wheel.
Tilt Wheel
A tilt wheel allows you to adjust the steering wheel
before you drive. You can raise it to the highest level to
give your legs more room when you exit and enter
the vehicle.
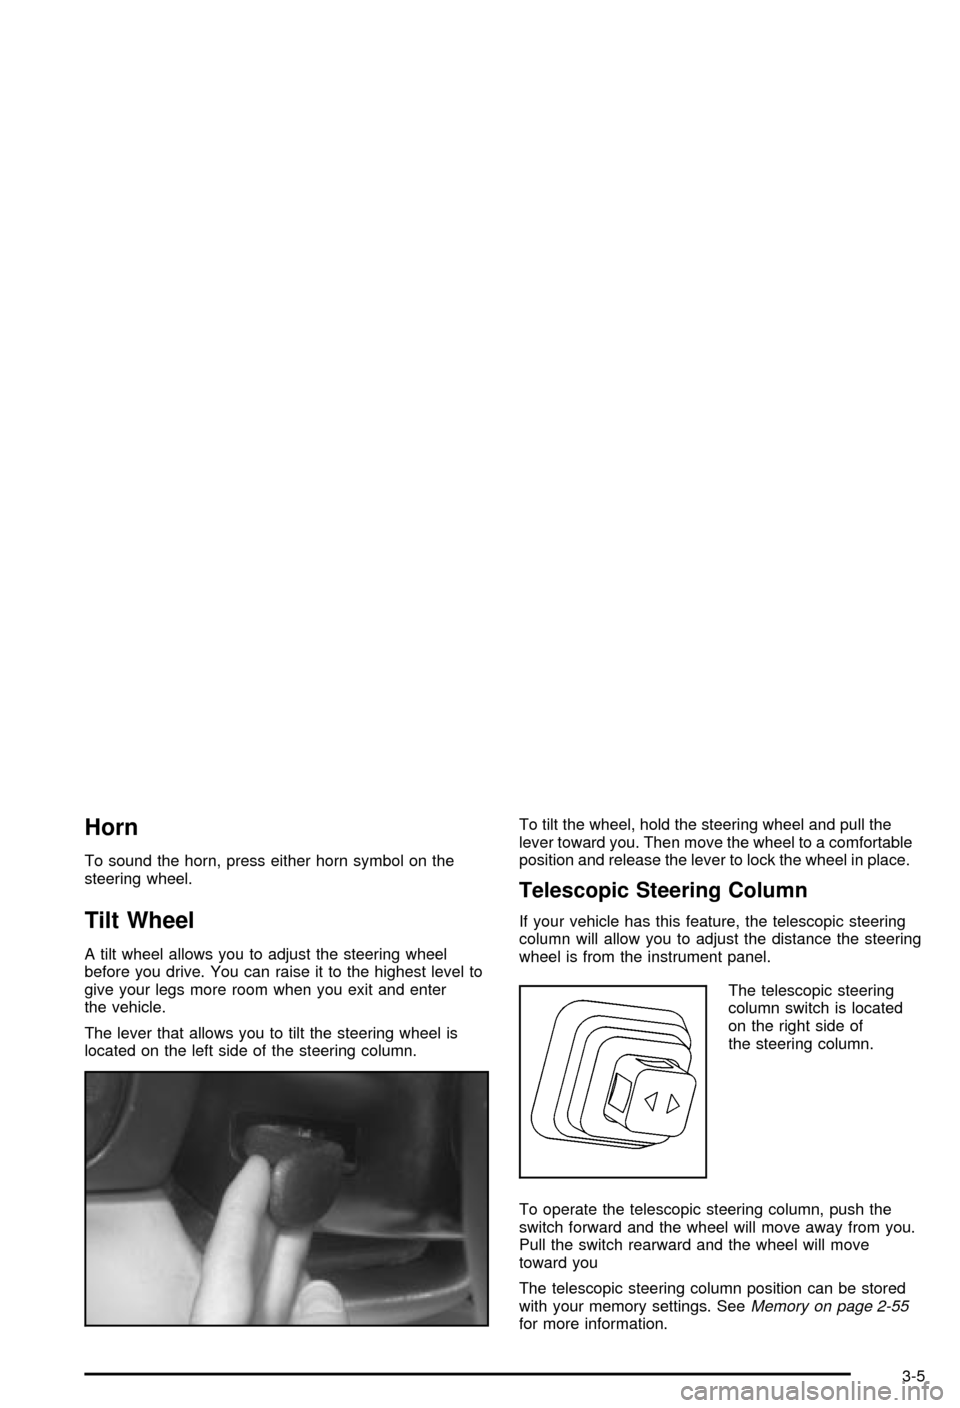
The lever that allows you to tilt the steering wheel is
located on the left side of the steering column.To tilt the wheel, hold the steering wheel and pull the
lever toward you. Then move the wheel to a comfortable
position and release the lever to lock the wheel in place.
Telescopic Steering Column
If your vehicle has this feature, the telescopic steering
column will allow you to adjust the distance the steering
wheel is from the instrument panel.
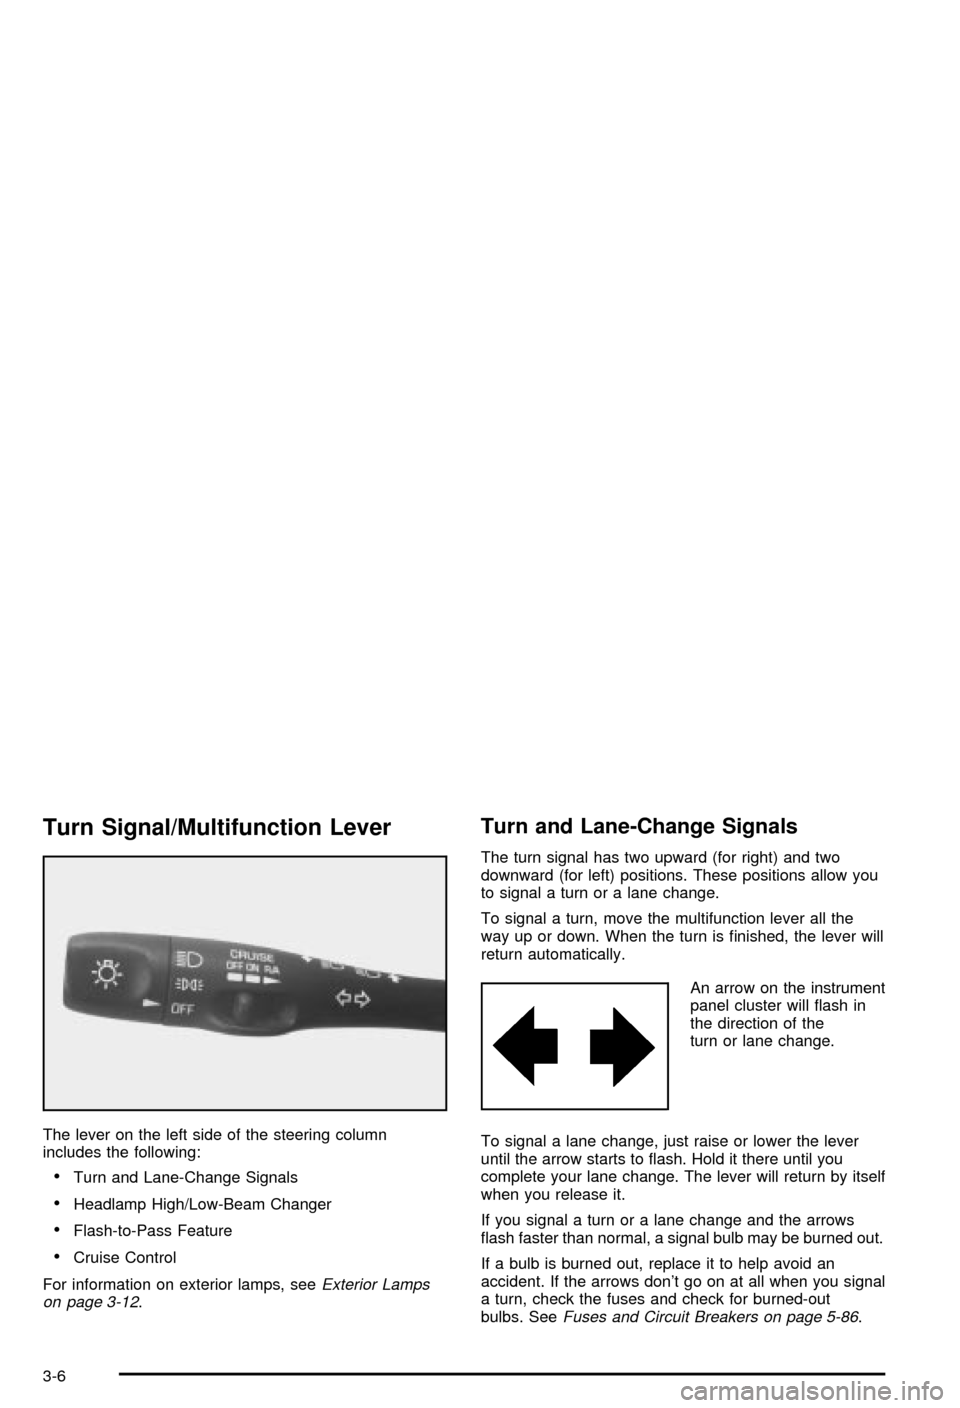
The telescopic steering
column switch is located
on the right side of
the steering column.
To operate the telescopic steering column, push the
switch forward and the wheel will move away from you.
Pull the switch rearward and the wheel will move
toward you
The telescopic steering column position can be stored
with your memory settings. See
Memory on page 2-55for more information.
3-5
Page 118 of 368

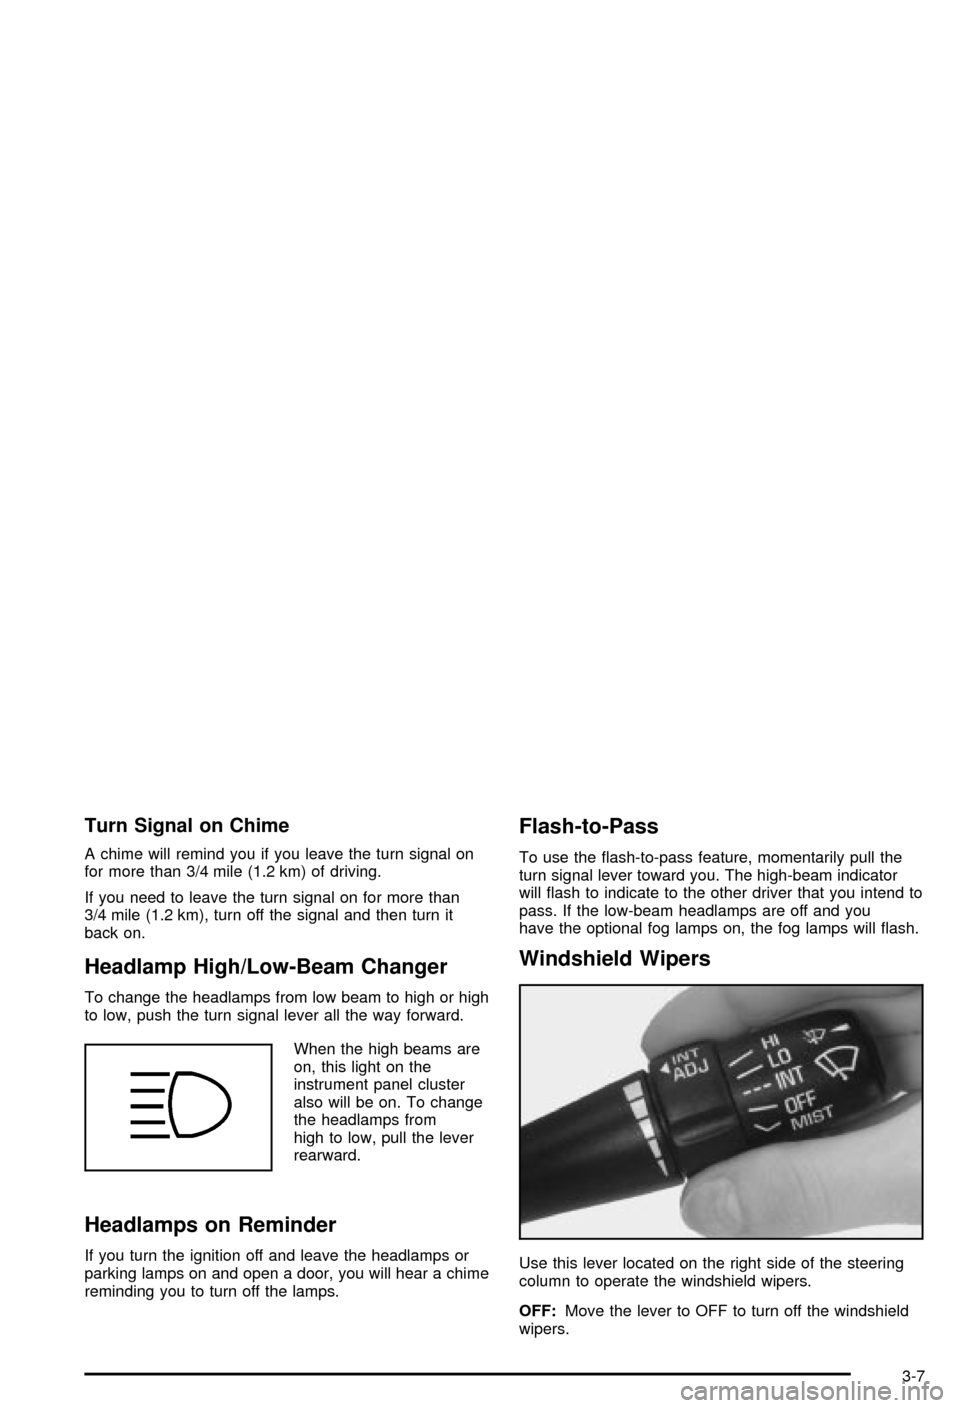
Turn Signal/Multifunction Lever
The lever on the left side of the steering column
includes the following:
·Turn and Lane-Change Signals
·Headlamp High/Low-Beam Changer
·Flash-to-Pass Feature
·Cruise Control
For information on exterior lamps, see
Exterior Lamps
on page 3-12.
Turn and Lane-Change Signals
The turn signal has two upward (for right) and two
downward (for left) positions. These positions allow you
to signal a turn or a lane change.
To signal a turn, move the multifunction lever all the
way up or down. When the turn is ®nished, the lever will
return automatically.
An arrow on the instrument
panel cluster will ¯ash in
the direction of the
turn or lane change.
To signal a lane change, just raise or lower the lever
until the arrow starts to ¯ash. Hold it there until you
complete your lane change. The lever will return by itself
when you release it.
If you signal a turn or a lane change and the arrows
¯ash faster than normal, a signal bulb may be burned out.
If a bulb is burned out, replace it to help avoid an
accident. If the arrows don't go on at all when you signal
a turn, check the fuses and check for burned-out
bulbs. See
Fuses and Circuit Breakers on page 5-86.
3-6
Page 119 of 368

Turn Signal on Chime
A chime will remind you if you leave the turn signal on
for more than 3/4 mile (1.2 km) of driving.
If you need to leave the turn signal on for more than
3/4 mile (1.2 km), turn off the signal and then turn it
back on.
Headlamp High/Low-Beam Changer
To change the headlamps from low beam to high or high
to low, push the turn signal lever all the way forward.
When the high beams are
on, this light on the
instrument panel cluster
also will be on. To change
the headlamps from
high to low, pull the lever
rearward.
Headlamps on Reminder
If you turn the ignition off and leave the headlamps or
parking lamps on and open a door, you will hear a chime
reminding you to turn off the lamps.
Flash-to-Pass
To use the ¯ash-to-pass feature, momentarily pull the
turn signal lever toward you. The high-beam indicator
will ¯ash to indicate to the other driver that you intend to
pass. If the low-beam headlamps are off and you
have the optional fog lamps on, the fog lamps will ¯ash.
Windshield Wipers
Use this lever located on the right side of the steering
column to operate the windshield wipers.
OFF:Move the lever to OFF to turn off the windshield
wipers.
3-7
Page 120 of 368

INT (Intermittent):Move the lever to INT to choose a
delayed wiping cycle. Turn the INT ADJ band down
for a longer delay or up for a shorter delay. The further
the INT ADJ band is turned upward, the shorter the
delay will be and the further the INT ADJ band is turned
downward, the longer the delay will be. The wiper
speed can only be adjusted when the lever is in the INT
position. Use this position for light rain or snow.
LO (Low Speed):Move the lever up to the ®rst setting
past INT, for steady wiping at low speed.
HI (High Speed):Move the lever up to the second
setting past INT, for steady wiping at high speed.
MIST:Move the lever all the way down to MIST for a
single wiping cycle. Hold it there until the windshield
wipers start; then let go. The windshield wipers will stop
after one wipe. If you want more wipes, hold the
band on MIST longer.
Heavy snow or ice can overload the wipers. If this
occurs, a circuit breaker will stop the wipers until the
motor cools. So, be sure to clear any ice and snow from
the windshield wiper blades before using them. If the
wiper blades are frozen to the windshield, carefully
loosen them or warm the windshield before turning the
wipers on. If your blades do become worn or
damaged, get new blades or blade inserts.Windshield Washer
The lever on the right side of the steering column also
controls the windshield washer. There is a button at
the end of the lever. To spray washer ¯uid on the
windshield, press the button and hold it. The washer will
spray until you release the button. The wipers will
continue to clear the window for about six seconds after
the button is released and then stop or return to your
preset speed.
{CAUTION:
In freezing weather, don't use your washer
until the windshield is warmed. Otherwise the
washer ¯uid can form ice on the windshield,
blocking your vision.
If the ¯uid in the windshield washer ¯uid reservoir is
low, the message LOW WASHER FLUID will appear on
the Driver Information Center (DIC) display. It will
take 60 seconds after the bottle is re®lled for this
message to turn off. For information on the correct
washer ¯uid mixture to use, see
Windshield Washer
Fluid on page 5-36andPart D: Recommended Fluids
and Lubricants on page 6-14.
3-8
Page 126 of 368

Fog Lamps
Your vehicle may have this feature. Use the fog lamps
for better vision in foggy or misty conditions. Your
parking lamps or low-beam headlamps must be on or
the fog lamps won't work.
To turn the fog lamps on, press the button located on
the instrument panel, to the left of the steering column. A
light in the button will come on when the fog lamps
are on. Press the button again to turn the fog lamps off.
Twilight Sentinelž(Optional in United
States, Standard in Canada)
Twilight Sentinelžcan turn your lamps on and off for
you. A light sensor on top of the instrument panel makes
the Twilight Sentinel
žwork, so be sure it isn't covered.
You can customize your vehicle to turn Twilight
Sentinel
žon or off (except for vehicles ®rst sold in
Canada). SeeDriver Information Center (DIC) on
page 3-44to turn this feature on or off.
When Twilight Sentinel
žis turned on, you will see the
following happen:
·When it's dark enough outside, the front turn signal
lamps (DRL) will go off, and the headlamps and
parking lamps will come on. The other lamps
that come on with headlamps will also come on.
·When it's bright enough outside, the headlamps will
go off, and the front turn signal lamps (DRL) will
come on, as long as the exterior lamp switch is in
the OFF position.
If you start your vehicle in a dark garage, the automatic
headlamp system will come on immediately. Once you
leave the garage, it will take approximately one minute for
the automatic headlamp system to change to DRL if it is
light outside. During that delay, your instrument panel
cluster may not be as bright as usual.
3-14
Page 131 of 368

The HUD controls are located to the left of the steering
wheel.To adjust the HUD so you can see it properly, do the
following:
1. Start your engine and slide the HUD dimmer control
all the way up.
The brightness of the HUD image is determined by
the light conditions in the direction your vehicle
is facing and where you have the HUD dimmer
control set. If you are facing a dark object or
a heavily shaded area, your HUD may anticipate
that you are entering a dark area and may begin
to dim.
It is possible for sunlight to enter the HUD causing
all of the graphics to light up. The display will
return to normal when the sunlight is no longer
entering the HUD.
2. Adjust the seat to a comfortable driving position. If
you change your seat position later, you may have
to re-adjust your HUD.
3. Press the top or bottom of the DISPLAY switch to
center the HUD image in your view.
The HUD image can only be adjusted up and down,
not side-to-side.
4. Slide the dimmer control downward until the HUD
image is no brighter than necessary.
To turn HUD off, slide the switch to OFF.
3-19
Page 132 of 368

If the sun comes out or it becomes cloudy, you may
need to adjust the HUD brightness again using
the dimmer control. Polarized sunglasses could make
the HUD image harder to see.
To change from English to metric units, press the
E/M button located to the right of the steering wheel.
Clean the inside of the windshield as needed to remove
any dirt or ®lm that reduces the sharpness or clarity
of the HUD image.
To clean the HUD, spray household glass cleaner on a
soft, clean cloth. Wipe the HUD lens gently, then dry
it. Do not spray cleaner directly on the lens because the
cleaner could leak into the unit.
If the ignition is on and you can't see the HUD image,
check to see if:
·Something is covering the HUD unit.
·The HUD dimmer control is adjusted properly.
·The HUD image is adjusted to the proper height.
·Ambient light, in the direction your vehicle is facing,
is low.
·A fuse is blown. SeeFuses and Circuit Breakers on
page 5-86
.
Keep in mind that your windshield is part of the HUD
system. If you ever have to have your windshield
replaced, be sure to get one that is designed for HUD
or your HUD image may look blurred and out of focus.
Accessory Power Outlets
The accessory power outlet can be used to connect
electrical equipment such as a cellular phone or
CB radio.
The accessory power outlet is located inside the
center console storage compartment, on the forward
left side.
To use the outlet, remove the tethered cap. When not
using it, always cover the outlet with the protective cap.
Notice:When using an accessory power outlet,
maximum electrical load must not exceed 15 amps.
Always turn off any electrical equipment when
not in use. Leaving electrical equipment on for
extended periods will drain your battery.
Certain electrical accessories may not be compatible
with the accessory power outlet and could result
in blown vehicle or adapter fuses. If you experience a
problem, see your dealer for additional information
on accessory power outlets.
Notice:Adding some electrical equipment to your
vehicle can damage it or keep other things from
working as they should. This wouldn't be covered by
your warranty. Check with your dealer before
adding electrical equipment, and never use anything
that exceeds the amperage rating.
3-20