2003 CHEVROLET CORVETTE set clock
[x] Cancel search: set clockPage 99 of 368

Roof Panel
Your vehicle may have a removable roof panel.
Removing the Roof Panel
{CAUTION:
Don't try to remove a roof panel while the
vehicle is moving. Trying to remove the roof
panel while the vehicle is moving could cause
an accident. The panel could fall into the
vehicle and cause you to lose control, or it
could ¯y off and strike another vehicle. You or
others could be injured. Remove the roof panel
only when the vehicle is parked.
Until you are sure you can remove the panel alone,
have someone help you.
Notice:To avoid damage to the roof panel, paint
and weatherstripping, do not drop or rest it on
its edges. Place the roof panel in the egg-shaped
stowage receivers after removing it from the vehicle.1. Park on a level surface, set the parking brake ®rmly
and shift an automatic transmission into PARK (P).
Shift a manual transmission into REVERSE (R).
2. Turn the ignition key to OFF. Lower both sun visors
and turn them toward the door glass.
3. Open the rear hatch and remove any items that may
interfere with proper storage of the roof panel.
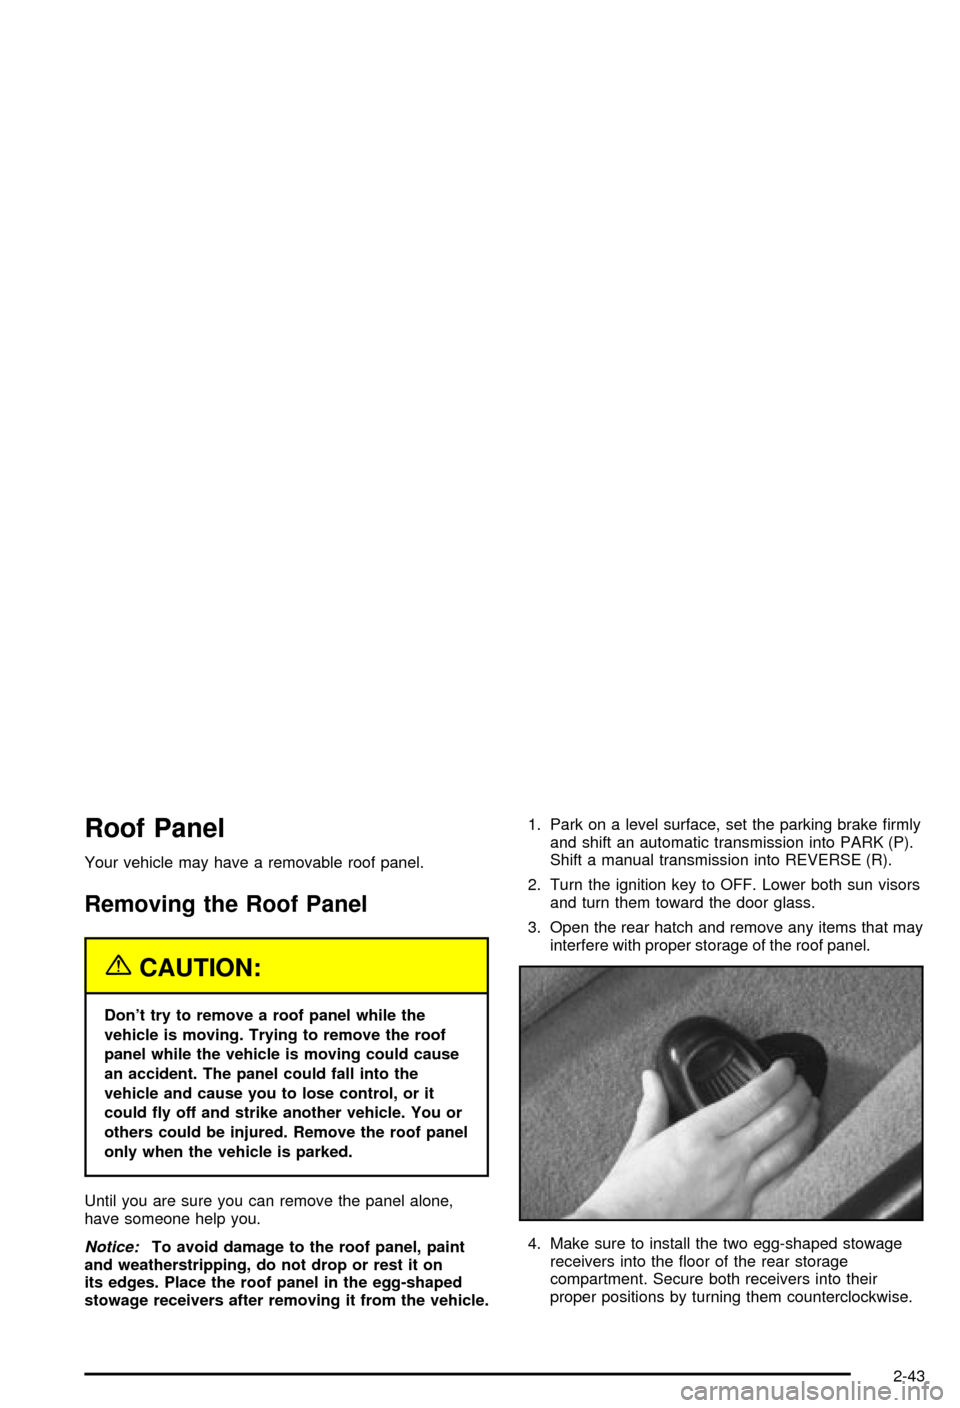
4. Make sure to install the two egg-shaped stowage
receivers into the ¯oor of the rear storage
compartment. Secure both receivers into their
proper positions by turning them counterclockwise.
2-43
Page 125 of 368

You can open the doors manually using the knob next
to the headlamp assembly. Turn the knob
counterclockwise until the doors are open. Turn the
knob clockwise to close the doors manually.
The headlamp doors should be open when driving in icy
or snowy conditions to prevent the doors from freezing
closed and when washing the vehicle to help clean
the headlamps.
Notice:In order to avoid possible contact of the
hood to the headlamp doors, either take care
in raising the hood with the headlamps up, or turn
off the headlamps prior to opening the hood.
Daytime Running Lamps
Daytime Running Lamps (DRL) can make it easier for
others to see the front of your vehicle during the
day. DRL can be helpful in many different driving
conditions, but they can be especially helpful in the short
periods after dawn and before sunset. Fully functional
daytime running lamps are required on all vehicles
®rst sold in Canada.The DRL system will make the front turn signal lamps
come on when the following conditions are met:
·The ignition is on,
·the exterior lamp switch is off and
·the parking brake is released.
When the DRL are on, only the front turn signal lamps
will be on. The headlamps, taillamps, sidemarker
and other lamps won't be on. Your instrument panel
won't be lit up either.
To idle the vehicle with the DRL off, set the parking
brake while the ignition is in OFF. Then start the vehicle.
The DRL, headlamps and parking lamps will stay off
until you release the parking brake.
As with any vehicle, you should turn on the regular
headlamp system when you need it.
3-13
Page 127 of 368

Make sure your instrument panel brightness control is in
full bright position. See ªInstrument Panel Brightness
Controlº under
Interior Lamps on page 3-15.
With Twilight Sentinel
žturned on, you can idle the
vehicle with the lamps off, even when it's dark outside.
First set the parking brake while the ignition is in
OFF. Then start the vehicle. The lamps will stay off until
you release the parking brake.
Twilight Sentinel
žalso provides exterior illumination as
you leave the vehicle. If Twilight Sentinelžhas turned
on the lamps when you turn off the ignition, your lamps
will remain on until:
·The exterior lamp switch is moved from OFF to the
parking lamp position, or
·a delay time that you select has elapsed.
See
Driver Information Center (DIC) on page 3-44to
select the delay time that you want. You can also select
no delay time.
If you turn off the ignition with the exterior lamp switch
in the parking lamp or headlamp position, the Twilight
Sentinel
ždelay will not occur. The lamps will turn off as
soon as the switch is turned off.
As with any vehicle, you should turn on the regular
headlamp system when you need it.
Interior Lamps
Instrument Panel Brightness
The knob for this feature is
located on the left side of
the instrument panel.
Push and release the knob and it will pop out. Turn the
knob clockwise to brighten the lights or counterclockwise
to dim them.
Be sure not to have this knob turned all the way down
with the lamps on during the day. Your Driver
Information Center (DIC) may not be visible.
3-15
Page 137 of 368

?(Recirculation):This mode keeps outside air
from coming in the vehicle. It can be used to prevent
outside air and odors from entering your vehicle or
to help cool the air inside your vehicle more quickly.
Press this button to turn the recirculation mode on or off.
When the button is pressed, an indicator light will
come on. The air-conditioning compressor also comes
on. The recirculation mode cannot be used with the
outside air mode.
When in the AUTO mode, the system automatically
selects recirculation to cool the vehicle's temperature.
By pressing this button, the system will lock into
recirculation mode. Any adjustment to the air intake
must then be made manually. Recirculation is not
available when using the defrost or defog mode because
outside air is needed to reduce moisture inside of the
vehicle.
Operating the system in the recirculation mode may
cause fogging of the vehicle's windows when the
weather is cold and damp. To clear the fog, switch the
system to either the defog or defrost mode and
increase the fan speed. To avoid re-fogging of the
windows, operate the system in the outside air mode.
Temperature Control:The DRIVER knob changes the
temperature on the driver's and passenger's side of
the vehicle. Turn the knob clockwise or counterclockwise
to manually increase or decrease the temperature
inside your vehicle. Whenever you turn this knob, thetemperature will be displayed for approximately ®ve
seconds along with the current fan speed and air
delivery mode.
The PASSENGER knob changes the temperature on
the passenger's side of the vehicle. When the knob is in
the 12 o'clock position, the passenger's temperature
is the same as the driver's. Turn the knob clockwise for
warmer air on the passenger's side or counterclockwise
for cooler air. If the driver-set temperature is set at
full cold 60ÉF (16ÉC) or full hot 90ÉF (32ÉC), turning the
PASSENGER knob has no effect because the system
is locked at a maximum setting.
#A/C (Air Conditioning):Press this button to
override the automatic system and turn the
air-conditioning system on or off. When A/C is pressed,
an indicator light in the button will come on to let you
know that the air conditioning is activated. When
in AUTO, the air-conditioning compressor will come on
automatically, as necessary.
Air conditioning does not operate at temperatures below
approximately 35ÉF to 40ÉF (2ÉC to 4ÉC). The air
conditioning cannot be turned off in defrost and defog,
as it helps to remove moisture from the vehicle. It
also helps to keep the windows clear.
3-25
Page 175 of 368

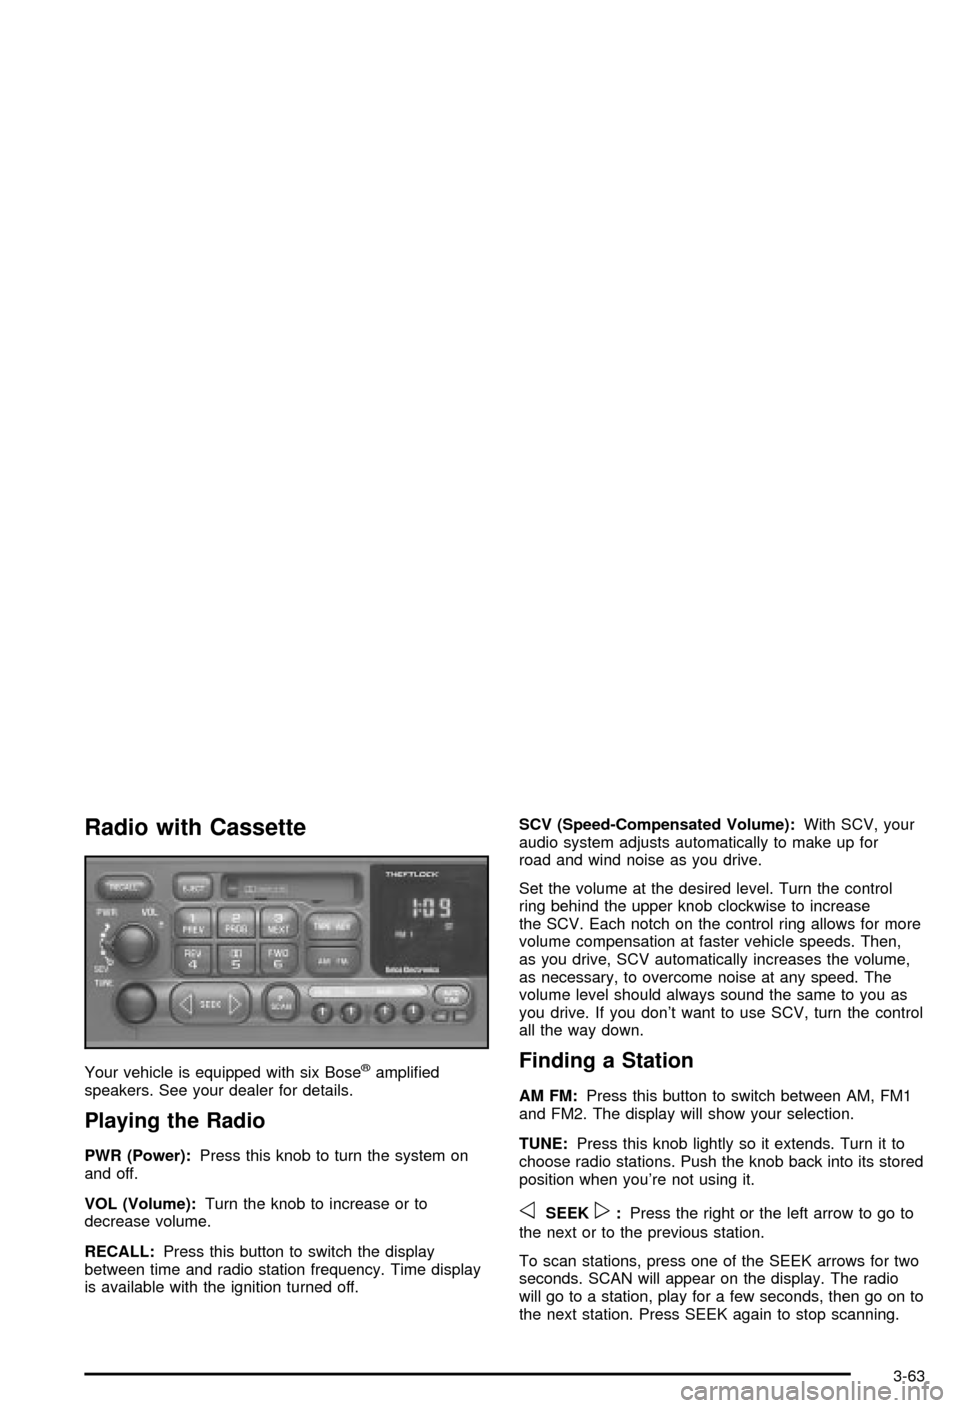
Radio with Cassette
Your vehicle is equipped with six Bosežampli®ed
speakers. See your dealer for details.
Playing the Radio
PWR (Power):Press this knob to turn the system on
and off.
VOL (Volume):Turn the knob to increase or to
decrease volume.
RECALL:Press this button to switch the display
between time and radio station frequency. Time display
is available with the ignition turned off.SCV (Speed-Compensated Volume):With SCV, your
audio system adjusts automatically to make up for
road and wind noise as you drive.
Set the volume at the desired level. Turn the control
ring behind the upper knob clockwise to increase
the SCV. Each notch on the control ring allows for more
volume compensation at faster vehicle speeds. Then,
as you drive, SCV automatically increases the volume,
as necessary, to overcome noise at any speed. The
volume level should always sound the same to you as
you drive. If you don't want to use SCV, turn the control
all the way down.
Finding a Station
AM FM:Press this button to switch between AM, FM1
and FM2. The display will show your selection.
TUNE:Press this knob lightly so it extends. Turn it to
choose radio stations. Push the knob back into its stored
position when you're not using it.
oSEEKp:Press the right or the left arrow to go to
the next or to the previous station.
To scan stations, press one of the SEEK arrows for two
seconds. SCAN will appear on the display. The radio
will go to a station, play for a few seconds, then go on to
the next station. Press SEEK again to stop scanning.
3-63
Page 179 of 368

Radio with CD
Your vehicle is equipped with six Bosežampli®ed
speakers. See your dealer for details.
Playing the Radio
PWR (Power):Press this knob to turn the system on
and off.
VOL (Volume):Turn the knob to increase or to
decrease volume.
RECALL:Press this button to switch the display
between time and radio station frequency. Time display
is available with the ignition turned off.
SCV (Speed-Compensated Volume):With SCV, your
audio system adjusts automatically to make up for
road and wind noise as you drive.Set the volume at the desired level. Turn the control
ring behind the upper knob clockwise to increase
the SCV. Each notch on the control ring allows for more
volume compensation at faster vehicle speeds. Then,
as you drive, SCV automatically increases the volume,
as necessary, to overcome noise at any speed. The
volume level should always sound the same to you as
you drive. If you don't want to use SCV, turn the control
all the way down.
Finding a Station
AM FM:Press this button to switch between AM, FM1
and FM2. The display will show your selection.
TUNE:Press this knob lightly so it extends. Turn it to
choose radio stations. Push the knob back into its stored
position when you're not using it.
oSEEKp:Press the right or the left arrow to go to
the next or to the previous station.
To scan stations, press one of the SEEK arrows for two
seconds. SCAN will appear on the display. The radio
will go to a station, play for a few seconds, then go on to
the next station. Press SEEK again to stop scanning.
The radio will seek or scan only to stations that are
in the selected band and only to those with a strong
signal.
3-67
Page 275 of 368

Bulb Replacement
For the proper type of replacement bulb, seeBulb
Replacement on page 5-47.
For any bulb changing procedure not listed in this
section, contact your dealer's service department.
Halogen Bulbs
{CAUTION:
Halogen bulbs have pressurized gas inside
and can burst if you drop or scratch the bulb.
You or others could be injured. Be sure to read
and follow the instructions on the bulb
package.
Headlamps
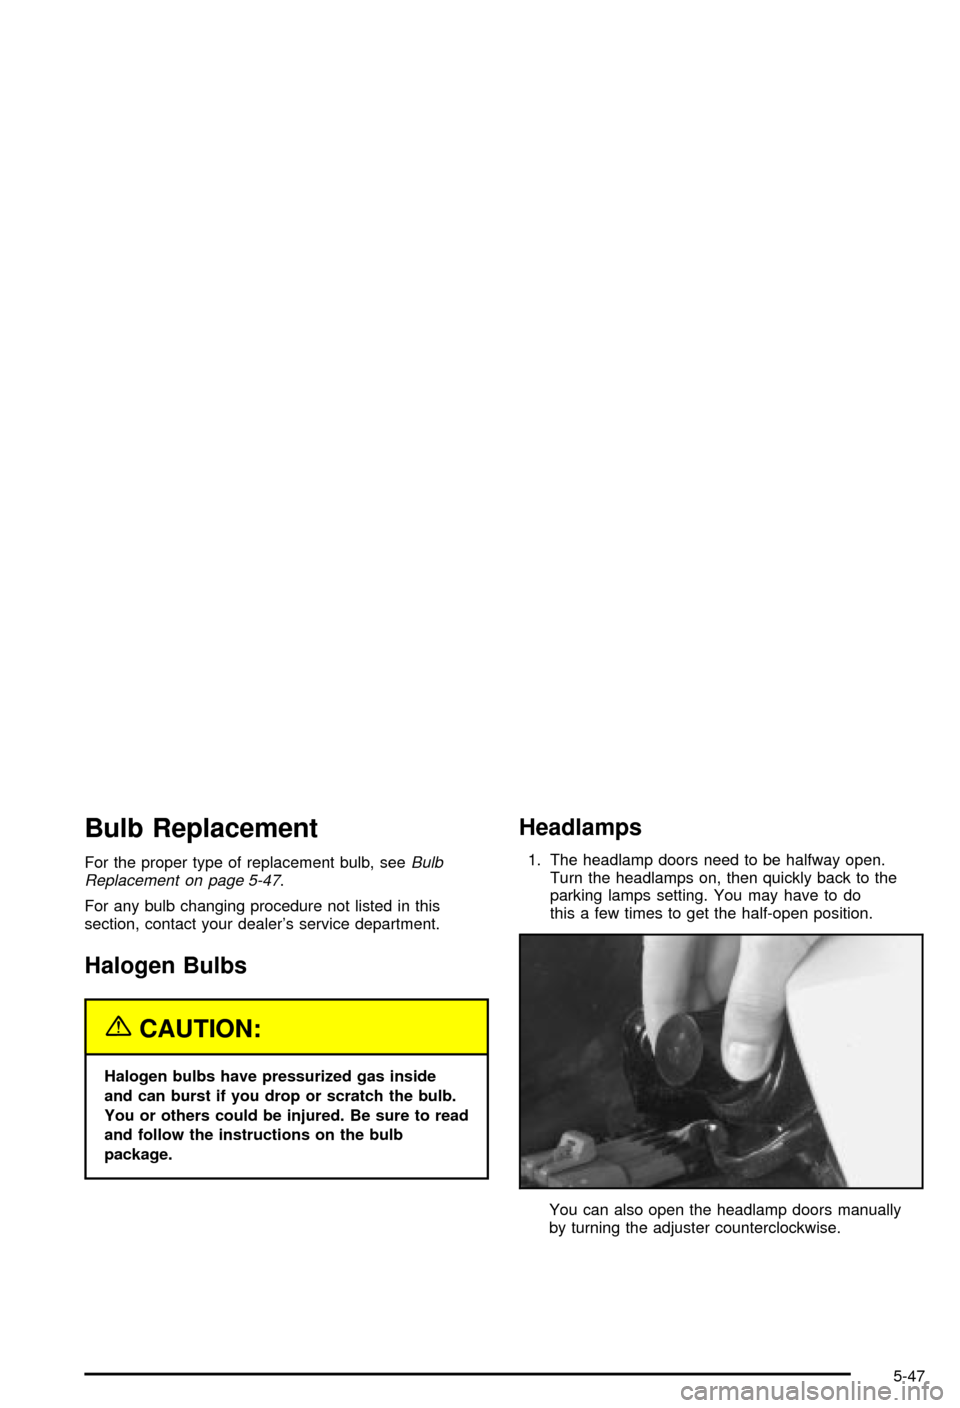
1. The headlamp doors need to be halfway open.
Turn the headlamps on, then quickly back to the
parking lamps setting. You may have to do
this a few times to get the half-open position.
You can also open the headlamp doors manually
by turning the adjuster counterclockwise.
5-47
Page 300 of 368

{CAUTION:
It can be dangerous to get out of your vehicle
with the engine running, if the shift lever is not
in NEUTRAL (N) with the parking brake ®rmly
set (manual transmission). Your vehicle can
roll or move suddenly even when on fairly
level ground. To be sure your vehicle won't
move, always set your parking brake and move
the shift lever to NEUTRAL (N) when you start
or idle your engine.
{CAUTION:
Idling the engine in a closed-in place or with
the climate control system off can cause
deadly carbon monoxide (CO). See ªEngine
Exhaustº in the Index.
{CAUTION:
In¯ating something too much can make it
explode, and you or others could be injured.
Be sure to read the in¯ator instructions, and
in¯ate the tire to its recommended pressure.
Do not exceed 36 psi (248 kPa).
Notice:Do not allow the air compressor to operate
continuously for more than six minutes to help
prevent damage from overheating.
Notice:If 26 psi (179 kPa) tire pressure cannot be
reached after six minutes the vehicle should not
be driven further. Damage to the tire is severe and
the sealant will not be effective. Remove the air
compressor plug from the accessory power outlet
and unscrew the in¯ating hose from the tire
valve. See ªRoadside Assistanceº in the Index.
If 26 psi (179 kPa) tire pressure is reached in six
minutes or less, disconnect the air compressor and
attach the enclosed maximum speed label to the inside
upper left corner of the windshield or to the face of
the radio/clock.
5-72