2003 CHEVROLET BLAZER fuel
[x] Cancel search: fuelPage 1 of 420

Seats and Restraint Systems........................... 1-1
Front Seats
............................................... 1-2
Rear Seats
............................................... 1-7
Safety Belts
.............................................. 1-9
Child Restraints
.......................................1-32
Air Bag System
.......................................1-52
Restraint System Check
............................1-58
Features and Controls..................................... 2-1
Keys
........................................................ 2-3
Doors and Locks
....................................... 2-7
Windows
.................................................2-11
Theft-Deterrent Systems
............................2-17
Starting and Operating Your Vehicle
...........2-19
Mirrors
....................................................2-41
HomeLink
žTransmitter
.............................2-44
Storage Areas
.........................................2-48
Vehicle Personalization
.............................2-61
Instrument Panel............................................. 3-1
Instrument Panel Overview
.......................... 3-2
Climate Controls
......................................3-17
Warning Lights, Gages and Indicators
.........3-21
Audio System(s)
.......................................3-37Driving Your Vehicle....................................... 4-1
Your Driving, the Road, and Your Vehicle
..... 4-2
Towing
...................................................4-45
Service and Appearance Care.......................... 5-1
Service
..................................................... 5-3
Fuel
......................................................... 5-4
Checking Things Under the Hood
................. 5-8
Rear Axle
...............................................5-45
Four-Wheel Drive
.....................................5-45
Front Axle
...............................................5-46
Bulb Replacement
....................................5-47
Windshield Wiper Blade Replacement
.........5-52
Tires
......................................................5-54
Appearance Care
.....................................5-76
Vehicle Identi®cation
.................................5-83
Electrical System
......................................5-84
Capacities and Speci®cations
.....................5-91
Normal Maintenance Replacement Parts
......5-92
Maintenance Schedule..................................... 6-1
Maintenance Schedule
................................ 6-2
Customer Assistance Information.................... 7-1
Customer Assistance Information
.................. 7-2
Reporting Safety Defects
...........................7-10
INDEX................................................................1
2003 Chevrolet Blazer Owner ManualM
Page 84 of 420

Testing the Alarm
The alarm can be tested by following these steps:
1. From inside the vehicle, lower the driver's window
and open the driver's door.
2. Activate the system by locking the doors with the
power door lock switch while the door is open, or
with the remote keyless entry transmitter.
3. Get out of the vehicle, close the door and wait for
the SECURITY light to go out.
4. Then reach in through the window, unlock the door
with the manual door lock and open the door. This
should set off the alarm.
If the alarm does not sound when it should but the
vehicle's headlamps ¯ash, check to see if the horn
works. The horn fuse may be blown. To replace
the fuse, see
Fuses and Circuit Breakers on page 5-85.
If the alarm does not sound or the vehicle's headlamps
do not ¯ash, the vehicle should be serviced by an
authorized service center.
Passlockž
Your vehicle is equipped with the
Passlockžtheft-deterrent system.
Passlock
žis a passive theft-deterrent system.
Passlockženables fuel if the ignition lock cylinder is
turned with a valid key. If a correct key is not used or the
ignition lock cylinder is tampered with, fuel is disabled.
During normal operation, the SECURITY light will
go off approximately ®ve seconds after the key is turned
to RUN.
If the engine stalls and the SECURITY light ¯ashes,
wait about 10 minutes until the light stops ¯ashing before
trying to restart the engine. Remember to release the
key from START as soon as the engine starts.
If the engine does not start after three tries, the vehicle
needs service.
If the engine is running and the SECURITY message
comes on, you will be able to restart the engine if
you turn the engine off. However, your
Passlock
žsystem is not working properly and must be
serviced by your dealer. Your vehicle is not protected
by Passlock
žat this time. You may also want to check
the fuse. SeeFuses and Circuit Breakers on page 5-85.
See your dealer for service.
In an emergency, call the GM Roadside Assistance
Center. See
Roadside Assistance Program on page 7-6.
2-18
Page 88 of 420

When starting your engine in very cold weather (below
0ÉF or (±18ÉC), do this:
1. With your foot off the accelerator pedal, turn the
ignition key to START and hold it there up to
15 seconds. When the engine starts, let go of
the key.
2. If your engine still won't start (or starts but then
stops), it could be ¯ooded with too much gasoline.
Try pushing your accelerator pedal all the way to the
¯oor and holding it there as you hold the key in
START for about three seconds. When the engine
starts, let go of the key and accelerator. If the
vehicle starts brie¯y but then stops again, do the
same thing, but this time keep the pedal down
for ®ve or six seconds. This clears the extra
gasoline from the engine.
Notice:Your engine is designed to work with the
electronics in your vehicle. If you add electrical
parts or accessories, you could change the way the
engine operates. Before adding electrical equipment,
check with your dealer. If you don't, your engine
might not perform properly.
Engine Coolant Heater
Your vehicle may be equipped with this feature.
In very cold weather, 0ÉF (±18ÉC) or colder, the engine
coolant heater can help. You'll get easier starting
and better fuel economy during engine warm-up.
Usually, the coolant heater should be plugged in a
minimum of four hours prior to starting your vehicle. At
temperatures above 32ÉF (0ÉC), use of the coolant
heater is not required.
To Use the Engine Coolant Heater
1. Turn off the engine.
2. Open the hood and unwrap the electrical cord. The
cord is located in the engine compartment behind
the underhood fuse block on the driver's side of the
vehicle.
3. Plug it into a normal, grounded 110±volt AC outlet.
2-22
Page 91 of 420

Notice:Shifting to REVERSE (R) while your vehicle
is moving forward could damage your transmission.
Shift to REVERSE (R) only after your vehicle is
stopped.
To rock your vehicle back and forth to get out of snow,
ice or sand without damaging your transmission,
see If You Are Stuck: In Sand, Mud, Ice or Snow on
page 4-42.
NEUTRAL (N):In this position, your engine doesn't
connect with the wheels. To restart when you're already
moving, use NEUTRAL (N) only.
{CAUTION:
Shifting into a drive gear while your engine is
ªracingº (running at high speed) is dangerous.
Unless your foot is ®rmly on the brake pedal,
your vehicle could move very rapidly. You
could lose control and hit people or objects.
Don't shift into a drive gear while your engine
is racing.
Notice:Damage to your transmission caused by
shifting out of PARK (P) or NEUTRAL (N) with
the engine racing isn't covered by your warranty.DRIVE (D):This position is for normal driving. If you
need more power for passing, and you're:
·Going less than about 35 mph (55 km/h), push your
accelerator pedal about halfway down.
·Going about 35 mph (55 km/h) or more, push the
accelerator all the way down.
You'll shift down to the next gear and have more power.
DRIVE (D) should not be used when towing a trailer,
carrying a heavy load, driving on steep hills or for
off-road driving. Select THIRD (3) when operating the
vehicle under any of these conditions.
THIRD (3):This position is also used for normal driving.
It offers more power and lower fuel economy than
DRIVE (D). You should use THIRD (3) when towing a
trailer, carrying a heavy load, driving on steep hills
or winding roads or for off-road driving.
SECOND (2):This position gives you more power but
lower fuel economy than THIRD (3). You can use
SECOND (2) on hills. It can help control your speed as
you go down steep mountain roads, but then you
would also want to use your brakes off and on.
You can also use SECOND (2) for starting your vehicle
from a stop on slippery road surfaces.
2-25
Page 92 of 420

FIRST (1):This position gives you even more power
but lower fuel economy than SECOND (2). You can use
it on very steep hills, or in deep snow or mud. If the
shift lever is put in FIRST (1) while the vehicle is moving
forward, the transmission won't shift into ®rst gear
until the vehicle is going slowly enough.
Notice:If your wheels won't turn, don't try to drive.
This might happen if you were stuck in very deep
sand or mud or were up against a solid object. You
could damage your transmission. Also, if you
stop when going uphill, don't hold your vehicle there
with only the accelerator pedal. This could overheat
and damage the transmission. Use your brakes
or shift into PARK (P) to hold your vehicle in
position on a hill.
Tow/Haul Mode
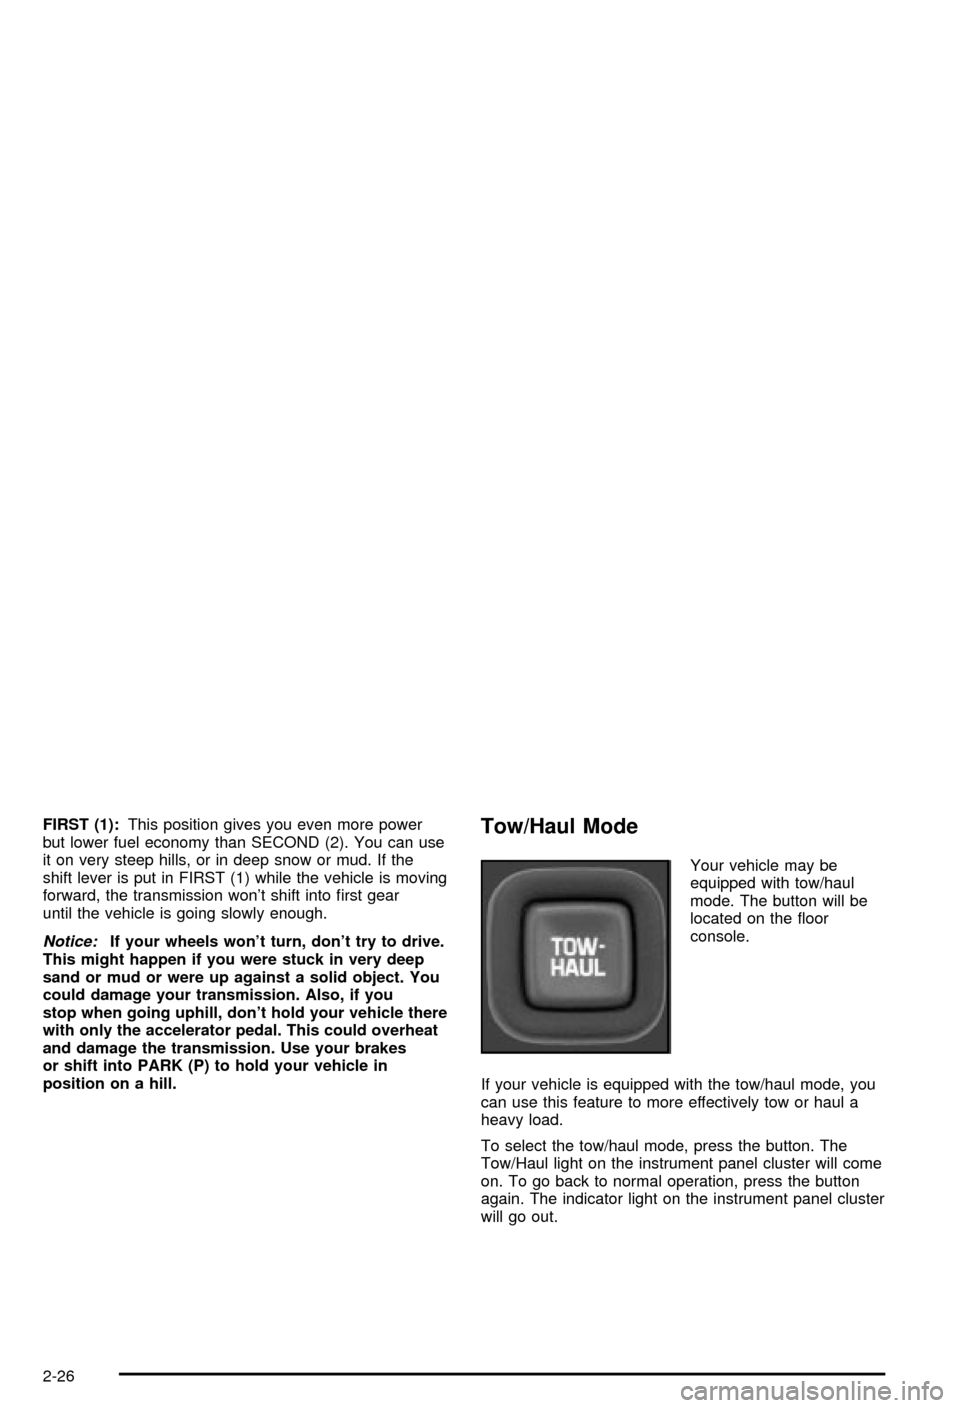
Your vehicle may be
equipped with tow/haul
mode. The button will be
located on the ¯oor
console.
If your vehicle is equipped with the tow/haul mode, you
can use this feature to more effectively tow or haul a
heavy load.
To select the tow/haul mode, press the button. The
Tow/Haul light on the instrument panel cluster will come
on. To go back to normal operation, press the button
again. The indicator light on the instrument panel cluster
will go out.
2-26
Page 94 of 420

Up-Shift Light
If you have a manual
transmission, you have a
SHIFT light on your
instrument panel cluster.
This light will show you when to shift to the next higher
gear for best fuel economy.
When this light comes on, you can shift to the next
higher gear if weather, road and traffic conditions let you.
For the best fuel economy, accelerate slowly and shift
when the light comes on.
While you accelerate, it is normal for the light to go on
and off if you quickly change the position of the
accelerator. Ignore the SHIFT light when you downshift.{CAUTION:
If you skip a gear when you downshift, you
could lose control of your vehicle. You could
injure yourself or others. Don't shift down
more than one gear at a time when you
downshift.
If your vehicle has four-wheel drive and is equipped with
a manual transmission, disregard the up-shift light
when the transfer case is in 4LO.
Four-Wheel Drive
If your vehicle has four-wheel drive, you can send your
engine's driving power to all four wheels for extra
traction. To get the most satisfaction out of four-wheel
drive, you must be familiar with its operation. Read
the part that follows before using four-wheel drive. You
should use two-wheel high (2HI) for most normal
driving conditions.
Notice:Driving in the 4-WHEEL HIGH (4HI) or
4-WHEEL LOW (4LO) positions for a long time on
dry or wet pavement could shorten the life of
your vehicle's drivetrain.
2-28
Page 97 of 420

Automatic Transfer Case
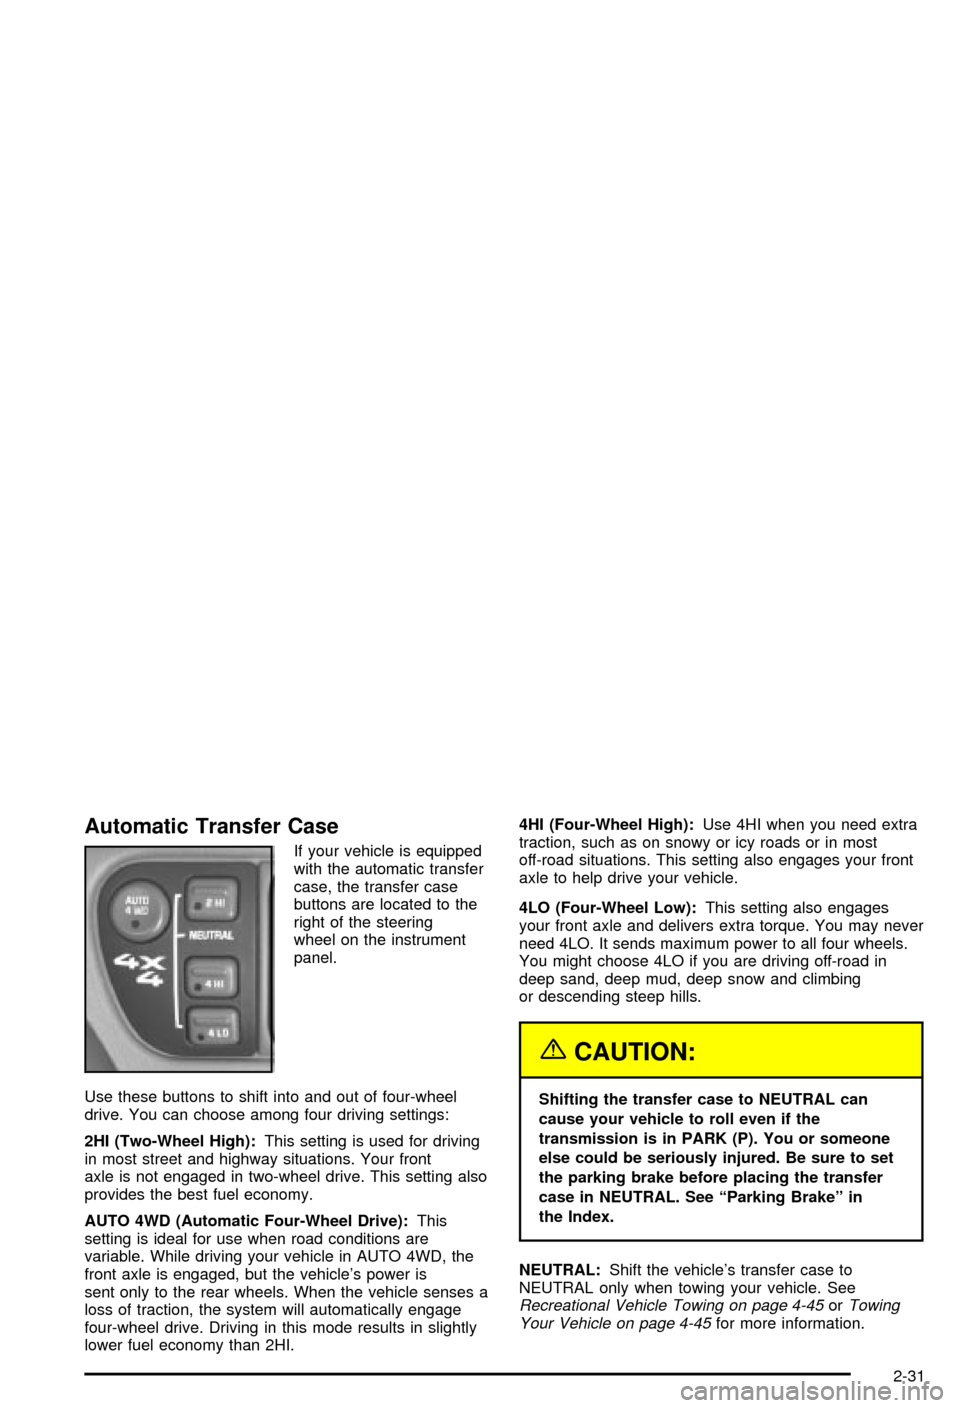
If your vehicle is equipped
with the automatic transfer
case, the transfer case
buttons are located to the
right of the steering
wheel on the instrument
panel.
Use these buttons to shift into and out of four-wheel
drive. You can choose among four driving settings:
2HI (Two-Wheel High):This setting is used for driving
in most street and highway situations. Your front
axle is not engaged in two-wheel drive. This setting also
provides the best fuel economy.
AUTO 4WD (Automatic Four-Wheel Drive):This
setting is ideal for use when road conditions are
variable. While driving your vehicle in AUTO 4WD, the
front axle is engaged, but the vehicle's power is
sent only to the rear wheels. When the vehicle senses a
loss of traction, the system will automatically engage
four-wheel drive. Driving in this mode results in slightly
lower fuel economy than 2HI.4HI (Four-Wheel High):Use 4HI when you need extra
traction, such as on snowy or icy roads or in most
off-road situations. This setting also engages your front
axle to help drive your vehicle.
4LO (Four-Wheel Low):This setting also engages
your front axle and delivers extra torque. You may never
need 4LO. It sends maximum power to all four wheels.
You might choose 4LO if you are driving off-road in
deep sand, deep mud, deep snow and climbing
or descending steep hills.
{CAUTION:
Shifting the transfer case to NEUTRAL can
cause your vehicle to roll even if the
transmission is in PARK (P). You or someone
else could be seriously injured. Be sure to set
the parking brake before placing the transfer
case in NEUTRAL. See ªParking Brakeº in
the Index.
NEUTRAL:Shift the vehicle's transfer case to
NEUTRAL only when towing your vehicle. See
Recreational Vehicle Towing on page 4-45orTowing
Your Vehicle on page 4-45for more information.
2-31
Page 120 of 420

Variance is the different between magnetic north and
geographic north. In some areas, the difference between
the two can be great enough to cause false compass
readings. If this happens, follow these instructions to set
the variance for your particular location:
1. Find your location on the zone map. Record your
zone number.
2. Press and hold both the MODE and the US/MET
buttons in the COMP/TEMP mode.3. After ®ve seconds, the compass will acknowledge
the variation mode by displaying the current zone
number. When it does, release both buttons.
4. Press US/MET until your zone number appears on
the display.
5. Press MODE to set your zone number. Your
variance is now set and the display will return to the
COMP/TEMP mode.
TRIP:Once in the TRIP mode, press the MODE button
for the following trip functions:
AVG ECON (Average Economy):The average fuel
economy since the last reset is displayed.
INST ECON (Instantaneous Economy):Instantaneous
fuel economy for the last second of driving is displayed.
RANGE:The display indicates the estimated distance
that can be travelled with the remaining fuel in the tank,
based on the fuel economy for the last few hours of
driving.
FUEL USED:The fuel used since the last reset is
displayed.
AVG SPEED (Average Speed):The average speed
since the last reset is displayed.
2-54