2003 CHEVROLET ASTRO cruise control
[x] Cancel search: cruise controlPage 131 of 386

Turn SignaVMultifunction Lever
The lever on the driver’s side of the steering column
includes the following:
Turn and Lane Change Signals
Headlamp High/Low-Beam Changer
Flash-to-Pass
Windshield Wipers
Windshield Washer
Cruise Control (Option)
Turn and Lane Change Signals
The turn signal has two upward (for right) and two
downward (for left) positions. These positions allow you
to signal a turn or a lane change.
To signal a turn, move the lever all the way up or
down. When the turn is finished, the lever will return
automatically.
An arrow on the instrument
Dane1 cluster will flash in
the direction of the
turn or lane change.
To signal a lane change, just raise or lower the lever
until the arrow starts to flash. Hold it there until you
complete your lane change. The lever will return by itself
when you release it.
As you signal a turn or a lane change, if the arrows
flash faster, a signal bulb may be burned out and other
drivers won’t see your turn signal.
For information on the exterior lamps, see
Exterior
Lamps
on page 3-12.
3-6
Page 135 of 386

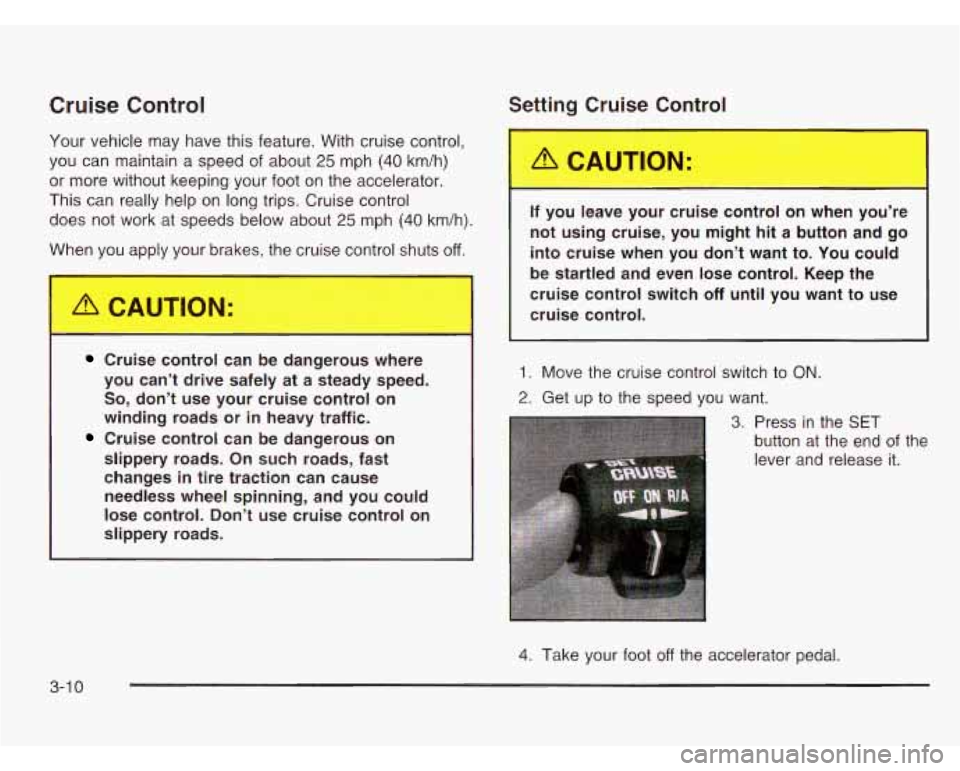
Cruise Control
Your vehicle may have this feature. With cruise control,
you can maintain a speed
of about 25 mph (40 km/h)
or more without keeping your foot on the accelerator.
This can really help on long trips. Cruise control
does not work at speeds below about
25 mph (40 km/h).
When you apply your brakes, the cruise control shuts
off.
Cruise con,. _. ,an be dang-. DUS where
you can’t drive safely at a steady speed.
So, don’t use your cruise control on
winding roads or in heavy traffic.
Cruise control can be dangerous on
slippery roads. On such roads, fast
changes in tire traction can cause needless wheel spinning, and you could
lose control. Don’t use cruise control on
slippery roads.
I
If yvu leave your cruise control on when you’re
not using cruise, you might hit a button and go
into cruise when you don’t want to. You could
be startled and even lose control. Keep the
cruise control switch
off until you want to use
cruise control.
1. Move the cruise control switch to ON.
2. Get up to the speed you want.
3. Press in the SET
button at the end of the
lever and release it.
4. Take your foot off the accelerator pedal.
3-1 0
Page 136 of 386

Resuming a Set Speed Increasing Speed While Using Cruise
Suppose you set your cruise control at a desired speed Control
and then you apply the brake. This, of course, shuts There are two ways to go to a higher speed:
off the cruise control. But you don’t need to reset it. * Use the accelerator pedal to get to the higher
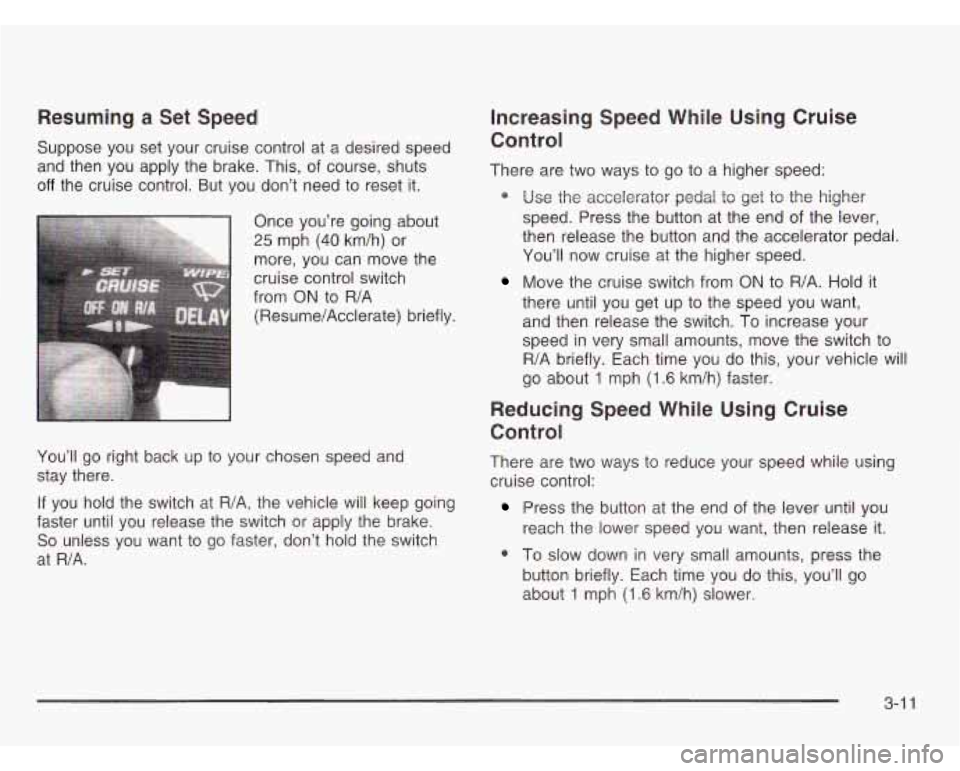
Once you’re going about
25 mph (40 km/h) or
more, you can move the
cruise control switch
from
ON to R/A
(Resume/Acclerate) briefly.
You’ll
go right back up to your chosen speed and
stay there.
If you hold the switch at
R/A, the vehicle will keep going
faster until you release the switch or apply the brake.
So unless you want to go faster, don’t hold the switch
at
R/A.
speed. Press the button at the end of the lever,
then release the button and the accelerator pedal.
You’ll now cruise at the higher speed.
Move the cruise switch from ON to R/A. Hold it
there until you get up to the speed you want,
and then release the switch. To increase your
speed in very small amounts, move the switch to
R/A briefly. Each time you do this, your vehicle will
go about
1 mph (1.6 km/h) faster.
Reducing Speed While Using Cruise
Control
There are two ways to reduce your speed while using
cruise control:
Press the button at the end of the lever until you
reach the lower speed you want, then release it.
0 To slow down in very small amounts, press the
button briefly. Each time you do this, you’ll go
about 1 mph (1.6 km/h) slower.
3-1 1
Page 137 of 386

Passing Another Vehicle While Using
Cruise Control
Use the accelerator pedal to increase your speed.
When you take your foot
off the pedal, your vehicle will
slow down to the cruise control speed you set earlier.
Using Cruise Control on Hills
How well your cruise control will work on hills depends
upon your speed, load and the steepness
of the hills.
When going up steep hills, you may want to step on the
accelerator pedal to maintain your speed. When going
downhill, you may have to brake or shift to a lower gear to
keep your speed down. Of course, applying the brake
takes you out of cruise control. Many drivers find this to
be too much trouble and don’t use cruise control on
steep hills.
Ending Cruise Control
There are two ways to turn off the cruise control:
Step lightly on the brake pedal.
Move the cruise switch to OFF.
Erasing Speed Memory
When you turn off the cruise control or the ignition, your
cruise control set speed memory is erased.
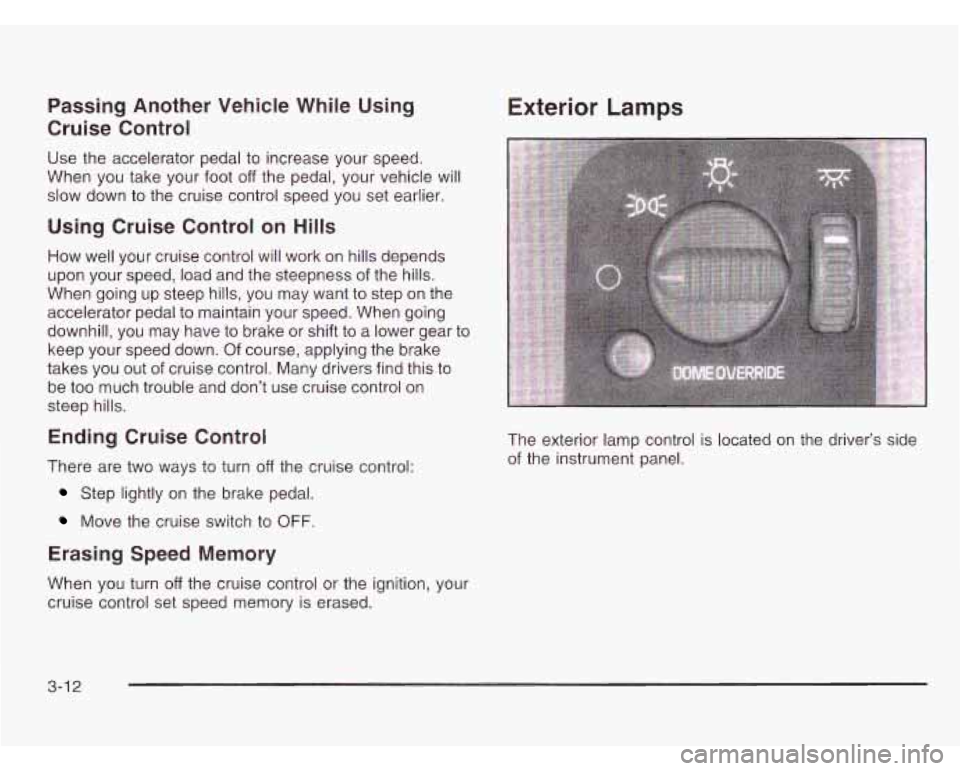
Exterior Lamps
The exterior lamp control is located on the driver’s side
of the instrument panel.
3-1 2
Page 311 of 386

FuseKircuit Usage
Breaker
1
2
Stop/Turn/Hazard Lamps,
Center High Mounted Stop Lamp,
Anti-Lock Brakes
Radio Accy, Rear Seat
Audio Controls
FuseKircuit
Breaker
3
4
5
6
8
9
Usage
Courtesy Lamps, Glove Box Lamp,
Dome Reading Lamps, Vanity Mirror
Lamps, Courtesy Lamps
Daytime Running Lamps Relay,
Instrument Panel Cluster
Rear Defogger
Cruise Module, Truck Body Control Module, Instrument Panel Cluster,
Cruise Control Switch,
Electrochromic Mirror
Power Outlets, DLC,
Subwoofer Amplifier
Crank Circuit Fuse, ParWNeutral
Switch, Starter Enabler Relay
License Plate Lamp, Tailamps,
Parking Lamps, Ashtray Lamp,
Panel Lights, Trailer Taillamps,
Front and Rear Sidemarker Lamps,
Door Switch Illumination, Headlamp
Switch Illumination, Rear Seat
Audio Illumination, Truck Body
Control Module
5-94
Page 312 of 386

13
14
15
16
Fuse/Circuit Usage Breaker
10 Air Bag System
11 Not Used
12 L, MI, M2 Blower Motor, Rear Air
Conditioning Relay Coil, Front Cont.
Temp. Door Motor, HI Blower Relay.
Defogger Timer Coil
Cigarette Lighter, Door Lock
Switches, Dutch Door Release Module
Cluster Illum, Climate Controls,
Chime Module, Radio Illumination,
Rear Heat Switch Illumination, Rear
Wipermasher Switch Illumination,
Rear Liftgate Switch Illumination,
Remote Cassette Illumination,
Overhead Console, Truck Body
Control Illurnination
Truck Body Module, Headlamp Relay
Front Turn Signals, Rear Turn
Signals, Trailer Turn Signals,
Back-up Lamps, Brake Transmission
Shift Interlock Solenoid 21
22
23
24
A
19
20
FuseKircuit
Usage
Breaker
17 Front Wipers, Front Washer Pump
18 VCM-lgn
3, VCM-Brake, Cruise
Stepper Motor Signal, ATC Module
Instrument Panel Radio: ATC
(Main Feed),
2000 Series (Standby)
PRNDUOdometer, TCC Enable and
PWM Solenoid, Shift A and Shift B
Solenoids, 3-2 Downshift Solenoid, Instrument Panel Cluster, VCM
Module
Powr Adjust Mirrors
Not Used
Rear Wiper, Rear Washer Pump
Not Used
(Circuit Breaker) Power Door Lock
Relay, 6-Way Power Seats
(Circuit Breaker) Power Windows
B
5-95
Page 350 of 386

Throttle System Inspection
Inspect the throttle system for interference or binding,
and for damaged or missing parts. Replace parts
as needed. Replace any components that have high
effort or excessive wear.
Do not lubricate accelerator
and cruise control cables.
Transfer Case and Front Axle
(All-Wheel Drive) Inspection
Every 12 months, or at engine oil change intervals,
check front axle and transfer case and add lubricant
when necessary.
A fluid loss could indicate a problem.
Check and have it repaired, if needed. Check vent
hose at transfer case for kinks and proper installation.
Brake System Inspection
Inspect the complete system. Inspect brake lines and
hoses for proper hook-up, binding, leaks, cracks,
chafing, etc. Inspect disc brake pads for wear and
rotors for surface condition. inspect other brake parts,
including calipers, parking brake, etc. Check parking
brake adjustment. You may need to have your brakes
inspected more often
if your driving habits or conditions
result in frequent braking.
6-31
Page 370 of 386

Checking Brake Fluid .................................. 5-43
Checking Coolant ............................................ 5-29
Checking Engine Oil ........................................ 5-15
Checking Things Under the Hood ...................... 5-1 1
Checking Your Restraint Systems ...................... 1-71
Chemical Paint Spotting ................................... 5-89
Child Restraints
Child Restraint Systems
............................... 1-44
Infants and Young Children ........................... 1-38
Lower Anchorages and Top Tethers for
Children (LATCH System)
.......................... 1-52
Older Children ............................................. 1-35
Securing a Child Restraint Designed for
the LATCH System
................................ 1-54
Securing a Child Restraint in a Center
Seat Position
....................................... 1-57
Securing a Child Restraint in a Rear
Outside Seat Position
............................... 1-54
Securing a Child Restraint in the Right
Front Seat Position
................................... 1-59
Top Strap ................................................... 1-48
Top Strap Anchor Location ............................ 1-50
Where to Put the Restraint ........................... 1-47
Cigarette Lighter ............................................. 3-1 7
Cleaning
Inside of Your Vehicle
.................................. 5-83
Outside of Your Vehicle ................................ 5-86
Underbody Maintenance ............................... 5-89
Weatherstrips .............................................. 5-86
Cleaning Exterior Lamps/Lenses ....................... 5-86
Climate Control System ................................... 3-18
Rear .......................................................... 3-21
Rear Heating System ................................... 3-19
Compact Disc Messages .................................. 3-45
Compact Spare Tire ........................................ 5-82
Composite Headlamps ..................................... 5-56
Control of a Vehicle .......................................... 4-6
Convenience Net ............................................ 2-45
Coolant
Engine Temperature Gage
............................ 3-30
Heater, Engine ............................................ 2-22
Cooling System .............................................. 5-33
Cruise Control ................................................ 3-10
Current and Past Model Order Forms ................ 7-12
Customer Assistance Information
Customer Assistance for Text
Customer Assistance
Off ices ........................... 7-4
Customer Satisfaction Procedure ..................... 7-2
GM Mobility Program for Persons with
Disabilities
................................................ 7-5
Reporting Safety Defects to General Motors ....... 7-11
Reporting Safety Defects to the
Canadian Government
.............................. 7-11
Reporting Safety Defects to the United States Government
......................... 7-10
Roadside Assistance Program ......................... 7-6
Service Publications Ordering Information ........ 7-11
Rear Air Conditioning System ........................ 3-20
Courtesy Transportation ......... ...... 7-8
Telephone (TTY) Users ............................... 7-4
3